QO-100 TX/RX Dashboard

I’ve now completed the GQRX Receive and Icom IC-705 Transmit dashboard in Node Red. It was a fun project to put together and needed some javascript coding to get the functionality I wanted but, I got there in the end.

M0AWS QO-100 GQRX/IC-705 control dashboard

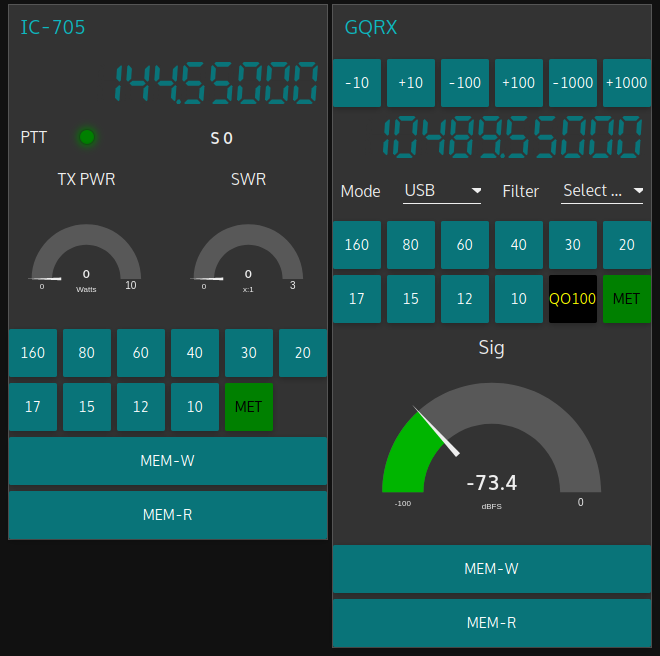
The dashboard looks fairly simple but, there is a lot behind the scenes to get it to this stage.

On the left is the Icom IC-705 transmit control panel. It shows the transmit frequency, power output and SWR reading. The SWR is so that I can check that the input into the 2.4Ghz transverter doesn’t have any connectivity issues. The “S0” will actually display the S Meter reading when the IC-705 is being used as a normal transceiver rather than being in QO-100 Duplex mode as shown above where the GQRX app and Funcube Dongle SDR are being used as the receiver.

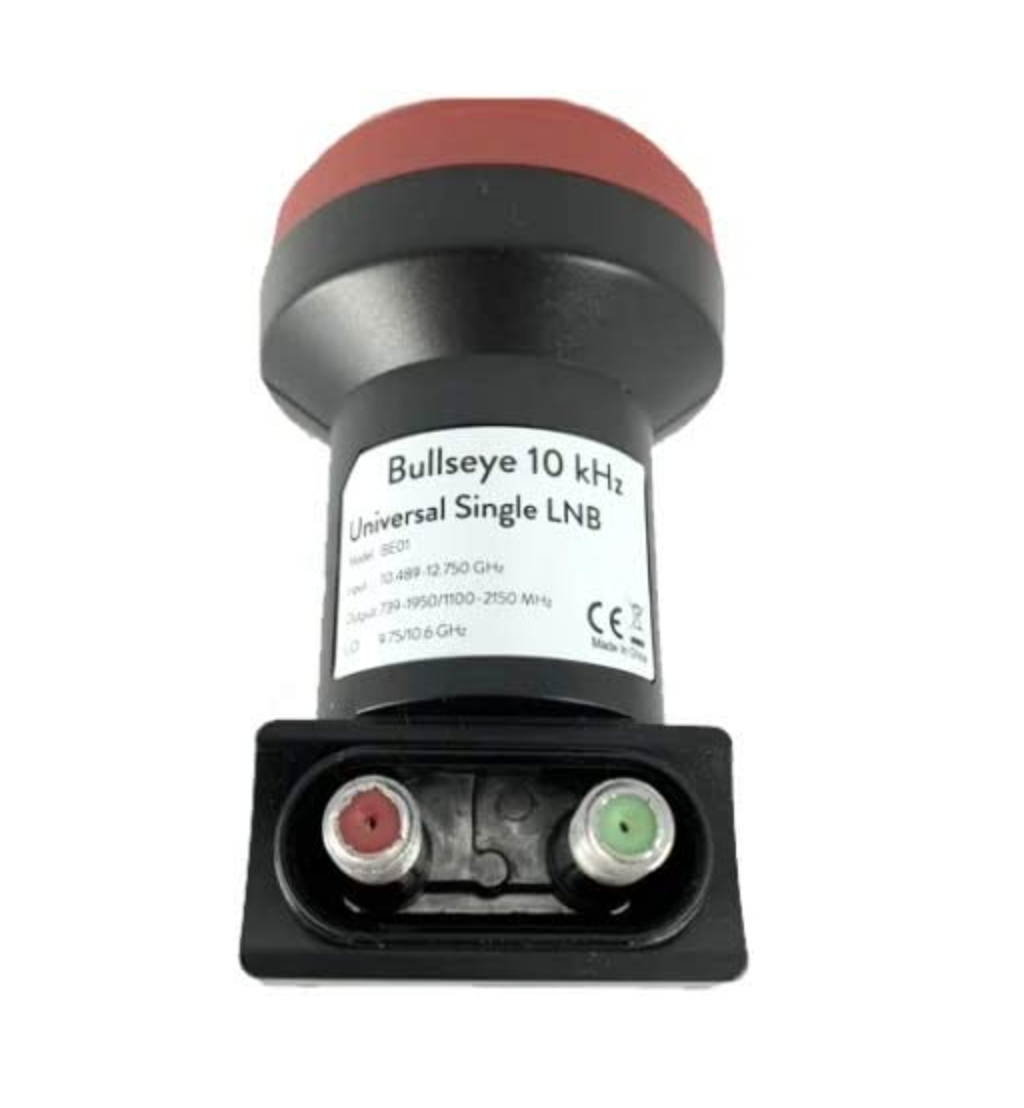
The GQRX side of the dashboard shows the downlink frequency which tracks the uplink frequency of the VFO on the IC-705. This will ensure that the Funcube Dongle Pro+ SDR receiver will always be on the correct downlink frequency relative to the uplink frequency, thus I should always be able to hear my own signal coming from the QO-100 satellite.

Once taken out of QO-100 mode the two radios can be used independently on any of the HAM bands and can be switched using the buttons on the dashboard.

I also coded in a simple memory facility where a frequency can be stored in Node Red and recalled later on both the transmit and receive sides.

Looking at the dashboard it all looks simple and straight forward however, if you look at the Node Red flow it becomes obvious that this isn’t the case.

QO-100 Dashboard Flow in the Node Red Editor (Click for larger image)

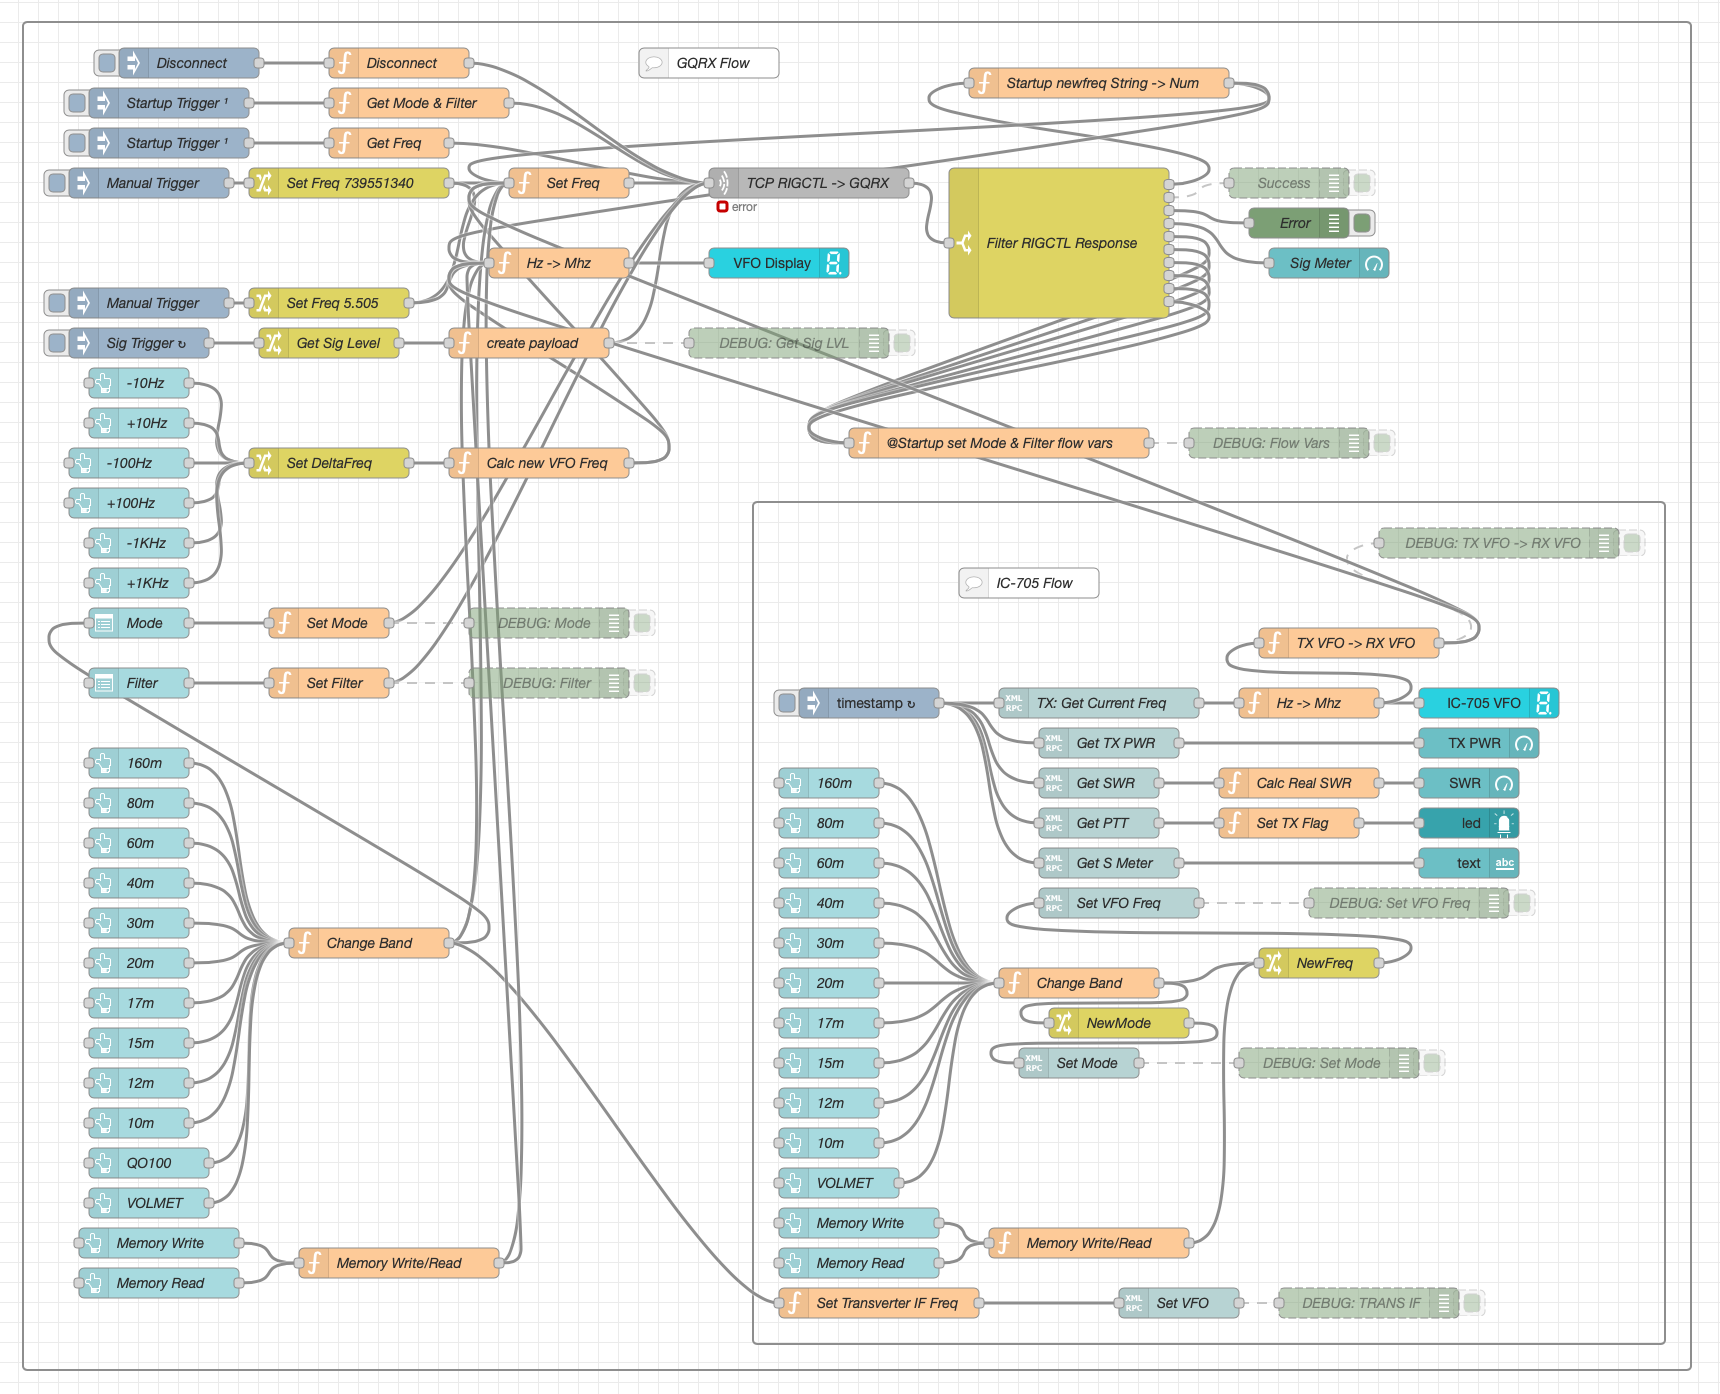
There’s a lot to the flow to get the information from the receiver and transmitter so that it can be presented on the dashboard. There’s also some code to convert between Rigctl protocol used by the GQRX application and XMLRPC used by the IC-705 via FLRig and WFview. I had to also code around a bug in the Node Red XMLRPC node whereby you have to add 0.1 onto the VFO frequency for it to be passed onto the radio otherwise the information is never sent. This was a real pain of a bug to find but, with a little experimentation I found the problem and managed to code around it. The strange thing about this is that the 0.1 added onto the frequency isn’t actually passed onto the radio via the XMLRPC node, it just has to have that on input otherwise it doesn’t work at all. A very strange bug and hopefully one that will be fixed by the node developer in future releases.

All that is left to do now is add the temperature sensors dashboard to complete the dashboard. These haven’t arrived yet and so I’ve not been able to create the necessary flow to collect the data from them.

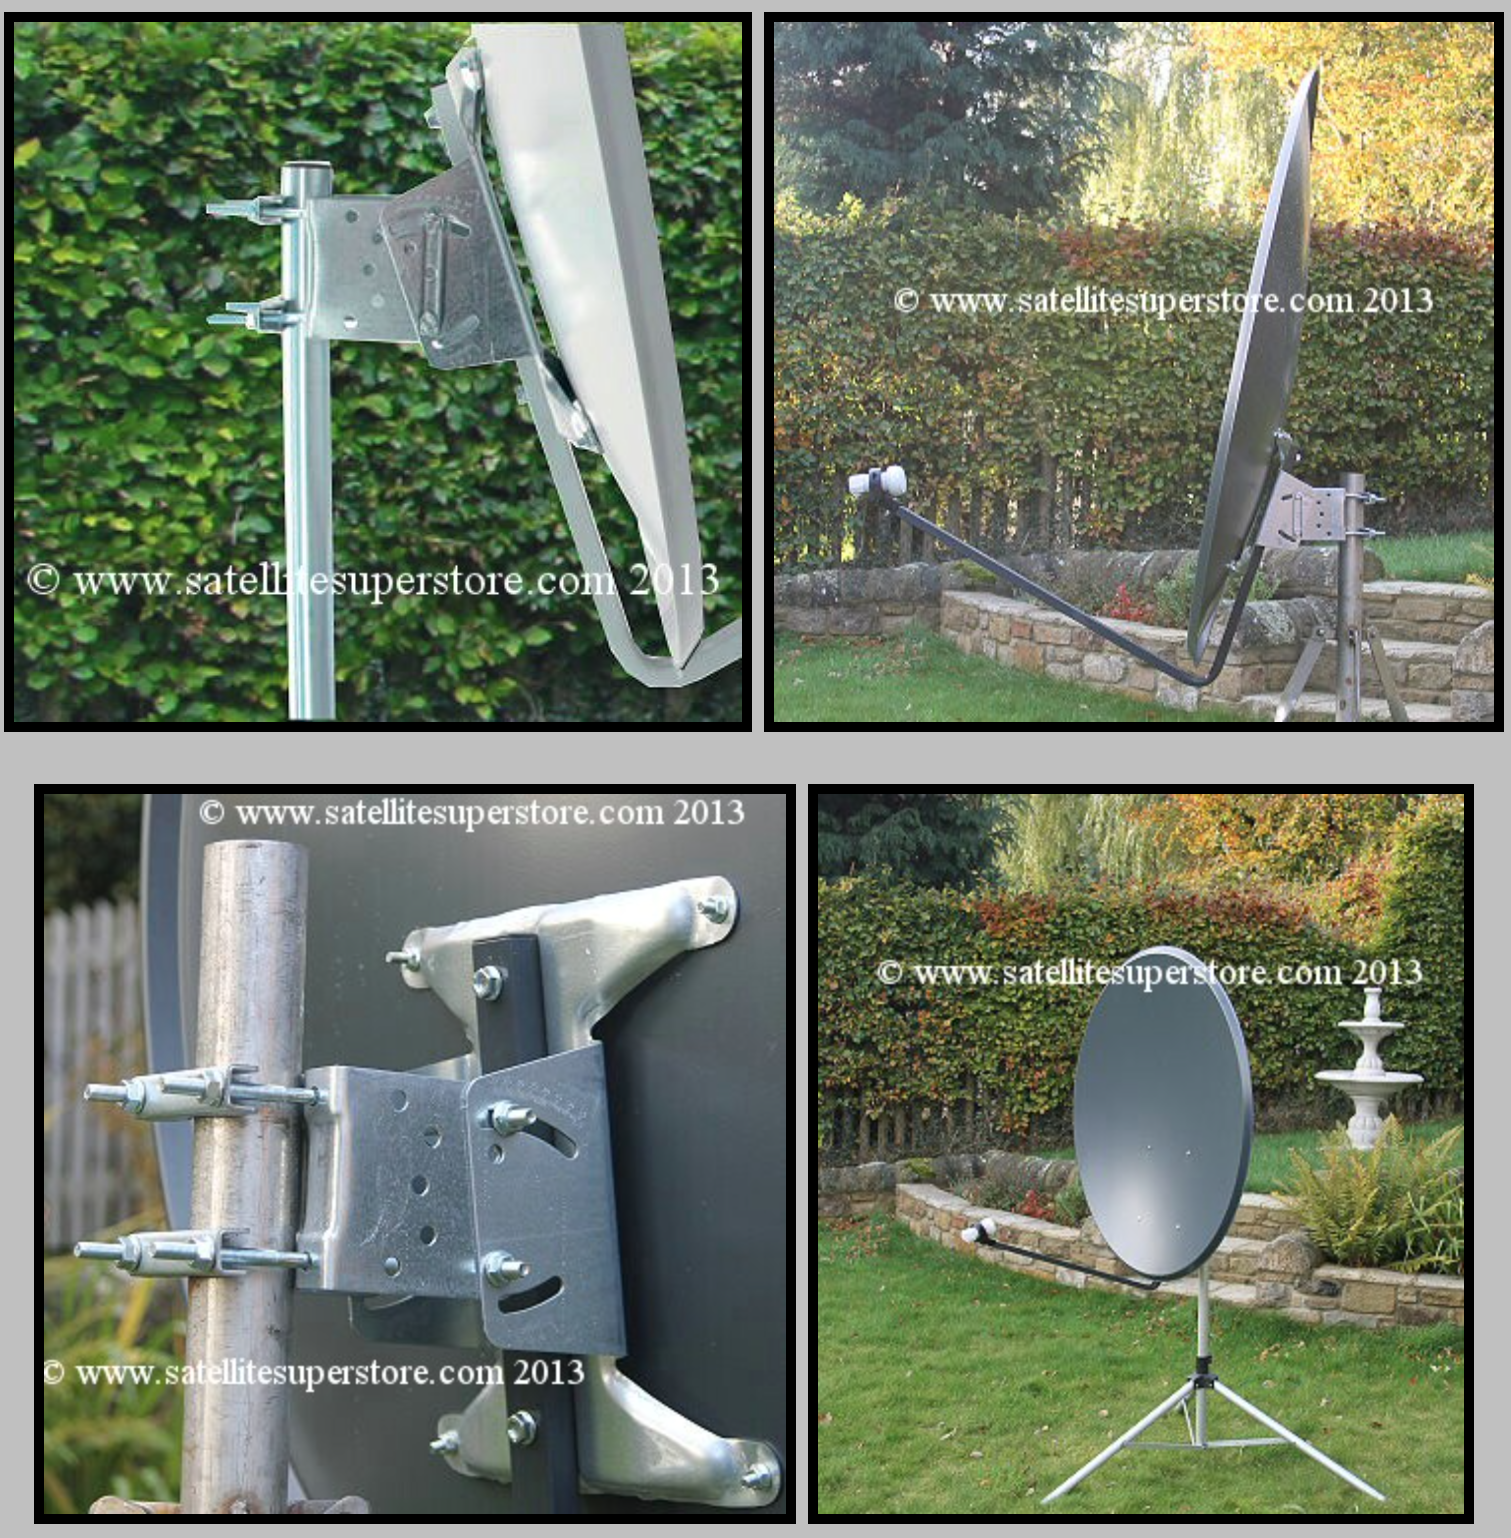
Hopefully this coming week the weather will improve and I’ll start getting the dish antenna up and the get the receive side working.

UPDATE: Further development of my QO-100 Dashboard has taken place, you can read all about it here.

More soon …

QO-100 Station – Initial parts purchase

After much reading and viewing of youtube videos I have finally settled on the parts that I want to use to build my QO-100 Satellite ground station.

Initially I’m only going to build the receive path of the QO-100 station. From the articles and blogs I’ve read online all the experienced Amateur Radio satellite Op’s recommend getting the receive side sorted first and then moving onto the transmit path.

I need to stress here that I have no experience of radio above 433Mhz (70cm), a band that I have only used a handful of times. 99% of my Amateur Radio life has been spent below 30Mhz and so this is going to be a very new experience for me.

So, what am I going to purchase for the receive path?

I’ve settled on a 1.1m off-set dish from the Satellite Super Store that should give me plenty of gain if I manage to get it pointed successfully at the bird.

I’ll pair a Bullseye 10Ghz TCXO LNB with the dish to give me a high stability receive path that shouldn’t wander too much up and down the band with temperature changes throughout the seasons.

1.1m Off-Set Dish for QO-100

The Bullseye LNB gets extremely good reviews from the HAM Satellite community, although it is a little on the expensive side compared to many others available. Since I only want to do this once I’ve gone with the more expensive option in the hope that it gives me the stability I’m looking for.

Since we’ve never had satellite TV here at home I’ve only just learnt that LNBs require a voltage feed since reading about other peoples QO-100 station builds. Most LNBs can be used for either horizontal or vertical polarisation and are switched by feeding with either 12v or 18v respectively. The LNBs also use this same voltage feed to do the frequency down conversation and some amplification of the received signal.

At the moment I’m only looking to get onto the narrowband part of the QO-100 satellite service and so I will need to feed the LNB with around 12v to ensure vertical polarisation is achieved. The easiest way to do this is to inject the 12v feed up the coax cable to the LNB.

Bullseye 10Ghz TCXO LNB

To achieve this I will need to purchase a little circuit called a Bias Tee. This relatively simple circuit consists of a capacitor and inductor combination that stops the 12v from going back into the receiver whilst at the same time stopping the RF from going back into the power supply.

Bias Tee units are relatively cheap to buy online and I have decided to get one from Amazon that has been recommended in a number of blogs posts I have read during my research.

Broco Bias Tee

With these parts ordered I now need to source the materials to mount the dish up above head height in the garden with a clear view of the sky in the direction of the satellite.

Getting the dish up high enough to be above head height will be important for when I get the 2.4Ghz uplink path in place. At these frequencies it’s important to ensure that no one is able to walk across the front of the dish whilst I’m transmitting. I’m hoping to get the dish up about 3m in the air in such a fashion that it is rigid enough to stop the dish moving around in the wind. I must admit I’ve not done any wind load calculations for the 1.1m dish so I’ll have to see how it goes over time. Fortunately where I want to put the dish is fairly well sheltered from the north wind that often howls through here so, hopefully it won’t be an issue.

More soon …

Another Begali Key!

Since purchasing my Begali Pearl twin paddle morse key I’ve been looking to get another Begali for my IC-705 portable setup. Going portable means I need a key that isn’t super shiny like the Pearl, something a little more hardy would be ideal.

I was looking to buy the Begali Simplex Basic directly from Begali as it would be ideal for portable operations however, my lovely wife spotted another Begali key for sale on Ebay and pinged the details over to me to take a look at.

Begali Traveler Light

To my surprise the key for sale on Ebay was a Begali Traveler Light, the perfect key for portable use and at a much lower price than new.

I contacted the seller immediately asking a couple of questions about the key and got an immediate response, always a good sign!

It turned out that the key was being sold by Wallace, MM0AMV up in Scotland. Looking at his QRZ page it’s clear he’s an avid CW fan as he has two Begali keys. This was backed up by the conversation we had via Ebay messaging.

In no time at all I had paid the £170.00 including postage and was the owner of my second Begali morse key.

The key was in as new condition as described by Wallace, clearly it had been looked after well.

It didn’t take long for me to get it hooked up to my IC-705 and on air. After a little adjustment of the gap and return tension I had the key setup comfortably for my weird left-handed use.

The key isn’t anywhere as near as heavy as my Begali Pearl key but, it’s plenty heavy enough to stop it moving around when in use. This is of course is helped by the two fold out legs that stabilise the key firmly during use but, protect the paddles solidly when in transit. It’s a great design and a very unique approach to making a fairly light but, solid twin paddle for portable usage.

In the garden with my Begali Traveler Light and IC-705 connected to my EFHW Vertical for 20m

Once folded the key takes very little space in the IC-705 portable case and completes the setup nicely. IC-705 radio, AH-705 remote auto ATU, Begali Traveler Light, tripod and a few interconnect cables, the perfect portable station.

IC-705 Portable station case with plenty of space for future additions

Since purchasing the IC-705 I’ve found that I’ve hardly used my Yaesu FTDX10, which is strange considering the receiver, filtering, DSP and APF combination is considerably better on the FTDX10 than it is on the IC-705. The IC-705 has a much nicer, easier to use user interface and it’s just a lot of fun to use even though it’s only a QRP rig. I can see me having many happy hours on air with this QRP station.

More soon …

300hz Filter for the Yaesu FTDX10

Since purchasing my new Begali Pearl morse key I’ve been wanting to install the 300hz CW filter into my Yaesu FTDX10. The radio comes standard from the factory with the 500z CW filter preinstalled however, being able to narrow the bandwidth down even further will help to reduce the ringing effect on noisy bands that often plaques CW Ops when trying to catch those very weak DX signals.

Since I had built up some free credit at ML&S by buying all my new radio equipment I decided to put it to good use and put it towards the cost of the optional 300hz filter for the radio.

In years past when I had a Yaesu FT1000MP I installed a full set of filters in it and it made quite a difference DXing on the 160/80/40m bands. Back then things like digital noise reduction (DNR) were in their infancy and so narrow filters were even more important than they are today.

Yaesu XF-130CN 300hz CW Filter for the FTDX10

The FTDX10 300hz filter looked very similar to the ones I fitted in the FT1000MP and it doesn’t look like they’ve changed at all over the years.

Yaesu XF-130CN 300hz CW Filter

Removing the cover from the FTDX10 it’s immediately apparent where the filter goes. A neat little cutout in the RF shield draws your eye immediately to the spot.

Cutout in the RF shield for the optional 300hz filter

Fitting the filter is easy enough however, you do have to take care to move the little black wire to one side otherwise it gets caught under the filter and stops it from seating properly onto its connections. There’s not a lot of slack on the wire either so care is needed to not pull it too taught.

Note the black wire on the right hand site of the connections for the 300hz filter

I was surprised to see how small the standard 500hz filter is in comparison to the optional 300hz filter.

Optional 300hz filter next to the factory fitted 500hz filter

With the filter safely in position and seated perfectly I had the cover and 9 screws back on in no time at all and then got the radio powered up to check if the menu system had the option of a 300hz filter in CW mode.

FTDX10 CW filter menu with 300hz option

Getting on air the filter makes quite a difference to the amount of background noise when listening to weak DX stations. Adding DNR and APF to the equation removes all background noise completely with the 300hz filter making it possible to hear the weakest of CW stations and complete silence in-between.

The bands aren’t in particularly good shape today however, I tuned around on the 20m band and found W7SW in Phoenix Arizona calling CQ. He wasn’t particularly strong but, it was a good opportunity to experience the difference between the filters without any DNR or APF enhancement.

Short video showing difference between 500hz and 300hz filters with W7SW calling CQ

Unfortunately W7SW disappeared before I could make another short video with the DNR and APF on to show the difference. I’ll revisit this again soon and get some video snippets up showing the difference the optional 300hz filter makes with DNR and APF.

More soon …

New radio ordered!

Yaesu FTDX10

After much research and decision making I finally decided to purchase a Yaesu FTDX10 HF/6m transceiver. Out of all the radios on the market and there are many, this is the one that I’ve decided has the functionality I need and gives the best performance for the money.

I really liked the little Icom IC705 but, it’s a lot of money for a QRP radio and performance wise isn’t as good as the FTDX10.

I also liked the Icom IC7300 but, this is now a 7 year old radio (at the time of writing this) and the tech has moved on substantially since then.

The FTDX10 is a hybrid SDR radio that combines the best of both worlds to give a performance level that exceeds many of the other transceivers on the market today. Ranking 3rd on the Sherwood Engineering Receiver Test Data it’s a great radio for the money.

The other thing that really impressed me with the FTDX10 was the DNR and Contour noise reduction functionality. Watching videos online it is amazing how when these two tools are used correctly together extremely weak CW signals can be recovered on a noisy band.

So, with the radio ordered from Martin Lynch and Sons I now need to start building some antennas and impedance matching circuits so that I can get on air once the transceiver arrives.

More soon …

New Radio

Sometime back I decided to sell all my HAM radio equipment as I’d completely lost interest in the hobby and decided to utilise the money to build a custom motorcycle. (Yes I build and ride motorcycles http://www.trailsoftheunexpected.co.uk ). Selling all the equipment raised a few thousand pounds which covered the cost of building the motorcycle.

So after a 10+ year break from HAM radio I’ve decided to get back into it, this means I need to buy a transceiver. The HAM radio market has changed considerably over the time I’ve been away from the hobby and there are a lot more manufacturers from China selling some interesting looking radios.

I’m currently considering two QRP transceivers, the Xiegu X6100 and the Icom IC705. These two SDR based QRP radios offer a lot of the facilities that I had with my Flex3000 and have peaked my interest for different reasons.

Firstly the Xiegu X6100 HF/6m transceiver is an Arm CPU based unit that runs a somewhat cutdown Linux operating system, being a UNIX/Linux admin professionally for many years this really appeals to me.

Xiegu X6100 SDR QRP Transceiver

This little radio has a small colour screen that displays the normal waterfall, VFO frequency and more however, it’s not a touch screen which is a shame. The plus for this radio is that it has a built in ATU, amazing considering the size of the unit.

I’ve joined the TOADS Discord group that are actively working on the O/S side of this little radio together with the manufacturer to try and get the code released into the Open Source world so that a community group can start developing it to its full potential. There’s some interesting reading in this group from some very knowledgable people and is well worth joining if you’re considering buying this radio.

Sadly the current firmware for the radio is very buggy and a fair bit of the functionality doesn’t work but, overtime I’m sure this will be resolved however, it’s a concern especially since it will be my only radio.

I’ve not been able to find any receiver test details for the transceiver so I’ve no idea how it performs. Since I’m only looking to use weak signal modes having a good receiver is paramount and is top of my list of priorities at the moment.

At £589.95 it’s at the lower end of the price spectrum for SDR radios but, it’s still a fair chunk of money to spend if it turns out problematic.

The Icom IC705 HF/6M/VHF/UHF QRP SDR transceiver is getting rave reviews and has a huge following. Coming from a long standing radio manufacturer you just know that this radio is going to be a high quality device that will just work out of the box.

With a price of £1299.99 here in the U.K. it’s more than double the price of the Xiegu X6100 but, it covers the VHF/UHF bands as well as the HF/6m bands and has a touch screen with GPS built in, there’s a lot packed into this little package!

When I look back at the little Yaesu FT817 I had years ago and how much fun I had with it, the Icom IC705 takes QRP radio to a new level.

What I really need to do is visit a HAM Radio store and sit down and try out these two radios side by side. Sadly the nearest store is over a hundred miles away!

Hello world!

Welcome to the new M0AWS Amateur Radio website.

I’ve been out of the hobby for 10+ years now and am only now starting to get back into Amateur Radio.

I lived in France for some time and was on air using the callsign F5VKM. Having many acres of land I was spoilt with large home built full wave vertical Delta loop antennas for most of the HF bands.

I’ve spent a lot of time on the 160m to 30m bands, mainly CW and digital modes but, since moving back to the U.K over 10 years ago I never bothered setting up a station again as I have a limited size garden and antenna unfriendly neighbours.

Having retired I was planning on travelling the world on my motorcycle but, since the world has been in the grip of the COVID19 pandemic since 2020 those plans have been put on hold.

Being stuck at home a lot due to various lockdowns and rampant infection rates I’ve decided that now is a good time to get back into radio!

At present I have nothing, no radio, no antennas, no PSU, no coax, nothing, so I’ve got a long way to go!

I’ll be designing and building all my own antennas and matching circuits and will be posting article on here showing my progress and results.

I’ve started researching radios and will definitely be going SDR and low power (QRP). Digital modes and CW will be the only modes I’ll use and power will be 5w or less.

I’m hoping to document things here as I build the new station so please drop by from time to time and see how it’s going.

More soon …