Venturing into the world of AllStarLink

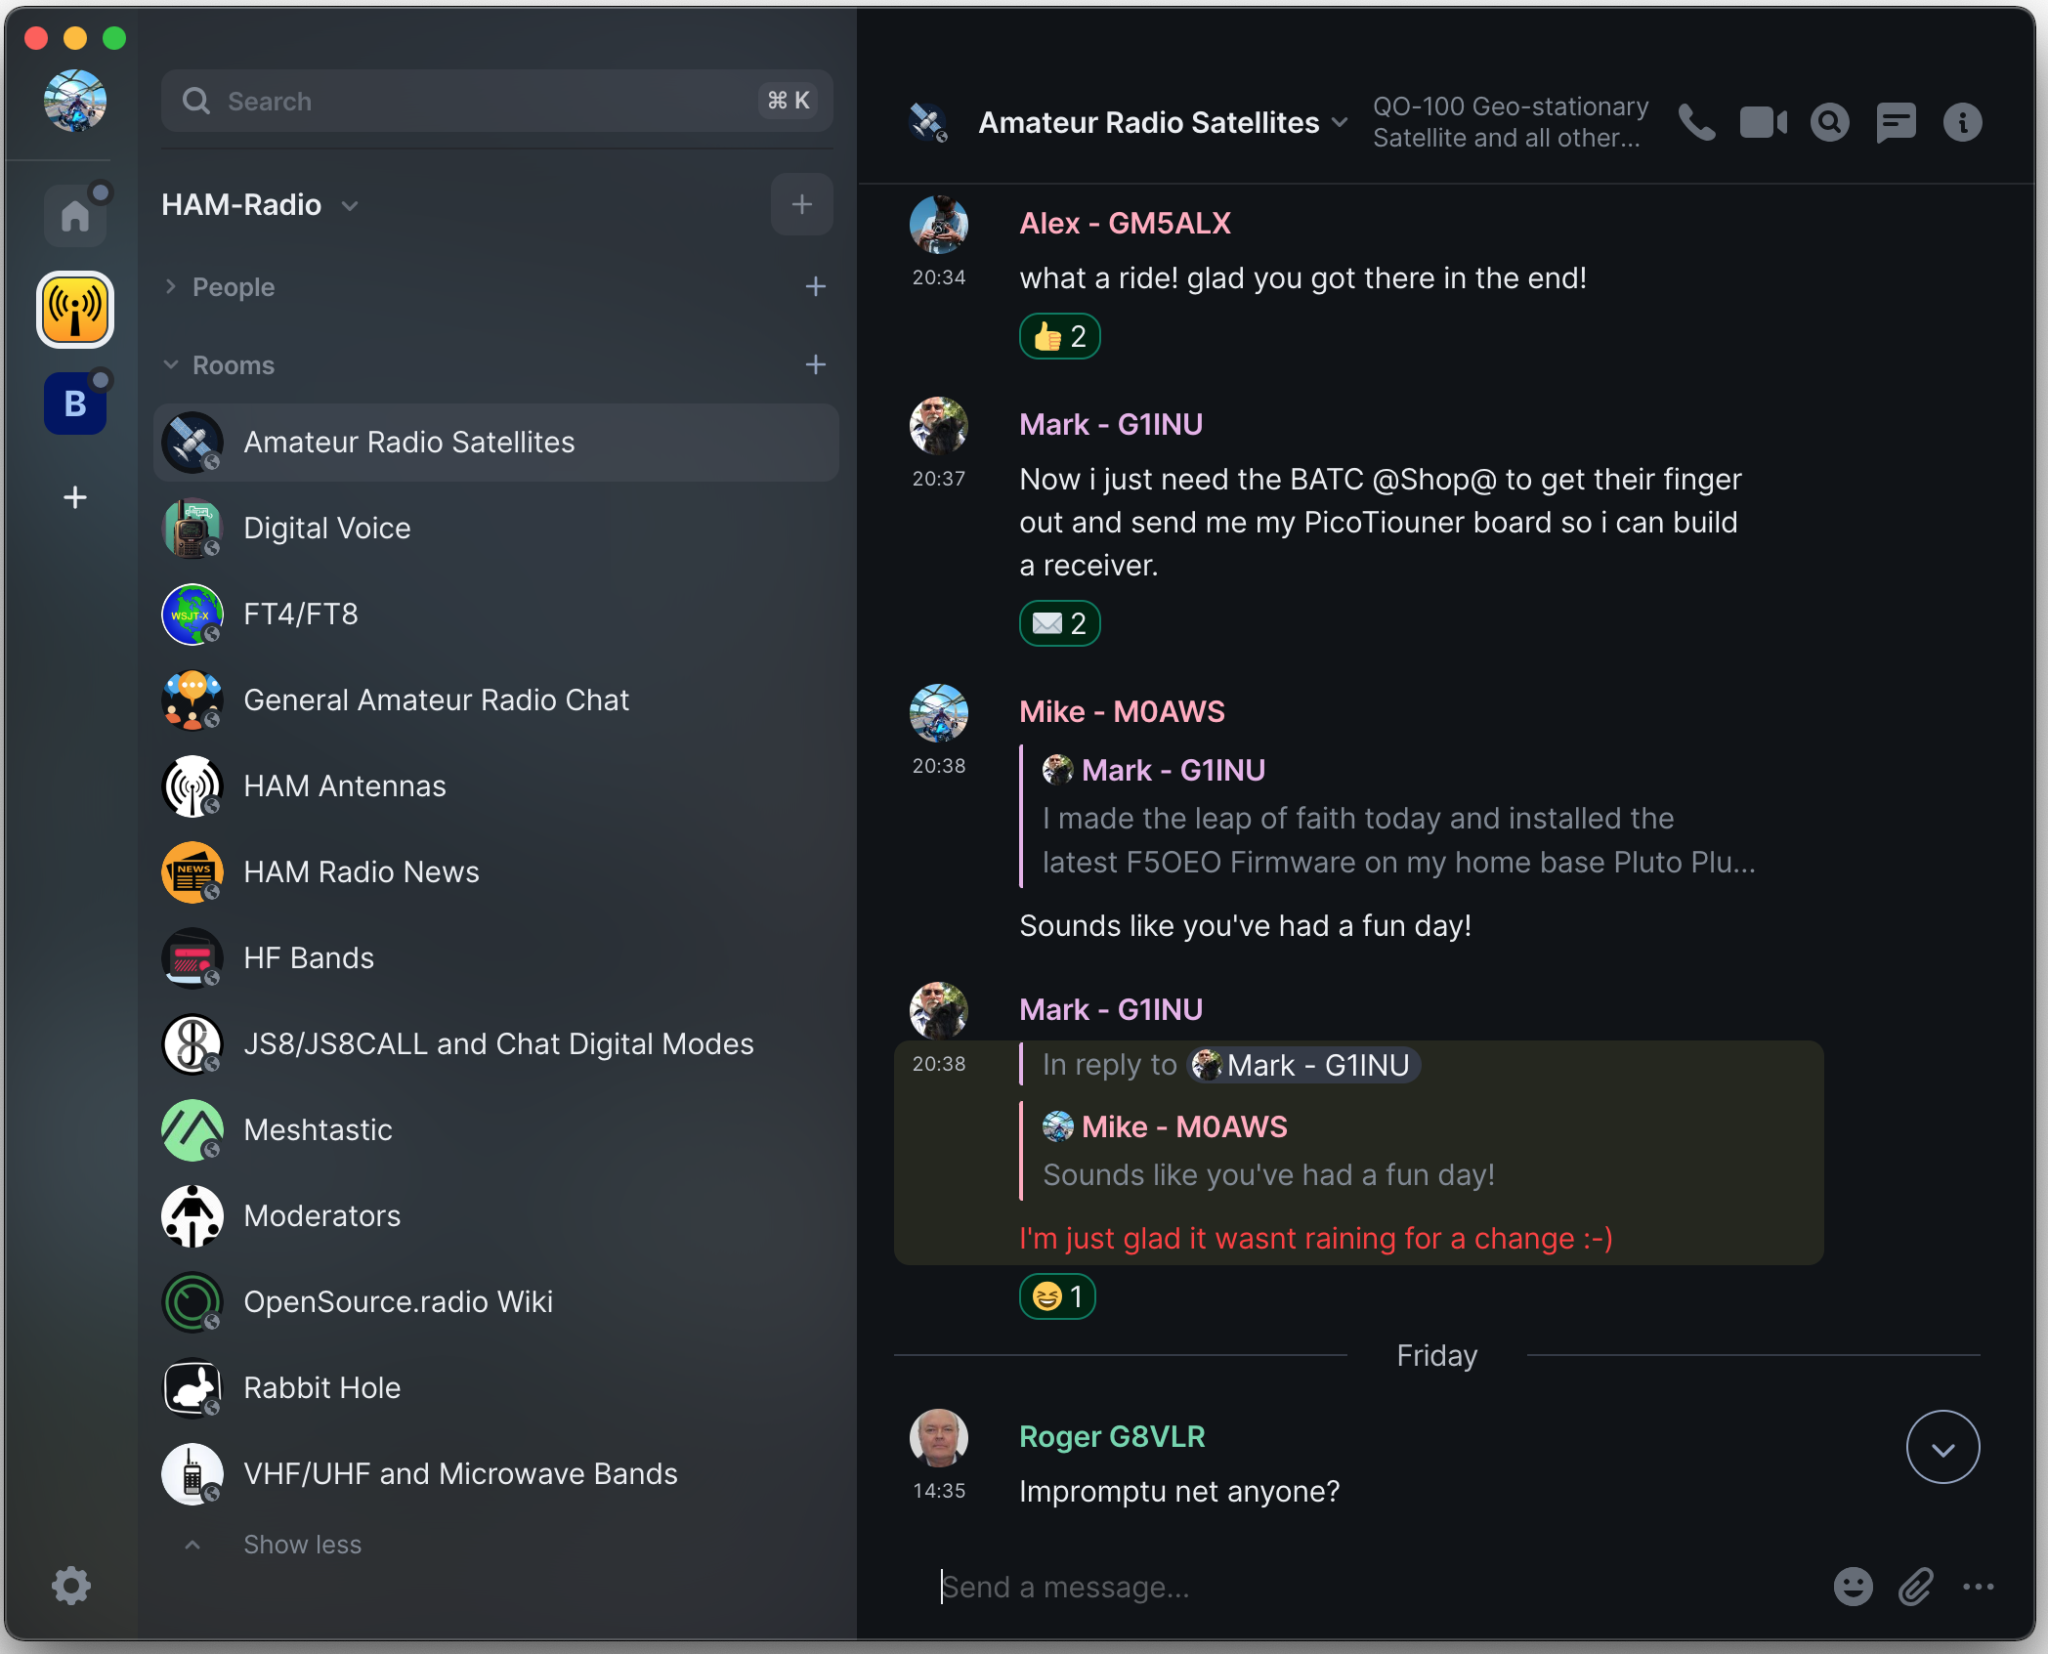
We’ve recently added a new room to the Matrix HAM Radio Space for Digital Voice modes as this was an area of interest that didn’t really fit into any of the other rooms.

The new Digital Voice room has attracted a lot of attention from members, with a lot of the focus being on the AllStarLink system. Michael, DK1MI built an AllStarLink node in the cloud for us all to use for Matrix Nets and so I decided I had to get in on the fun.
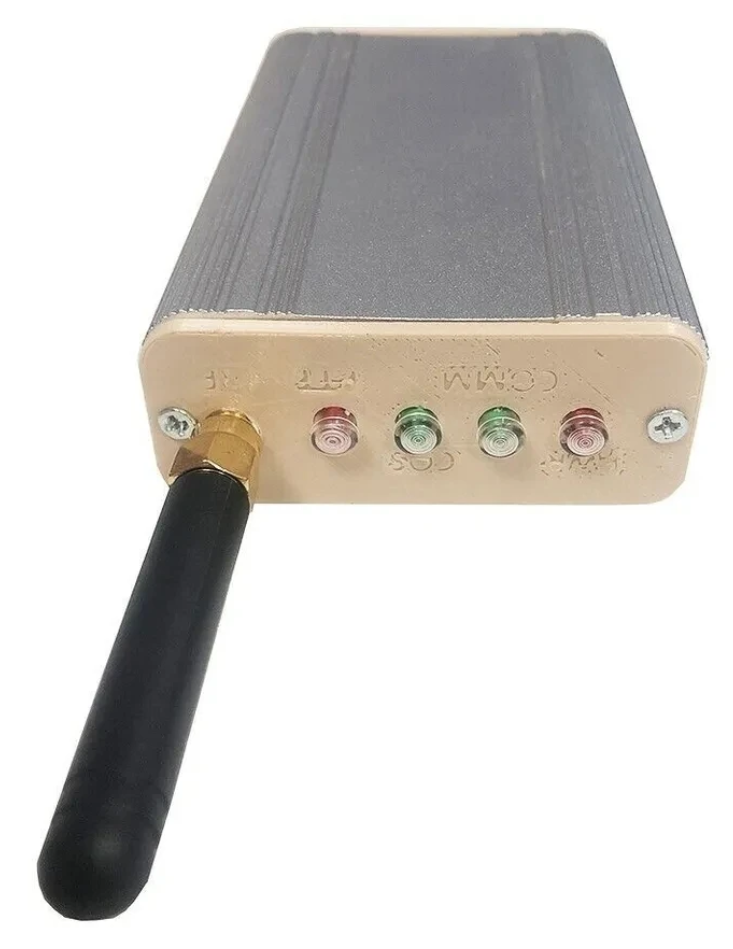
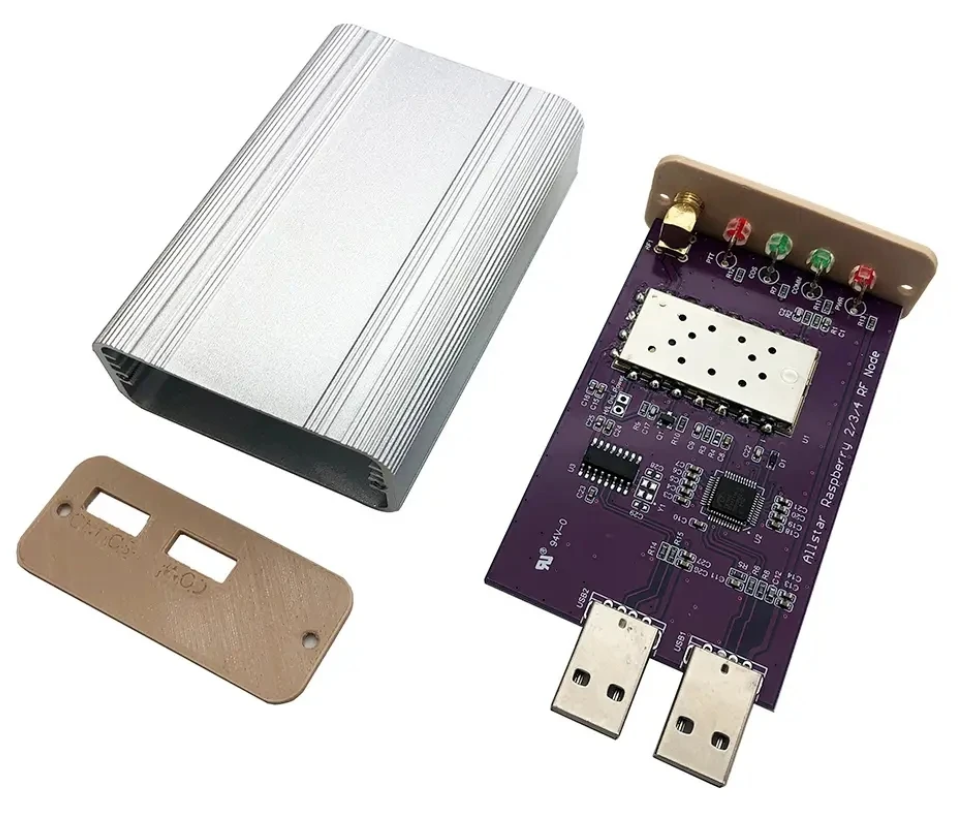
The Jumbospot SHARI SA818 Amateur Radio AllStarLink Radio Interface was originally designed by N8AR and implements a RaspberryPi 2/3/4 hosted AllStarLink node using a NiceRF SA818 embedded VHF/UHF radio module and sound card.

The two USB connectors on the SHARI device are position such that they plug into two of the available 4 USB ports on the RaspberryPi without the need for cables. This keeps the whole solution together in one neat package.

Before you start you will need to obtain a node number and secret (password) from the AllStarLink Portal. To get this you will need to provide proof to the AllStarLink administrators that you are a licensed Amateur Radio (HAM) operator. This is done by uploading a copy of the first page of your HAM licence to the website for the admin team to check. This can take 24hrs to be completed so make sure you get this all done before trying to build your node. You cannot build a node successfully without a node number and secret.

Of course you will also need a transceiver that can operate on the 438.800Mhz frequency or other frequency of your choice on the 2m or 70cm HAM band.

You will also need to open port 4569 on your internet router and setup port forwarding to the IP Address that you will be using on your RaspberryPi node. It’s important to use a static IP Address on your RaspberryPi.

There are quite a few different Linux based operating system (O/S) images that are available for the RaspberryPi devices that have been specifically tailored for the AllStarLink node and include all the necessary software and library packages out the box.

I decided to use the Raspbian GNU/Linux 10 (buster) based distribution as it is based on the very stable and reliable Debian Linux distro. You can download the exact version I am using from the Raspbian link above or directly from my website here.

Once downloaded you need to burn the ISO image onto a suitable SD card for your RaspberryPi. I use BalenaEtcher as it’s extremely quick and reliable at burning ISO images to SD cards.

Of course if you are a hardline Linux command line junkie you can always use dd to create the SD card.

Once you’ve got your O/S onto your SD card, slot it into your RaspberryPi making sure your SHARI device is connected to the two USB ports and then power it up. Make sure you have a good PSU for the RaspberryPi as the two devices together draw around 3A of current during the transmit cycle. (I use a 3.6A PSU from Amazon).

The default login for the Raspbian O/S is shown below. Login via SSH and configure your RaspberryPi for your local network. It’s important to use a static IP Address configured either directly on the RaspberryPi or via DHCP in your router.

Login: repeater
Passsword: allstarlink
SSH port: 22

Once you have your RaspberryPi connected to your LAN you are ready to start configuring it for AllStarLink.

The first thing you need to do is login to the raspi via SSH and then become root user using sudo as shown below:

sudo su -

Once you are root user, you need to add the AllStarLink repo to the sources file and update the operating system using the following command:

curl -s http://apt.allstarlink.org/repos/repo_signing.key | apt-key add
apt update --allow-releaseinfo-change
apt dist-upgrade

Copy and paste each line one at a time into your terminal. Once the last command finishes, the system is up to date and can be rebooted as follows:

reboot

Once the raspi has rebooted, login again via SSH as user repeater and then become root user again.

You now need to install a couple of Python components that are required by the system to function. Use the commands below as user root:

apt-get install python3-dev python3-pip
pip3 install pyserial

Next you need to change directory into the asterisk config file directory using the command shown below:

cd /etc/asterisk

In this directory you will find all the default config files that come as part of the distro. For this build we’re not going to use them and so we need to move them out of the way ready for a set of config files that have already been configured correctly.

Using the following commands create a new directory, move into that new directory and then move all the unwanted configuration files into it:

mkdir ORIGINAL-CONF-FILES
cd ./ORIGINAL-CONF-FILES
mv ../*.conf ./
ls -la
cd ../

You should now be back in the /etc/asterisk directory which will now be empty apart from the custom directory which we left in place.

You now need to copy the correctly configured configuration files into the /etc/asterisk directory. Start by downloading the zip file containing the new configuration files

Once downloaded, copy the .zip file into the repeater users home directory (/home/repeater) using either scp on the Linux command line or if using Windows you can use the FileZilla Client in SFTP mode using the login details above.

Once you have the .zip file in the repeater user’s home directory you need to copy the file into the /etc/asterisk directory as user root:

cp /home/repeater/AllStarLink-Config-v3.zip /etc/asterisk/

Next as user root, change directory into the /etc/asterisk directory and unzip the .zip file:

cd /etc/asterisk
unzip ./AllStarLink-Config-v3.zip

Once the file is unzipped you need to move a couple of files into the repeater users home directory using the following commands:

mv ./SA818-running.py /home/repeater
mv ./gpio /home/repeater

Once the files have been moved you need to set the correct ownership and privileges on the files using the following commands:

chown -R root:root /etc/asterisk/*.conf
chown repeater:repeater /home/repeater/gpio
chown repeater:repeater /home/repeater/SA818-running.py
chmod 755 /home/repeater/gpio
chmod 755 /home/repeater/SA818-running.py

The gpio BASH script and configuration details were supplied by Mark, G1INU in the Digital Voice room on the Matrix. It adds the COS light functionality to the setup. The COS light will now light every time the SA818 hears RF on the input.

The next thing you need to do is configure the SA818 radio device in the SHARI. The script I used was originally from https://wiki.fm-funknetz.de/doku.php?id=fm-funknetz:technik:shari-sa818 all I’ve done is change the entries to switch off CTCSS and changed the frequency to 438.800Mhz. Configuring the SA818 is done by running the SA818-running.py Python programme that you moved into the repeater user home directory. Making sure you are still user root, run the following commands:

cd /home/repeater
./SA818-running.py

At this point your SHARI SA818 device will be configured to operate on 438.800Mhz and CTCSS will be disabled.

If you want to change the frequency or enable and set a CTCSS tone to access the node you will need to edit the Python programme using your favourite text editor and change the entries accordingly. Once changed rerun the program as shown above and your SHARI will be reconfigured to your new settings.

Next you need to move the allmon.ini.php file into the correct directory so that it enables access to the Allstar Monitor web page on the device so that you can manage connecting/disconnecting nodes. Use the following commands as user root to achieve this:

cd /etc/asterisk
mv ./allmon.ini.php /var/www/html/allmon2/
chown root:root /var/www/html/allmon2/allmon.ini.php
chmod 644 /var/www/html/allmon2/allmon.ini.php

The allmon.ini.php file needs to have your node name entered into it for it to work correctly. As user root, change directory and edit the file using your favourite editor.

cd /var/www/html

Using your text editor, search for the line starting [XXXXX] and change the XXXXX to your node number. Save the change and exit the file.

At this point you are almost complete, all that is left to do is add your node number and node secret into the appropriate configuration files in the /etc/asterisk directory.

Since I am a Linux command line junkie I use vi to edit all the configuration files on the command line as user root, but you can use any editor of your choice.

cd /etc/asterisk

Start with the extensions.conf file. Search for the line starting with NODE = and delete the XXXXX entry and insert your node number. Save the file and edit it.

Next you need to edit the iax.conf file. This time search for the line starting with
register= and change the XXXXX for your node number and the YYYYYYYYYYYY for your node secret. Be careful not to accidentally delete any other characters in the lines otherwise it will corrupt the configuration file.

In the same file search for the two lines that start with secret = and change the YYYYYYYYYYYY for your node secret. Once you have changed both of the secret entries, save and exit the file.

The final file to edit is the rpt.conf file. Once again open the file using your favourite editor and search for the line starting with XXXXX = radio@127.0.0.1:4569/XXXXX, change the XXXXX entries for your node number making sure not to delete any other characters next to the XXXXX entries.

Further down in the same file there is a line that starts with [XXXXX], once again change the XXXXX for your node number making sure to keep the square brackets at each end of the node number as you edit it.

Finally move down to the very bottom of the file and find the two lines that start with /home/repeater/gpio, once again change the XXXXX entries for your node number.

Once this is done, save and exit the file. At this point your node should be fully configured and will only require a reboot to get it working.

As user root, reboot your raspi using the reboot command.

reboot

Once your raspi comes back online, login using SSH as user repeater and then become root user using the sudo command detailed above.

You now need to create the admin user password for the Allstar Monitor web page on the device. This is done using the following commands as user root:

cd /var/www/html/
htpasswd -c .htpasswd admin

You will be asked to enter a password twice for the admin user, make sure you make a note of this password as you will need it to login to the web page.

Once this is done your configuration is complete, logout from the terminal session by entering exit twice (once to logout as user root and another to logout as user repeater).

Using your favourite web browser enter the IP Address of your raspi into the URL bar as shown below:

http://<Your-Raspi-IP>/allmon2

Note: remove the <> from the URL once you have entered the required information.

Once this is done you should be presented with your node control panel as shown below.
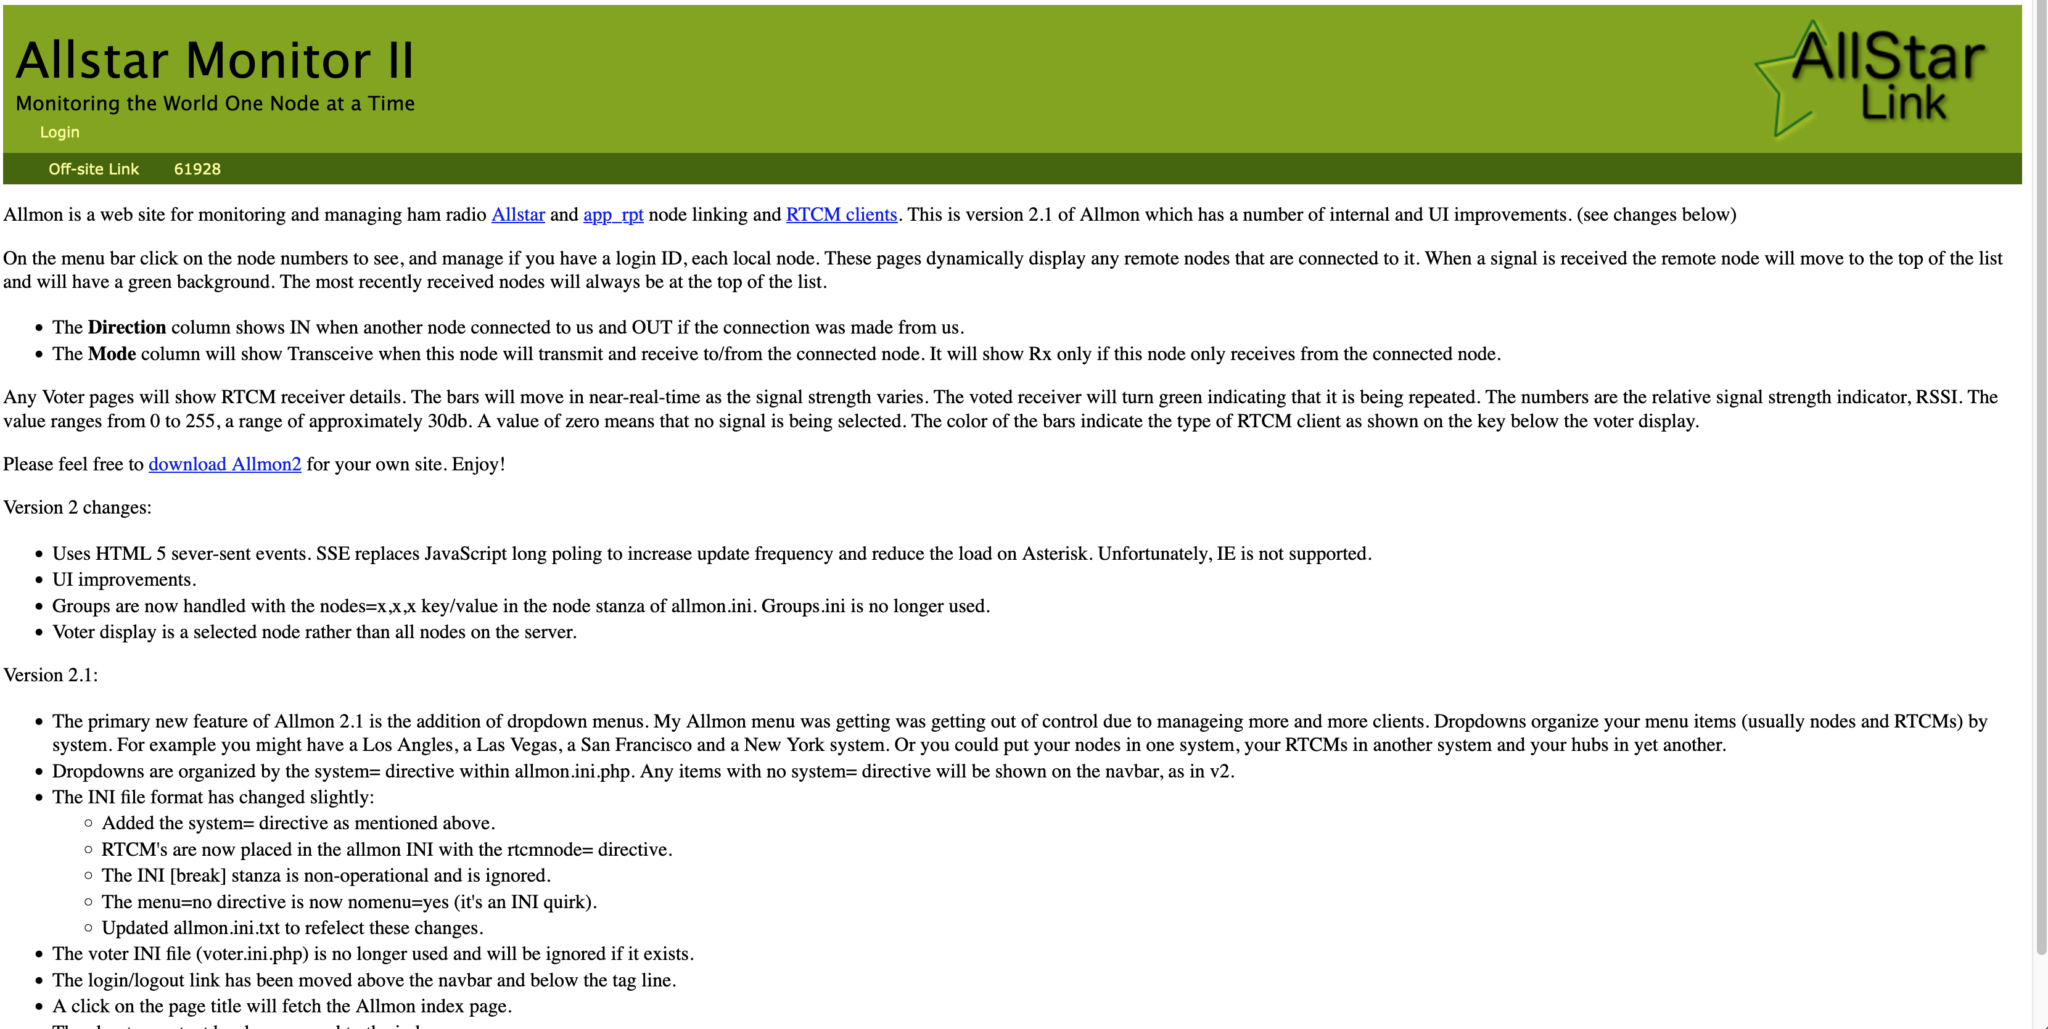
First visit to the AllStar Monitor Web Page

Login using Admin and the password you set above and you are now ready to start using your node.

It’s a good idea to connect to node 55553 which is a parrot test node to check your audio levels. you can do this by entering the node into the field at the top left and pressing the connect button.

M0AWS AllStarLink Node 61928 connected to 55553 Parrot

Once connected, tune your radio to 438.800Mhz FM and transmit a test message using your callsign and test123, or something similar. The parrot will then play your recording back to you so that you can hear how you sound. It will also comment on your audio level as to whether it is OK or not.

You are now connected to AllStarLink network and have the world at your finger tips. Below is a small list of nodes in the UK, Australia and America to get you started chatting with other HAMs via your node.

55553	ASL Parrot for testing
41522	M0HOY HUBNet Manchester, UK
60349	VK6CIA 439.275 Perth, Western Australia
51077	VK6SEG South West Hub B Albany WA
2167	M0JKT FreeSTAR UK HUB 2 freestar.network
53573	NWAG NW AllStar Group Lancashire, UK
27339	East Coast Hub Wilmington NC USA
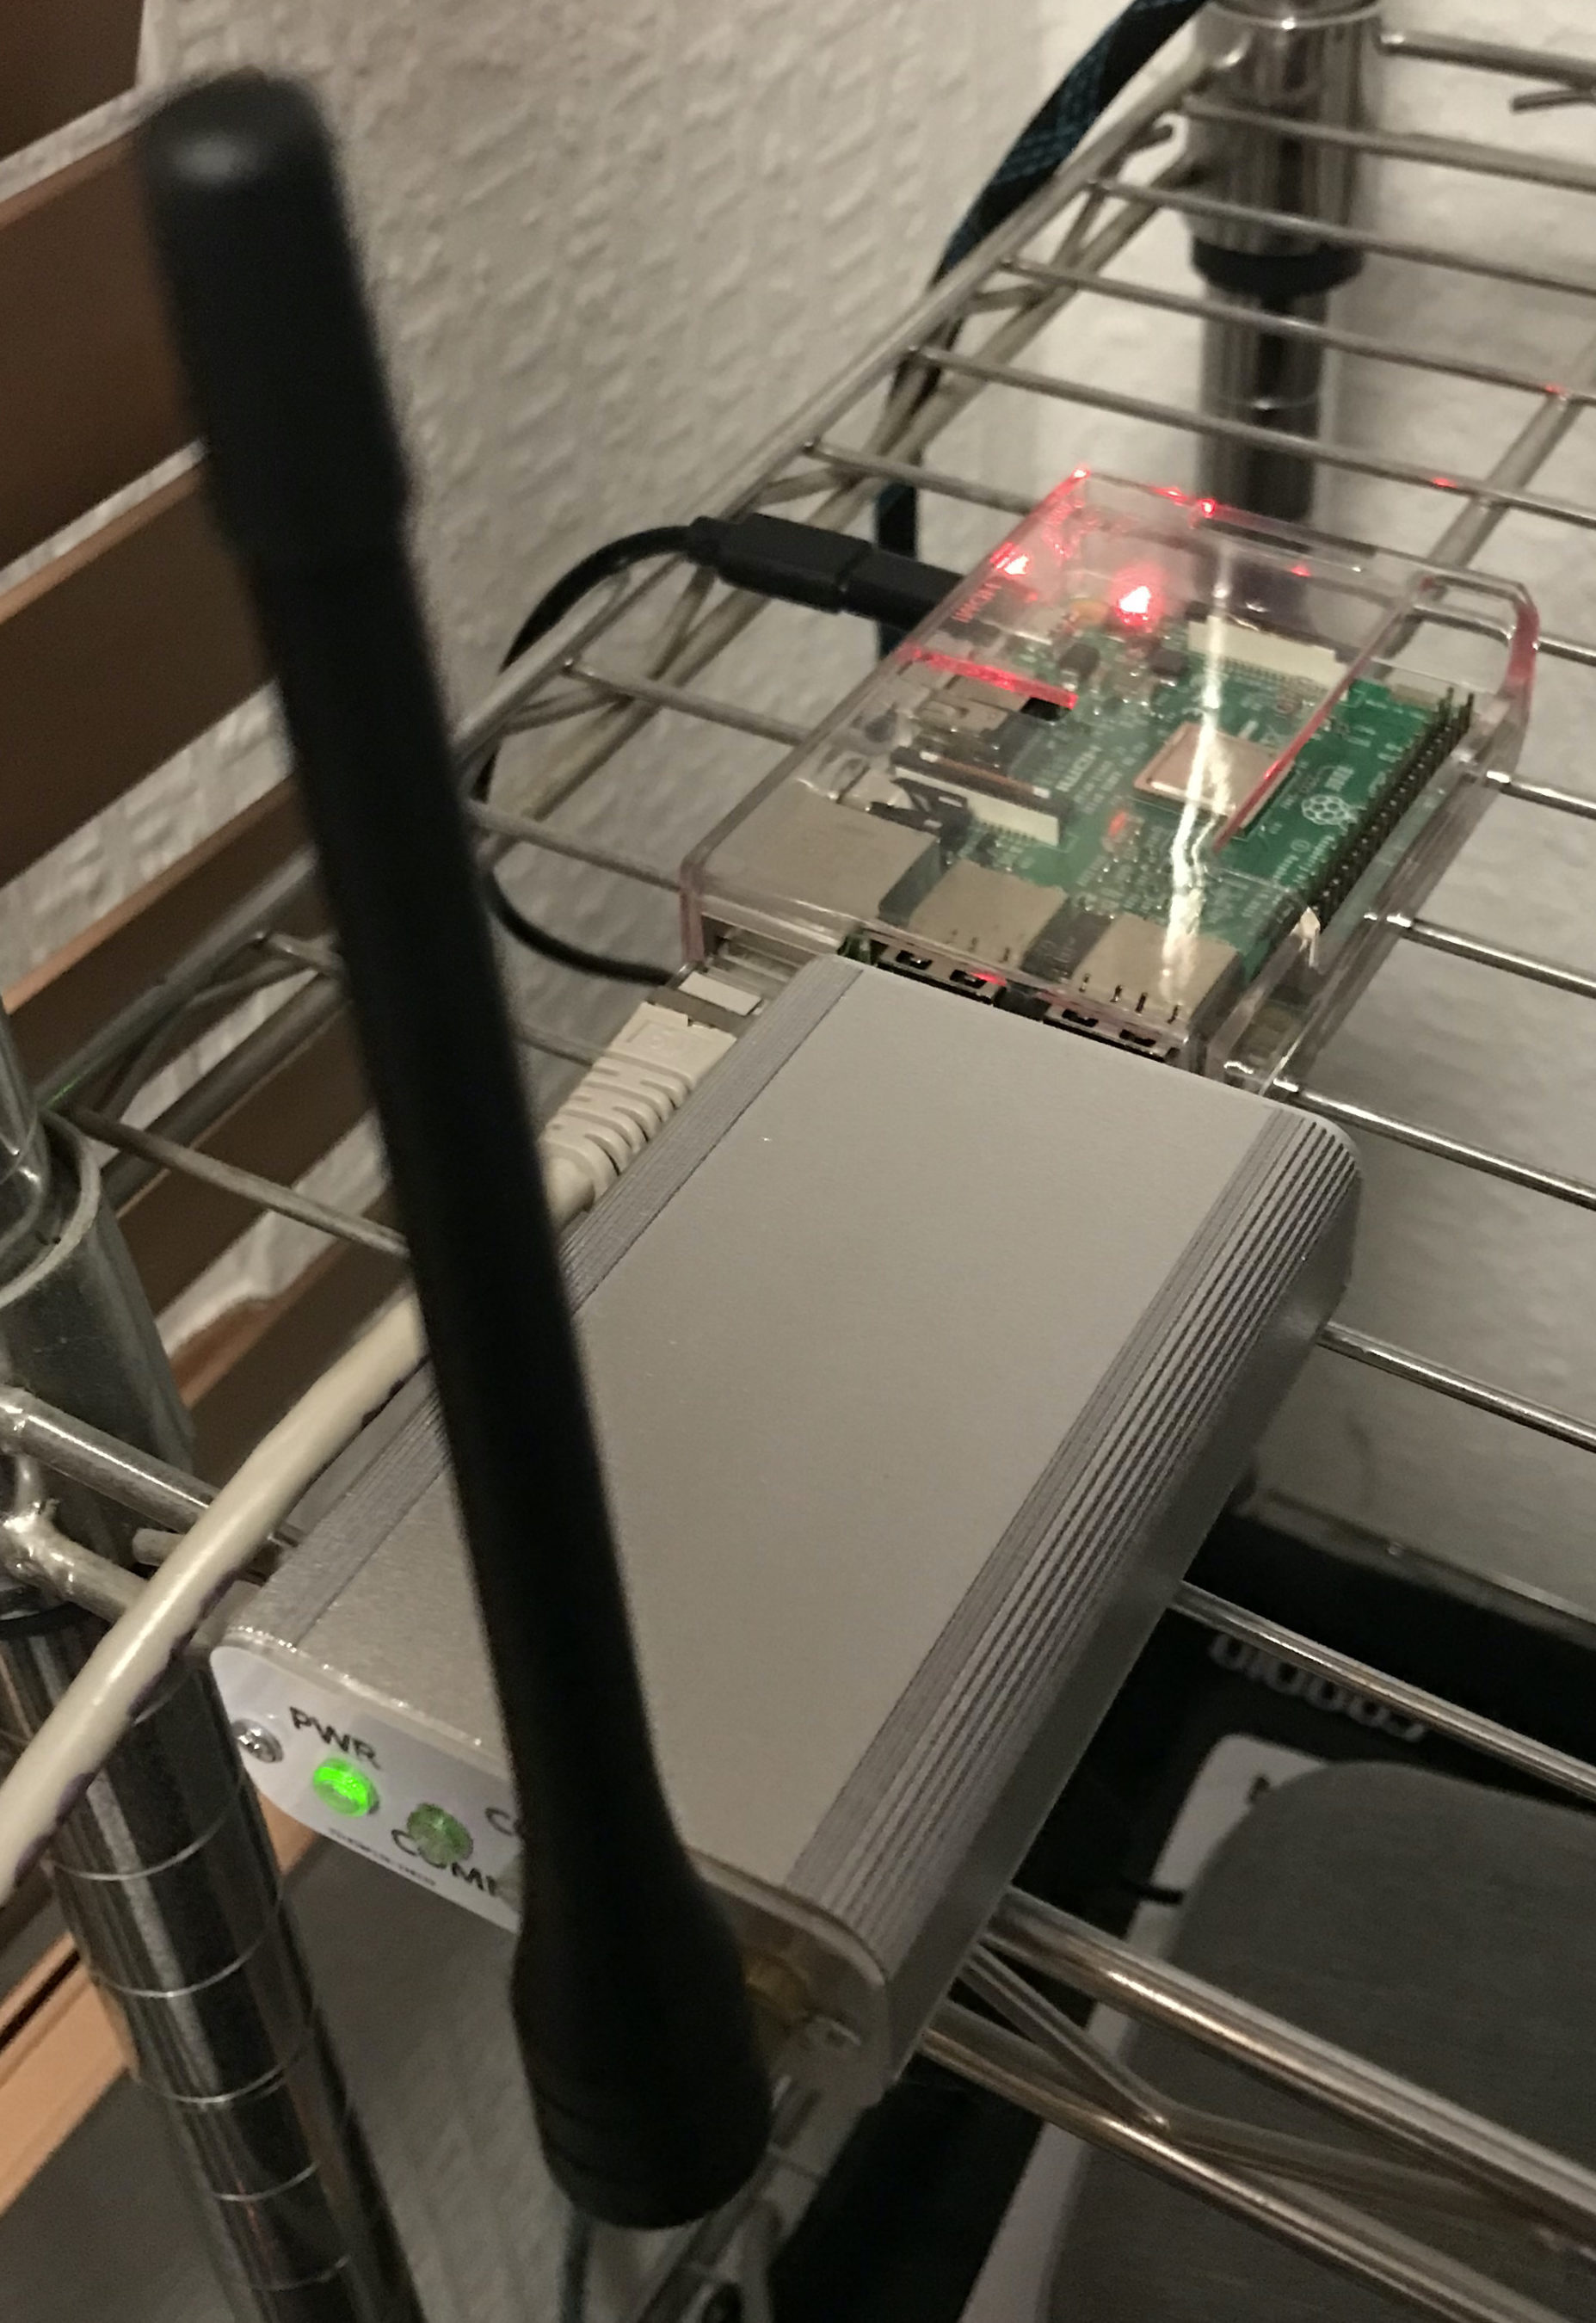
M0AWS AllStarLink Node 61928 sitting on the equipment rack

Thanks to Michael, DK1MI for building and hosting the Matrix HAM Radio Space AllStarLink Node (57881) and getting us all kicked off into the world of AllStarLink!

We hope to be having regular Matrix Net’s on the node soon for all Matrix members and visitors. We’ll organise days/times via the Digital Voice room.

More soon …

The Matrix HAM Radio Community continues to grow

A couple of years ago I built a Matrix Synapse server and connected it to the decentralised global Matrix chat network that is federated world wide by enthusiasts who host their own Matrix servers. Due to the enthusiasm for a decentralised network the Matrix has grown exponentially and is now an established force in the world of Opensource global communication services.

When I built my server and configured it online my aim was to bring together an enthusiastic group of Radio Amateurs (Radio HAMs) who could build a friendly, welcoming community where people could share, learn and have fun with other liked minded individuals without all the nonsense you see on commercial social media platforms.

Overtime we’ve increased the number of rooms available in the HAM Radio space and the number of subjects covered. This has grown organically as our community has grown and we’ve ventured together into new areas of the hobby.

Global Matrix Ham Radio Space hosted on the M0AWS Matrix Server

From the community a number of projects have spawned including the Opensource.radio Wiki that Mike, DK1MI is sponsoring that aims to detail all the Opensource HAM Radio software, Hardware and projects in one centralised site on the internet. This is a great project and one I am very happy to contribute to.

Thanks to Mike, DK1MI we now also have our own Matrix AllStarLink node available. This is a great resource for the community as it is often not possible for all of us to communicate via the radio waves due to geo-location, time zones, local planning regulations etc. Having this 24/7 internet based resource makes it a lot easier for the community to chat at any time even when propagation on the HF bands isn’t in our favour.

Mike, DK1MI has written an excellent article on the Matrix AllStarNode and more, I highly recommend you take a look at it.

We also have a very active satellite room with regular nets on the QO-100 satellite. With such a great range of rooms and subjects there’s plenty to read and talk about with the community.

If you fancy being part of this growing, enthusiastic group of Radio Amateurs and Short Wave Listeners (SWLs) then click on the link below and come and say hello, a warm welcome awaits!

https://m0aws.co.uk/matrix

More soon …

Building HAM Clock on an old RaspberryPi

I’ve got a couple of old RaspberryPi computers on the shelf in the shack and so decided it was time for me to put one of them to good use. The first model on the shelf is the oldest and is one of the very first RaspberryPi 1 computers that was released. (It’s the one with the yellow analog video signal output on the board!). This particular model is extremely slow but, I hang onto it just as a reminder of the first SBC in the line.

The second one is a RaspberryPi 2, a quad core machine that is only slightly faster than the first model but, it’s powerful enough to run HAM Clock.

It didn’t take long to install a vanilla Raspbian Desktop O/S and get it configured on the local LAN. I installed a few packages that I like to have available on all my Linux machines and then started on the HAM Clock install.

The first thing I needed to do was install the X11 development library that is required to compile the HAM Clock binary. To do this, open a terminal and enter the command below to install the package.

sudo apt install libx11-dev

You will need to type in your password to obtain root privileges to complete the installation process and then wait for the package to be installed.

The HAM Clock source code is available from the HAM Clock Website under the Download tab in .zip format. Once downloaded unzip the file and change directory into the ESPHamClock folder ready to compile the code.

cd ~/Downloads/ESPHamClock

Once in the ESPHamClock directory you can run a command to get details on how to compile the source code.

make help

This will check your system to see what screen resolutions are available and then list out the options available to you for compiling the code as shown below.

The following targets are available (as appropriate for your system)

    hamclock-800x480          X11 GUI desktop version, AKA hamclock
    hamclock-1600x960         X11 GUI desktop version, larger, AKA hamclock-big
    hamclock-2400x1440        X11 GUI desktop version, larger yet
    hamclock-3200x1920        X11 GUI desktop version, huge

    hamclock-web-800x480      web server only (no display)
    hamclock-web-1600x960     web server only (no display), larger
    hamclock-web-2400x1440    web server only (no display), larger yet
    hamclock-web-3200x1920    web server only (no display), huge

    hamclock-fb0-800x480      RPi stand-alone /dev/fb0, AKA hamclock-fb0-small
    hamclock-fb0-1600x960     RPi stand-alone /dev/fb0, larger, AKA hamclock-fb0
    hamclock-fb0-2400x1440    RPi stand-alone /dev/fb0, larger yet
    hamclock-fb0-3200x1920    RPi stand-alone /dev/fb0, huge

For my system 1600×960 was the best option and so I compiled the code using the command as follows.

make hamclock-1600x960

It’s no surprise that it takes a while to compile the code on such a low powered device. I can’t tell you how long exactly as I went and made a brew and did a few other things whilst it was running but, it took a while!

Once the compilation was complete you then need to install the application to your desktop environment and move the binary to the correct directory.

make install

Once the install is complete there should be an icon on the GUI desktop to start the app. If like mine it didn’t create the icon then you can start the HAM Clock by using the following command in the terminal.

/usr/local/bin/hamclock &

The first time you start the app you’ll need to enter your station information, callsign, location etc and then select the settings you want to use. There are 4 pages of options for configuring the app all of which are described in the user documentation.

M0AWS - HAM Clock running on RaspberryPi Computer
M0AWS – HAM Clock running on RaspberryPi Computer

Once the configuration is complete the map will populate with the default panels and data. I tailored my panels to show the items of interest to me namely, POTA, SOTA, International Beacon Project and the ISS space station track. I was hoping to be able to display more than one satellite at a time on the map however, the interface only allows for one bird to be tracked at a time.

You can access the HAM Clock from another computer using a web browser pointed at your RaspberryPi on your local LAN using either the IP address or the hostname of the device.

http://<hostname>:8081/live.html

or

http://<ip-address>:8081/live.html

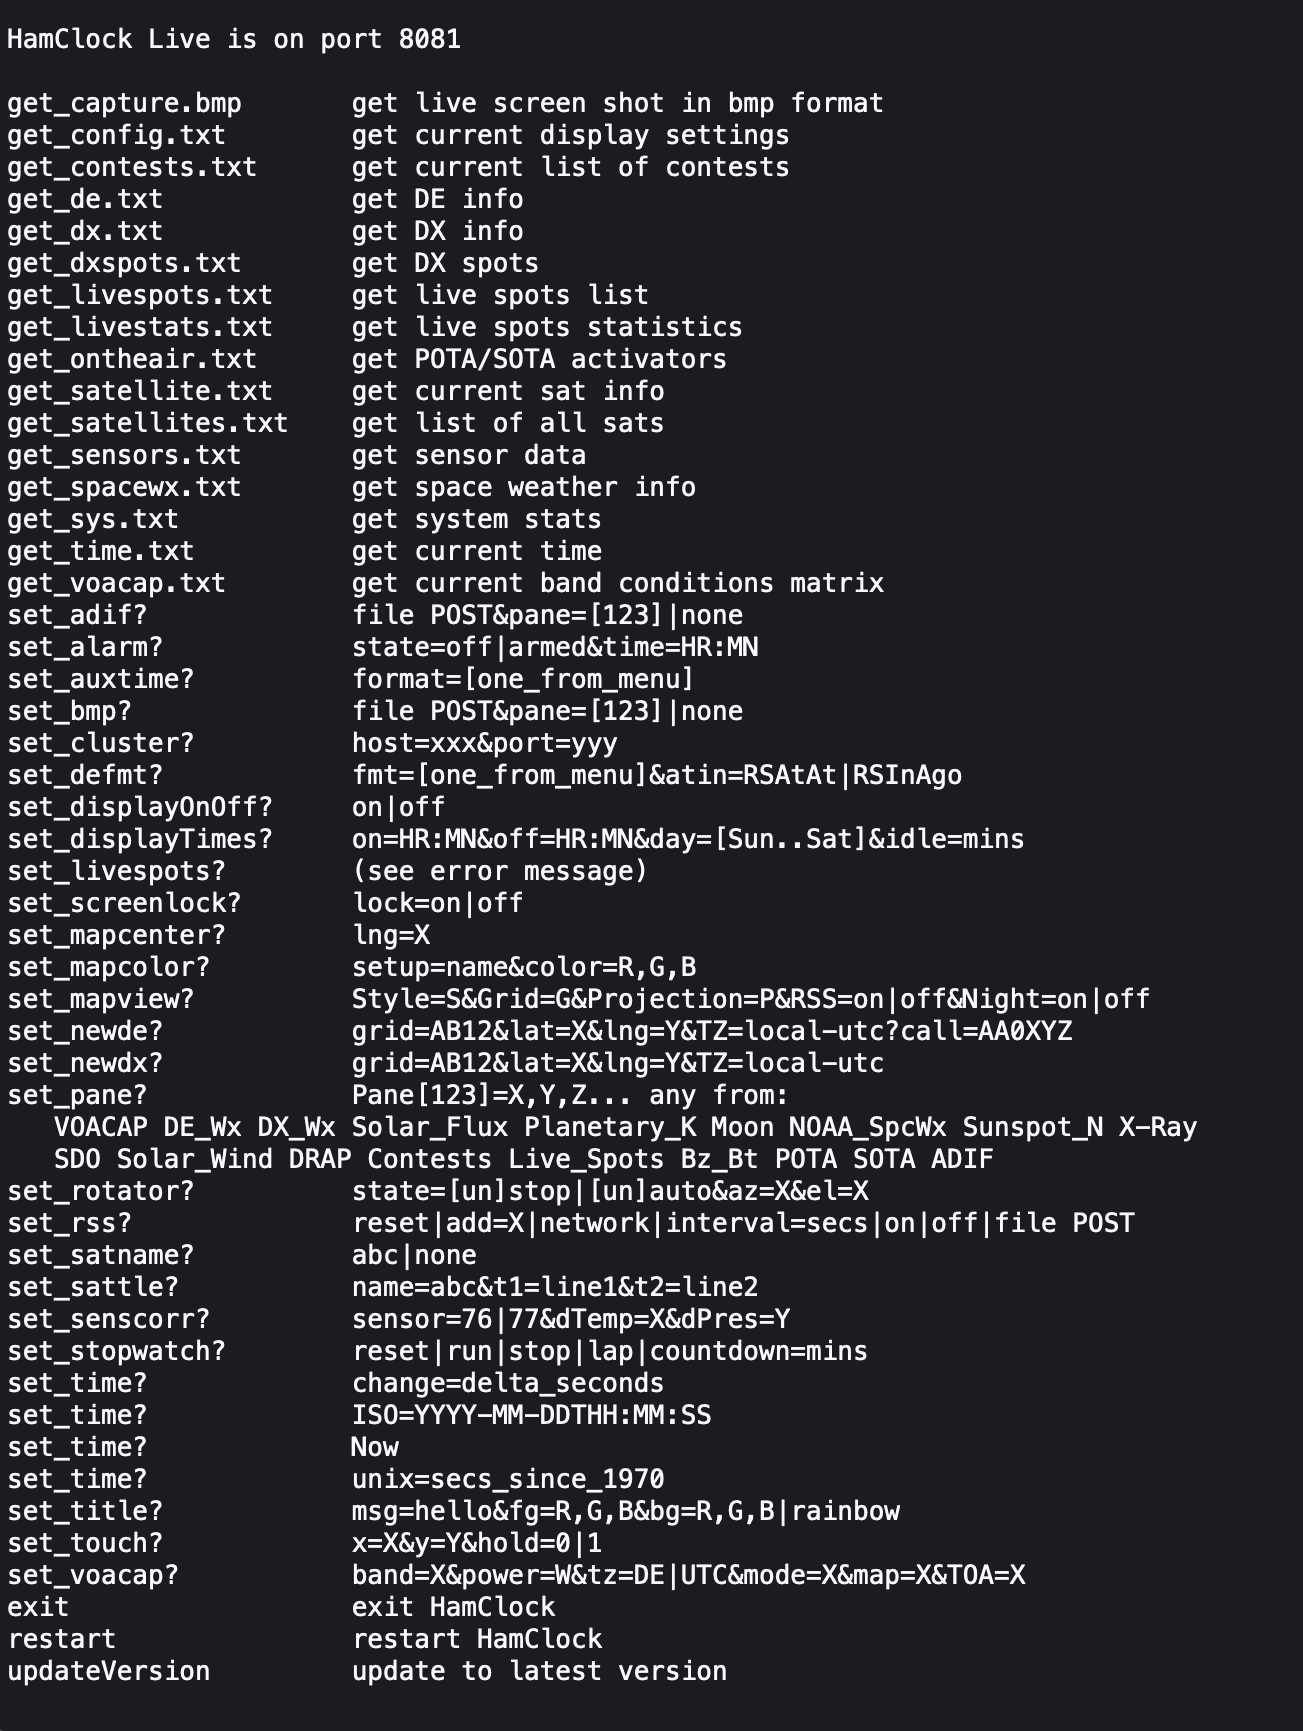
You can also control the HAM Clock remotely via web browser using a set of web commands that are detailed on port 8080 of the device.

http://<hostname or ip-address>:8080/

M0AWS - HAM Clock remote command set
M0AWS – HAM Clock remote command set

This is a great addition to any HAM shack especially if, like me you have an old HDTV on the wall of the shack that is crying out to display something useful.

More soon …

JS8 Logs now online

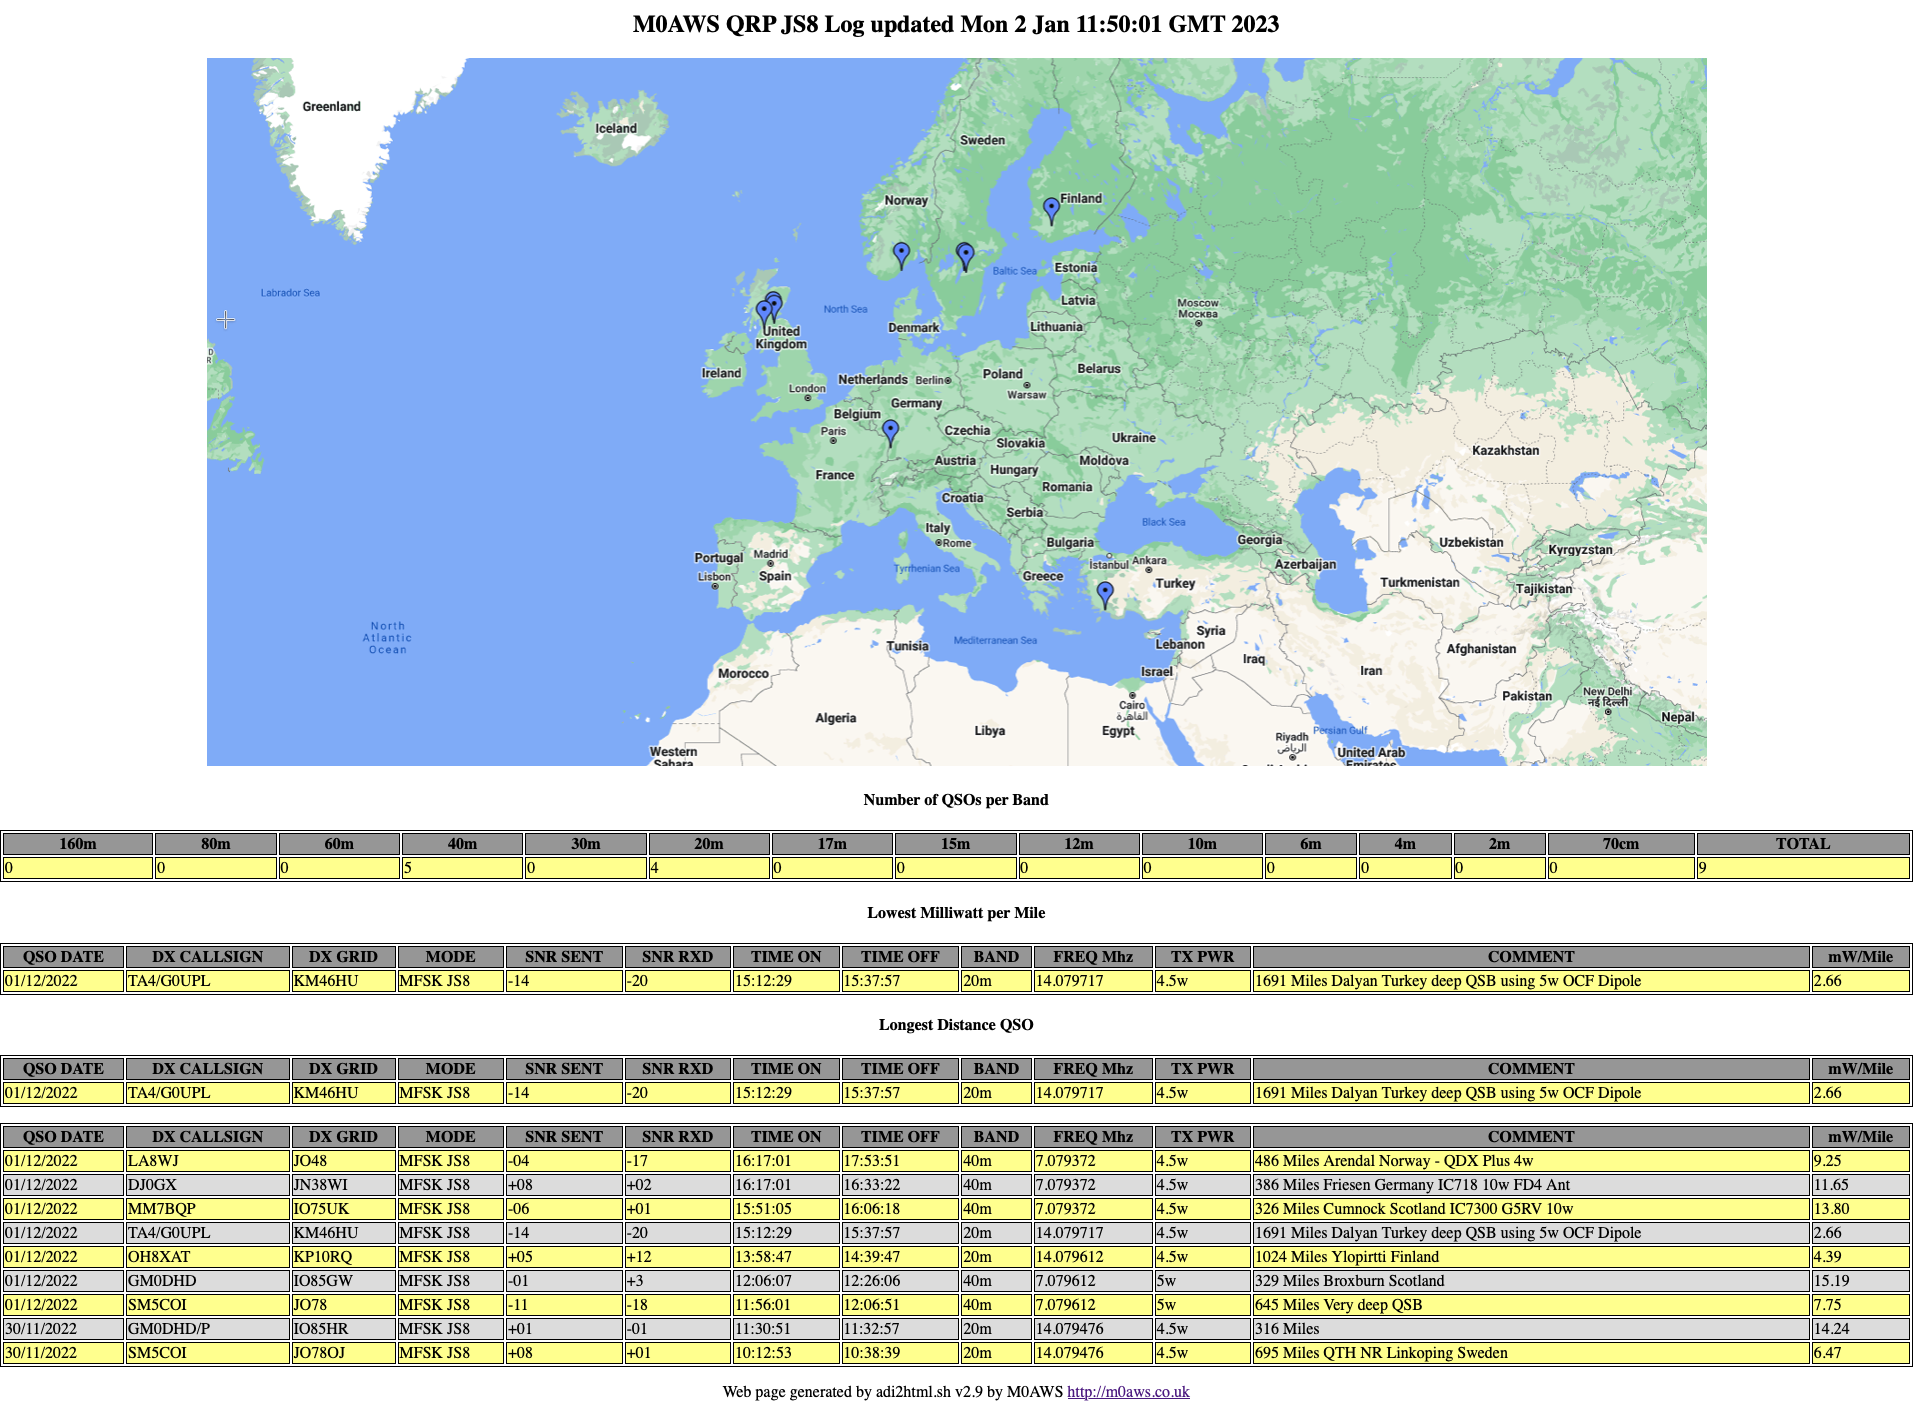
I’ve now added my JS8/JS8CALL logs to the website for both QRO (25w Max) and QRP (<10w) QSOs.

The JS8 logs are available from the Logs menu above.

I’ve updated the adi2html program to now be capable of processing the JS8CALL log file and will be releasing it into the public domain soon.

M0AWS QRP JS8 Online Log

More soon …

Social Media – Sucking the life out of our devices

Let me be up front from the outset, this isn’t a HAM Radio related article but, something that probably affects 99% of people today.

I’ve recently given up using social media. Like many of you reading this I had Instagram, Facebook, Twitter etc etc installed and active on all of my devices. Throughout the day and night my iPhone and iPad would be constantly notifying me of posts in the HAM Radio/Motorcycle/Adventure groups I was linked into, or that Jonny/Karen had posted something that I may be interested in, even though 99.99% of the time I wasn’t interested at all.

Even switching off notifications these apps still found ways to continually pester me, so annoying!

Then there was the toxicity, I was genuinely shocked at the constant barrage of hate and anger in the HAM Radio groups. If someone posted something about a radio/antenna/device and others disagreed there was this immediate attack and following argument that went on for days. These nearly always ended up with personal insults and hatred, whatever happened to respecting others opinions?

The HAM Radio groups weren’t the only ones either, the motorcycle groups were just as bad as were the adventure groups, social media really does bring out the worst in people.

Would we all really speak to each other in the same manner face-to-face? I doubt it!

So I deleted all my social media accounts and deleted the apps from all my devices and this is where something very positive happened.

Apart from the fact that my devices were no longer hounding me 24hrs a day, the batteries in my devices were lasting considerably longer.

With the social media apps installed my iPhone battery would barely last a day however, after deleting the apps I was amazed to find that after the next full charge my iPhone battery now lasted 2.5 days without a charge!

Even though I had my iPhone set not to allow the social media apps to update in the background and switched off notifications they were still consuming massive amounts of energy from the battery of the device even when the apps had been closed and were not being used.

Clearly the social media apps are busy skimming data in the background constantly collecting GPS information, movement, app usage etc etc building up a profile for targeted advertising. This data skimming is using considerable amounts of energy from the battery and it has to be questioned if this is reducing the life of device batteries overall.

I found the same on my iPad Pro too, battery life is now considerably longer, not quite as long as my iPhone but, it too is now lasting two days on a single charge even though I use it daily.

So, apart from no longer being exposed to the toxicity of social media, my device batteries are now lasting some 2 to 2.5 times longer allowing me to consume the content that interests me for longer rather than the batteries being discharged by the constant, silent collection of data for social media companies to sell on to advertisers.

If you are an avid social media user then perhaps now is a good time to consider deleting the apps from your devices and instead start using the website interface for each platform, this way you can still get your daily fix of targeted adverts but, without the constant drain on your battery.

Normal content will resume soon …..

All night DX fest!

Having just completed building my new radio shack I thought what better way to break it in than to do an all night radio session chasing the DX.

All nighters aren’t anything new for me, I did many an all night session low band DXing when we lived in France (F5VKM). Back then I had a massive cellar, part of which was a very well fitted out radio shack. With some very large antennas in our field out back I was truly spoilt with some great times on the 160m band in the dark winter months.

Now back in the UK and only just getting back into the hobby after a long break things are somewhat different. I now only have a typical small UK garden and only vertical antennas. Better than no antennas though!

The new radio shack is small compared to my super spacious setup in France but, it’s perfectly formed with all facilities.

For my over night radio session I decided to use my trusty Yaesu FTDX10, it has the best receiver I’ve ever used and is built to withstand the long haul operation.

Antenna wise I decided to use my 30m band EFHW vertical that can be tuned on most bands from 80m and upwards. I use a CG3000 remote auto tuner to match this antenna to the 50 ohm coax feed and it does a great job.

Being comfortably setup in the shack I tuned up on the 30m band and had a listen to see what shape the band was in.

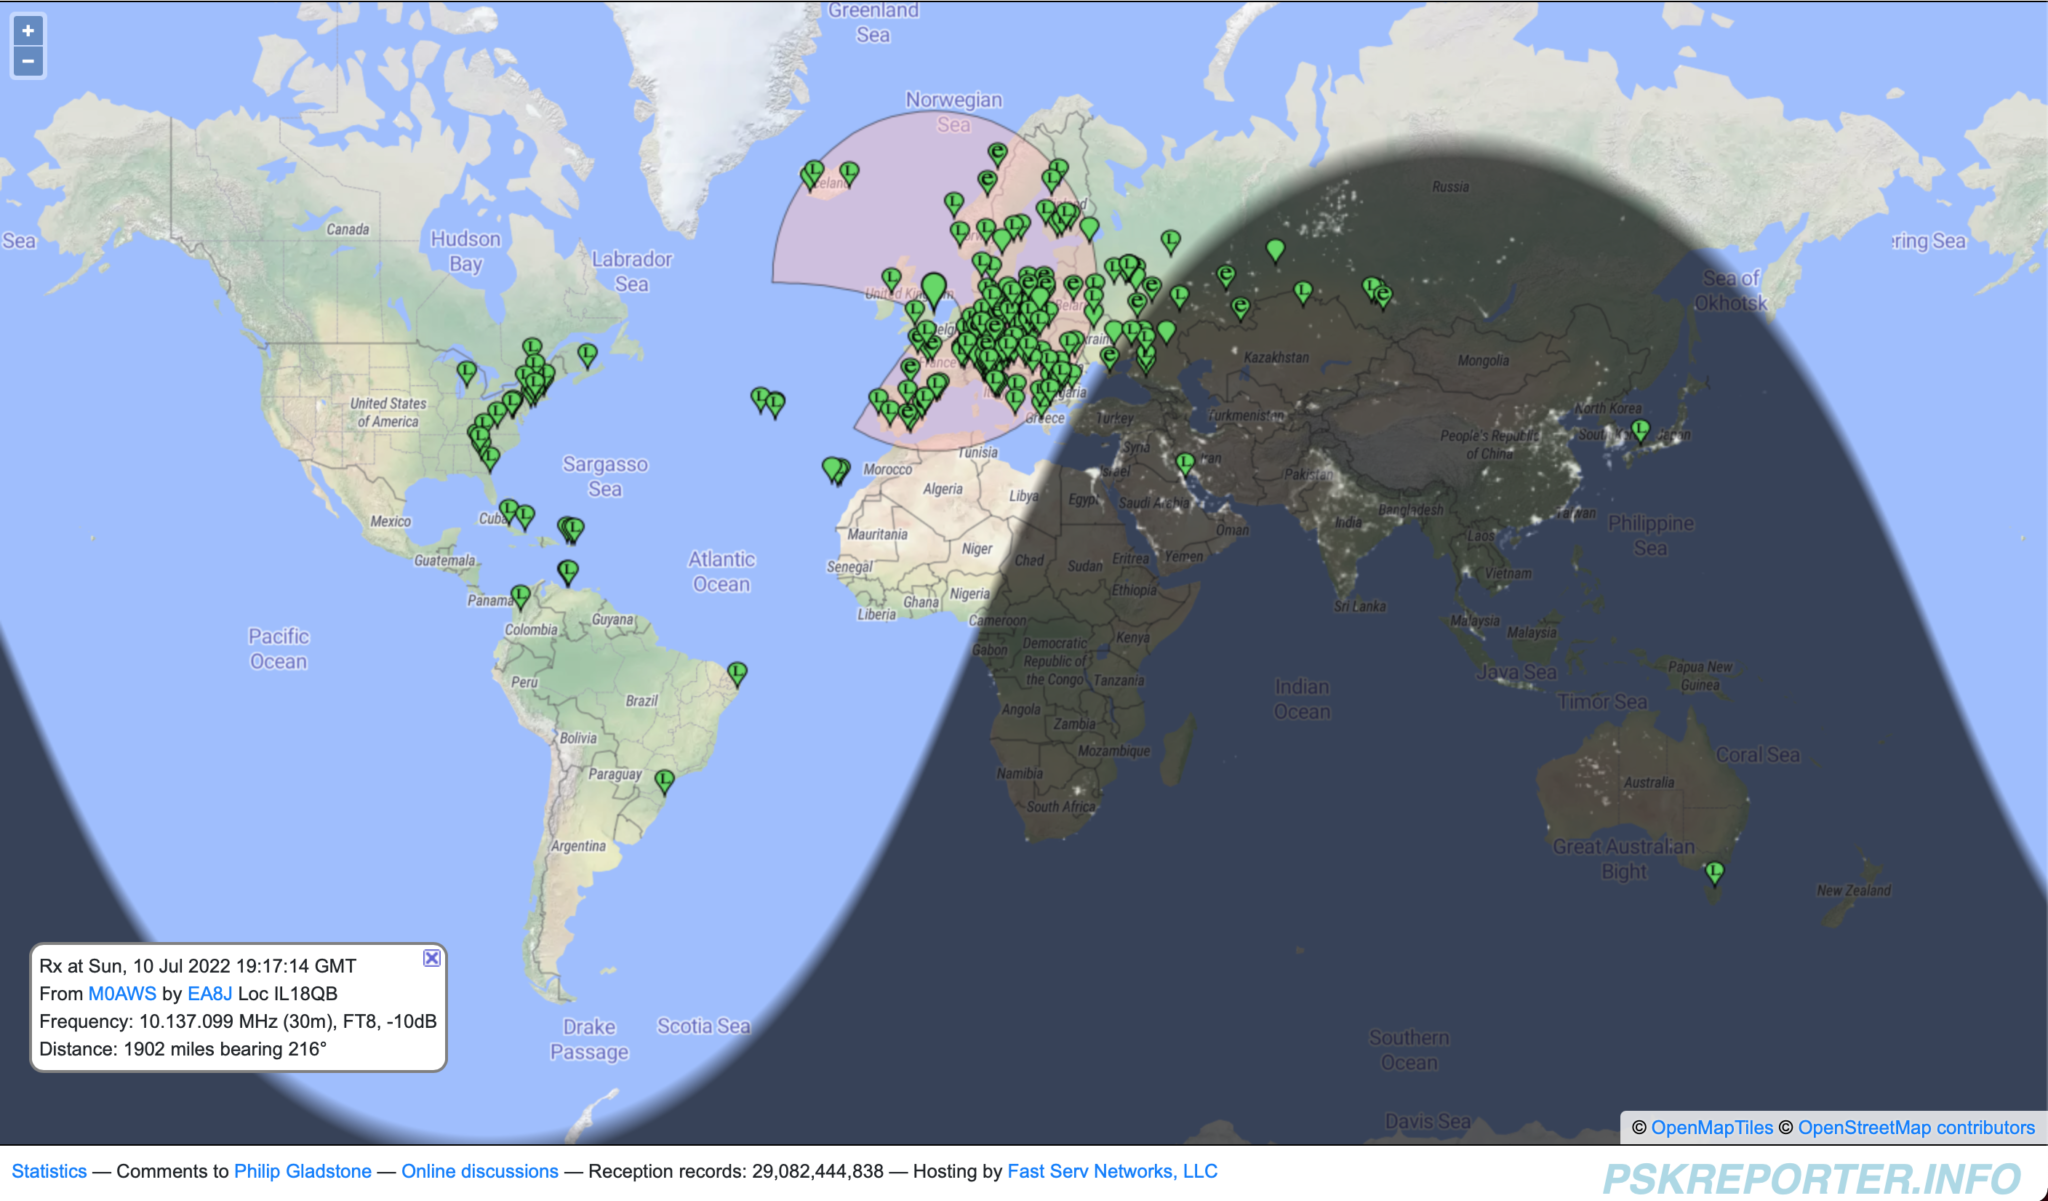
Stations heard on 30m 10/11-07-22

Using FT8 I worked a bunch of European, Russian/Asiatic Russian stations with ease, the band was in fairly good shape albeit localised around Europe and Russia. Wanting to work stations a little further afield I decided to move up on to the higher bands. 12m is a band I really like but, always seem to miss when it’s open.

Tuning up on the 12m band using the same vertical that I was just using on the 30m band the FT8 section was packed with signals. At last, I’ve tuned up on the band when it’s open!

I suddenly noticed Bobby, VP8ADR down in the Falkland Islands in the WSJTX waterfall and gave him a call. He had a fair few people calling him and so I joined the list. In no time at all Bobby answered my call and we exchange SNR reports of -8dB both ways. This was surprising as later on one of the FT8 Facebook groups Bobby stated he was using 200w into a Hexbeam during our QSO, I was only using a measly 18w into my Vertical, I would had expected a much lower SNR report. Clearly Bobby’s setup was doing all the work!

Right after the QSO with Bobby I immediately went on to work PY7ZC, LU8YD, PY2ATI, LW6EQC, PY2EBD and PY2THO all in quick succession. With the Falklands, Brazil and Argentina in the log so soon it was looking like it was going to be a fun packed night.

Next up on the waterfall was 9Y4DG in Trinidad and Tobago and 8P6ET in Barbados, two really nice locations to get into the log and new ones on 12m for me.

Having worked all the DX I could hear on 12m and not wanting to just spend hours working endless European stations I tuned down onto the 17m band using the same vertical antenna. This antenna really does work well on bands it’s not designed for.

First 3 stations in the log on 17m were all from Japan, JR3NZC, JQ6RUP and JA5BDZ. With all 3 stations being well on the way to 6000 miles away this was a good start. The propagation strangely swung to the west and I got YV5DRN from Venezuela in the log.

Not seeing any other stations that I wanted to work I retuned back onto 30m again and found it was open to South America and the Caribbean.

In no time at all I had YV4CLF in Venezuela, HK2AQ in Colombia, NP4TX and NP3XF in Puerto Rico and PY7ZC in Brazil all in the log.

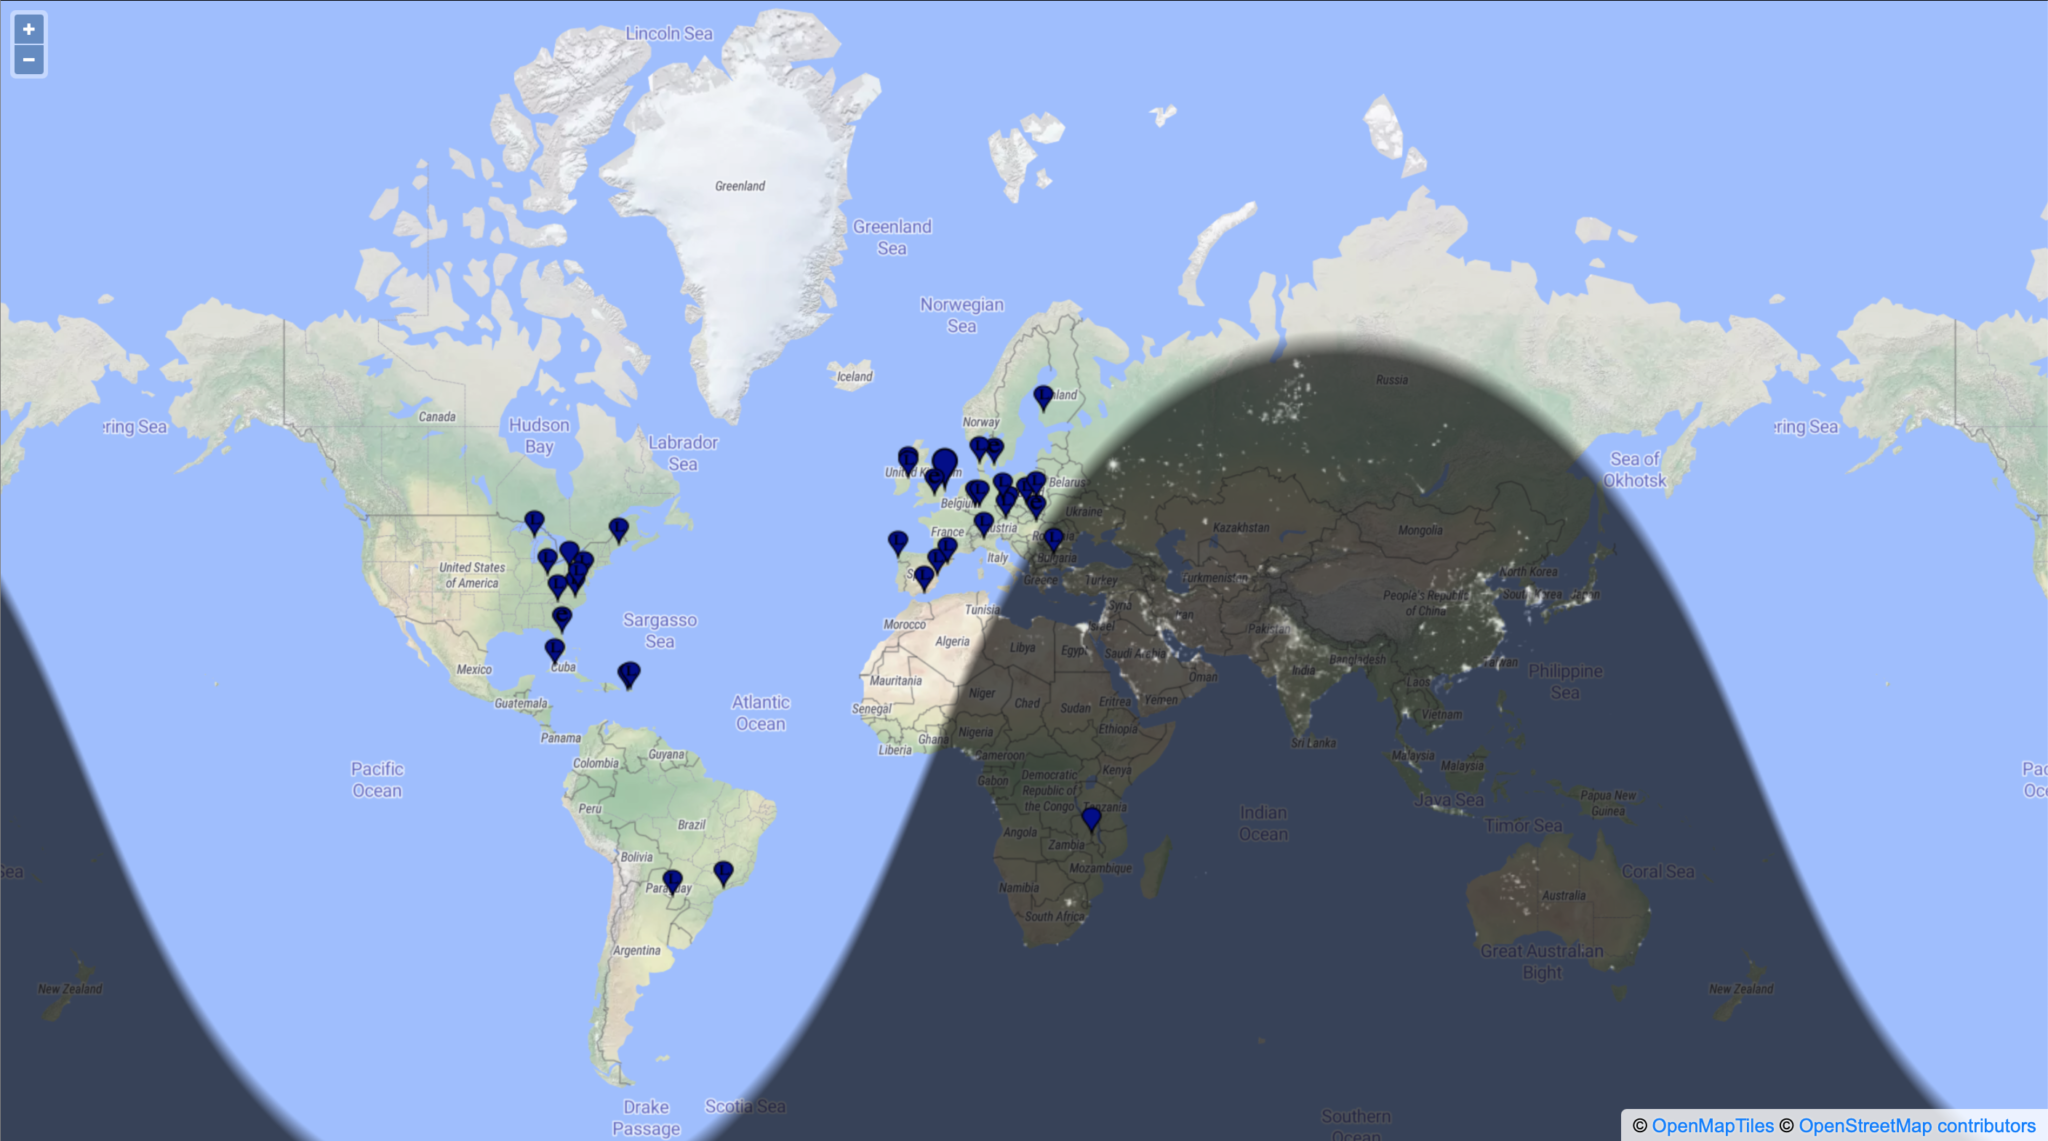
Being in complete darkness I decided to tune down on to the 60m band, one of my favourites, to see if there was much going on. Sure enough there were a few stations active on the limited space available.

First station worked was a new one for me FP/KV1J on St. Pierre and Miquelon Island just off the coast of New Foundland. I have to admit I had no idea where this little island was and confess to having to look it up on google maps.

I then went on to work a few East Coast USA stations all with good SNR reports for this time of year.

Stations heard on the 60m band 11-07-22

Having worked all the notable DX on 60m I tuned back onto the 17m which was now wide open to the world.

I stayed on this band for the rest of the night well into the morning grey line and beyond working some great DX including some new ones for me.

I worked many East Coast USA stations but, stations of note were 6Y5HN in Jamaica and AK6R, K6EU and K6EI in California on the West Coast USA. It’s rare for me to get into the West Coast USA for some reason.

UA0SDX in Irkutsk Siberia was also a nice one to get in the log. This is a town I was going to be riding my motorcycle through on my Mongolian trip before COVID19 and the war in Ukraine broke out and stopped the trip from happening. More information about my motorcycle adventures can be found on my Feralmoto website.

It was good to get an Ozzy call in the log too, VK6EI on the West Coast of Australia came in at a strong -15dB SNR giving me a surprising -14dB SNR report, incredible considering I was using just 22w into my vertical antenna.

Well after sunrise the DX was still pouring in and I worked KL7TC in Fairbanks Alaska, a new one for me that made me very happy as I’d been trying to get into Alaska for some time but, never seemed to time it right. Today was my day!

Another station I was really pleased to get into the log was V31MA. I’ve tried to get a QSO with this station many times but, have never succeeded until today. I called for about 20mins and eventually got a reply putting a huge smile on my face. -16dB SNR sent and -19dB SNR received, I was happy that I finally have Belize in the log.

The last station worked was RA0FF way over on the far East Coast of Russia, the complete opposite direction to Belize. Located in Yu-Sakhalinsk right on the Russian coast opposite Japan and at 5270 miles, this is my longest distance Russian station worked so far and one I was very happy to have in the log. I always get good take off towards Russia whether it be directly east or over the North Pole to the far eastern parts of the Siberian wilderness.

I had a great night chasing the DX on the HF bands and being retired didn’t have to worry about going to work after such a long night. I highly recommend that you try an all nighter at least once in your HAM radio career, you get the opportunity to work stations that you’d normally not hear during the day time hours.

You can see the full list of stations worked on the over nighter on my WSJTX Log page.

More soon …

How to make a webpage from your WSJT-X log file

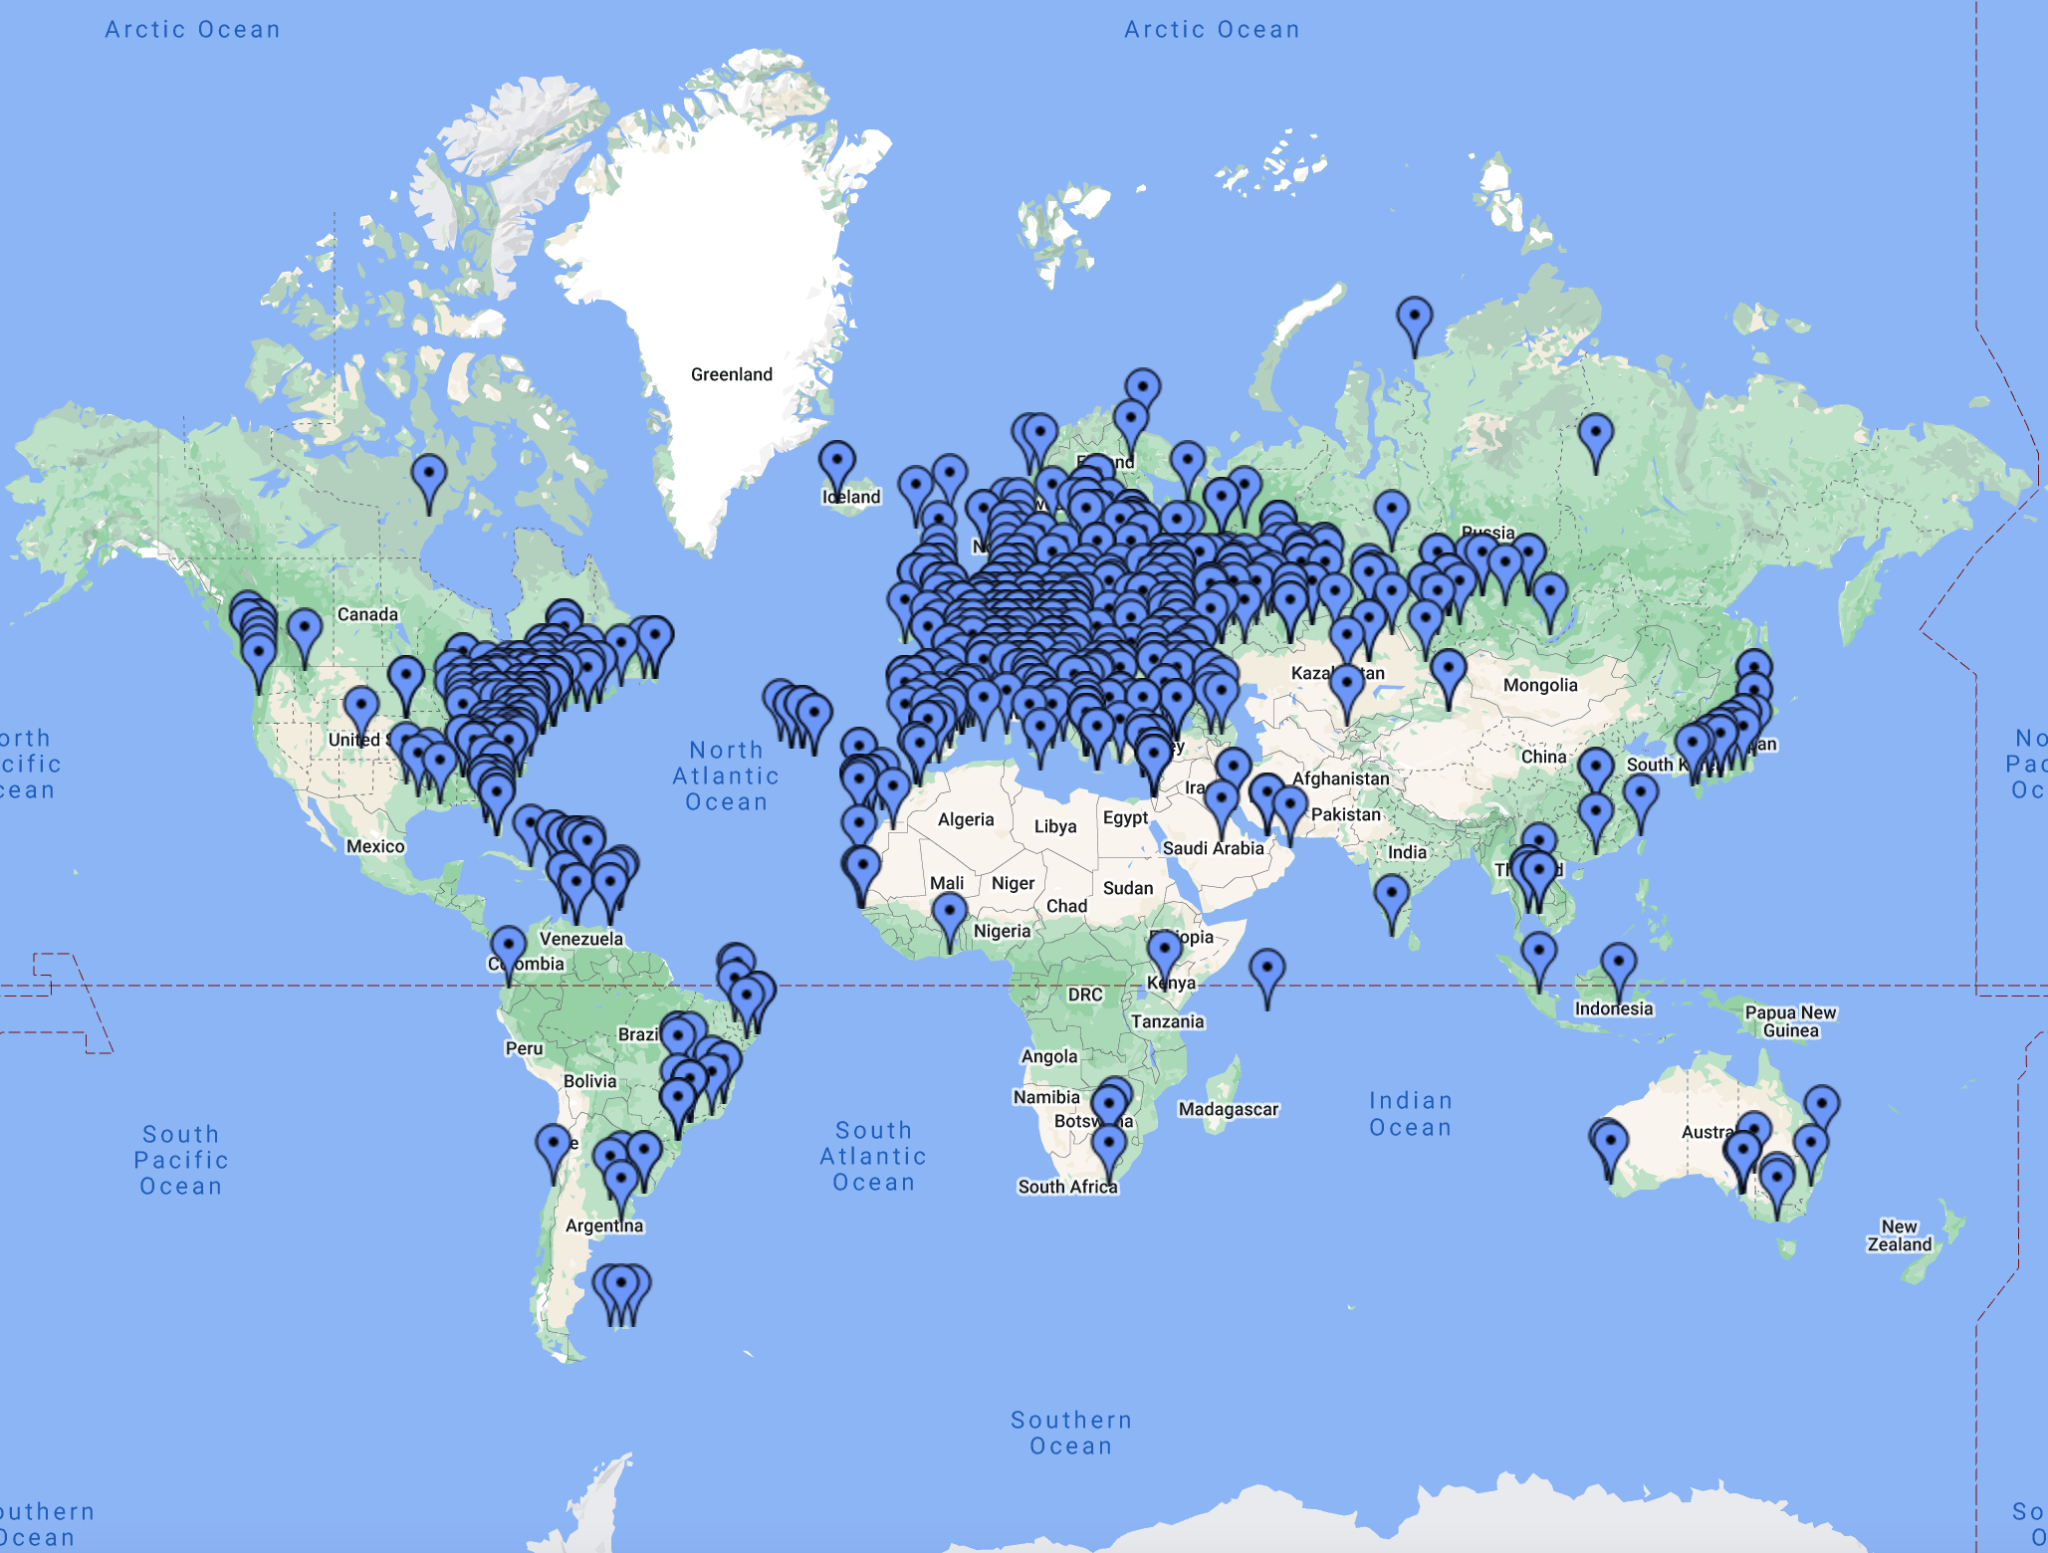
Map showing all M0AWS FT4/8 contacts

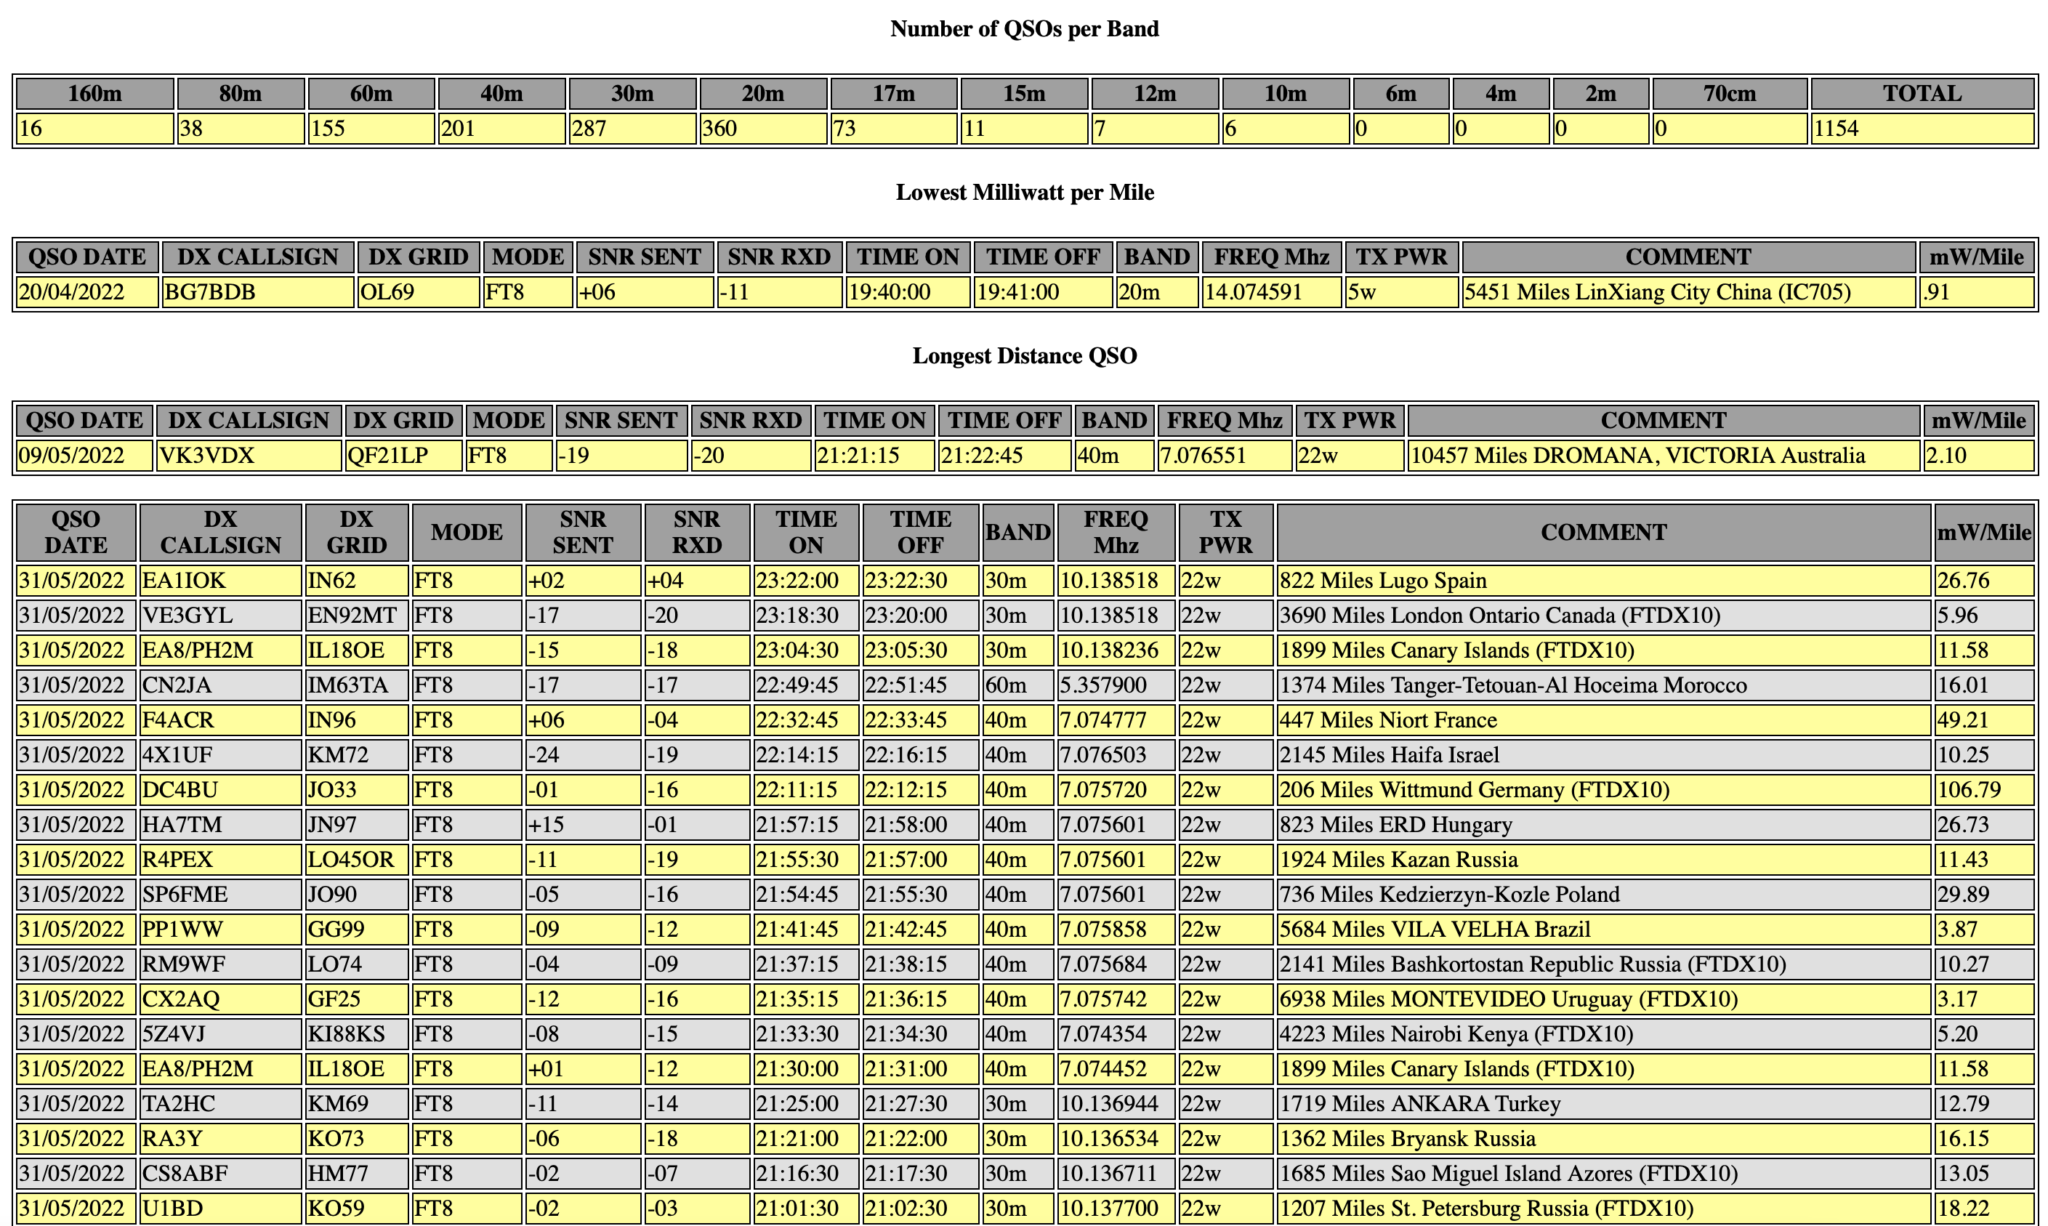
I’ve had a few messages of late asking how I generate my WSJT-X log web pages for my website. The answer is pretty simple, I use a little BASH script that I started writing some time back and have gradually improved over the last few months.

If you have a PC running Linux or a RaspberryPi running any of the normal Debian/Ubuntu/Redhat/Fedora based Linux distro’s that are available today then, this script should work just fine.

I originally wrote this program using Python but, a friend of mine bet me that I couldn’t write it in BASH and so, I took up the challenge and this is the result. It’s pretty simple and uses all the normal UNIX command line goodies like grep, sed and awk.

The script also uses WWL to calculate the distance between two Maidenhead locator grid squares and so it’s important to have it installed before running the script. (The script checks for it at runtime and will exit if it is not installed!). You can install WWL using your package manager on your Linux distro or from the command line directly. Details are in the READ-ME.txt file.

Screen grab from my M0AWS WSJT-X Log web page

It’s important that you READ the READ-ME.txt included in the zip file before trying to run any of the scripts included as it details the variables that you need to enter values for to make the script run on your PC/Server. (Example entries are in place as supplied).

The variables are mainly just paths to files on your system and whether you want distances calculated in miles or kilometres. Other than that there’s nothing else required for it to run.

I’ve also included details on how to run the script automatically from a crontab so that your webpage can be updated automatically every few minutes/hours etc.

The script also includes code to add a PNG map file into the generated webpage so that there is a graphical representation of all your QSOs. The map isn’t generated by the script (something I need to add in the coming few months) so you’ll need to generate it yourself and then add it to the website either via the crontab script included in the zip file or manually.

I use the QSOMap website to generate my map image files and then have them uploaded to my web server via the crontab script.

The script processes 100 entries per second on my web server (Headless virtual machine running Ubuntu Server 64bit Edition) and so should be pretty fast on most PCs. It will run somewhat slower on a RaspberryPi so be patient!

You can download the script and associated information using the button below.


If you do use my script please send me a link to your website so that I can take a look at your log file.

More soon …

Convert your RUMLogng radio logs to HTML

I’ve started using RUMLogng for logging on my MacBook Pro as it seems to be the most common logbook to use on the Apple Mac platform. I must admit that I’m not sure if I’ll carry on using it going forward as I’m not overly enamoured by it but, for the time being it’s all I have.

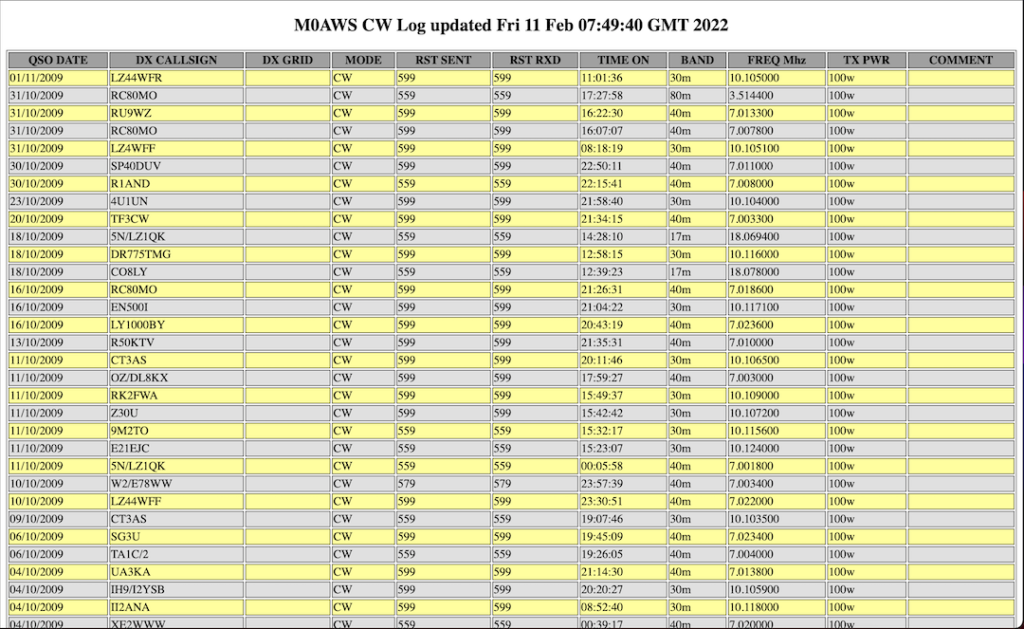
To get my logs on the blog I’ve written a small BASH shell script that reads the exported ADIF file from RUMLogng and creates a log in HTML format for each different mode.

You can see the output of the BASH script by selecting a log from the Logs menu at the top of this page.

If you want to be able to add your log to your own website then I’ve made the script available for download below.

Currently I’ve only tested the script with the few different modes that I have log entries for but, it should work for all modes. If you find any issues please contact me with all the details and I’ll look into resolving any problems.

As always, if you use my code to generate webpages on your website please consider leaving the footer in place so I get some credit, thanks!