40m Band NVIS Antenna Experiment

Since setting up the new station at my U.K. QTH I’ve not had any Inter-G contacts. This has mainly been due to the fact that the antennas I’ve currently got in place are all designed for chasing DX and so have far too low a radiation angle to be able to talk to other U.K. stations.

One of the things I do like about radio is the local chatter on the low bands. In the summer months working Inter-G on the low bands is most enjoyable so, I decided to put up a simple Near Vertical Incident Skywave (NVIS) antenna ready for the summer.

Unlike my French QTH, here in Suffolk we only have a tiny garden and so it’s a challenge to get any length of wire up that is anywhere near long enough for the low bands.

A quick measuring of the garden I worked out I could get 30m of wire approximately 3-4m off the ground at best. I’m very aware of my anti-antenna neighbours and so it needs to be as stealthy as possible.

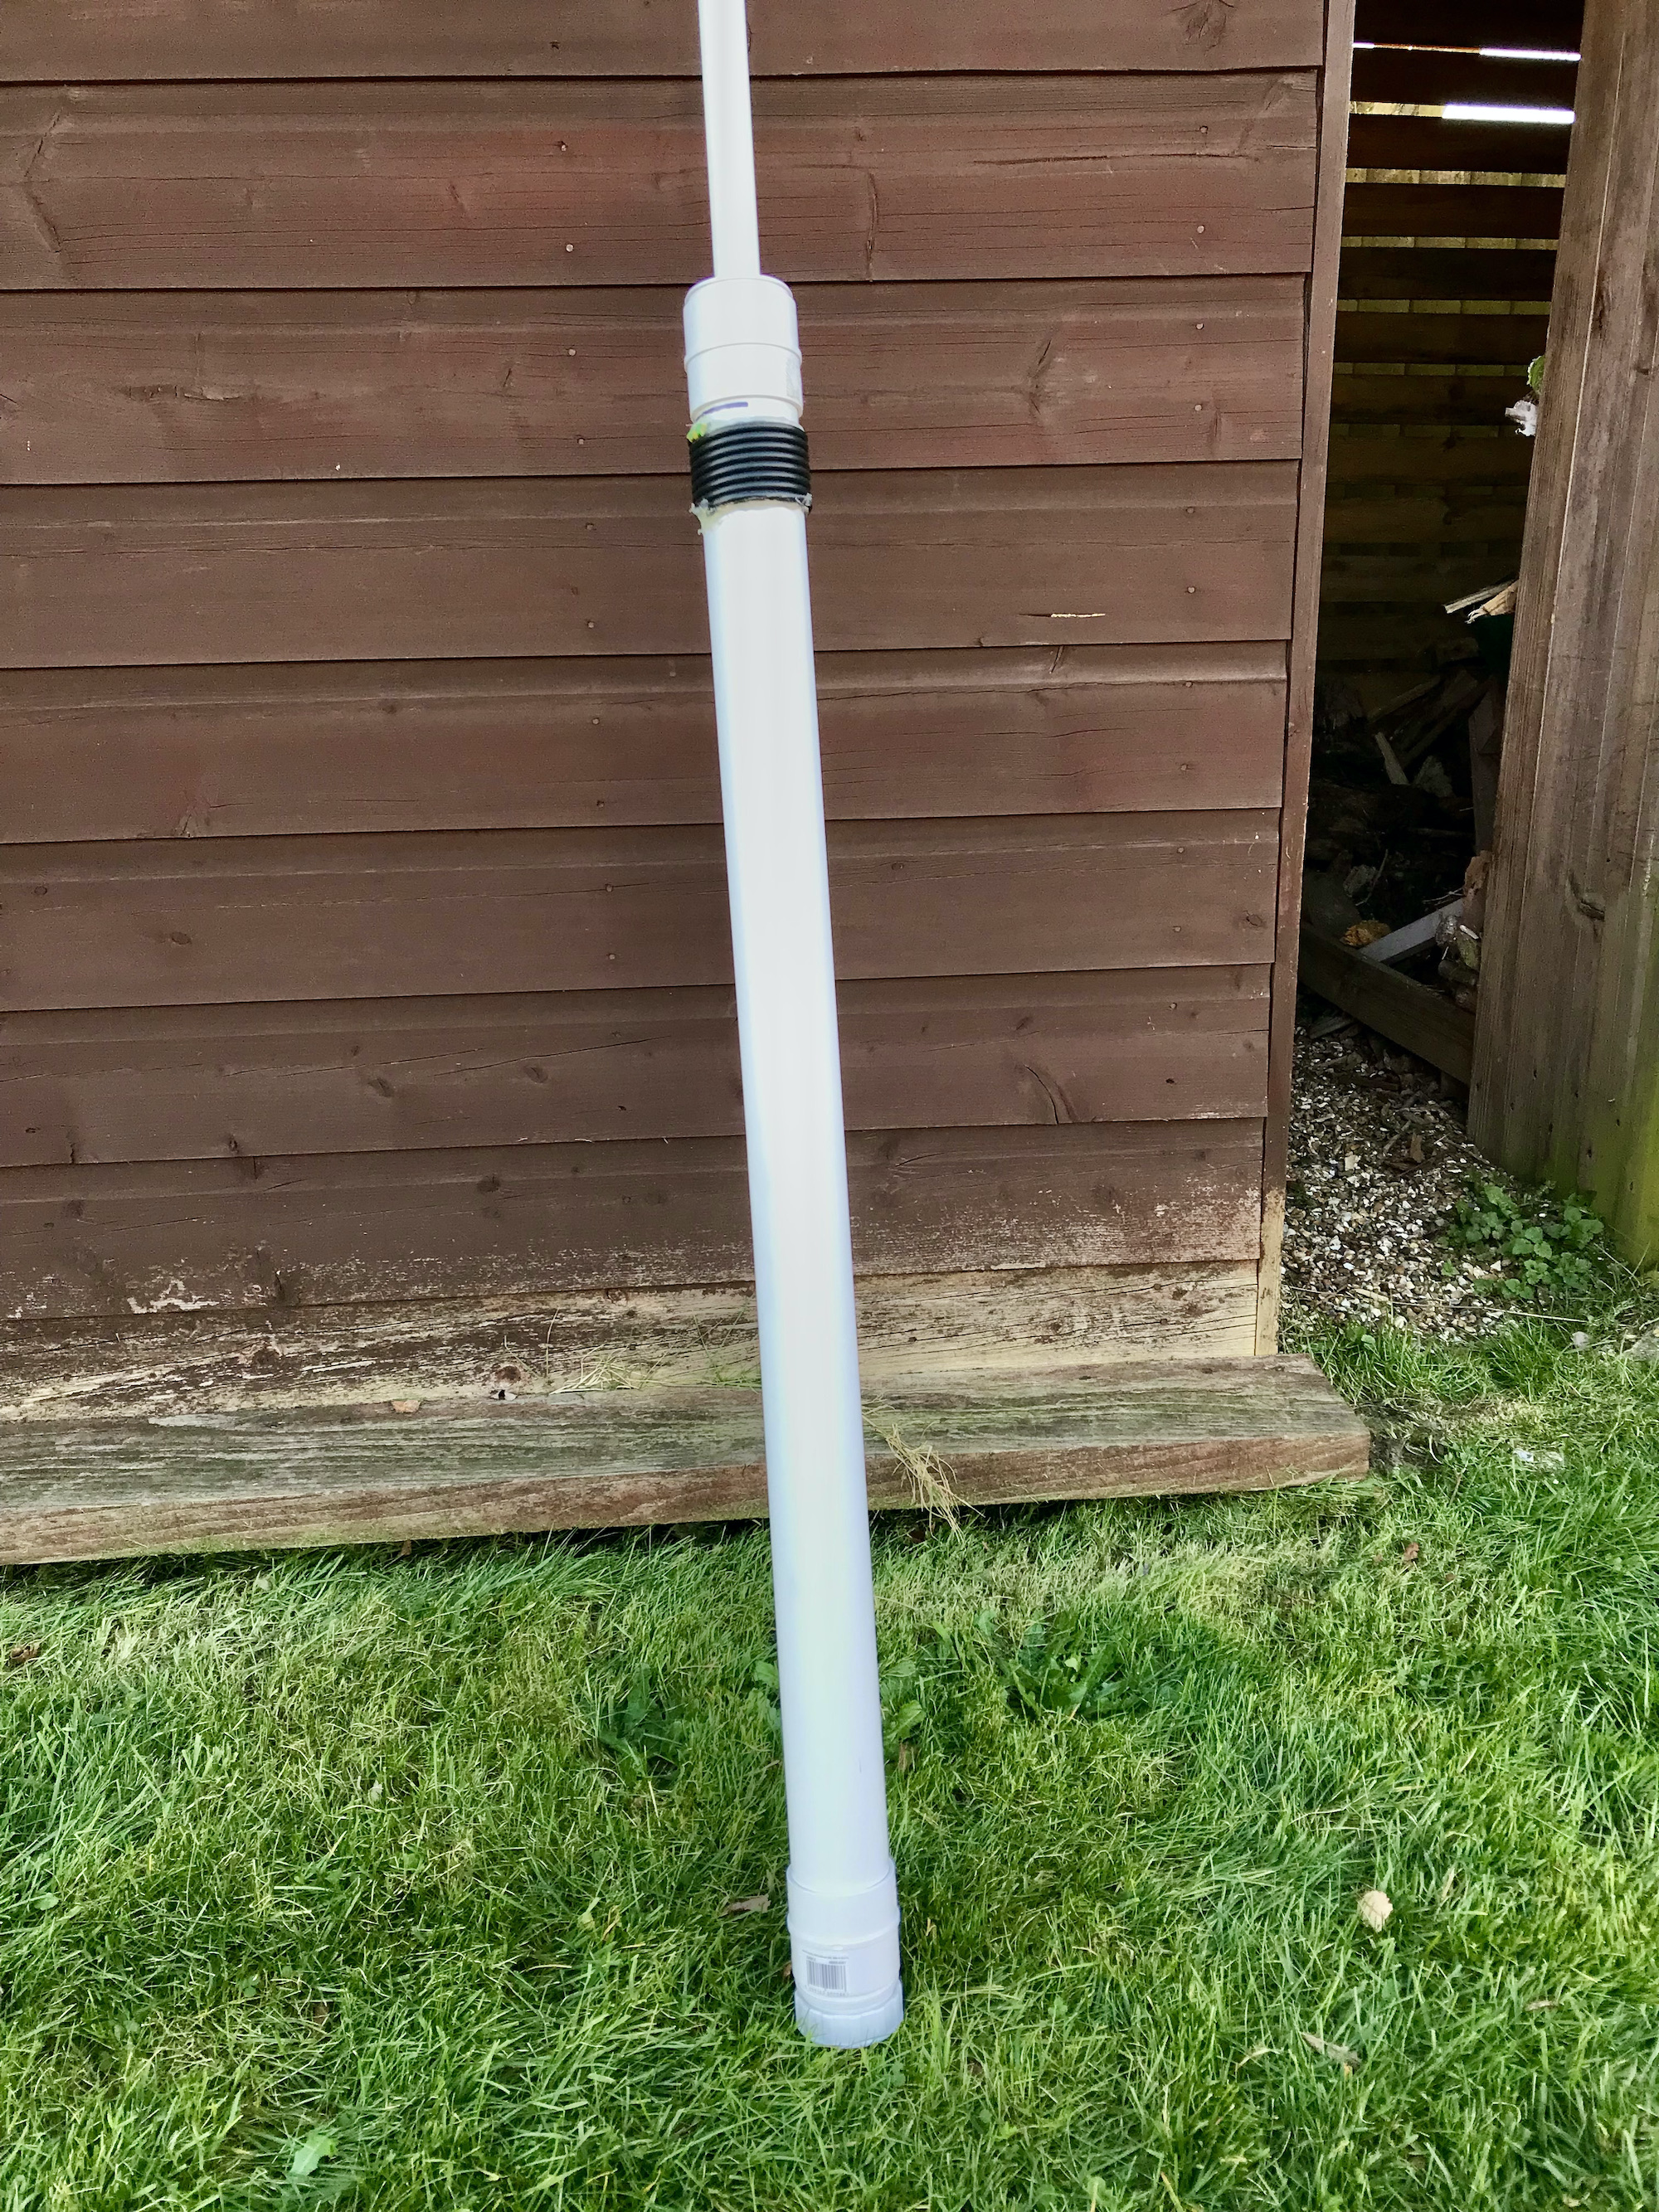
I decided to use some 1.5mm wire that I had in the workshop and utilise the high washing line poles that are already in place to get the wire along the max length of the garden.

With the wire in place and connected to the CG3000 auto remote tuner that I got off of Ebay for a song, ground post and radials connected I found that the antenna tunes up fine on all 3 low bands, perfect!

Tuning up on the 40m band I had an SWR 1:1 anywhere on the band. I could hear a number of strong U.K. stations and a few Dutch and German stations too. Since I’m on the East Coast of the U.K. The Netherlands and Germany aren’t that far away as the crow flies.

Setting the radio onto 40w SSB (First time on SSB in a very long time!) I put out a call. First station to come back was G8VVY, Robin in Malmesbury Wiltshire. Signals weren’t particularly strong and I gave him a 4/4 report and got a 5/5 in return.

Next station was PA3GLK, Dave in The Netherlands. Again signal reports were 5/5 and 5/6 but, perfectly readable.

Next up was G0SXC, Kevin in Lancashire. Signal reports were 5/9 both ways this time, very strong and fully quietening, the high angle radiation was doing its thing!

Last call was ON3PAT, Pat in Belgium. Very strong signals both ways, 5/9++ at a distance of 153 miles. NVIS propagation is working very well. I turned the output down to just 25w and Pat still gave me a 5/9 report.

Later in the day I decided to run some FT8 QSOs on 40m to see how far I could get reliably with no more than 25w. I was hoping that I may just be able to get 1000 miles as an absolute maximum but, be able to work stations at 100 Miles or less with ease.

Map showing NVIS FT8 contacts on the 40m band

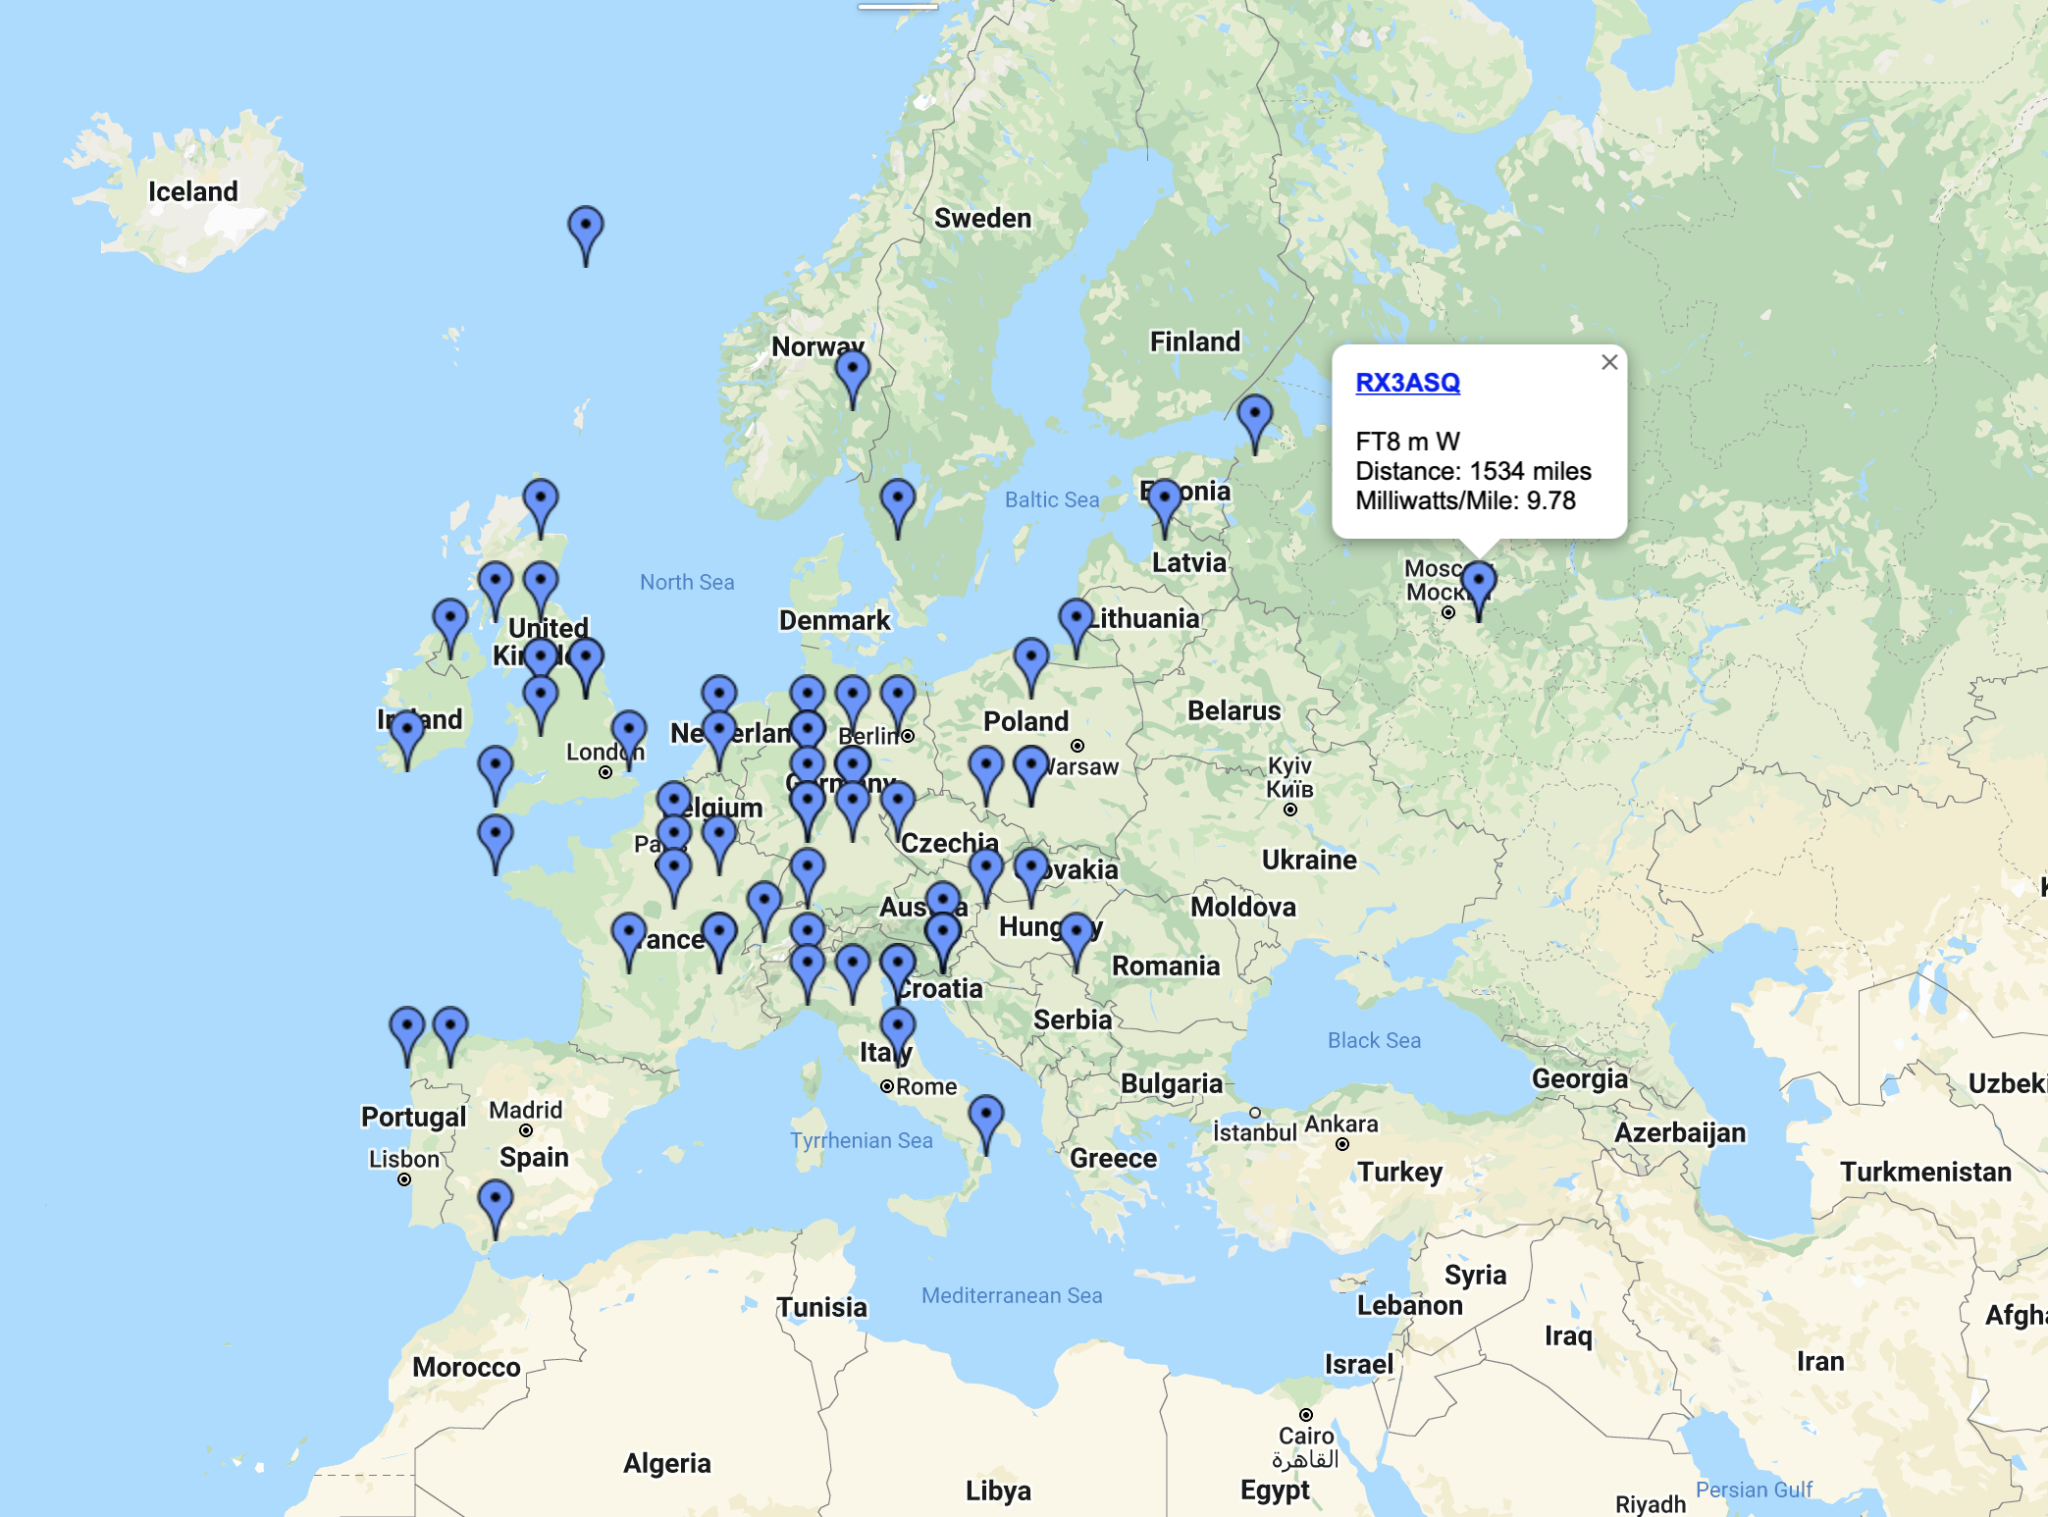
As you can see on the map above, 1534 miles was the best achieved, RX3ASQ just east of Moscow. The thing that pleased me most was the number of U.K. stations I could hear with the closest being just 43 miles away. Most European stations were easily worked even with reduced levels of power (10w) and so I’m hoping that this simple end fed NVIS antenna will become my goto antenna for local chatter on the 40m band.

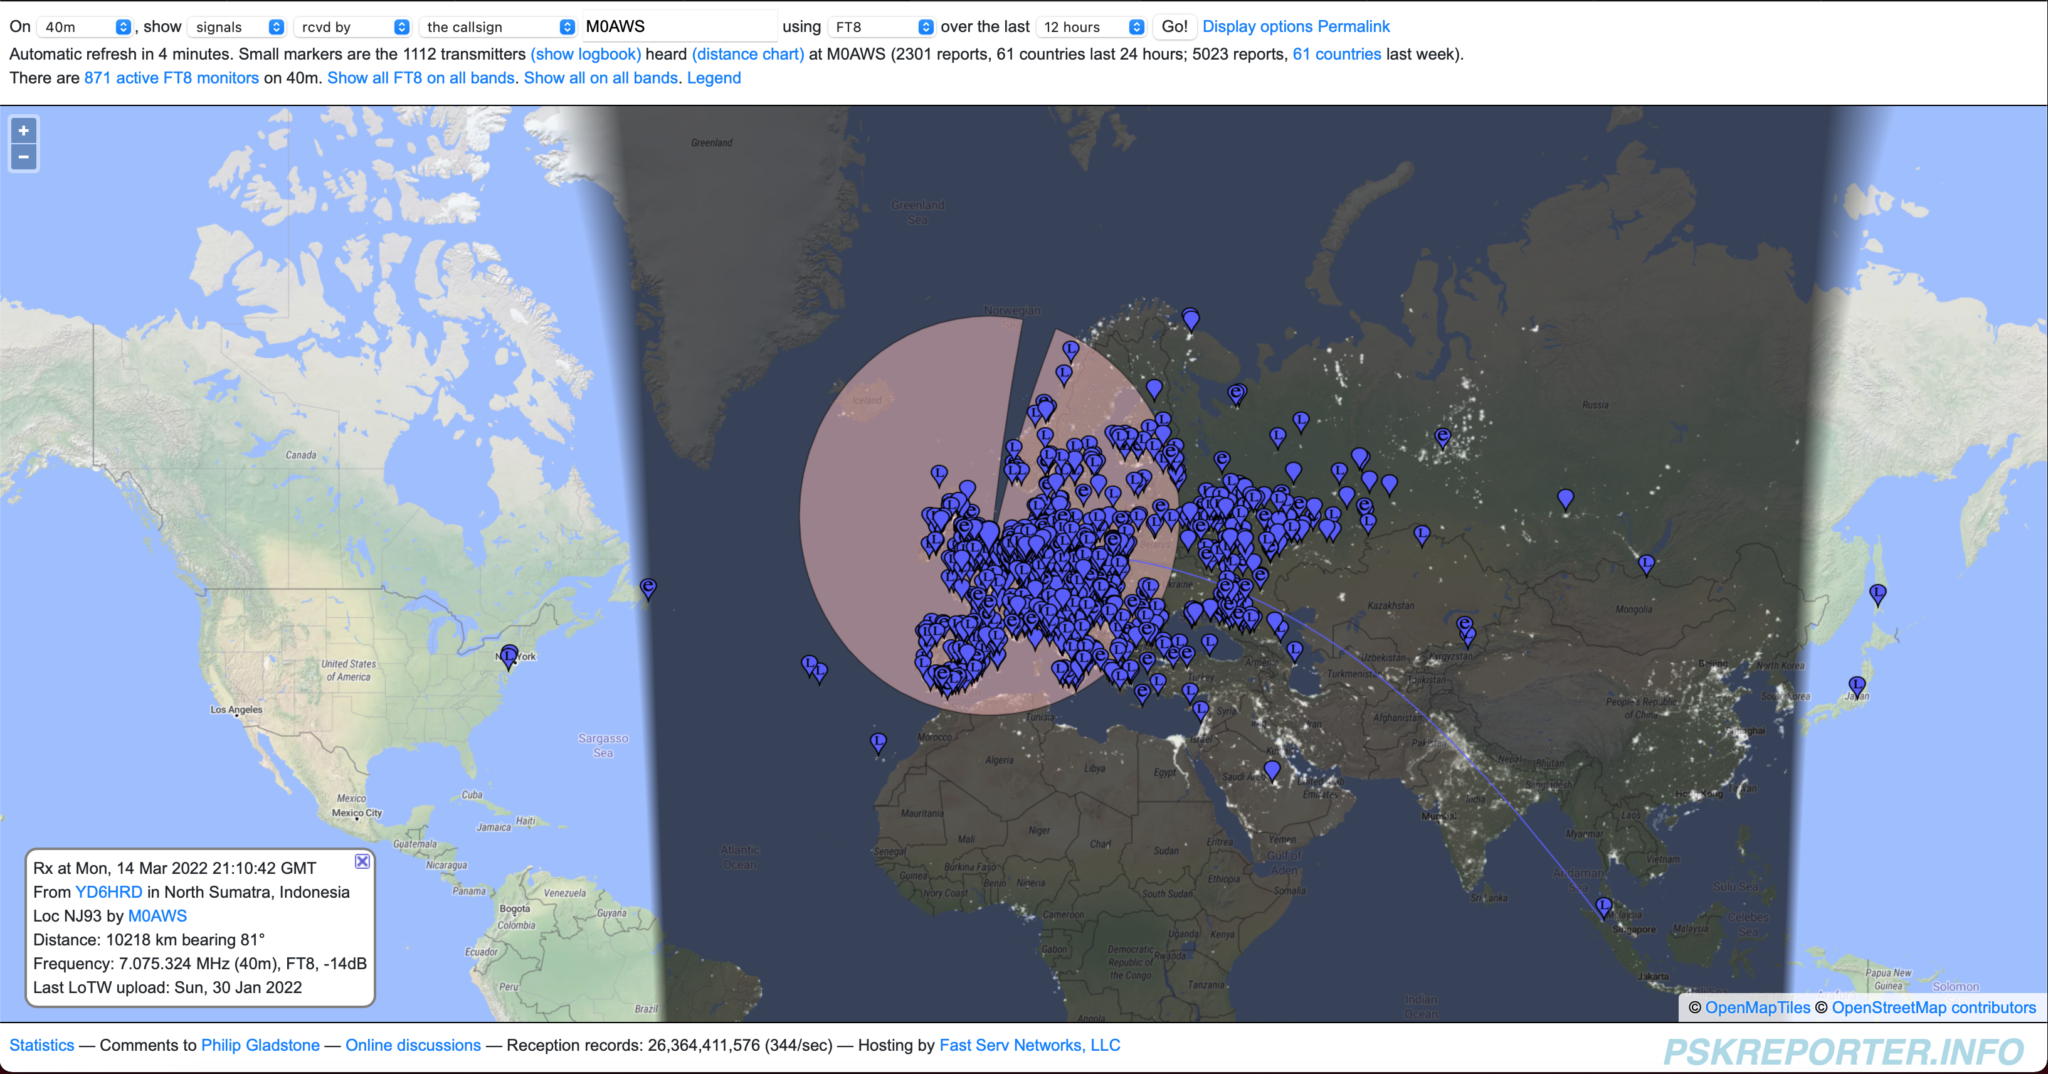
What was very interesting was what I could hear on the antenna, I didn’t expect to hear any DX stations at all however, I was surprised to see stations from Mongolia, Japan and the USA popping up in the WSJT-X window.

Obviously I couldn’t get back to them as my angle of radiation was far too high to get a signal out over those distances but, it just goes to show what can be a heard on a very low long wire.

Map showing stations heard on 40m using NVIS antenna

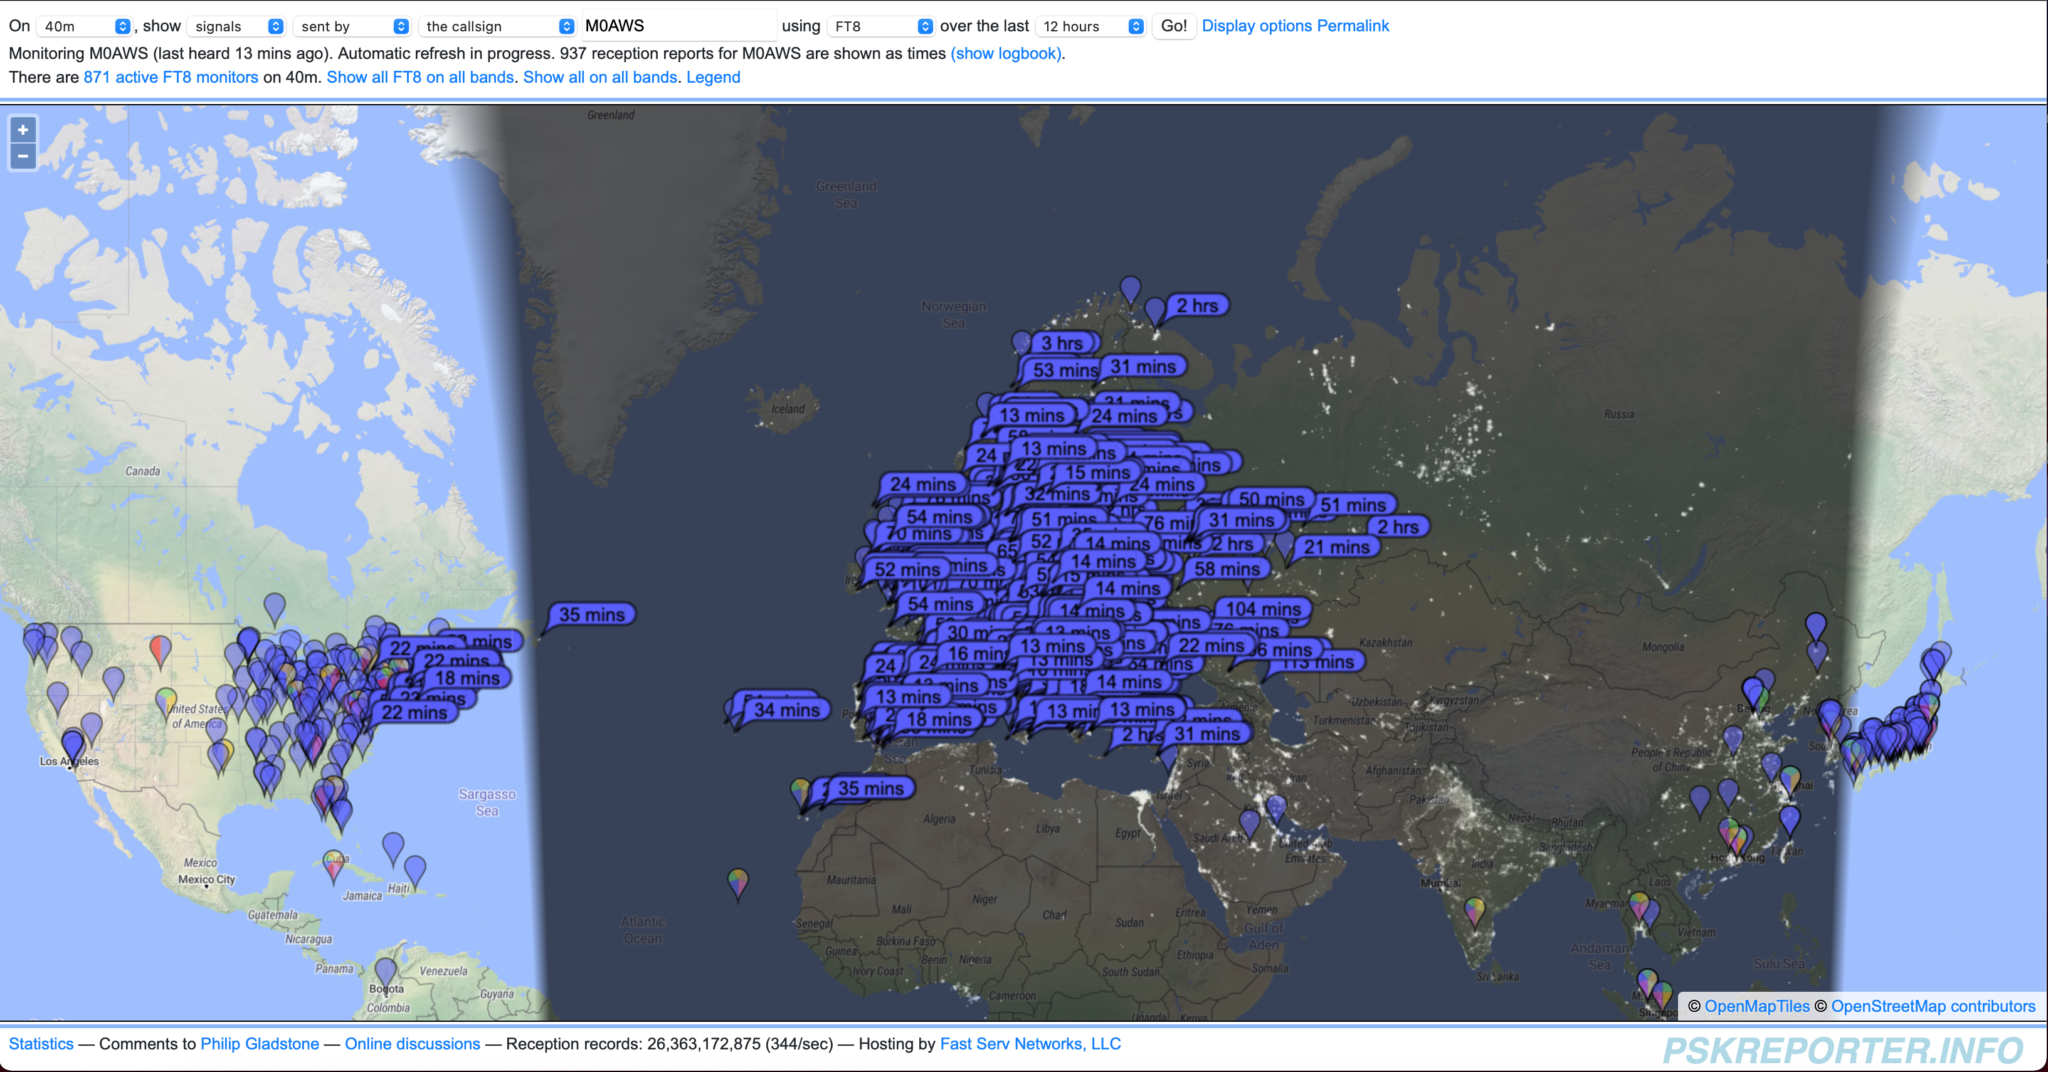
By the end of the evening to my surprise I had been heard in the USA, I was amazed to see where I’d managed to get into with such a low antenna. The main cluster of stations were in the U.K. and Europe of course which is exactly what I wanted from this antenna.

Stations that heard M0AWS on 40m FT8 using NVIS antenna

So the next test will be on the 80m band, I’m hoping to get similar results on SSB with inter-G stations being easy to work. I doubt I will be able to get anywhere near the 1500 miles I achieved on the 40m band but, I’ll be more than happy with U.K. and EU stations.

More soon …

Will raising my vertical antenna make it work better?

A question I get asked regularly is:

“Why don’t you mount your 20m EFHW Vertical antenna higher up in the air?
It’ll work much better the higher you get it”.

I have over the years tried raising and lowering my vertical antennas for DXing and found that keeping the base of the antenna and feed point low has advantages over a raised installation. I’ll try and explain this using some 3D and 2D far field plots from the EzNEC antenna modelling software that I use.

Below are the 3D and 2D far field plots as I have it setup at the moment. The 49:1 Unun is at ground level with the base of the antenna also at ground level.

20m EFHW vertical fed at ground level 3D Plot
20m EFHW vertical fed at ground level 2D Plot

Forgetting about the dBi gain figures for the time being and just concentrating on the overall radiation pattern you can see that with the antenna fed at ground level it has a typical circular radiation pattern with a deep null in the centre and a very low angle of maximum radiation. This makes the antenna perfect for DXing and is backed up by the success I’ve had on the 20m band working Australia, Thailand, Indonesia, South America, West Coast USA and Canada. This is exactly what I wanted and I’m extremely happy with it’s performance. I must add that I’m not looking to work European stations with this antenna, I’m only looking for DX stations especially those with very weak signals.

So now let’s take a look at what happens to the radiation pattern when we raise the antenna and the feed point above ground level.

First let’s raise the antenna so that the base and feed point are 3m above ground level.

20m EFHW Vertical with base and feed point 3m above ground 3D Far Field Plot
20m EFHW Vertical with base and feed point 3m above ground 2D Far Field Plot

Looking at the two far field plots above you can see that with the antenna and feed point raised by 3m we start to get some high angle lobes appearing in the centre of the radiation pattern. The overall maximum radiation is still at a low angle and so this would still be good for DXing but, does have an element of high angle radiation to it now. This will of course mean we’ll start to be able to work stations much closer to us and also be able to hear them better.

Raising the base of the antenna and feed point to 5m above the ground we see that the high angle lobes get even bigger and start to distort the overall radiation pattern of the antenna.

20m EFHW Vertical with base and feed point 5m above ground 3D Far Field Plot
20m EFHW Vertical with base and feed point 5m above ground 2D Far Field Plot

At 5m above ground the two high angle lobes have increased considerably which will result in more high angle radiation from the antenna. Maximum radiation is still at a low level though and so DXing will still be good with this setup but, from experimentation and experience I know that there are times when closer stations start to affect the ability to pick out the weaker DX stations. This is exactly what I don’t want.

Raising the antenna up even further to 10m above ground we get the following result.

20m EFHW Vertical with base and feed point 10m above ground 3D Far Field Plot
20m EFHW Vertical with base and feed point 10m above ground 2D Far Field Plot

At 10m above the ground the two high angle lobes shown on the 2D elevation far field plot are now almost as big as the main lobe below it. This means there will be considerable high angle radiation from the antenna which will result in the ability to communicate with stations much closer to your QTH rather than focusing just on the DX stations.

If you’re looking for the best of both worlds then getting your antenna up higher is the way to go, you’ll be able to work stations in the 300-1500 miles range with ease and the DX stations thousands of miles away.

From my experience there is one disadvantage with this in that the closer stations tend to drown out the weaker DX stations reducing the overall DX capability of the antenna and this is why I keep the antenna feed point at ground level. From experimentation and experience gained over the years I’ve found that keeping the antenna base and feed point at ground level gives me a better chance at working the DX than I have if I raise the antenna up higher.

As with everything in life there’s always a compromise!

So it really does depend what you want to use your antenna for. If like me you only want to chase those rare DX stations that are always difficult to get then keep the base of the antenna and feed point low. This will maximise the null in the centre of the radiation pattern and keep interference from “local” stations to a minimum. The draw back to this of course is that you won’t be able to work the closer stations when there is no DX around.

However, if you want the ability to work more “local” stations and the stronger DX stations raise your antenna and feed point up to a more suitable level above ground so that you obtain more high angle radiation from your vertical antenna. Then when there’s no DX around you’ll still be able to chat with the more local stations.

I hope this helps all the people that read my blog understand the choice I have made and why I keep the base of the antenna and feed point at ground level.

More soon …

Venturing onto the 4m Band

The 4m band isn’t a band that I’ve ever used before. The main reason for this is that I’ve never had a radio that had 4m capability built in. Most HF rigs today come with the 6m band but, very few have the 4m band, that is until now.

Having recently purchased a Yaesu FTDX10 I now have access to the 4m band with a max power of 50w. (You do need to reset the radio into UK mode to get the 4m band)

From reading online I understand that the 4m band is very much like the 6m band propagation wise but, with fewer users. Since the 2m and 70cm bands are completely dead in the Woodbridge area I thought that perhaps there might be a few local HAMs on the 4m band.

Now having a transceiver for the band I needed to think about an antenna too.

Searching online I came across an article by G4AQB referencing a 4m band antenna built by Tim, G6TM. Both of these articles incorrectly refer to the antenna design as an EFHW for 4m, it is in fact a Sleeved Dipole or sometimes referred to as an End Fed Vertical Dipole for the 4m band. If it was an EFHW it would have a very high impedance and would need a 49:1 Unun to match it to 50 ohm coax.

Since this antenna is just a dipole it presents an almost perfect impedance match to 50 Ohm coax without the need for any matching circuit.

G4AQB build notes

Working from G4AQB’s build notes as detailed on his blog it’s very quick and easy to cut the coax to the right length, strip part of the outer shield and create the choke using 8 turns of the same coax cable.

Since I wanted to make this a permanent fixture in the garden I decided to make an enclosure for the antenna so that it is weather proof and easy to mount.

Using a mix of 25mm conduit, 50mm plastic tubing, a screw cap and a reducer I put together a very tidy 4m band sleeved dipole vertical antenna.

Home brew 4m sleeved dipole in plastic enclosure

Looking at the photo above you can see I used the 25mm conduit to house the sleeved dipole, I then used a reducer to join the 50mm tube to the 25mm conduit. Drilling two holes in the 50mm tube I brought the coax out and wound it 8 times around the tube to form the choke coil and then passed the coax back into the 50mm tubing so that it continued down to the SO239 socket on the bottom cap. I used some hot glue to hold the choke coil in place.

SO239 mounted in the bottom of the 50m tubing

I strapped the antenna to the top of the washing line post to check the SWR and found it’s a perfect match. With an SWR of 1:1 at the bottom of the band and 1.1:1 at the top of the band.

Overall I’m really pleased with the simple design and build.

I listened to the 4m band for a few hours whilst doing other things and didn’t hear a single soul, I do hope it’s not dead like the 2m band!

More soon …