20m – 10m Bi-Directional Slot Fed Antenna

The bi-directional slot fed HF antenna isn’t mentioned very often these days for some strange reason. It’s a real shame as it is an excellent antenna that gives high gain through the loop between the frequencies of 14Mhz and 29Mhz.

M0AWS 20m - 10m HF Slot Antenna
M0AWS 20m – 10m Slot Fed HF Antenna

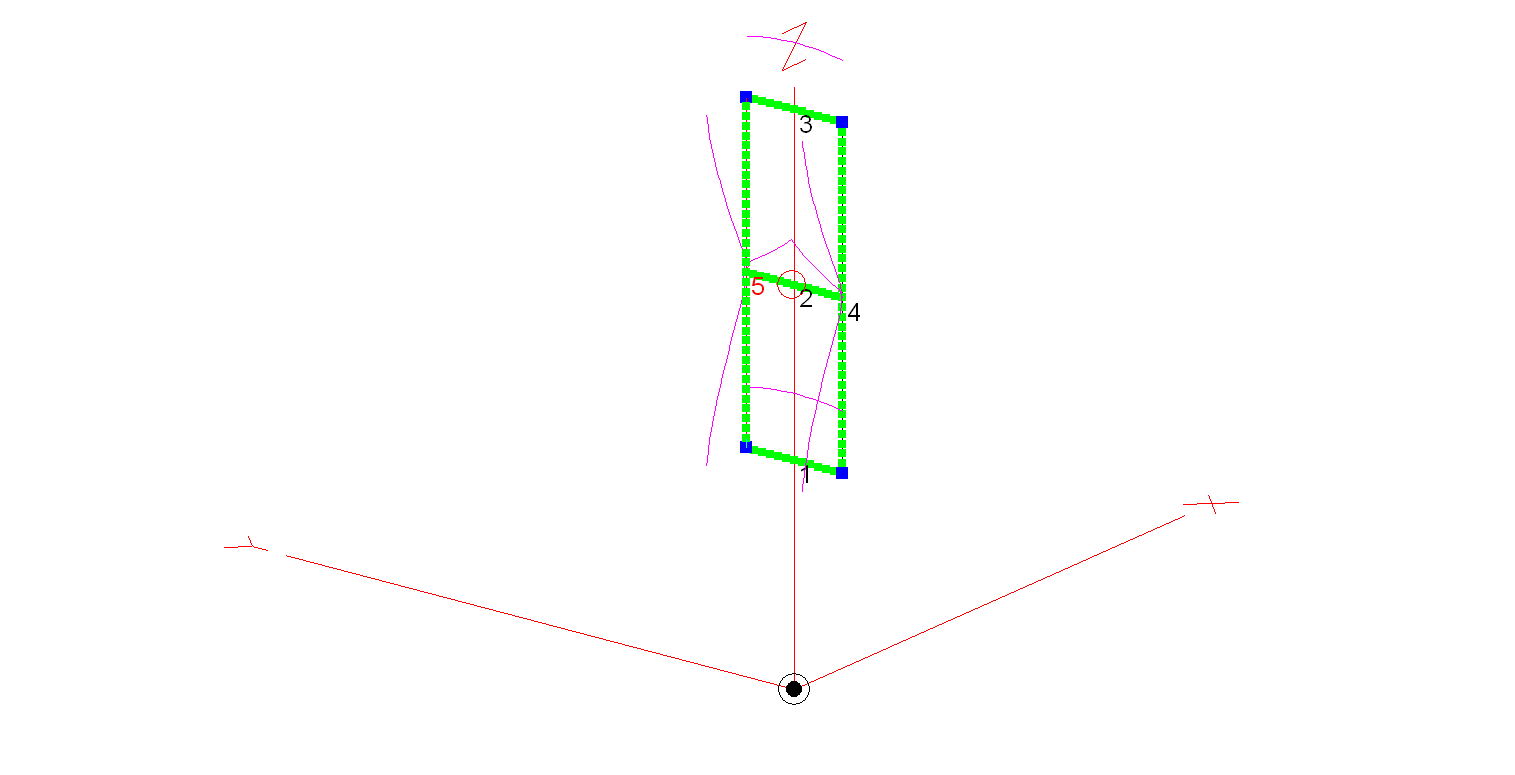
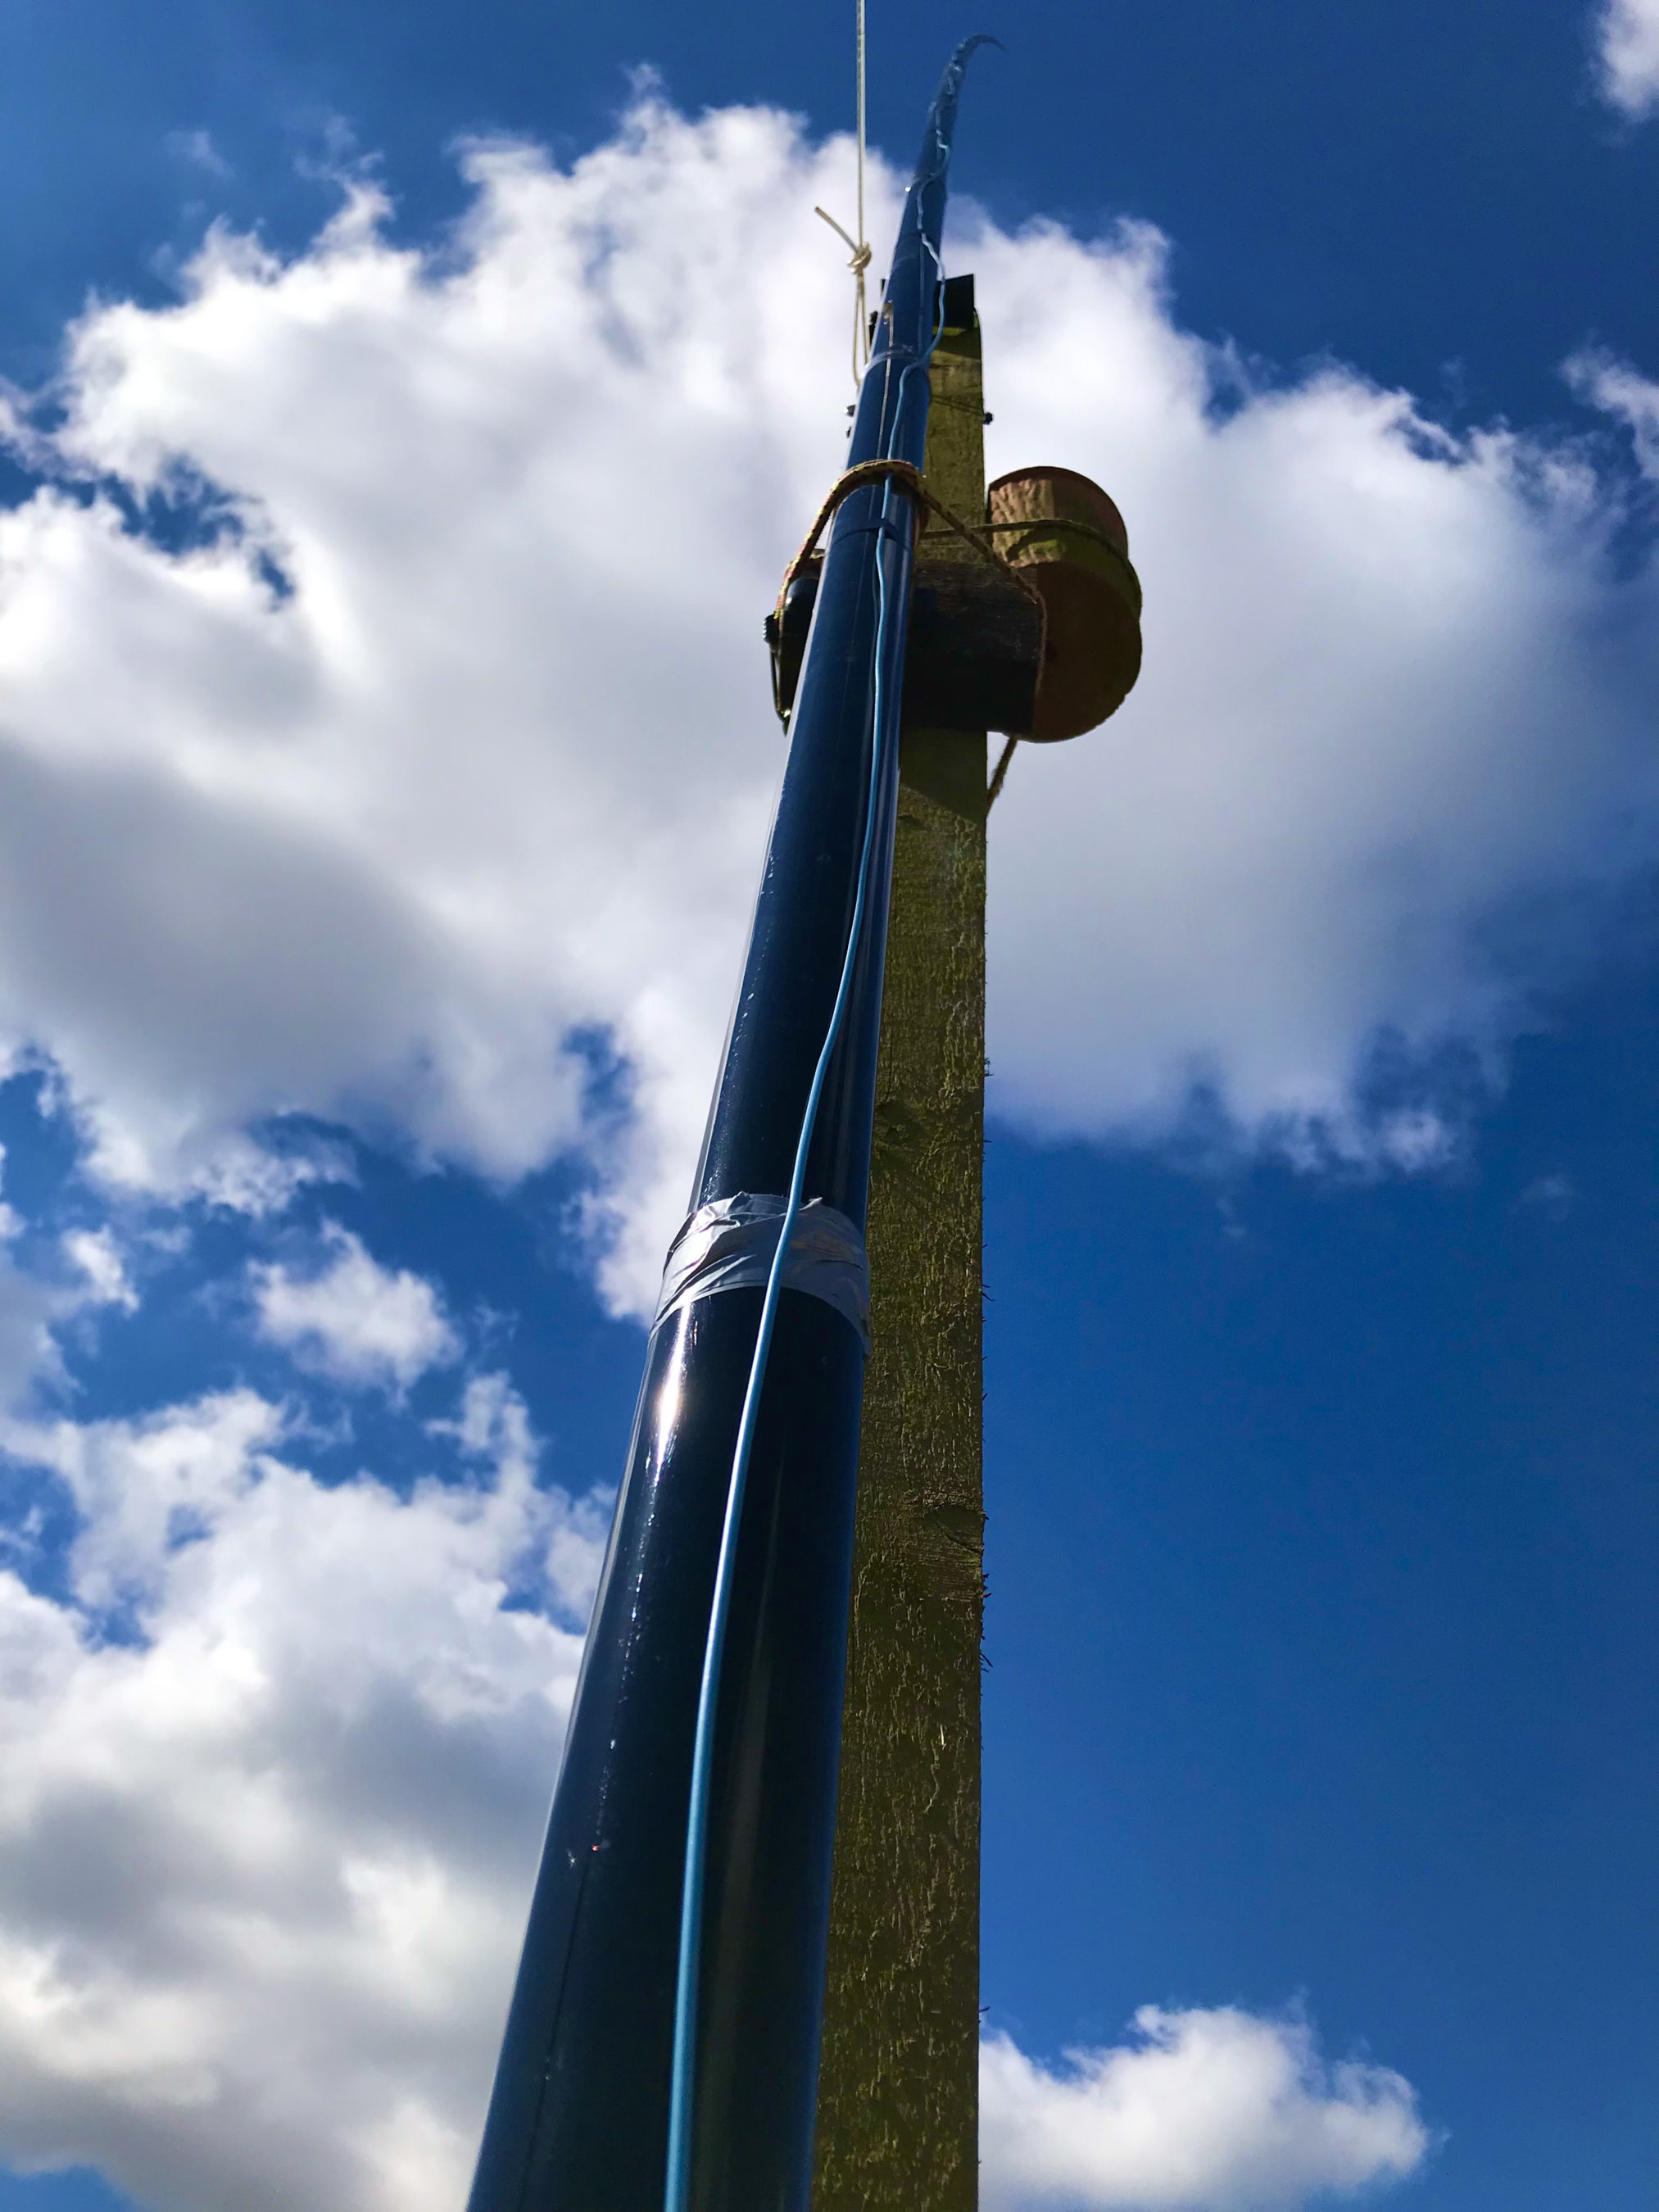
Construction of the antenna is relatively simple, 3 x 3m long horizontal wires and 2 x 9.2m long vertical wires. I’ve modelled the antenna using 20mm diameter copper tubing for the horizontal conductors and 2.5mm wire for the two vertical conductors. Using the 20mm copper tubing provides a rigid platform for the mounting of the antenna on a non-conductive mast whilst reducing weight by using 2.5mm wire for the vertical conductors. You could of course use 20mm copper tubing for all the conductors if you have a non-conductive mast that can handle the weight.

An alternative option is to hang the antenna from a high tree and secure it in position with non-conductive nylon cord. This works very well and makes it extremely easy to manually rotate.

The antenna is fed at the centre of the middle horizontal tube (conductor 2 in the image above) using one of the following methods:

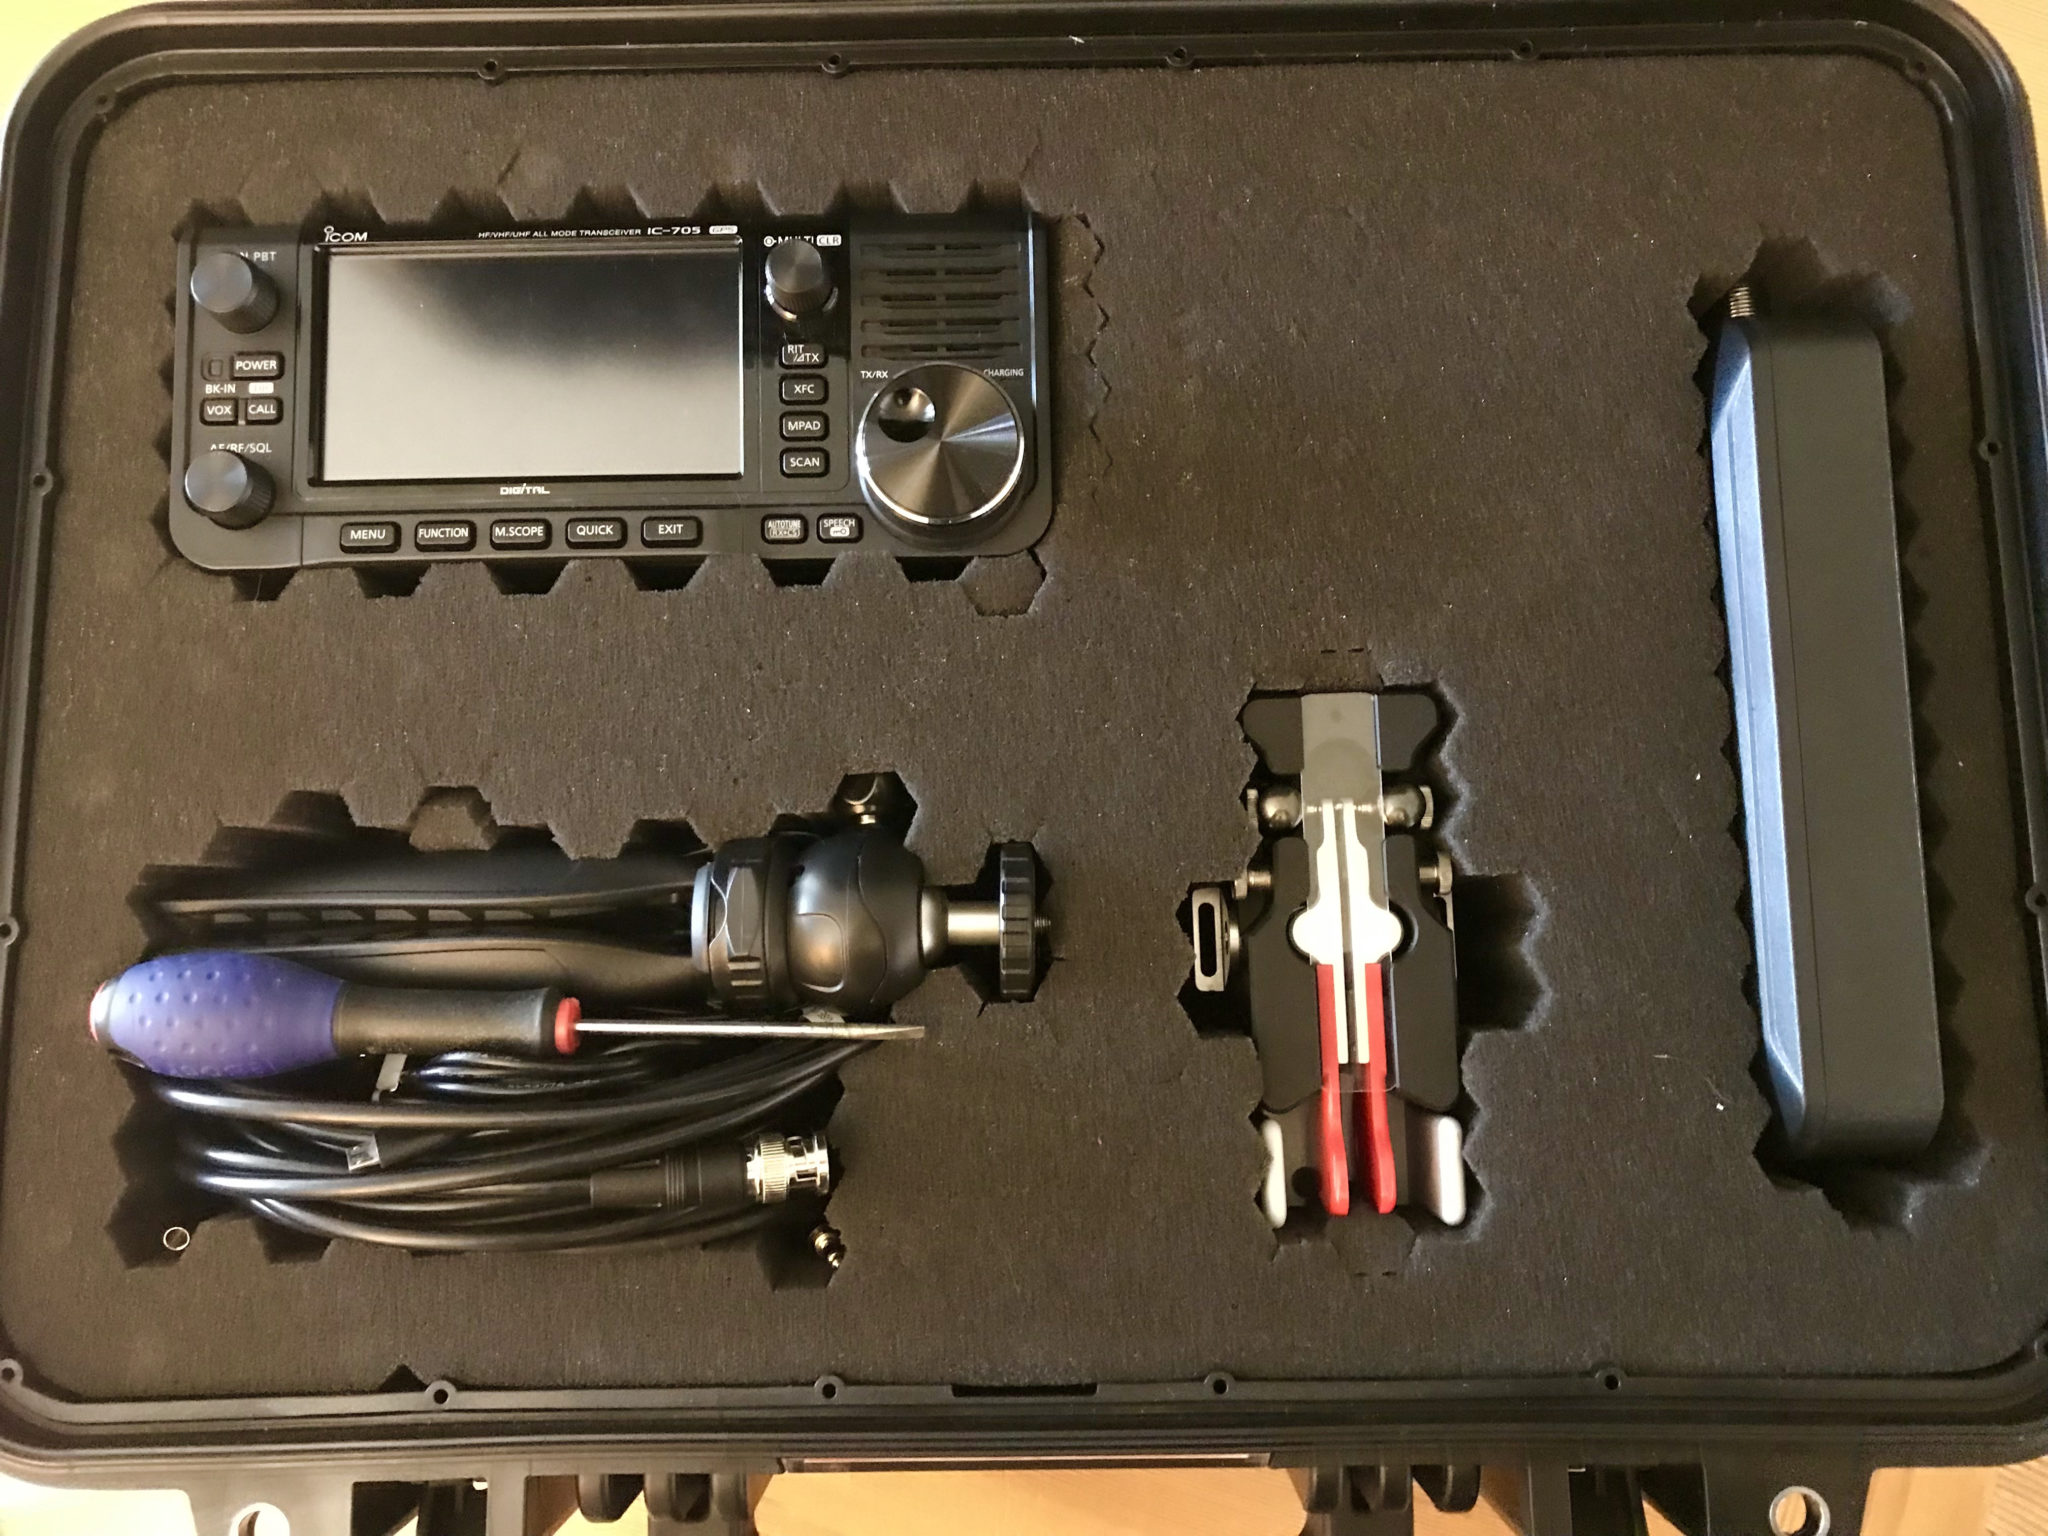
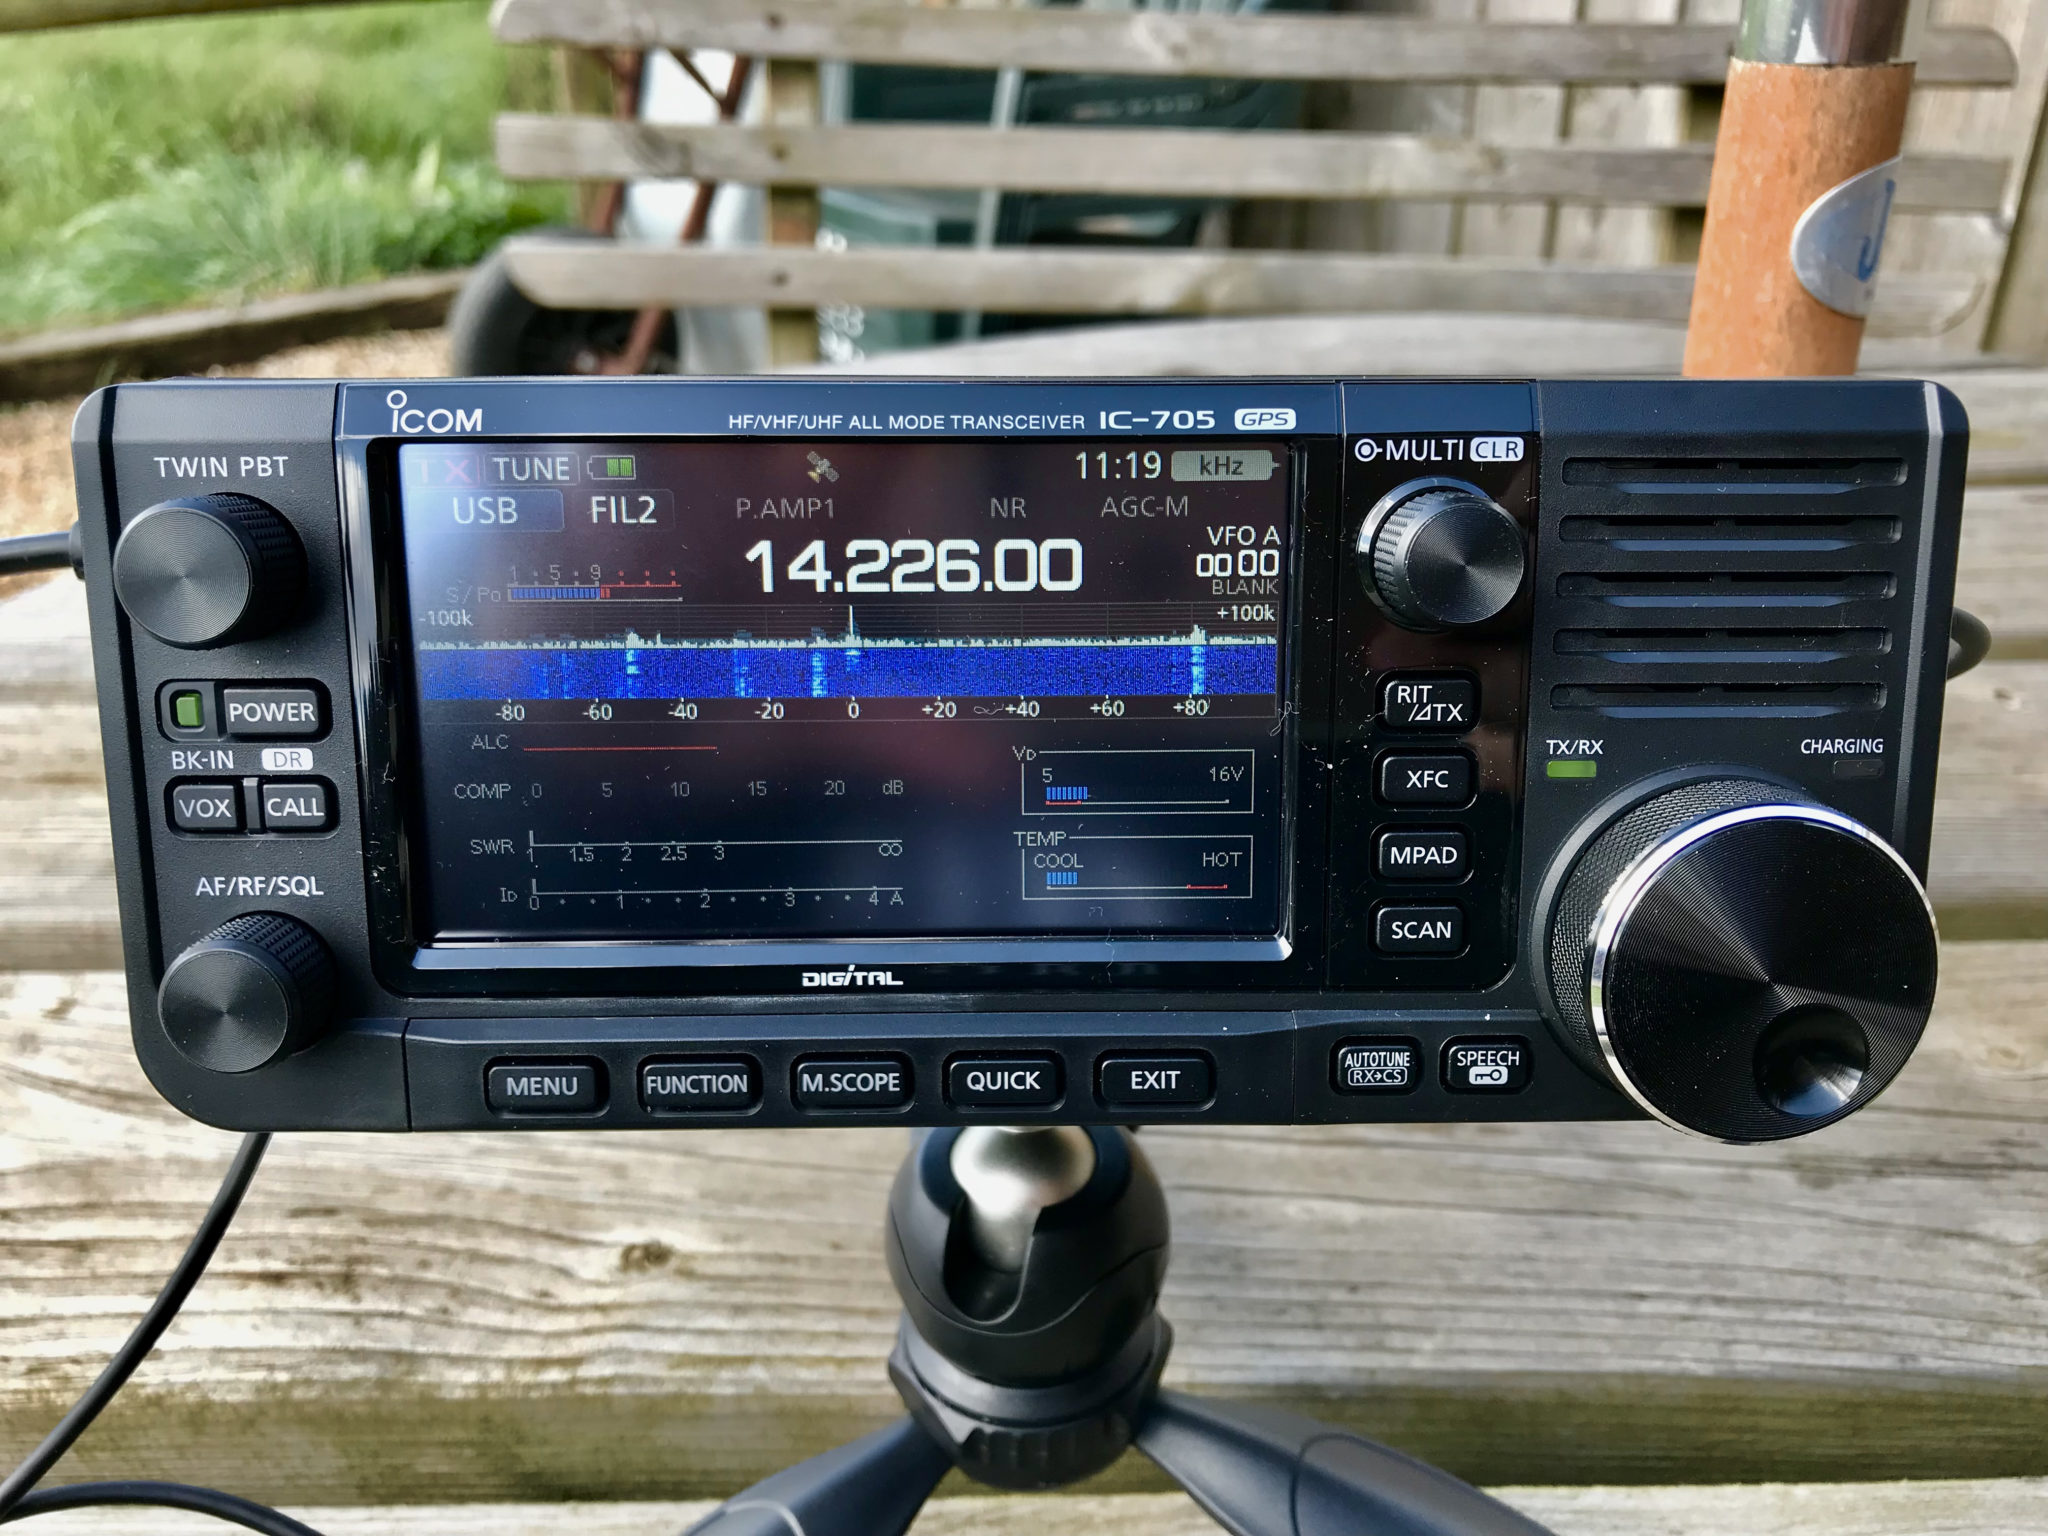
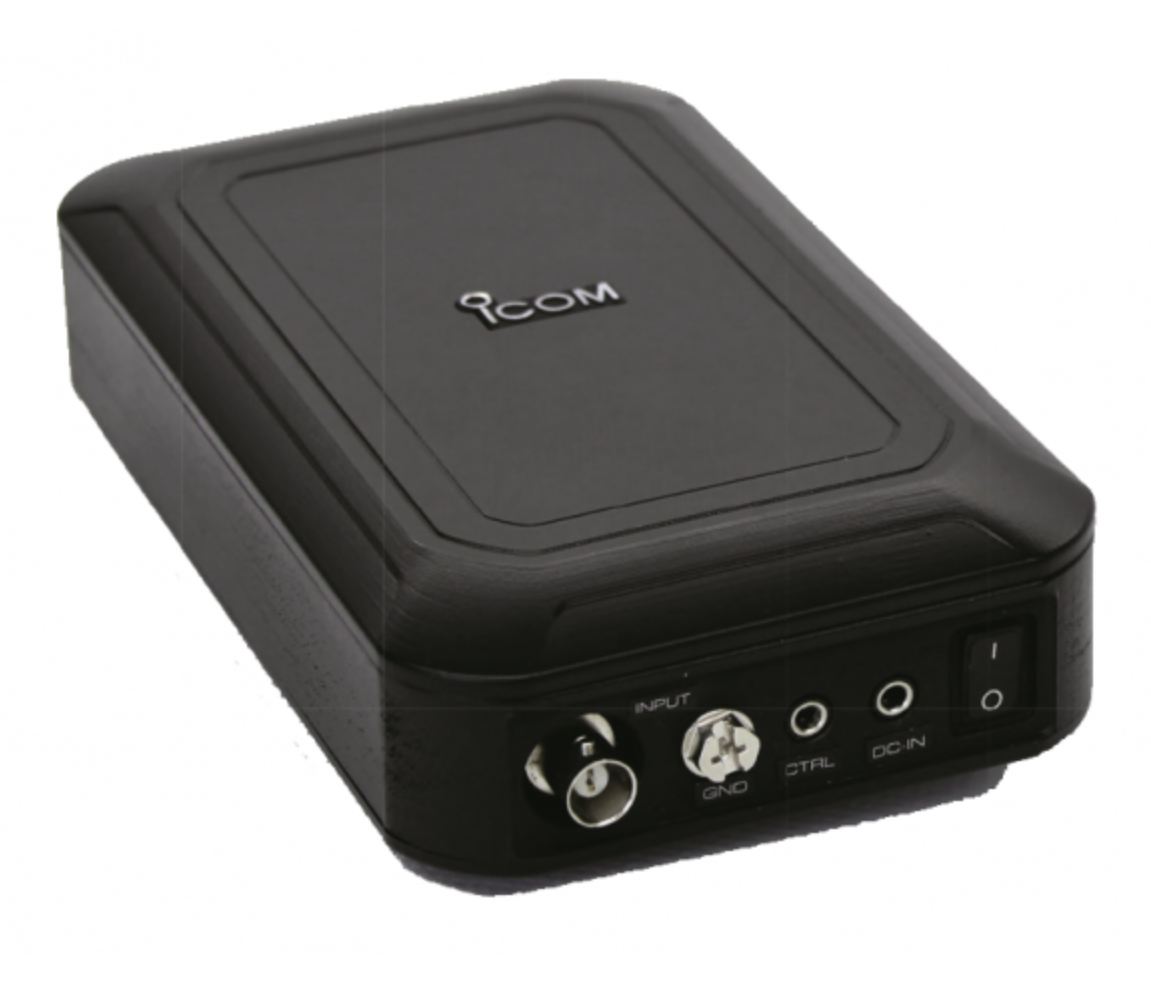
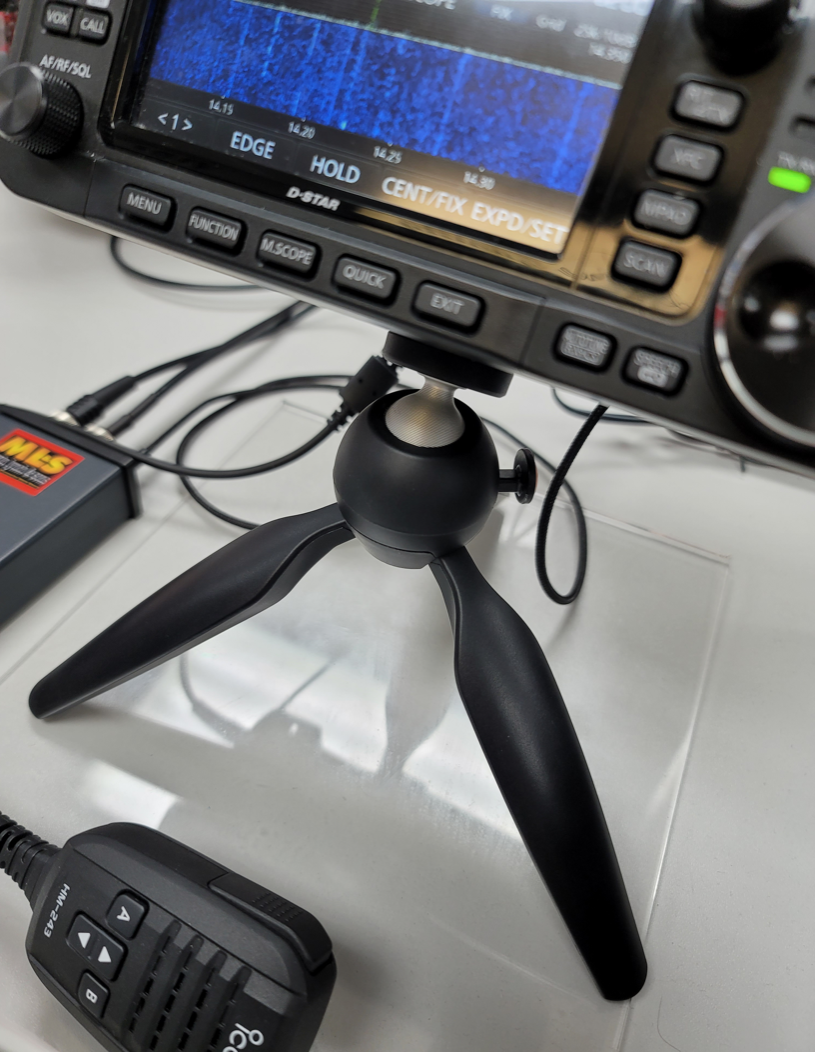
Method 1 – Use a 4:1 Balun and ATU either in the radio/Radio Shack or connected directly to the Balun. Connecting a remote auto ATU to the balun directly at the feed point is the best option as you will then have a perfect 50 Ohm impedance match to the coax cable going back to the radio. (I’ve used my AH-705 and a 4:1 Balun at the feed point in the past with excellent results).

Method 2 – Connect a remote auto ATU directly to the feed point of the antenna and then 50 Ohm coax back to the radio shack. This will provide a perfect SWR match on all bands and works extremely well. (I’ve used my AH-705 remote auto ATU in this configuration as well in the past, again with excellent results and no discernible difference to method 1).

Method 3 – Feed the antenna with 450 Ohm open ladder line and use a 4:1 Balun and ATU in the radio shack to match the antenna to 50 Ohm radios. It’s important to bring the 450 Ohm ladder line away from the feed point horizontally and not vertically downwards. This will then help to protect the radiation pattern.

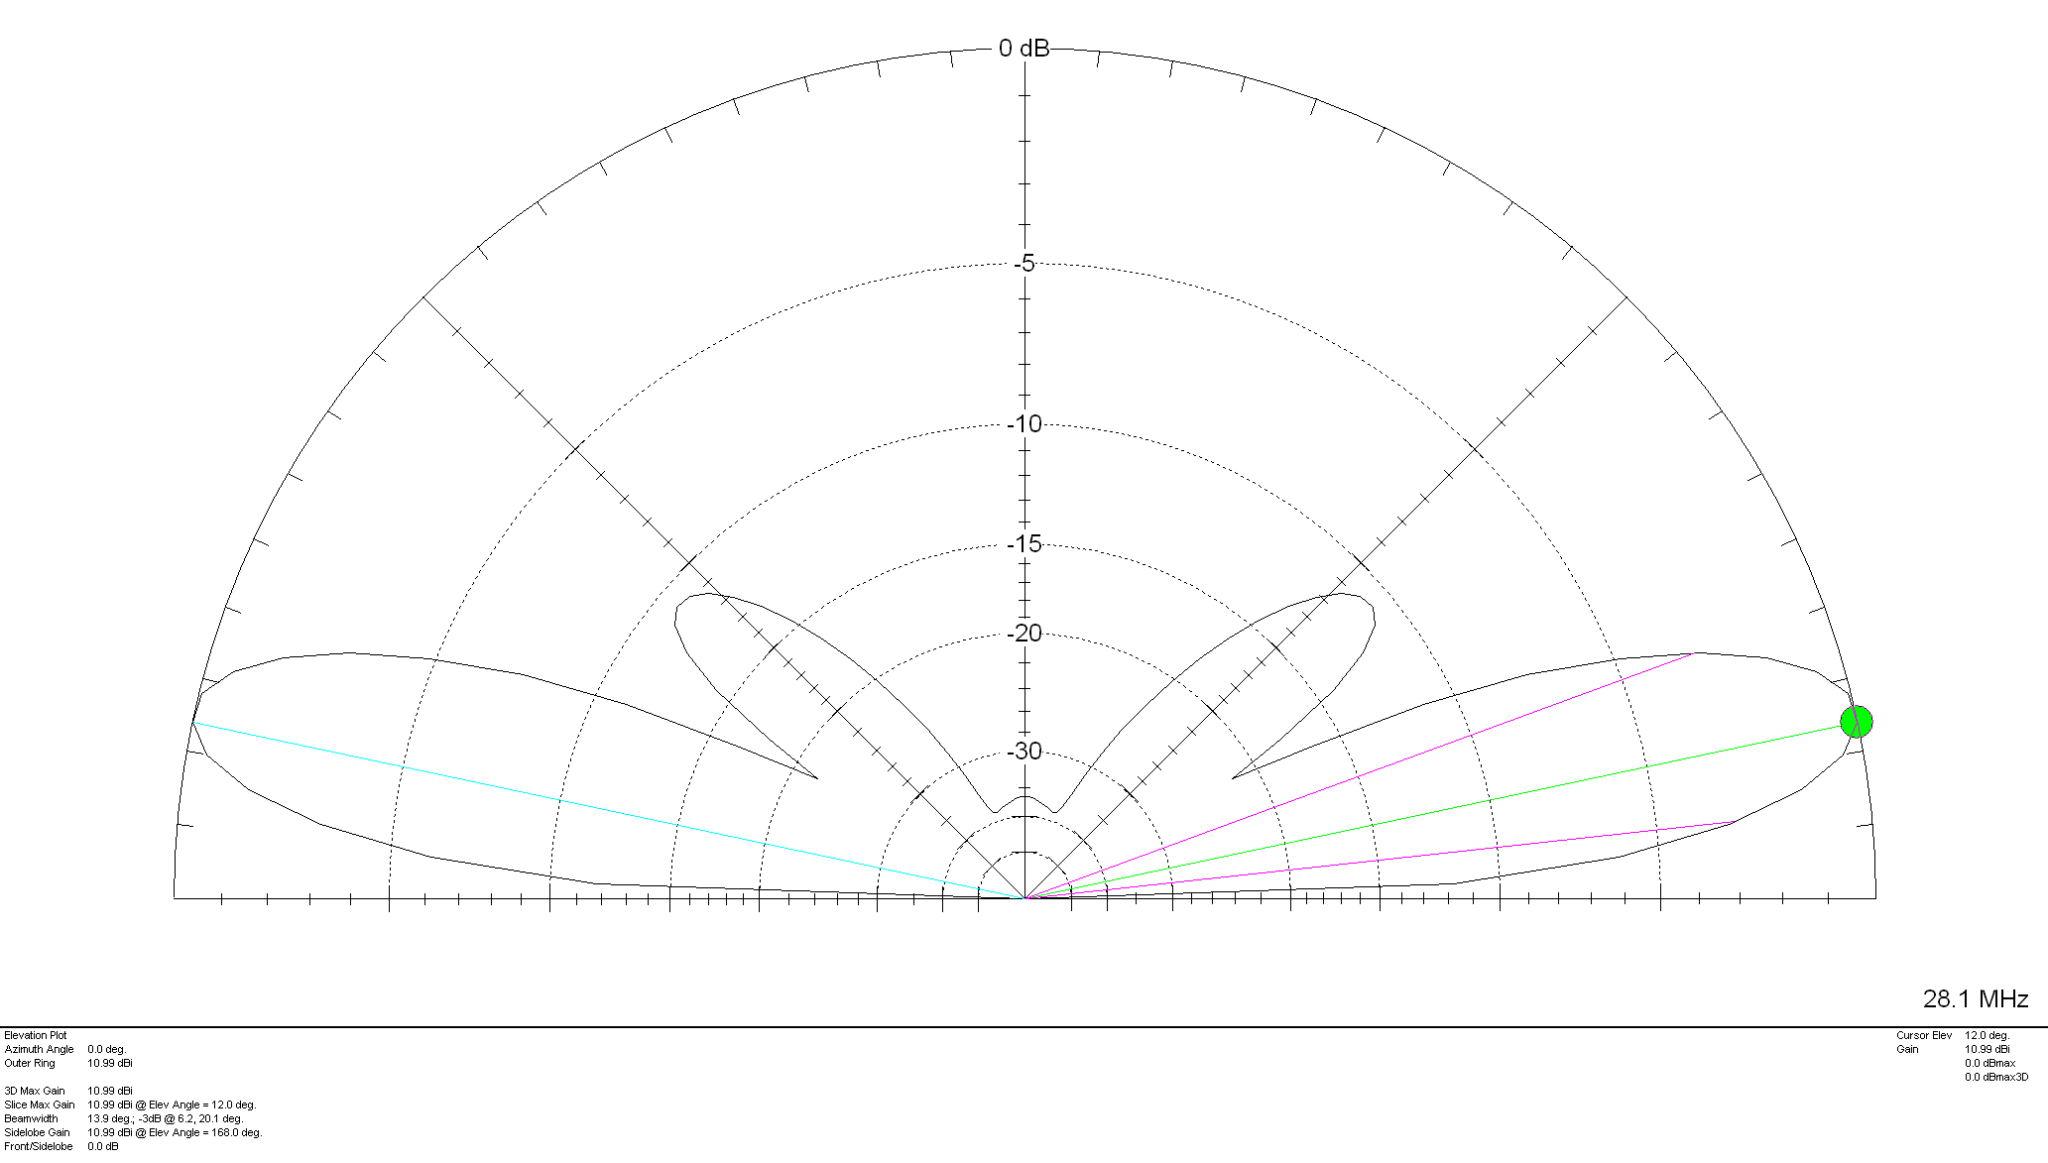
Looking at the 2D Far Field Plots this antenna provides excellent gain at relatively low radiation angles on all bands 20m – 10m making it an ideal antenna for chasing DX.

20m Band 2D Far Field Plot
17m Band 2D Far Field Plot
15m Band 2D Far Field Plot
12m Band 2D Far Field Plot
10m Band 2D Far Field Plot

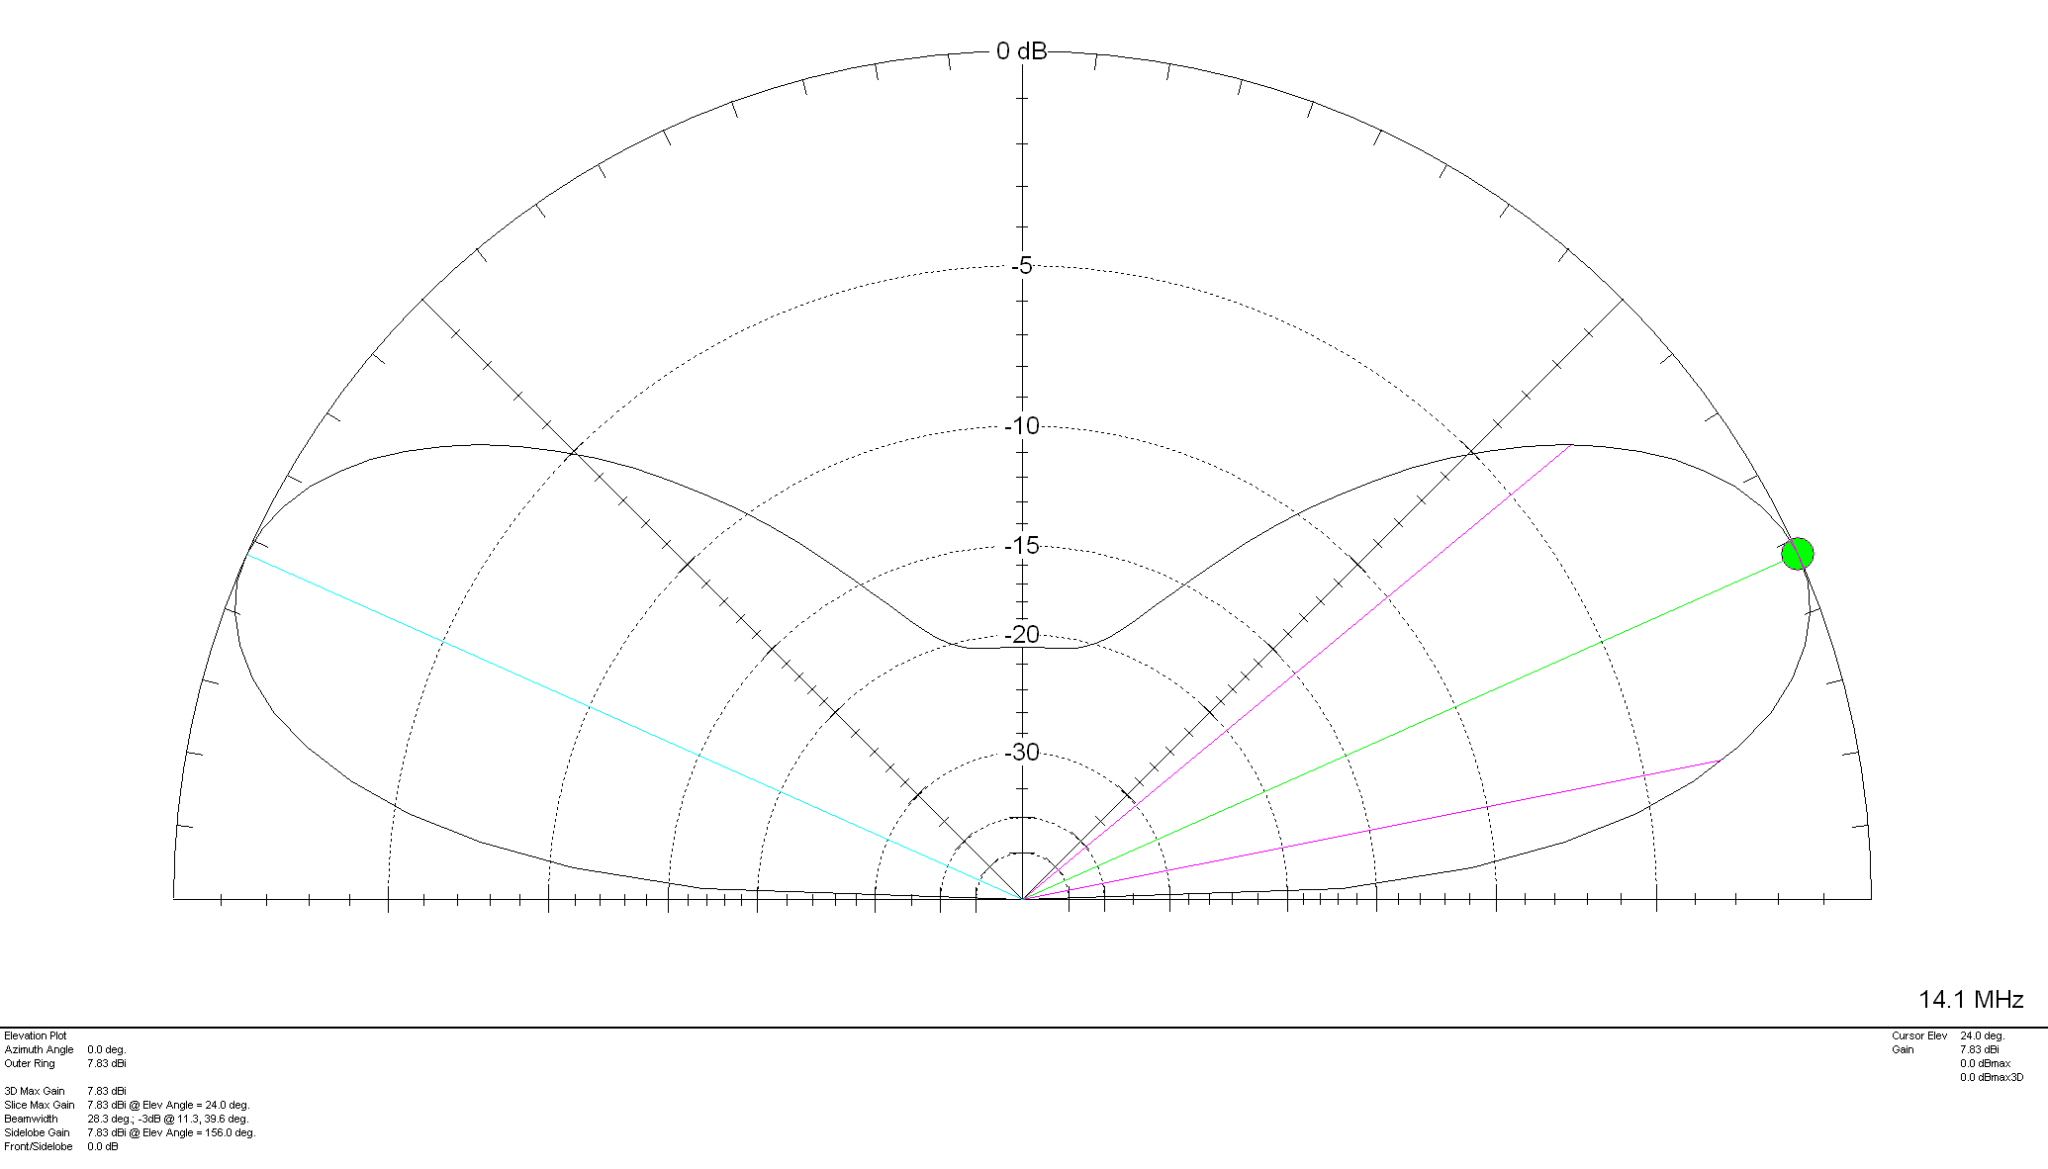
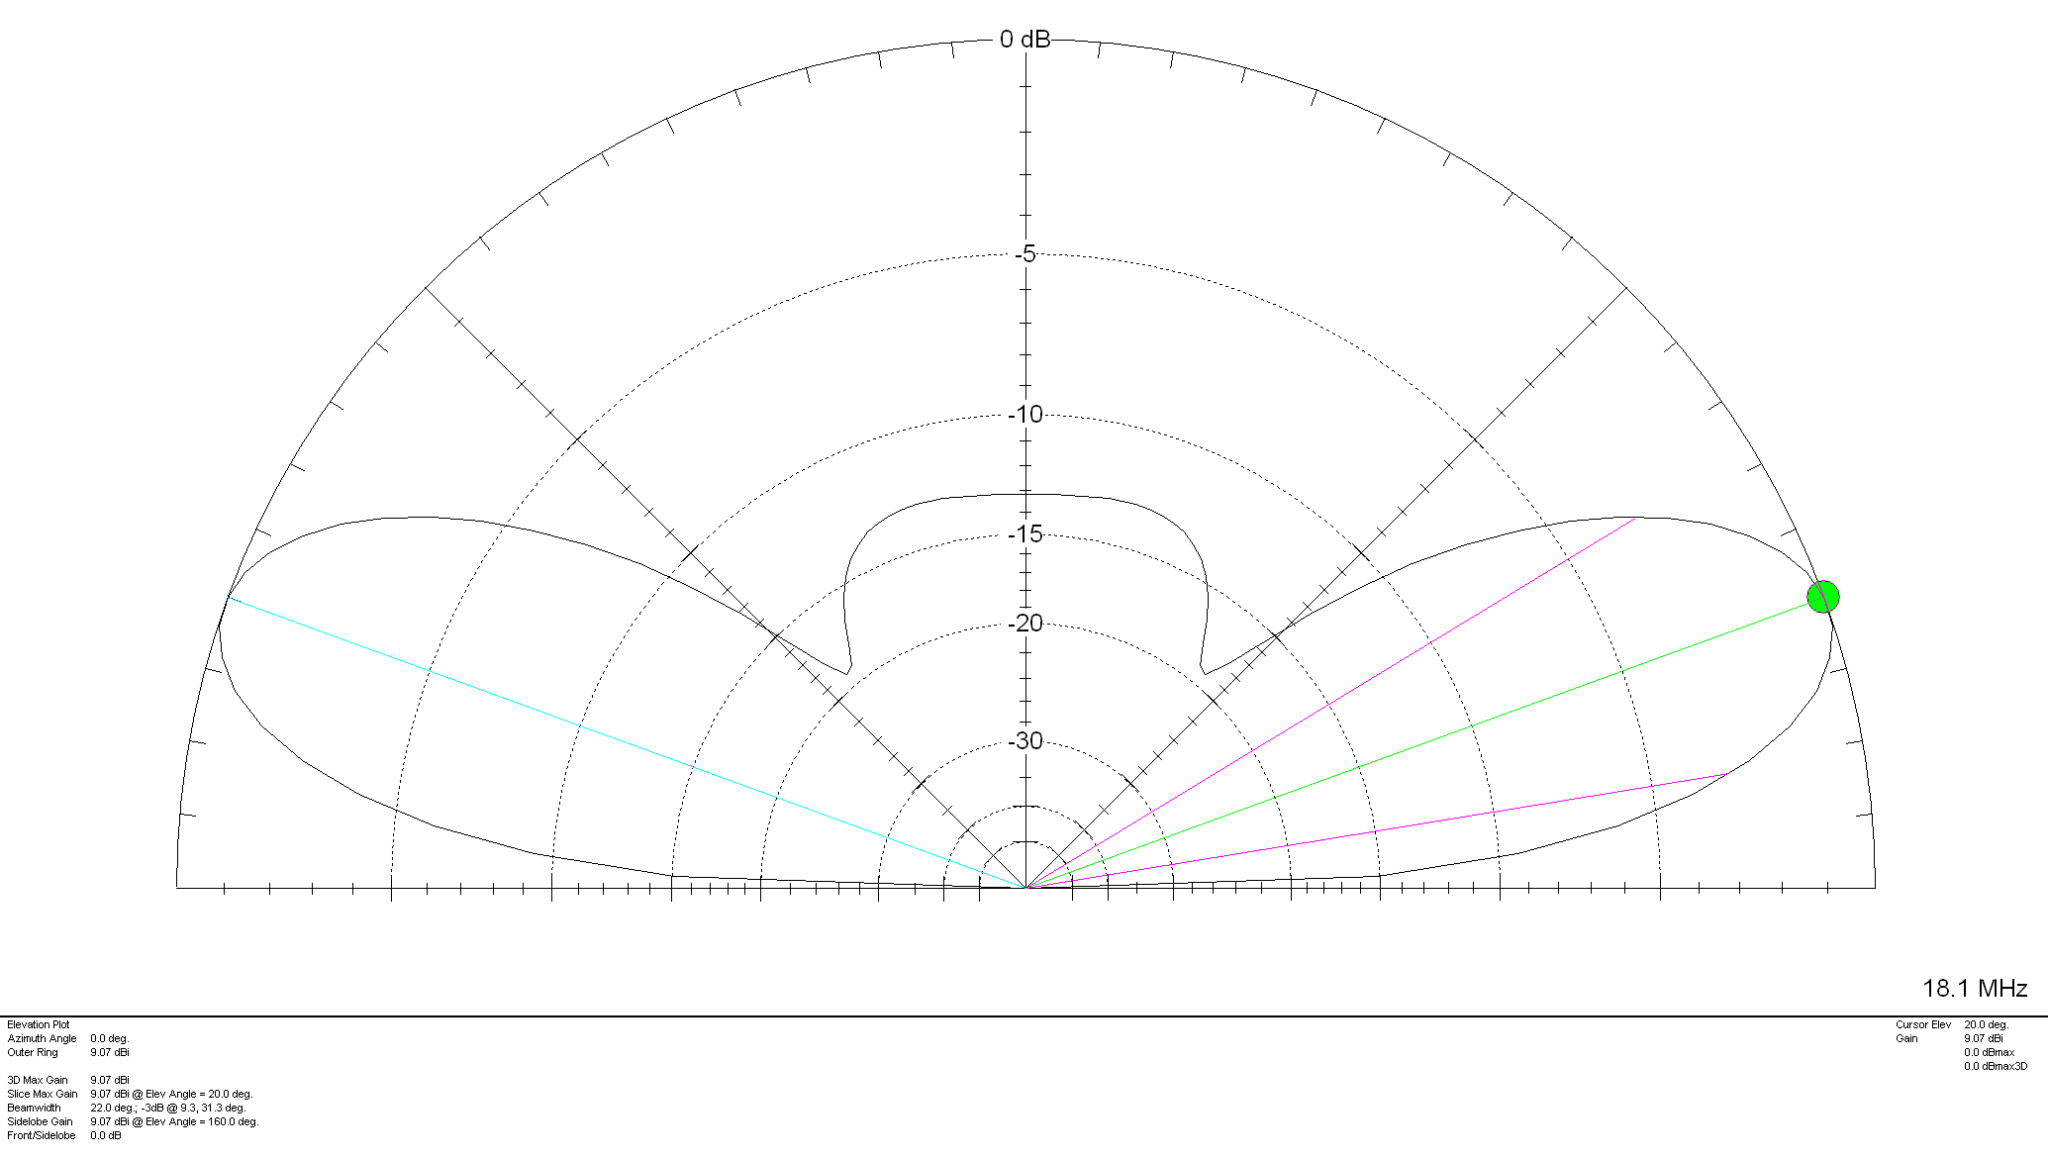
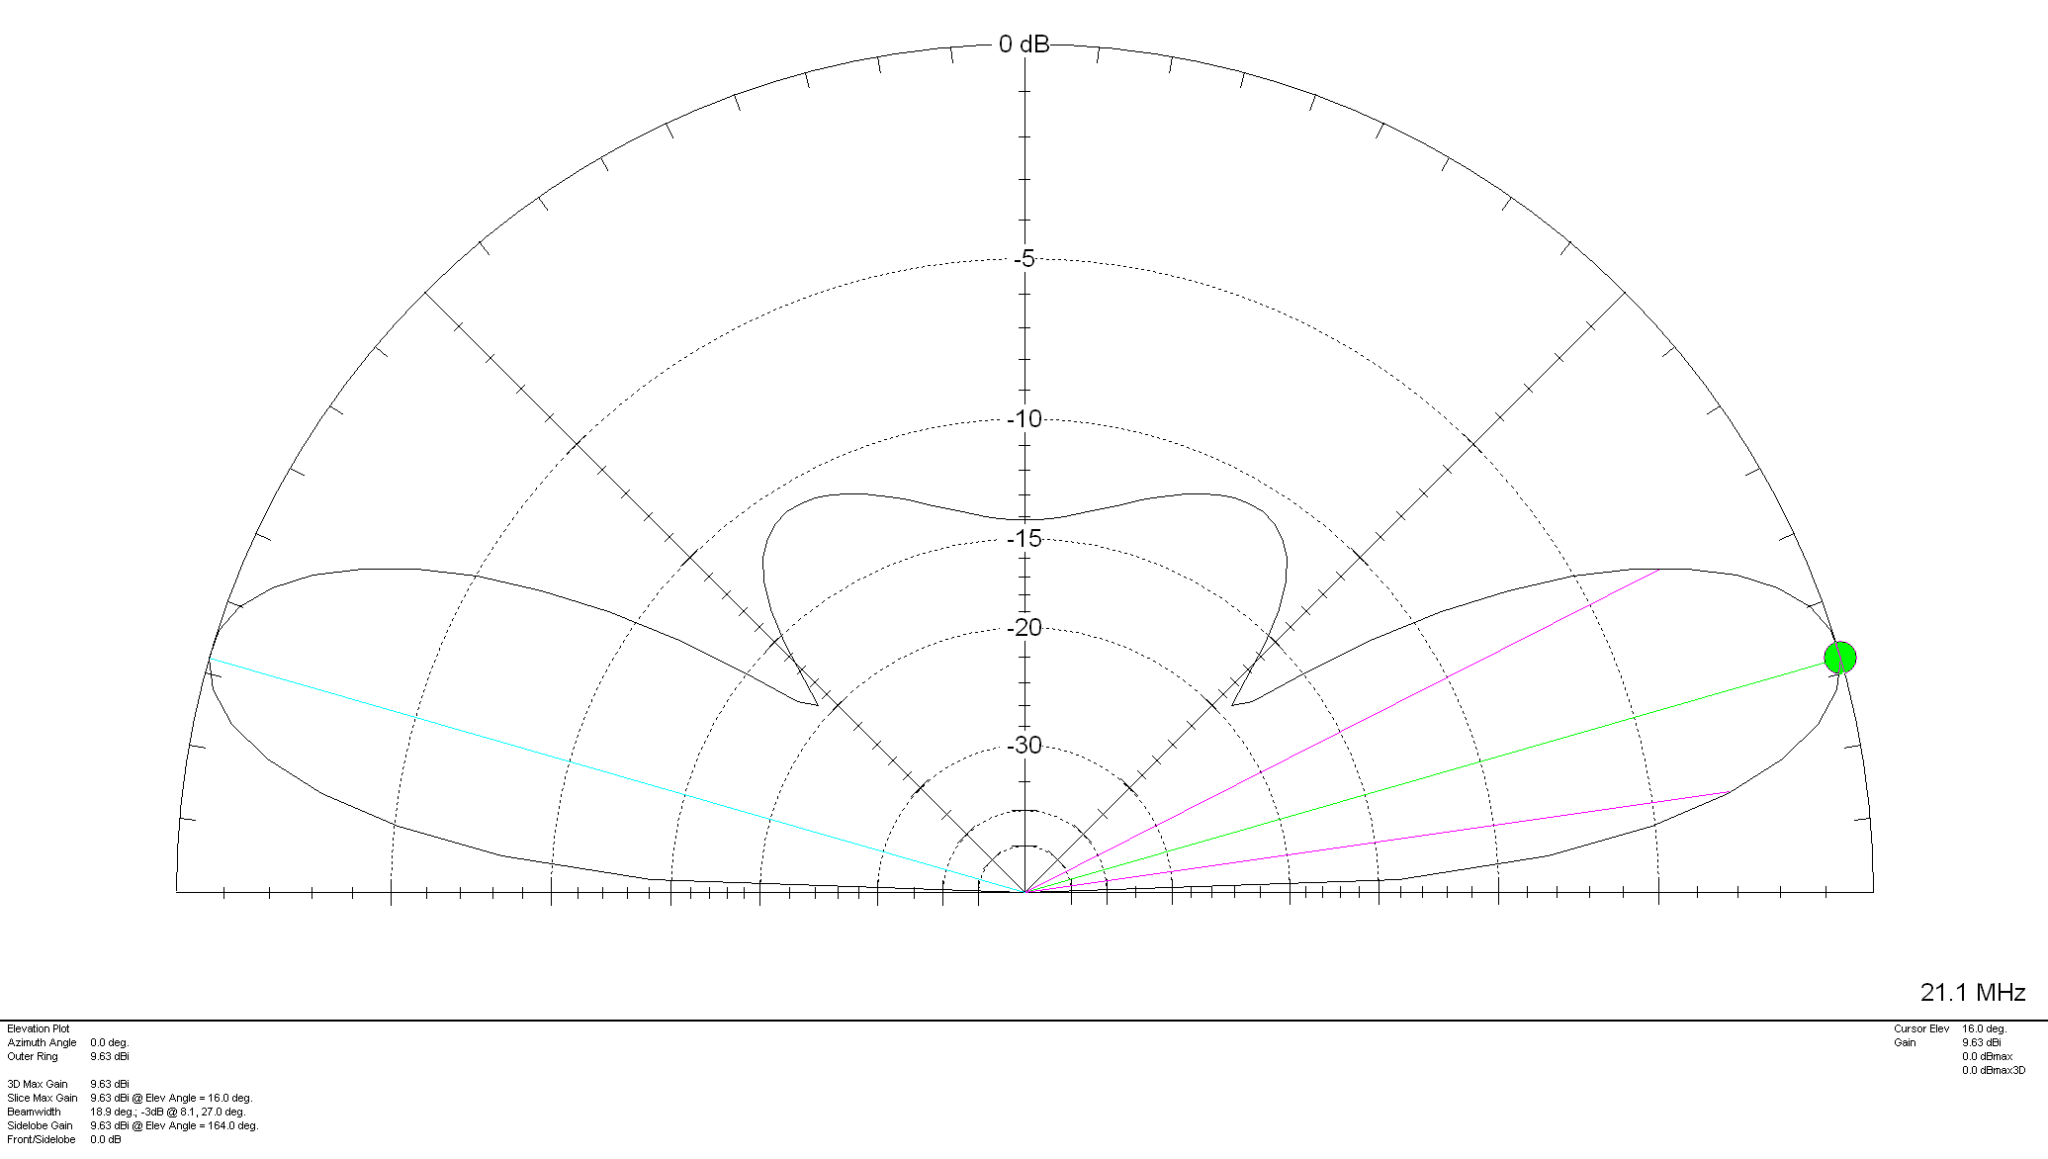
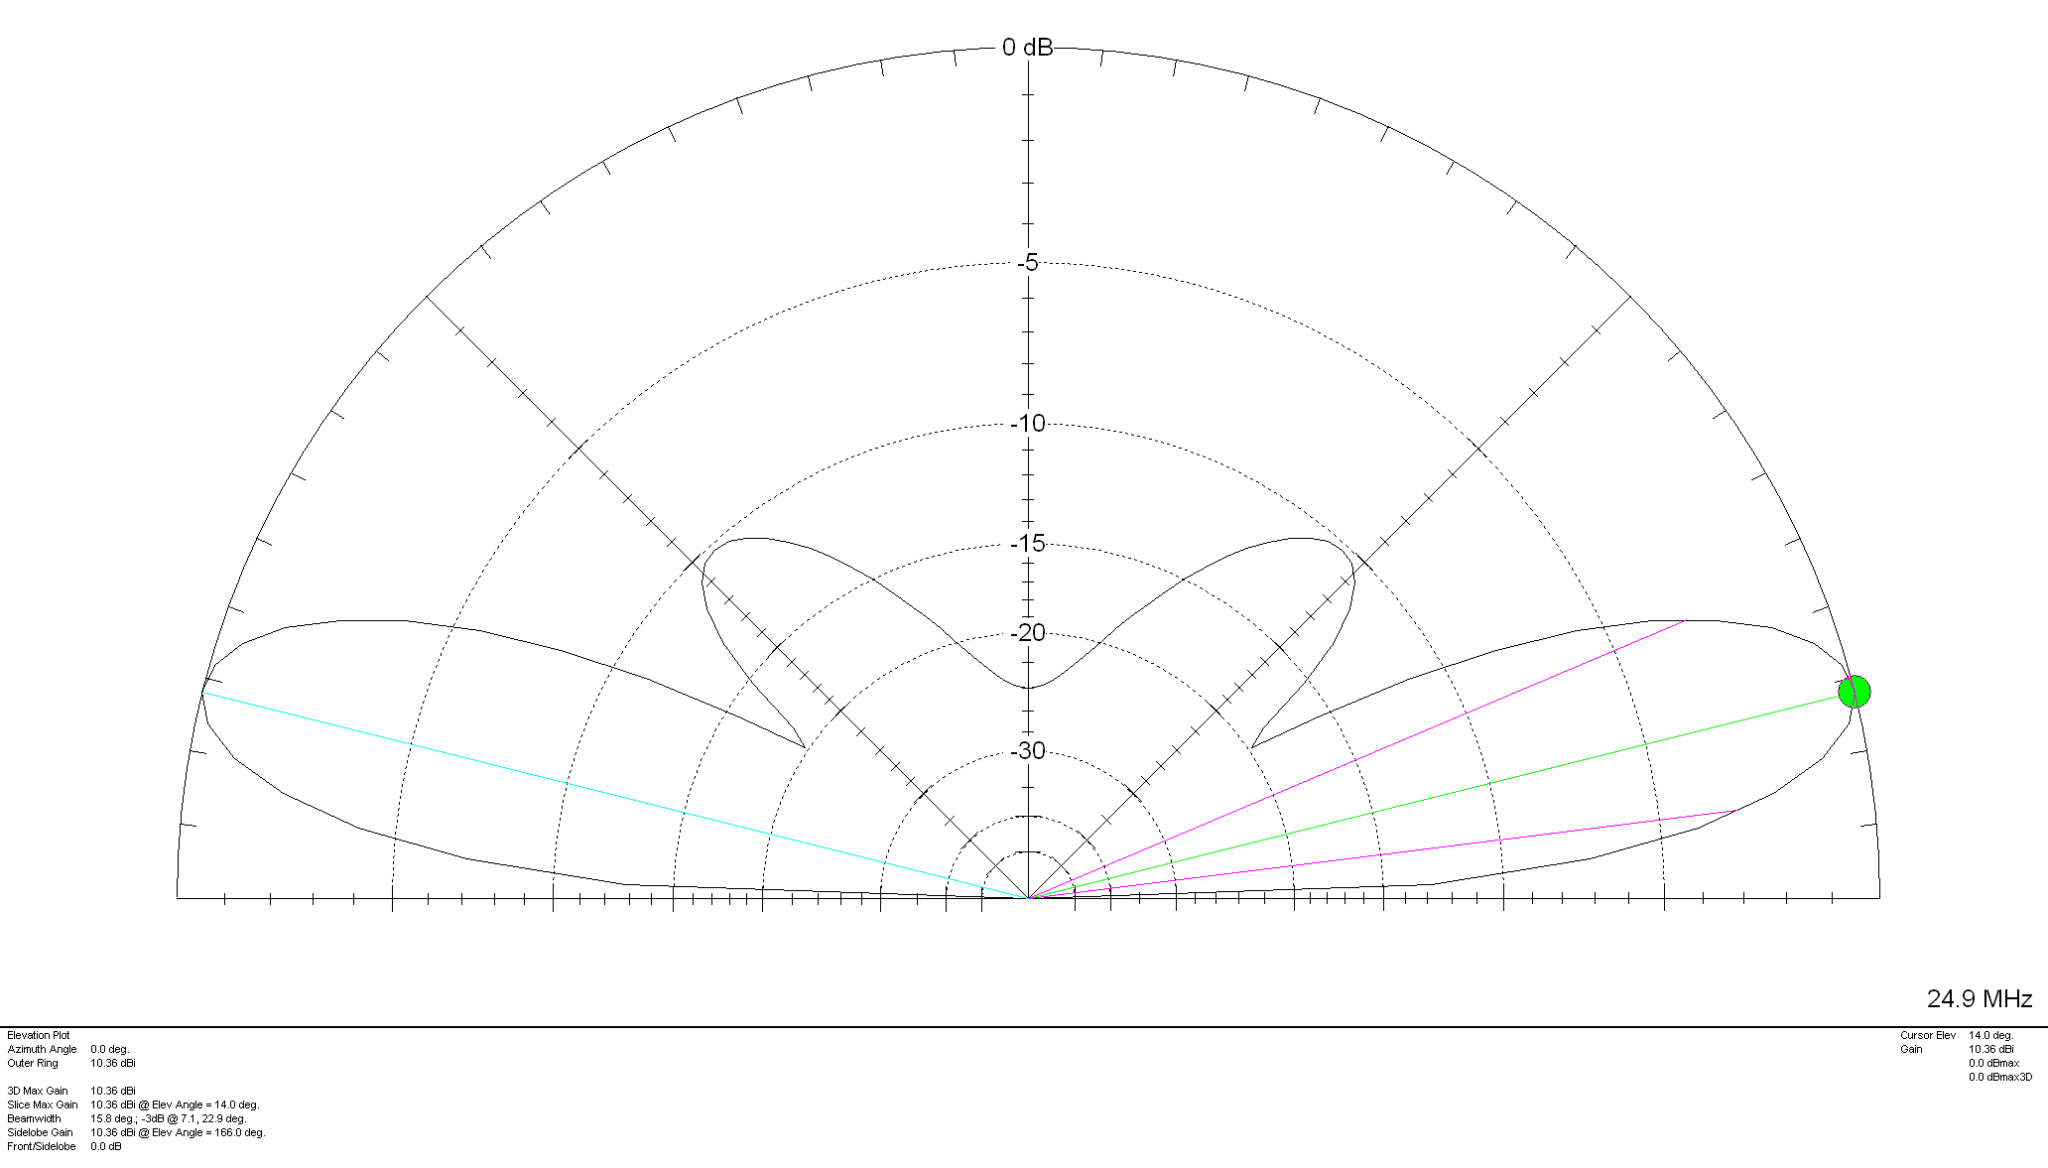
The gain on each band is as follows:

20m Band – 7.83dBi at 24 Degrees
17m Band – 9.07dBi at 20 Degrees
15m Band – 9.63dBi at 16 Degrees
12m Band – 10.36dBi at 14 Degrees
10m Band – 10.99dBi at 12 Degrees

10m Band 3D Far Field Plot

The 10m Band 3D Far Field Plot above shows the typical radiation pattern for the antenna. Maximum radiation is through the loop with very little high angle radiation making it ideal for chasing DX stations. Gain increases as frequency increases however, angle of maximum radiation decreases as frequency increases improving DX capability of the antenna on the higher bands. It’s worth ensuring that the antenna is rotatable as this will then enable you to point the antenna at the DX station to maximise signal strength at the DX end. Pointing this antenna North/South makes it great for working VK/ZL over the North Pole whilst at the same time being able to work South Africa from the UK.

Summary:

Horizontal Wire Lengths: 3m @ 20mm Diameter
Vertical Wire Lengths: 9.2m @ 2.5mm Diameter
Modelled Height above ground at Centre (Conductor 2): 10.6m
Feed Type: 4:1 Balun + ATU / Remote Auto ATU / 450 Ohm Ladder line with 4:1 Balun & ATU

Resolving the IC-705 USB interference problem

Since getting my Icom IC-705 I’ve had a constant issue with interference on the HF bands from the USB connection on the radio when the AH-705 remote auto ATU is connected.

If I use the radio without the AH-705 inline there is no issue at all but, as soon as the AH-705 is connected to the radio there is some 9 S points of computer data noise across all the HF bands rendering them unusable.

Reading online this appears to be a common issue and so I set about trying to find a resolution.

The noise is most likely being induced onto the outer braid of the screen on the cables and so I decided to look into making a common mode choke.

Visiting the HAM Goodies website I ordered a couple of FT240-31 Ferrite Toroids as I’d read this particular mix is ideal for making common mode chokes.

USB Cable wrapped around a FT240-31 Ferrite Toroid to create a choke

I wrapped a long USB cable around the toroid and used some tape to hold the cable in place, it’s surprising how much length is lost by simply wrapping around what looks like a very small toroid.

Firing up the radio the noise was reduced considerably but, it was still there and so I decided to do the same to the coaxial cable between the AH-705 and the IC-705.

Coaxial cable between AH-705 and IC-705 wrapped around a FT240-31 Ferrite Toroid

Once I’d wrapped the coax around the toroid and reconnected the coax between the radio and ATU I was pleased to see that the computer data noise was now gone on all bands except for the 10m band. For some reason the 10m band interference is still as strong as it was without the toroids in place.

I’m not too sure why this is. I tried more and less turns on the toroid to no avail and so eventually I decided to just live with it for the time being.

At least now I can use 160m -> 12m without any interference whatsoever, a massive improvement on what I had before.

I need to do some more research on the different mixes of the ferrite toroids and perhaps trying a different mix will resolve the problem on the 10m band too.

More soon …

Another Begali Key!

Since purchasing my Begali Pearl twin paddle morse key I’ve been looking to get another Begali for my IC-705 portable setup. Going portable means I need a key that isn’t super shiny like the Pearl, something a little more hardy would be ideal.

I was looking to buy the Begali Simplex Basic directly from Begali as it would be ideal for portable operations however, my lovely wife spotted another Begali key for sale on Ebay and pinged the details over to me to take a look at.

Begali Traveler Light

To my surprise the key for sale on Ebay was a Begali Traveler Light, the perfect key for portable use and at a much lower price than new.

I contacted the seller immediately asking a couple of questions about the key and got an immediate response, always a good sign!

It turned out that the key was being sold by Wallace, MM0AMV up in Scotland. Looking at his QRZ page it’s clear he’s an avid CW fan as he has two Begali keys. This was backed up by the conversation we had via Ebay messaging.

In no time at all I had paid the £170.00 including postage and was the owner of my second Begali morse key.

The key was in as new condition as described by Wallace, clearly it had been looked after well.

It didn’t take long for me to get it hooked up to my IC-705 and on air. After a little adjustment of the gap and return tension I had the key setup comfortably for my weird left-handed use.

The key isn’t anywhere as near as heavy as my Begali Pearl key but, it’s plenty heavy enough to stop it moving around when in use. This is of course is helped by the two fold out legs that stabilise the key firmly during use but, protect the paddles solidly when in transit. It’s a great design and a very unique approach to making a fairly light but, solid twin paddle for portable usage.

In the garden with my Begali Traveler Light and IC-705 connected to my EFHW Vertical for 20m

Once folded the key takes very little space in the IC-705 portable case and completes the setup nicely. IC-705 radio, AH-705 remote auto ATU, Begali Traveler Light, tripod and a few interconnect cables, the perfect portable station.

IC-705 Portable station case with plenty of space for future additions

Since purchasing the IC-705 I’ve found that I’ve hardly used my Yaesu FTDX10, which is strange considering the receiver, filtering, DSP and APF combination is considerably better on the FTDX10 than it is on the IC-705. The IC-705 has a much nicer, easier to use user interface and it’s just a lot of fun to use even though it’s only a QRP rig. I can see me having many happy hours on air with this QRP station.

More soon …

A little IC-705/AH-705 fun

I spent some time this morning in the garden with the Icom IC-705/AH-705 combo connected to my End Fed Half Wave (EFHW) vertical for the 30m band. This is a great antenna that works superbly on the 30m band. Being a resonant half wave fed via a 49:1 Unun it doesn’t require any ATU inline normally and so it’s quick and easy to use with any radio.

Today I decided to disconnect and remove the 49:1 Unun and hook up the Icom AH-705 instead. I thought it would be an interesting exercise to see how well it handled the EFHW vertical on both 30m and the other bands.

Icom AH-705 connected to the 30m Band EFHW Vertical Antenna

I purchased a couple of 5m leads for the AH-705 so that I could setup the radio on the picnic table in the garden and be a comfortable distance from the antenna. They worked great and allow me to use the radio in the spring/summer sun with ease.

Icom IC-705 setup on the picnic table in the garden

The little AH-705 remote auto ATU really does work well with the IC-705. Each time you change bands all you have to do is give a quick press of the PTT on the mic and it automagically goes into tune mode and matches the antenna to the 50 Ohm radio in seconds.

I was was really pleased to see that the AH-705 ATU matched the EFHW Vertical for 30m on the 80m, 60m, 40m, 30m and 20m bands with a perfect 1:1 SWR. With the antenna consisting of 14.81m of wire this makes it somewhat short of a 1/4 wave on the 80m band and I’m not too sure how well it will work. On the 40m band it is a 3/8 wave antenna so should work well. It’s a 1/4 wave on the 60m band and of course a half wave on 30m band as per it’s original design. On the 20m band it is just under 3/4 wavelength long so hopefully should work reasonably well. Of course it won’t be as good as my 20m band EFHW Vertical that has a much lower angle of radiation but, will make an interesting comparison.

The antenna also tunes up nicely on all the other higher bands including the WARC bands. On 17m it is getting close to a full wave length and on 15m it is just over a full wavelength and so should work fairly well on these two bands albeit with a higher than optimal angle of maximum radiation.

On the 12m band it is 1.25 wavelengths long and of course on the 10m band it is almost 1.5 wavelengths long. I’m not sure how well it is going to work on these two higher bands but, for a 14.81m long piece of wire it certainly gives me a good chance on a wide spectrum of frequencies.

30m Band EFHW Vertical Antenna in the breeze

The bands weren’t in particularly good shape this morning but, I found some SSB signals on the 20m band and so decided to see if I could make some contacts.

First contact was with S51DX in Slovenia. He was using 1kw into a 5 element beam pointed pretty much directly at me. The little IC-705 S meter took a pounding with him peaking +30db over S9 most of the time. I was really pleased to get a 5/9 report from him using just 5w from the IC-705 on the standard 7v battery. Of course his station was doing all the work but, it’s good to take advantage of these big stations when running QRP power levels.

Next I had a QSO with John, EA7JUR in Almeria Spain. But this time the battery on the IC-705 was pretty much exhausted and so I hooked it up to the 12v supply to get it charging whilst I was on air. This of course gave me the ability to increase my O/P power by 100% to a massive 10w!

I wasn’t so strong at John’s end, only getting 5/5 report at best whilst he was 5/5-5/9 with me with some QSB. John was using a mini beam antenna again pointed towards me so once again all the work was being done at his end. We had a good chat for a number of minutes until it was time for lunch.

Listening on the 40m band I did hear a very interesting station, KN6IPA/Aeronautical-Mobile. Justin, KN6IPA is part of the crew on a USAF KC135 air-to-air refuelling tanker that flies out of RAF Lakenheath in the U.K. He was transmitting from the aircraft whilst in flight over Germany. His signal was between 5/9 and 5/9+20dB on my vertical antenna and had a massive pileup of people calling him from all over Europe.

I did try calling him with my punchy 10w of power but, couldn’t compete with the huge pileup of very loud, powerful stations all incessantly calling. It was really interesting to just sit back and listen to Justin’s information. He was using 300w into a wire antenna that runs from the fuselage to the vertical stabiliser. Of course being so high up he had a massive advantage and could be heard for hundreds of miles with ease, hence every one and their dog was calling him.

Photo of the KC135 tanker that KN6IPA was transmitting from courtesy of his QRZ.COM page

If you look closely at the photo above of the KC135 that Justin is a crew member on you can just make out the wire antenna on the vertical stabiliser.

I have to admit that I would love to spend a few hours on the radio aboard the KC135 whilst it was flying around, just imagine the DX you could work!

More soon …

Something for the weekend?

Since purchasing the Yaesu FTDX10 and getting some wire into the air I’ve been working DX all over the world with ease. So far I’ve not exceeded 25w total output and yet I’ve worked as far as Australia, South America and West Coast USA and Canada. I’m often found to be using far less than 25w, even 5w on the 60m band is a huge amount of fun!

The FTDX10 has an incredible receiver, the best I have ever owned, for the money it really is an amazing bit of kit. The only thing about it that doesn’t work for me is the size when trying to go portable. It’s just a tad too big and requires a huge battery to power it. I love everything else about the FTDX10 apart from this one thing.

So, with the FTDX10 now being the prime shack radio I decided to look into a solution for portable operations. There are many options available today from the cheap Chinese made radios to the old reliable FT817/818 (which I used to own and had a lot of fun with) through to a multitude of newer, more modern full functionality radios. We are truly spoilt for choice these days!

One radio I have read a lot about is the Icom IC-705, it’s an incredibly feature packed little radio with a max output of 10w that covers 160m all the way up to 70cms. With its large super clear colour touch screen and easy swap battery solution it ticks all the boxes.

Icom IC-705 Portable HF/VHF/UHF Transceiver

One thing many people complain about is the fact that the IC-705 doesn’t have a built in ATU. This has never bothered me as I am a firm believer that the ATU should be at the antenna and not in the radio at the end of a long coax run. Running various antenna models on my EzNEC software has shown that keeping the ATU at the antenna is by far the best solution.

Of course Icom have this covered with their AH-705 remote auto ATU that’s specifically designed to compliment the IC-705. Powered by just two AA batteries and utilising latching relays the unit is both very quick to tune and uses next to no power at all, ideal for those Parks on the Air (POTA) or in my case, Beaches on the Air (BOTA) activations.

Being a quality Icom product the AH-705 isn’t cheap, at £299.99 it’s actually one of the most expensive auto ATUs available for the IC-705.

Icom AH-705 Remote Auto ATU

The other thing I wanted was some kind of stand for the IC-705 that would allow me to angle the radio such that the display and controls are always easily useable. On the ML&S site I found a nifty little tripod that will do the job nicely and so, that had to be included in the bundle.

Icom IC-705 Tripod stand

Fortunately for me the AH-705 was on special offer over the Easter Bank Holiday with 40% off making it the same price as the cheaper MAT tuner from china.

So I have now ordered an IC-705, matching AH-705 and the tripod all for the bundle price of £1504.87 including VAT, I even got free shipping thrown in too!

So that leaves just one more thing that I need to complete my radio solution, a morse key!

Having sold my Schurr Profi II Twin Paddle key (Been kicking myself ever since!!) a few years ago when I decided to take a break from radio I’m now in the position of not owning a morse key.

I did order a Vine Antenna RST-TP1 key from ML&S but, that had to go back (There’ll be an article about it coming very soon!) and so, I decided to spend a bit more and get a much better quality key.

Talking to many people online and Tony at ML&S it’s apparent that the Begali Morse keys are some of the best available these days. Looking on the Begali website they certainly have a great selection of high quality keys available, some for much more than I want to spend.

Begali Pearl Twin Paddle Morse Key

So after much consideration I decided to purchase a Begali Pearl Twin Paddle Morse key in Palladium and Gold with red paddles. It’s a super looking key and gets great write ups. It’s also their biggest seller, that says a lot.

More soon …