
After writing my article on how to build an AllStarLink node using a RaspberryPi 3b and SHARI radio device I was asked by a few people if I could possibly automate the process to make it easier for those who aren’t Linux command line junkies like me.
Over the last couple of days in-between doing other things I’ve been writing and testing a BASH shell script that will completely configure a fully working AllStarLink node.
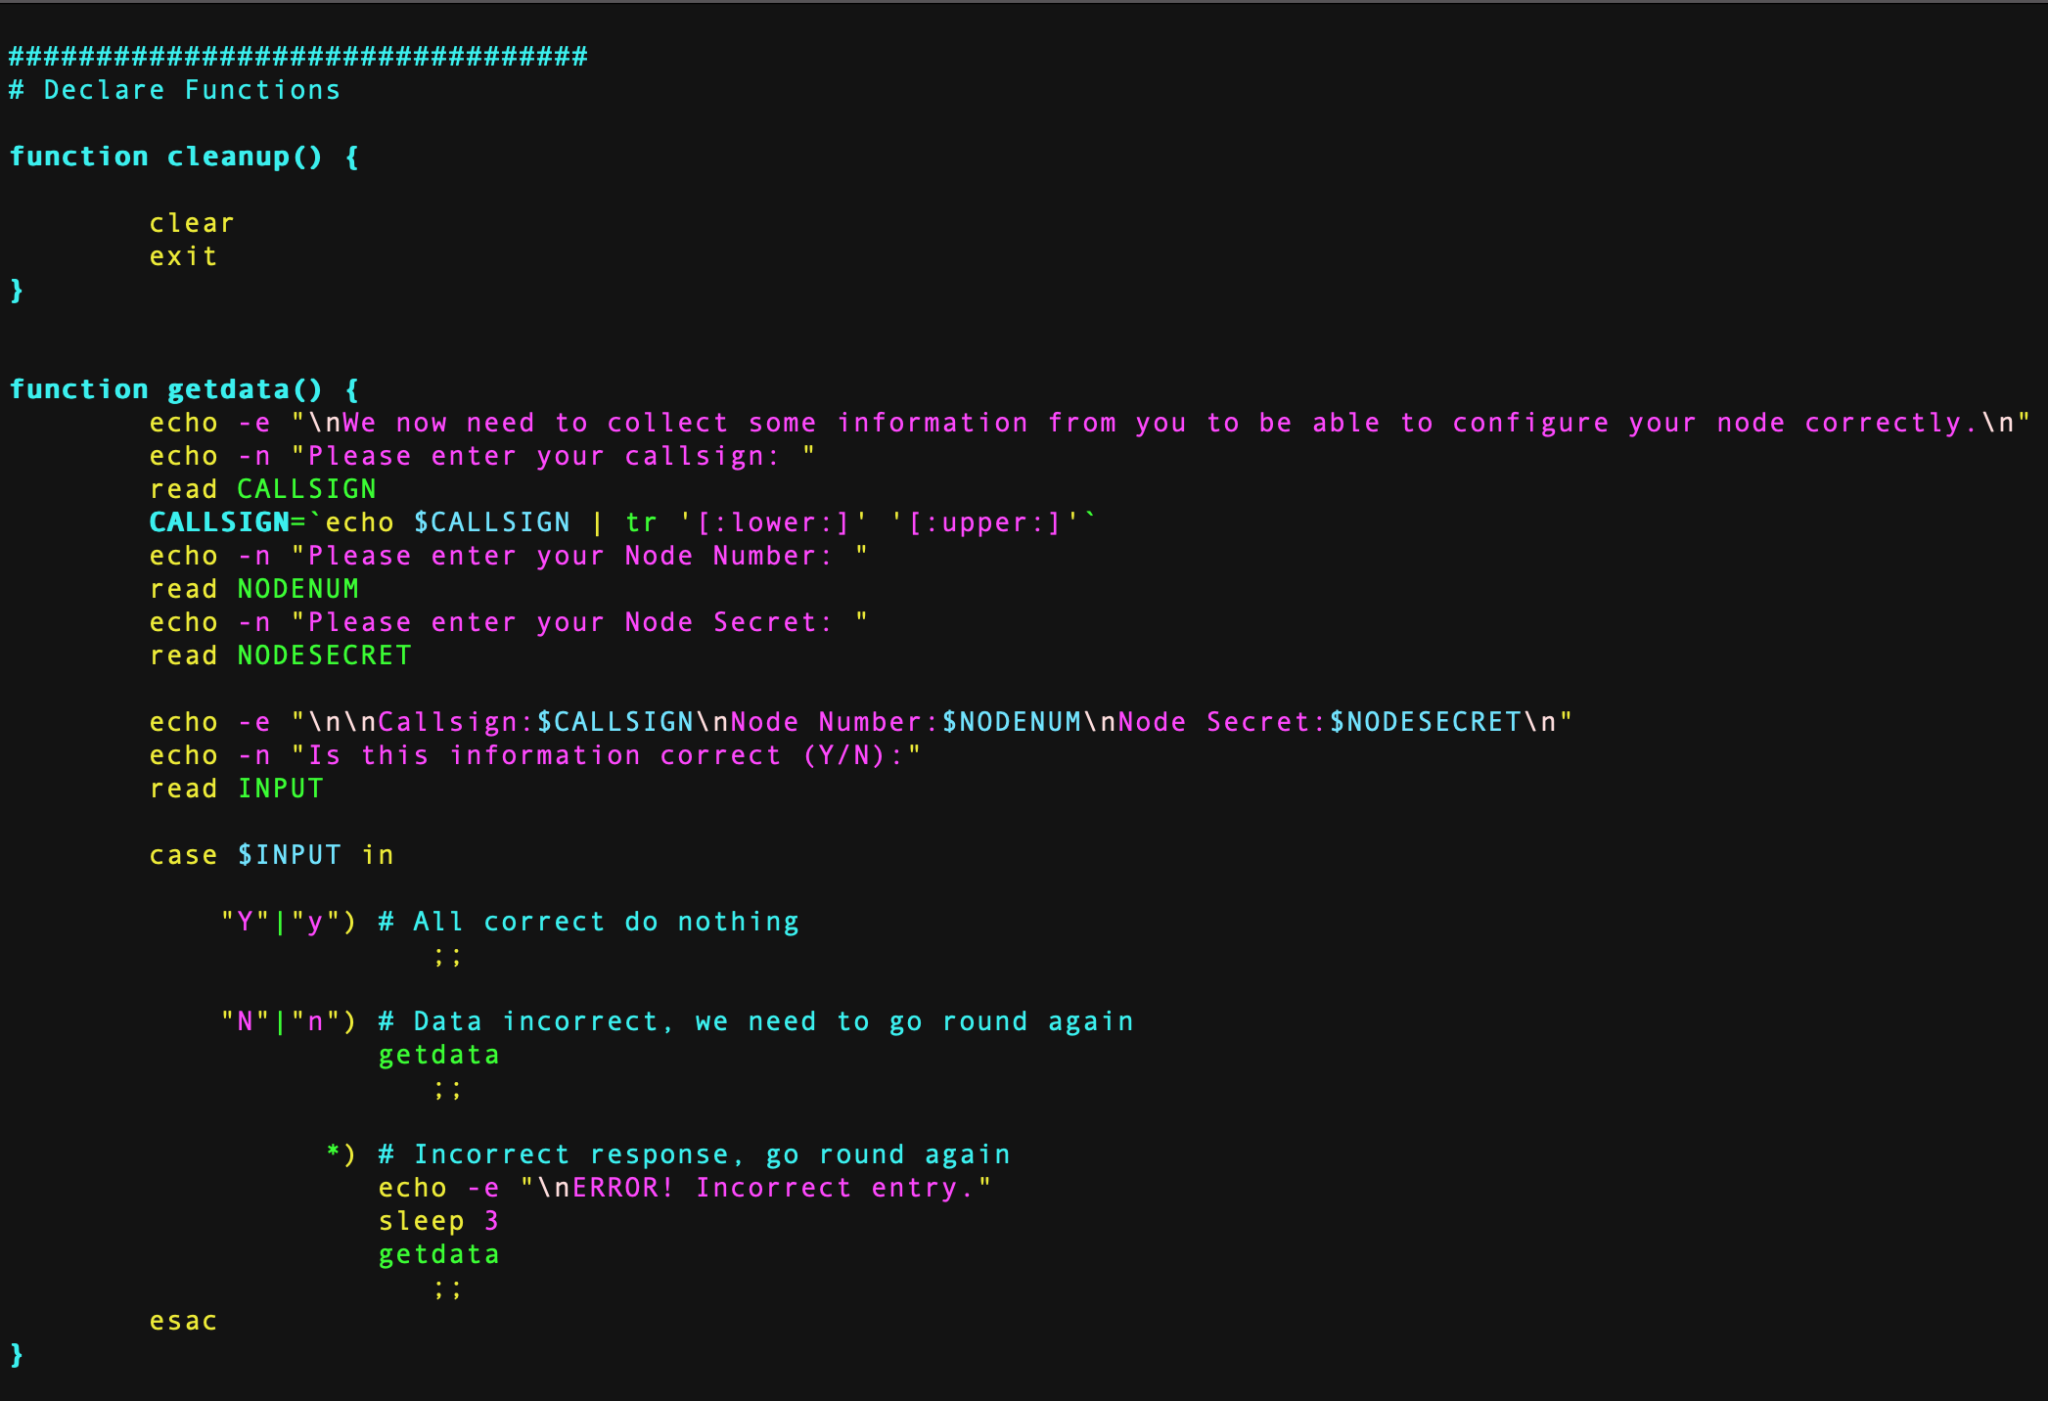
To use the script you must already have your RaspberryPi (preferably a Pi 3b) connected to your LAN with full internet access using the Raspbian based version of the AllStarLink software downloadable from here.
The specific version I use is:
asl-2.0.0-beta.6-kc1kcc-20210324-rpi-armhfI have tested the BASH script using this specific version of O/S only.
Once your RaspberryPi 3b is up and running, has full internet access and is accessible on your local LAN, using SSH login in as the user ‘repeater‘ using the password ‘allstarlink‘.
It’s important you only use this login to configure the node as this is the user the script is expecting to be run by. You must login via SSH as the SHARI device needs to be connected to the RaspberryPi 3b and you won’t be able to connect a keyboard and mouse at the same time. (If you are using two USB cables for the SHARI device then you can use a keyboard and mouse along with a monitor attached to your RaspberryPi instead of using SSH).
Once logged in as user repeater run the following wget command to download the zipped install script:
wget https://m0aws.co.uk/AllStarLink/AllStarLinkBuild.zipOnce downloaded you need to unzip the program from the zip file and make it executable using the following commands:
unzip ./AllStarLinkBuild.zip
chmod 755 ./install.sh
You are now ready to build your AllStarLink node. Before you run the script make sure you have your node number and node secret to hand. These are obtained from the AllStarLink portal.
Once you’ve got all your node information you can run the script using the following command:
./install.shThe script will now take you through the full process of updating the operating system as necessary, installing all the required packages and software. It will then reboot the RaspberryPi and you will need to login and run the script a second time using the command above.
On the second run the script will install some python specific software, ask you to enter your callsign, node number and node secret and will then configure your node. The last thing it does is configure the Allmon2 and Supermon Web Admin websites. During this process it will ask you to enter a password twice for the Admin user for the two websites, make sure you make a note of this password as you will need it to login and control your node.
Once the node is configured it will be rebooted and you will then be able to connect to your node using your favourite web browser and the user admin and the password you set above.
To access the Allmon2 web-admin system use the following URL:
http://your-RaspberryPi-IP-Address/allmon2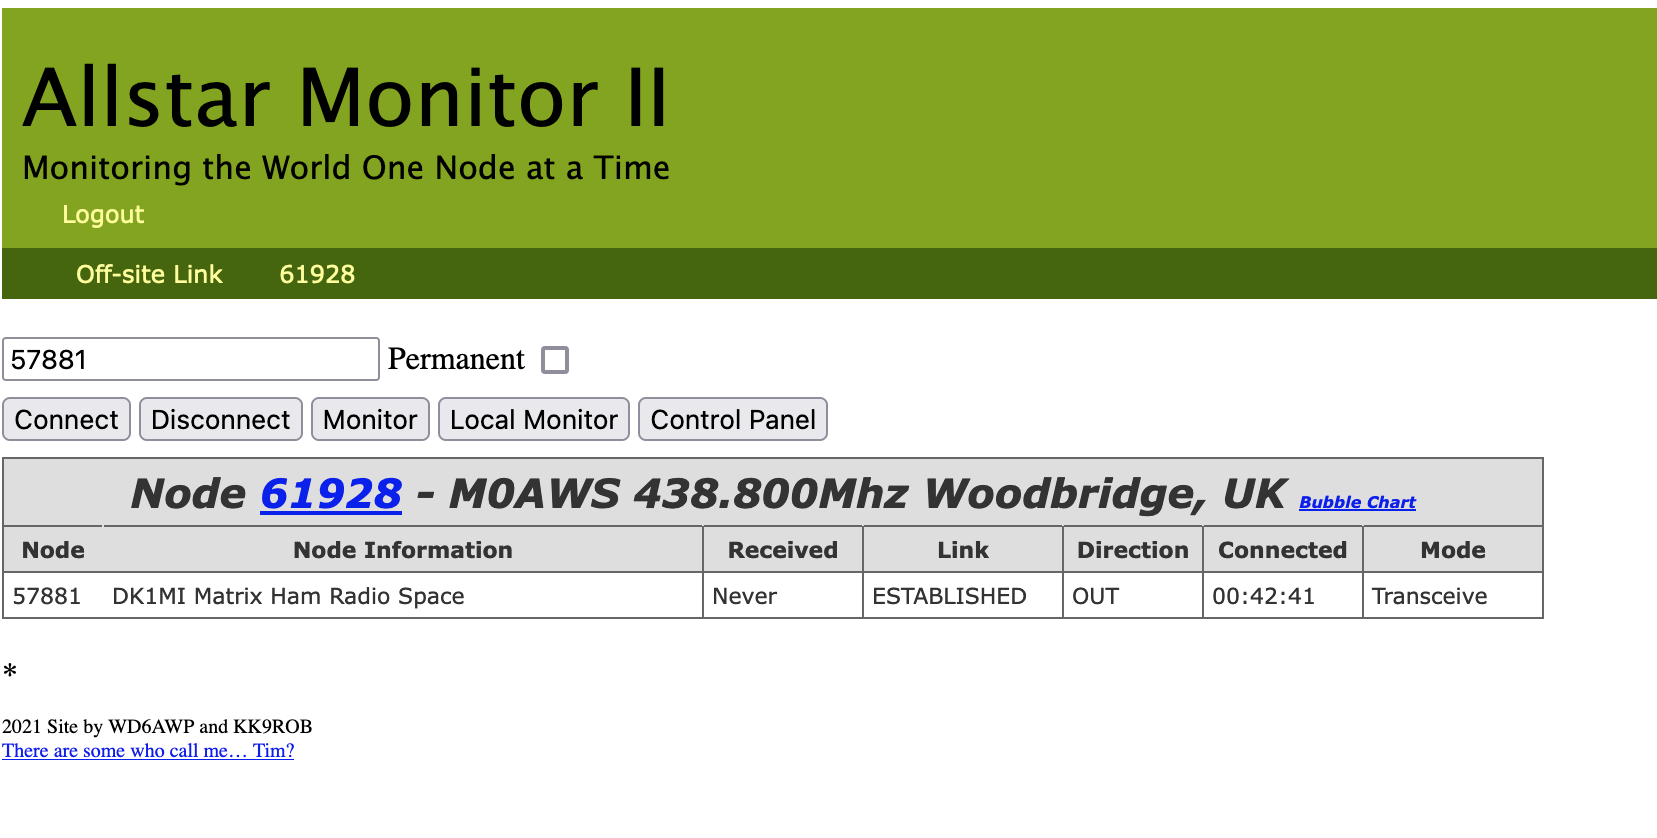
For those of you who prefer Supermon you an use the following URL:
http://your-RaspberryPi-IP-Address/supermon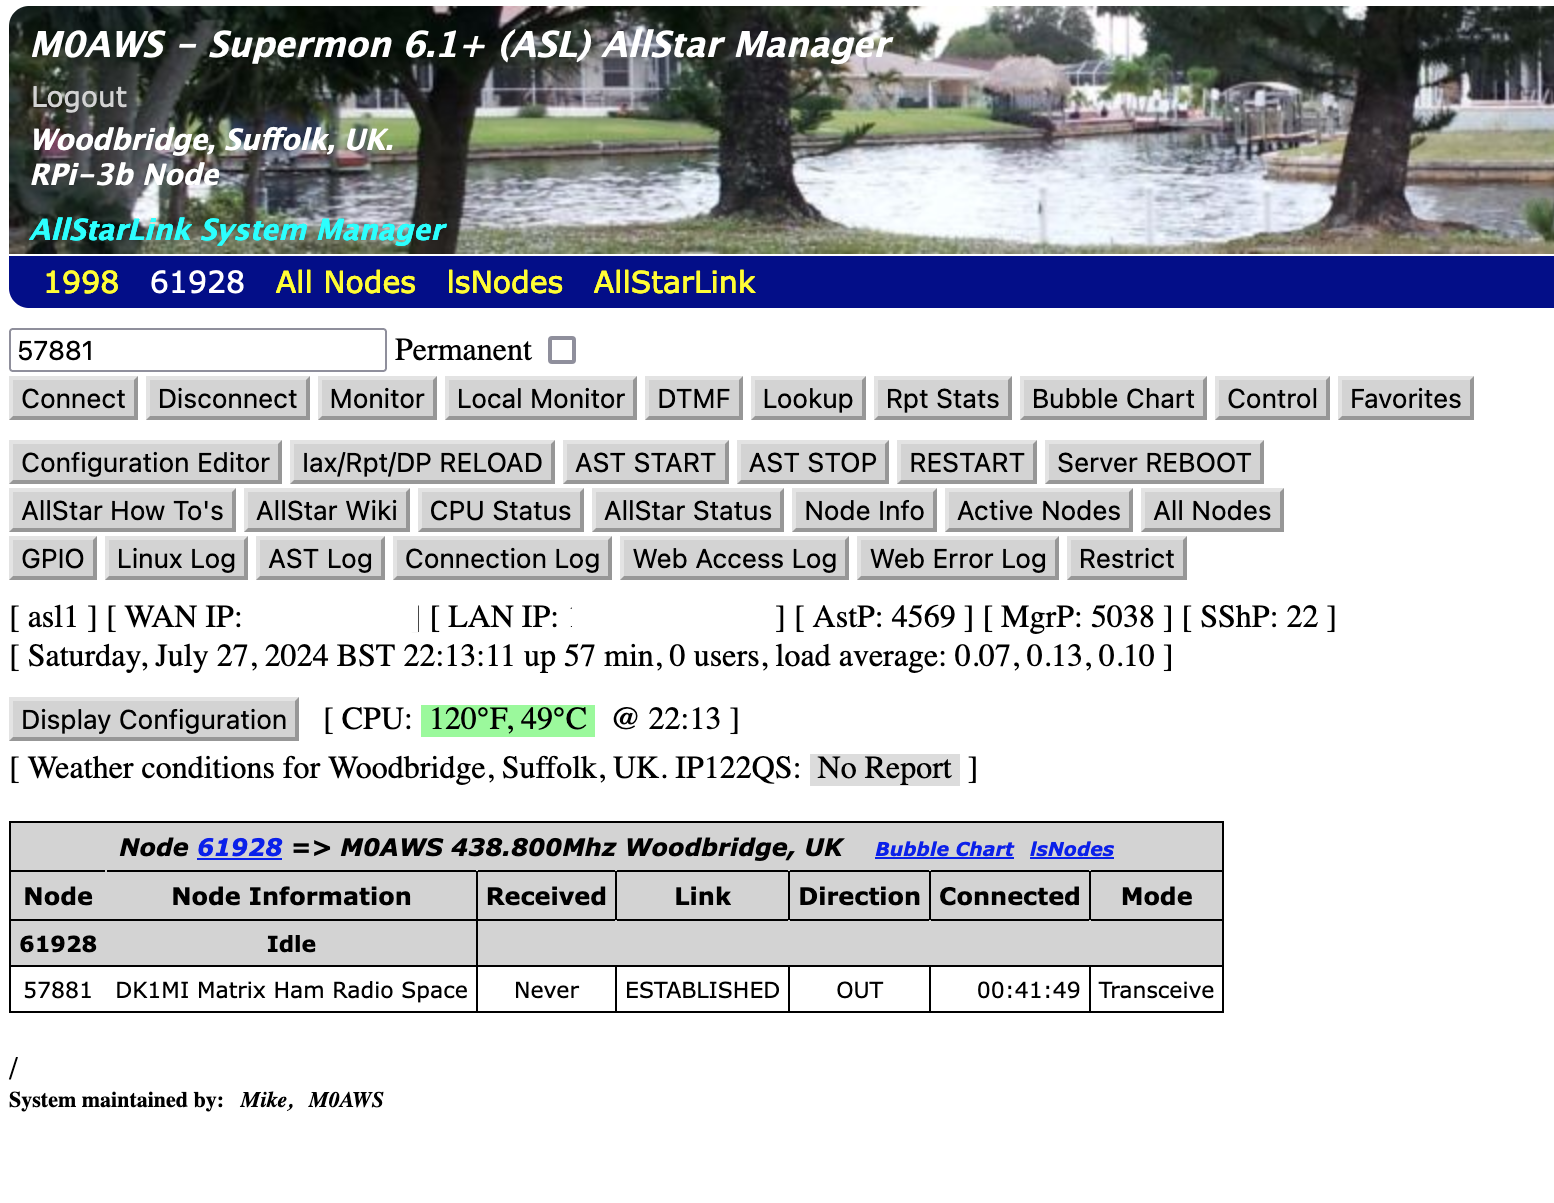
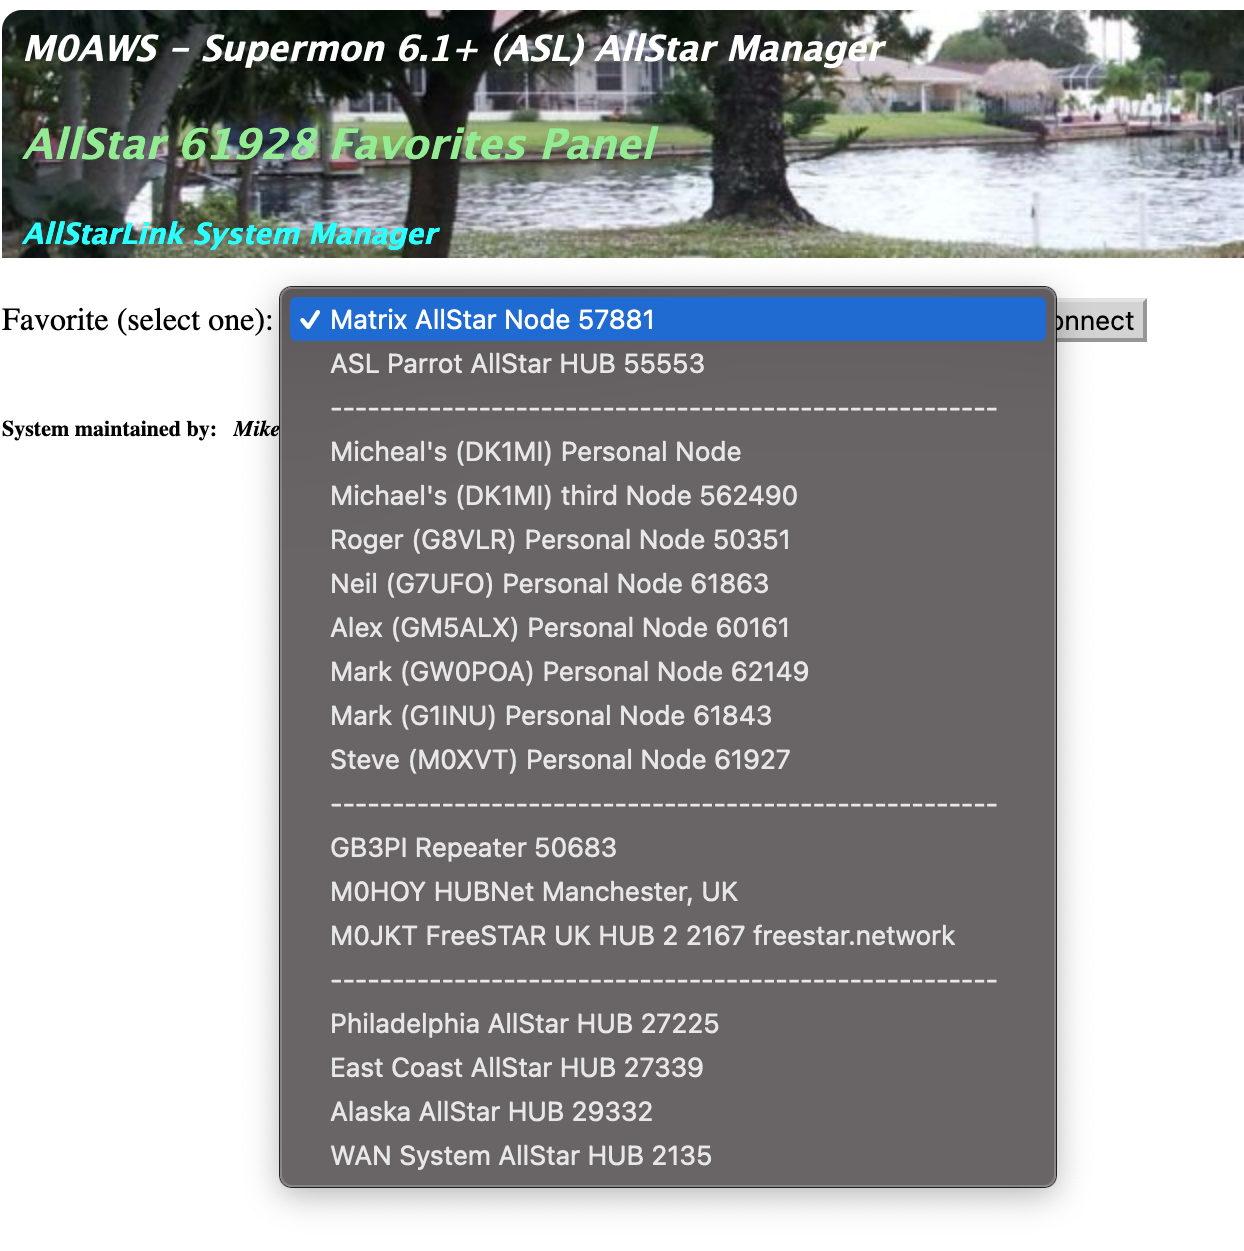
I have also pre-populated the Favorites button with a list of nodes that I use often. You can easily change these entries by editing the favorites.ini file in the /var/www/html/supermon directory as user root.
When you first login to your node via your web browser you’ll notice that it says your node isn’t in the database. You can update the database by using the following URL in your web browser:
http://your-RaspberryPi-IP-Address/allmon2/astdb.phpThis will force an update of the database and your node information should now be displayed correctly.
Hopefully this will make it much easier for the non Linux people to build an AllStarLink node using a RaspberryPi 3b and a SHARI radio device.
More soon …