Updates to my install-pihpsdr.sh script

Over the last few weeks I’ve been working on my install-pihpsdr script to build a version of the DL1YCF PiHPSDR fork that will work with the Adalm Pluo, Pluto+ and LibreSDR transceivers.

Since I don’t own any of these devices, Steve M0XVT has loaned me his Adalm Pluto and LibreSDR devices to test with.

Initially neither of the devices would work with the PiHPSDR build that my script was creating. After some investigation I found this was due to the fact that the developer build script was only building the SOAPYSDR library, it wasn’t building the modules for each device type.

This was easily fixed by adding some extra code that would build the necessary SOAPYSDR modules so that the devices were discovered on the local LAN.

Since I had the devices to hand I took the opportunity to test the updated build script on a number of Linux Distro’s that I have to hand.

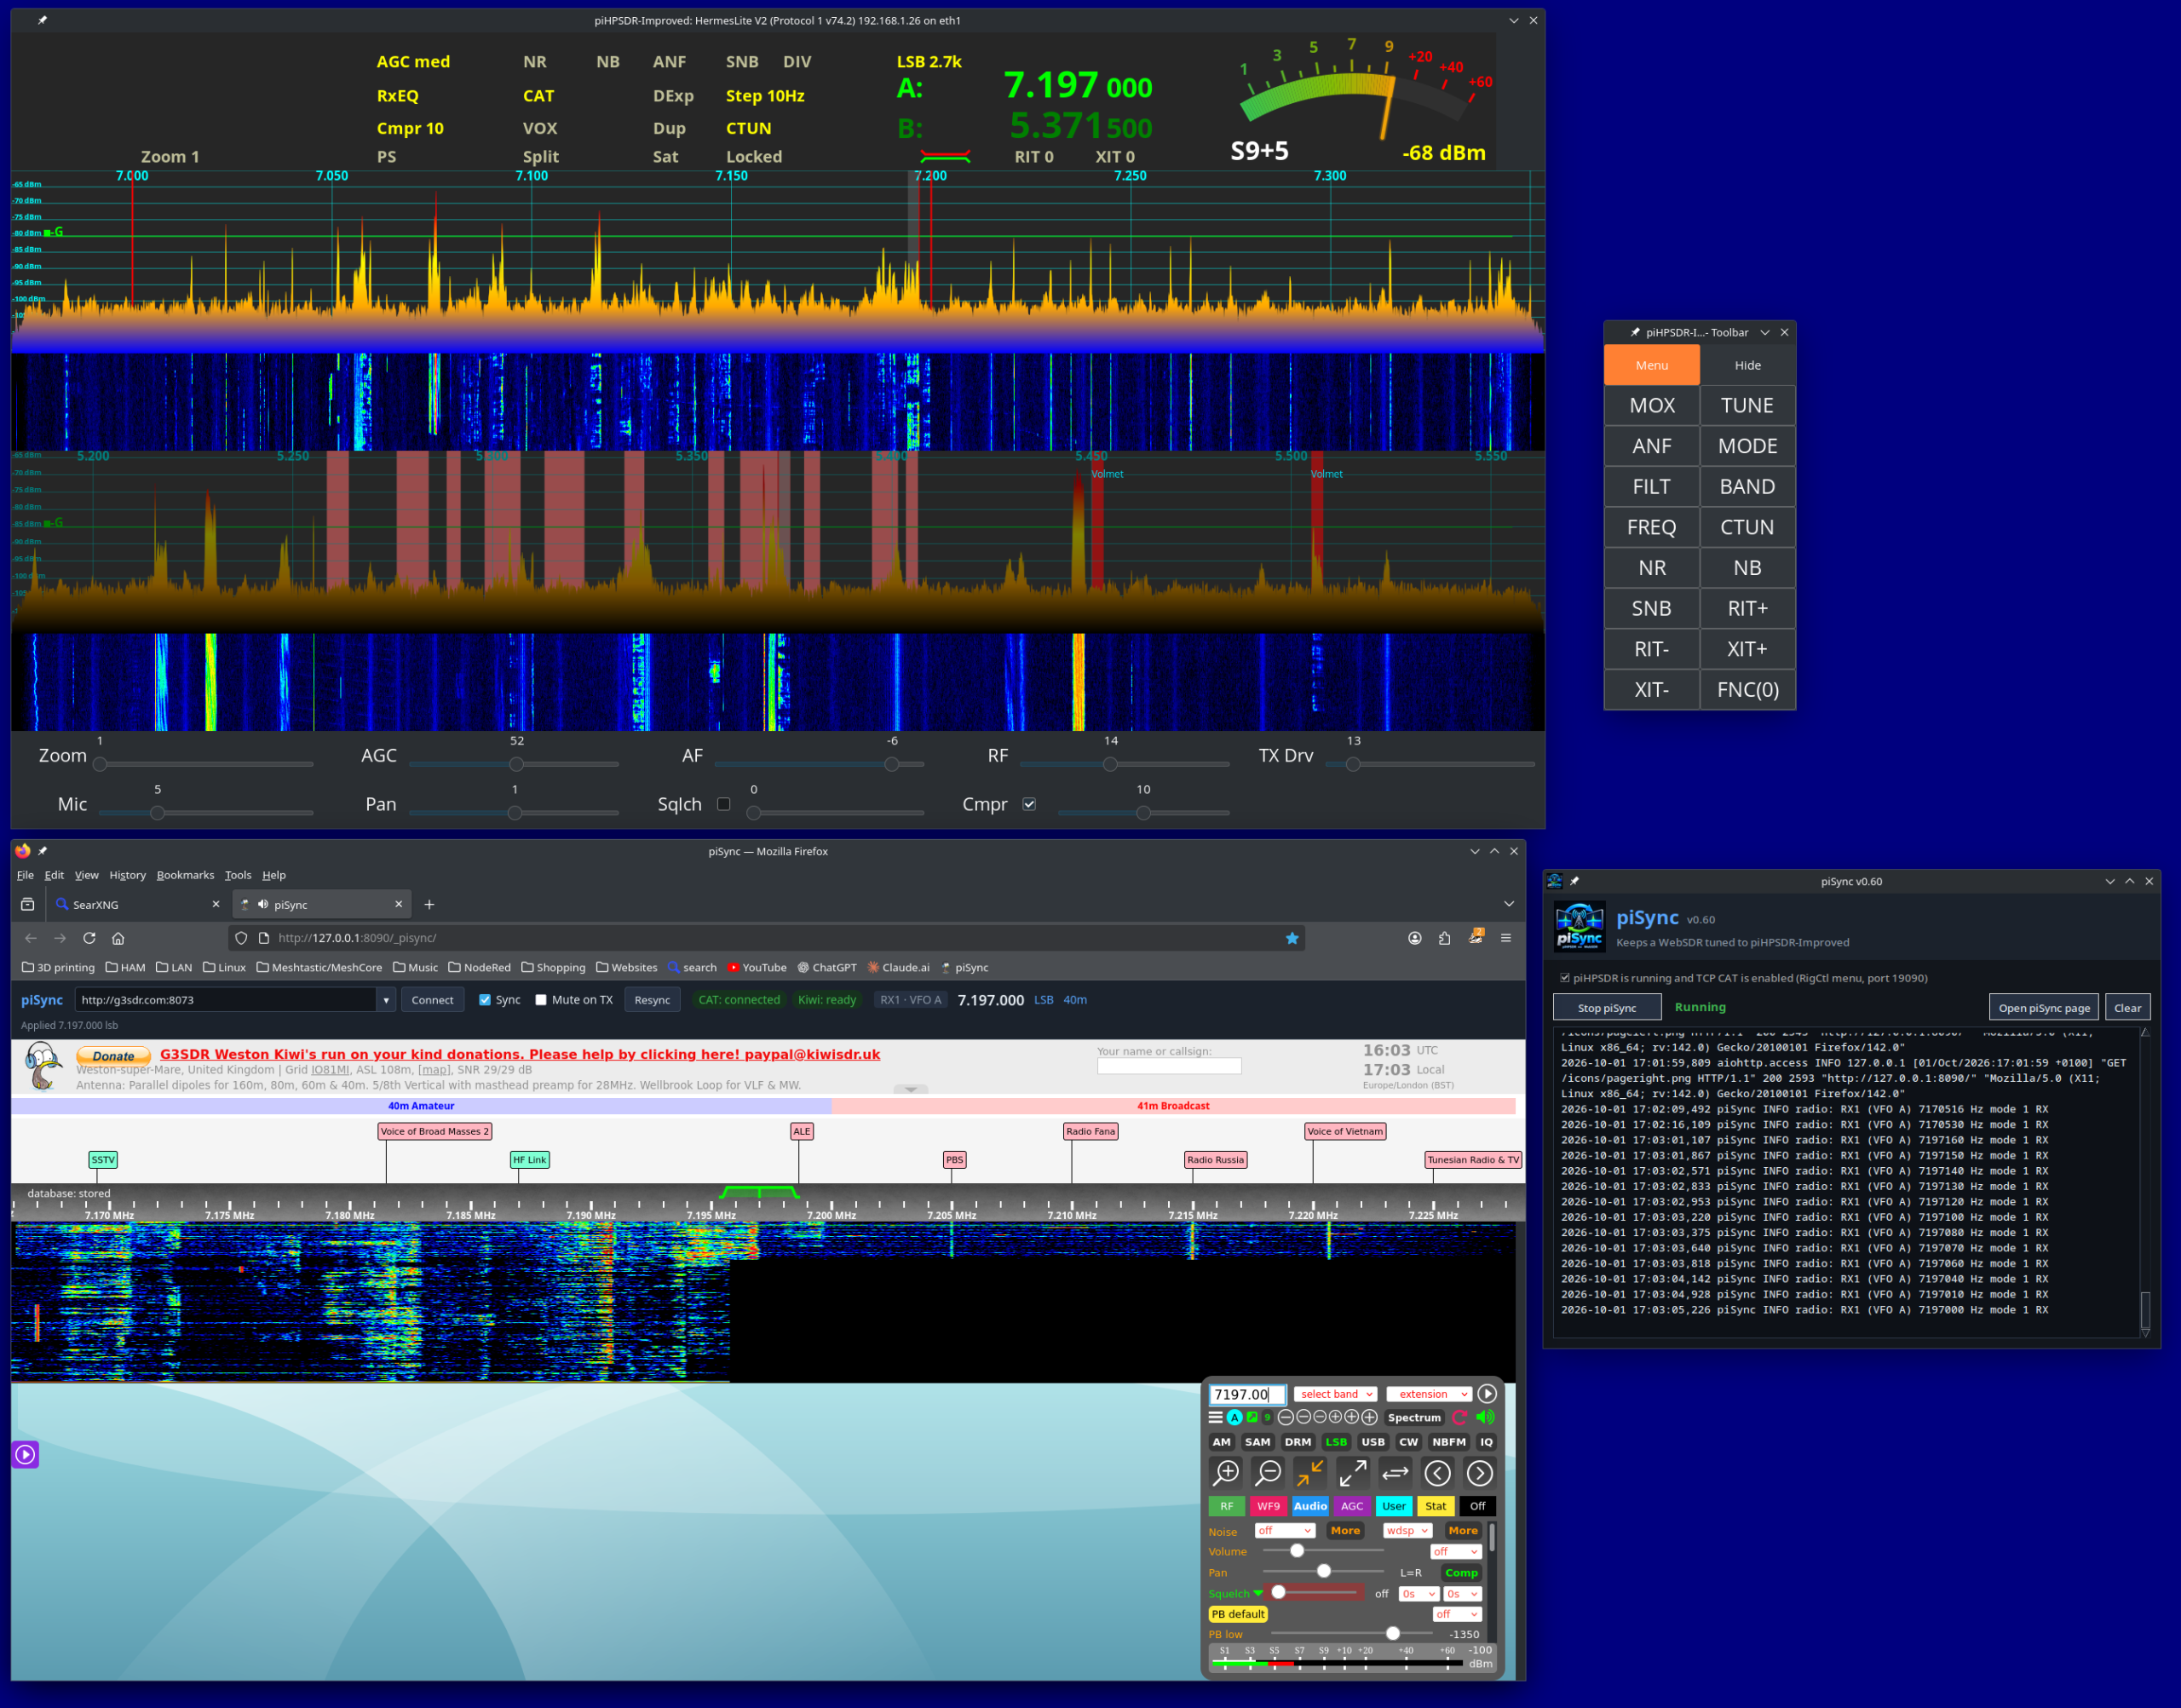
PiHPSDR running on Linuxmint 22.1 Cinnamon Edition using the LibreSDR transceiver

I tested the updated build script on Kubuntu 22.04LTS, Linuxmint 22.1 Cinnamon Edition and RaspberryPi 4/5 running the latest RaspberryPi OS 64bit version.

These all worked great with the transceivers and will now make a great platform for QO-100 stations that use either the Adalm Pluto, Pluto+ or LibreSDR devices.

Of course this build of PiHPSDR will also work with the Hermes Lite 2 and RadioBerry devices that I use most of the time in my own radio shack.

The updated PiHPSDR install script can be downloaded from my original blog article on the subject that is located here: https://m0aws.co.uk/?p=3686

The updated build script will most likely work on most Debian based Linux distro’s and build a working version of PiHPSDR. If you find a distro where you have problems please email me and let me know the details and I’ll happily look at the issue and try to resolve it.

Thanks to Steve for the loan of his precious SDR transceivers, I had a lot of fun with them!

More soon …

Building a new Desktop Environment for the RaspberryPi 5

Regular readers of my blog will already know that I am a huge fan of the Linux operating system, it’s clearly evident in most of the content on this website.

I am also a very enthusiastic user of one of the first credit card sized computers that came to be, namely the RaspberryPi. I own all the iterations of this wonderful little computer from the very first version to the latest and greatest, RaspberryPi 5.

This little computer has done more for computing in education than Microsoft and Apple will ever achieve and it’s done it at an incredibly low price making it more accessible to schools, colleges and students than any other platform.

The RaspberryPi has what most consider to be the best support on the planet when it comes to single board computers (SBCs). From the dedicated team that build Raspberry Pi OS, to all the amazing projects and forums that are available, for free on the internet today.

The RaspberryPi computer really has revolutionised computing for the masses.

My RaspberryPi 5 that I am writing this article on
My RaspberryPi 5 that I am using to write this article.

Raspberry Pi OS really is very good. It’s based on the great Debian distro’ that many of us seasoned Linux users dearly love. It’s light weight, fast and meets the needs of everyone that is venturing into the exciting world of Linux and SBCs for the first time.

Overtime as we all become more experienced with Linux on the RaspberryPi we become more demanding and start to find the Raspberry Pi OS desktop environment lacking. Sure it can be enhanced by adding more and more to it however, it never quite reaches the point of satisfaction and we are always wishing for something more.

With the Pi-5, the latest iteration of this great credit card sized computer, users are now able to seriously think about building a more powerful desktop environment for their little berry flavoured computers.

On my desktop PCs dotted around the house I have used Kubuntu for decades. It’s a slick and powerful desktop environment that has met my needs for many years and I love it more than any other Linux desktop. Sadly Kubuntu isn’t easily available out the box for the RaspberryPi and so I decided that it was time to replicate it as closely as possible on my new, super powerful RaspberryPi 5.

When I ordered my RaspberryPi 5 from Pimoroni I added the NVMe base and 250GB M.2 SSD drive to the order. Up until now I’d always used SD cards however, they are slow and unreliable and so I decided that since the Pi-5 has PCIe it was time to take the step away from SD cards and start using SSD technology.

Getting the OS onto the SSD is a two stage affair. First you have to create a bootable SD card to boot the Pi-5 from and then use it via the RaspberryPi Imager to install the OS onto the SSD. It’s a bit long winded but, easy enough.

Since I’m a huge Kubuntu fan I decided my desktop of choice for my new Pi-5 was going to be KDE-Plasma. I had tried to install this desktop before on older model Pi’s however, it ran so slow that it was unusable. With the new Pi-5’s increased computing power and the speed of the SSD I was confident that this was now possible.

I started out installing the Lite version of Raspberry Pi OS on the SSD. This is a command line only version of Linux that doesn’t include any desktop environment, a nice clean slate to start from.

RaspberryPi Imager showing Pi OS Liite (64bit)
RaspberryPi Imager showing Pi OS Lite (64bit)

Once the Lite version of the OS was installed on the SSD I shutdown the Pi-5 and removed the SD card and then powered the Pi-5 back up again so that it booted from the SSD.

Upon booting I was presented with the simple Linux Login prompt. After entering my username and password as setup during OS install I landed at the Linux command prompt.

sudo su -

I used sudo to become root user as shown above and then set about building my new KDE based super computer. First I needed to update the operating system with all the latest patches and security fixes.

apt update && apt dist-upgrade

The update and upgrade process ran for a while but, it was soon complete.

reboot

I issued the reboot command and then logged back in again, I was now ready to start building the KDE desktop environment.

sudo su -
apt install kde-plasma-desktop gldriver-test

Becoming root again I type the command to install the KDE-Plasma desktop and the graphics-related config services. There’s a lot of packages to download and install so, I left it to do its thing.

A little while later all the packages were installed and ready to go. I now needed to tell the system to boot into the new graphical user interface instead of the command prompt using systemctl.

systemctl set-default graphical.target

Once this was done I needed to make a change to the display settings using the raspi-config program.

raspi-config

Selecting No.2 on the menu, Display Options and then D2 Screen Blanking, I disabled screen blanking so that I got the full 4K support for my KDE Desktop.

Once the system had been configured for a graphical user interface there was only one thing left to do and that was to shutdown the RaspberryPi.

shutdown -h now
The beautiful KDE-Plasma Desktop on RaspberryPi 5

Powering the Pi-5 back up again I was greeted by the standard KDE Plasma login screen and then, after logging in I was transported to the beautiful KDE desktop. I was now smiling like a Cheshire cat!

The KDE desktop is incredibly snappy on the Pi-5 with an SSD, app’s open instantly and run with minimum CPU exertion. It was now time to load the rest of the KDE application suite to complete the build. Popping open a terminal I hit the command line once more.

sudo su -
apt install kde-full vim yakuake vlc firefox rsyslog

This loads the full set of KDE applications adding just about everything you’ll ever need to the desktop environment. It’s about 1GB of packages and so depending on your internet speed it could take a while but, it’s well worth the wait.

Once complete you are ready to go with a fully functional, snappy, powerful desktop.

I’m extremely pleased with the performance of the Pi-5. KDE is super fast, snappy and responsive. With 8GB of RAM on tap the RaspberryPi has no problem with performance. The Pi-5 and KDE-Plasma really do make a great desktop computer at an incredible cheap price.

Looking for a new computer?

Add a cheap USB sound card and a pair of speakers and this little setup will meet the needs of 90% of the population with ease and go on to satisfy the more seasoned, demanding Linux user or programmer without breaking the bank.

More soon …

Using the DL1YCF version of PiHPSDR with the RadioBerry

(This information is also for the Hermes Lite 2, Adalm Pluto, Pluto+ and LibreSDR)

During my RadioBerry build I started out using the version of PiHPSDR that was created just for the RadioBerry. The problem with this is that it is hard coded for a very small screen making it hard to use on a big screen since the user cannot resize the window dynamically.

I decided to look for a forked version of the PiHPSDR software that had the ability to change the window size to suit all use cases. During my search I stumbled across the DL1YCF fork of the source code that has some enhancements, one of which is the ability to change the display size.

In no time at all I had the source code downloaded and compiled only to find that it didn’t work with the RadioBerry. After some investigation I found that this was due to the fact that the RadioBerry software has compiled into it code that is used to access the GPIO pins on the RaspberryPi so that it can communicate with the RadioBerry HAT. This is fine except that the DL1YCF version of PiHPSDR also has code in it to use the GPIO pins. This of course causes a conflict and the net result is that nothing works.

Reading through the source code and Makefile I found that all I needed to do was to compile a version of PiHPSDR without GPIO support. This would then remove the conflict and allow the RadioBerry software to operate correctly.

To this end I put together a download/compile/install script for the DL1YCF version of PiHPSDR that will work on a RaspberryPi with a RadioBerry HAT and give the ability to resize the window to fit any size screen.

The script also works on a Linux Desktop PC running Ubuntu/Kubuntu/Linuxmint/Debian operating systems. (It will most likely work on other distro’s too but, these are all I have to hand currently). You can of course also use this software with a Hermes Lite 2 transceiver.

DL1YCF PiHPSDR running on RaspberryPi 4 with RadioBerry HAT on a large monitor

To install this enhanced version of PiHPSDR on your RaspberryPi/Desktop PC with GPIO support disabled, download the installation script below, unzip it and run it in a terminal on your RaspberryPi/Desktop PC in your home directory. (/home/<your-username>).

The script will download the latest source code from the DL1YCF github, disable the GPIO code and then compile and install it to your computer. If installing on a RaspberryPi it will create an icon on the desktop for you to use to start the software.

If installing on a PC then you will need to create your own desktop icon as the one created only works on a RaspberryPi. You can of course just start the software from the command line in a terminal. (My preferred method).

If you have a RaspberryPi 5 then I highly recommend that you run this version of PiHPSDR on it as it has a lot more computing power and handles using dual receive with ease. It will run on a Pi4 but, you will load the CPU more as it’s not as powerful as the later model Pi5.

The script will ask if you want to compile in SOAPYSDR support so that PiHPSDR will work with RTL-SDR, Adalm-Pluto, Pluto+ and LibreSDR. Enter Y to compile in support or N if you don’t need it.


I hope this proves useful to all the RadioBerry, Hermes Lite 2 and Pluto users out there who want to use PiHPSDR on a big screen.

More soon …

Automated RaspberryPi/SHARI Node Build

NOTE: The info in this article is out of date and does not work with the latest version of AllStarLink. The Debian O/S it is based on is no longer in support.

After writing my article on how to build an AllStarLink node using a RaspberryPi 3b and SHARI radio device I was asked by a few people if I could possibly automate the process to make it easier for those who aren’t Linux command line junkies like me.

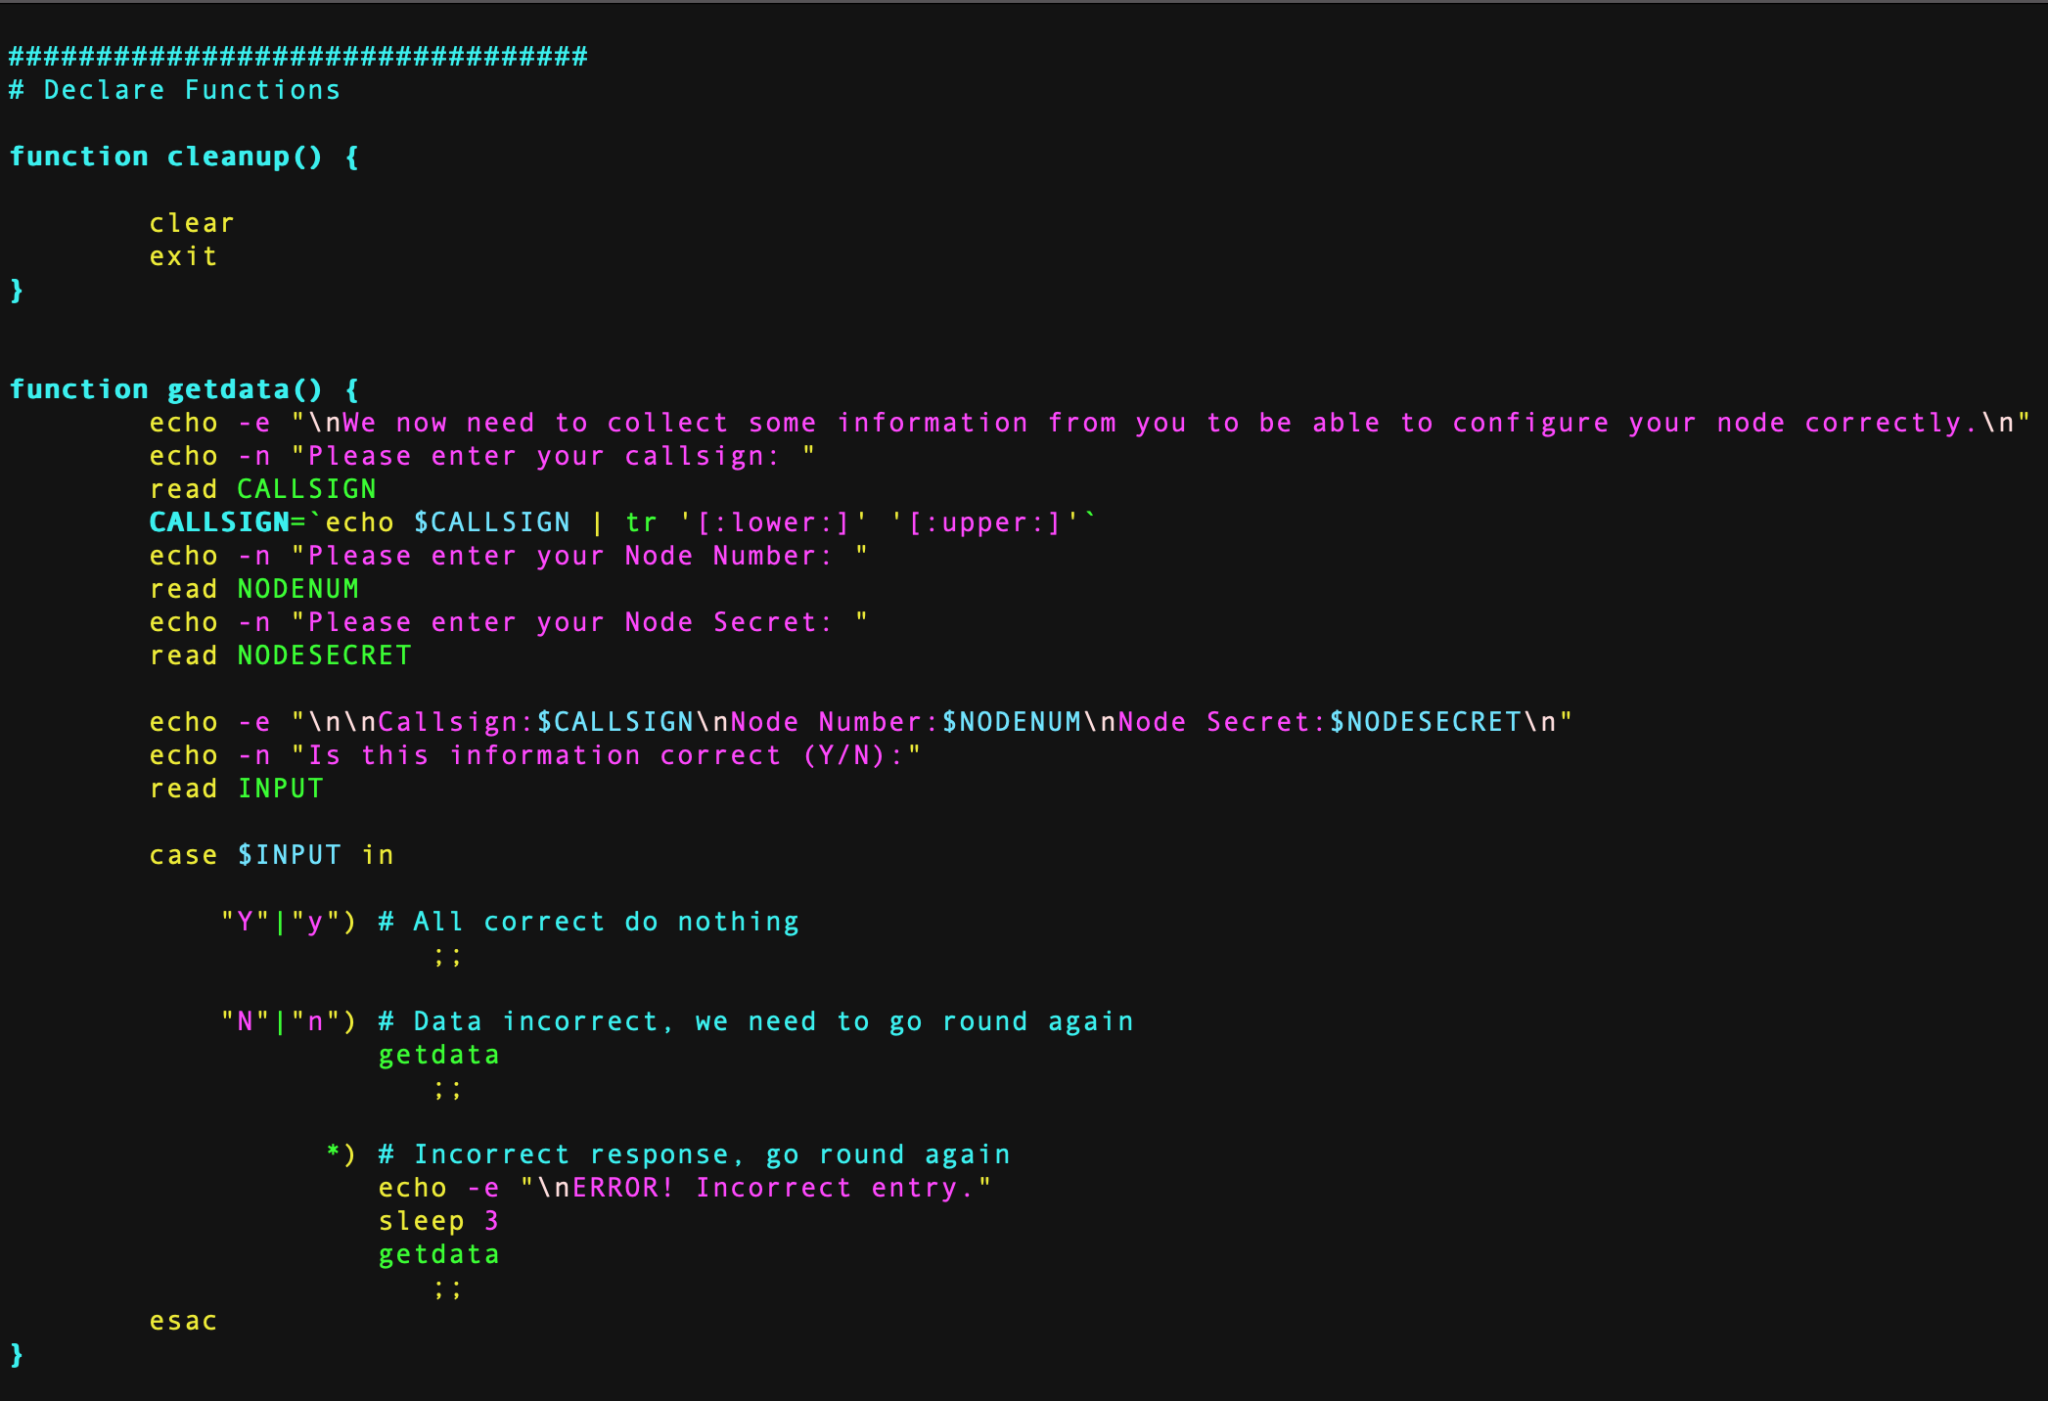
Over the last couple of days in-between doing other things I’ve been writing and testing a BASH shell script that will completely configure a fully working AllStarLink node.

M0AWS - Coding the BASH script for the automated AllStarLink installation
M0AWS – Coding the BASH script for the automated AllStarLink installation

To use the script you must already have your RaspberryPi (preferably a Pi 3b) connected to your LAN with full internet access using the Raspbian based version of the AllStarLink software downloadable from here.

The specific version I use is:

asl-2.0.0-beta.6-kc1kcc-20210324-rpi-armhf

I have tested the BASH script using this specific version of O/S only.

Once your RaspberryPi 3b is up and running, has full internet access and is accessible on your local LAN, using SSH login in as the user ‘repeater‘ using the password ‘allstarlink‘.

It’s important you only use this login to configure the node as this is the user the script is expecting to be run by. You must login via SSH as the SHARI device needs to be connected to the RaspberryPi 3b and you won’t be able to connect a keyboard and mouse at the same time. (If you are using two USB cables for the SHARI device then you can use a keyboard and mouse along with a monitor attached to your RaspberryPi instead of using SSH).

Once logged in as user repeater run the following wget command to download the zipped install script:

wget https://m0aws.co.uk/AllStarLink/AllStarLinkBuild.zip

Once downloaded you need to unzip the program from the zip file and make it executable using the following commands:

unzip ./AllStarLinkBuild.zip
chmod 755 ./install.sh

You are now ready to build your AllStarLink node. Before you run the script make sure you have your node number and node secret to hand. These are obtained from the AllStarLink portal.

Once you’ve got all your node information you can run the script using the following command:

./install.sh

The script will now take you through the full process of updating the operating system as necessary, installing all the required packages and software. It will then reboot the RaspberryPi and you will need to login and run the script a second time using the command above.

On the second run the script will install some python specific software, ask you to enter your callsign, node number and node secret and will then configure your node. The last thing it does is configure the Allmon2 and Supermon Web Admin websites. During this process it will ask you to enter a password twice for the Admin user for the two websites, make sure you make a note of this password as you will need it to login and control your node.

Once the node is configured it will be rebooted and you will then be able to connect to your node using your favourite web browser and the user admin and the password you set above.

To access the Allmon2 web-admin system use the following URL:

http://your-RaspberryPi-IP-Address/allmon2
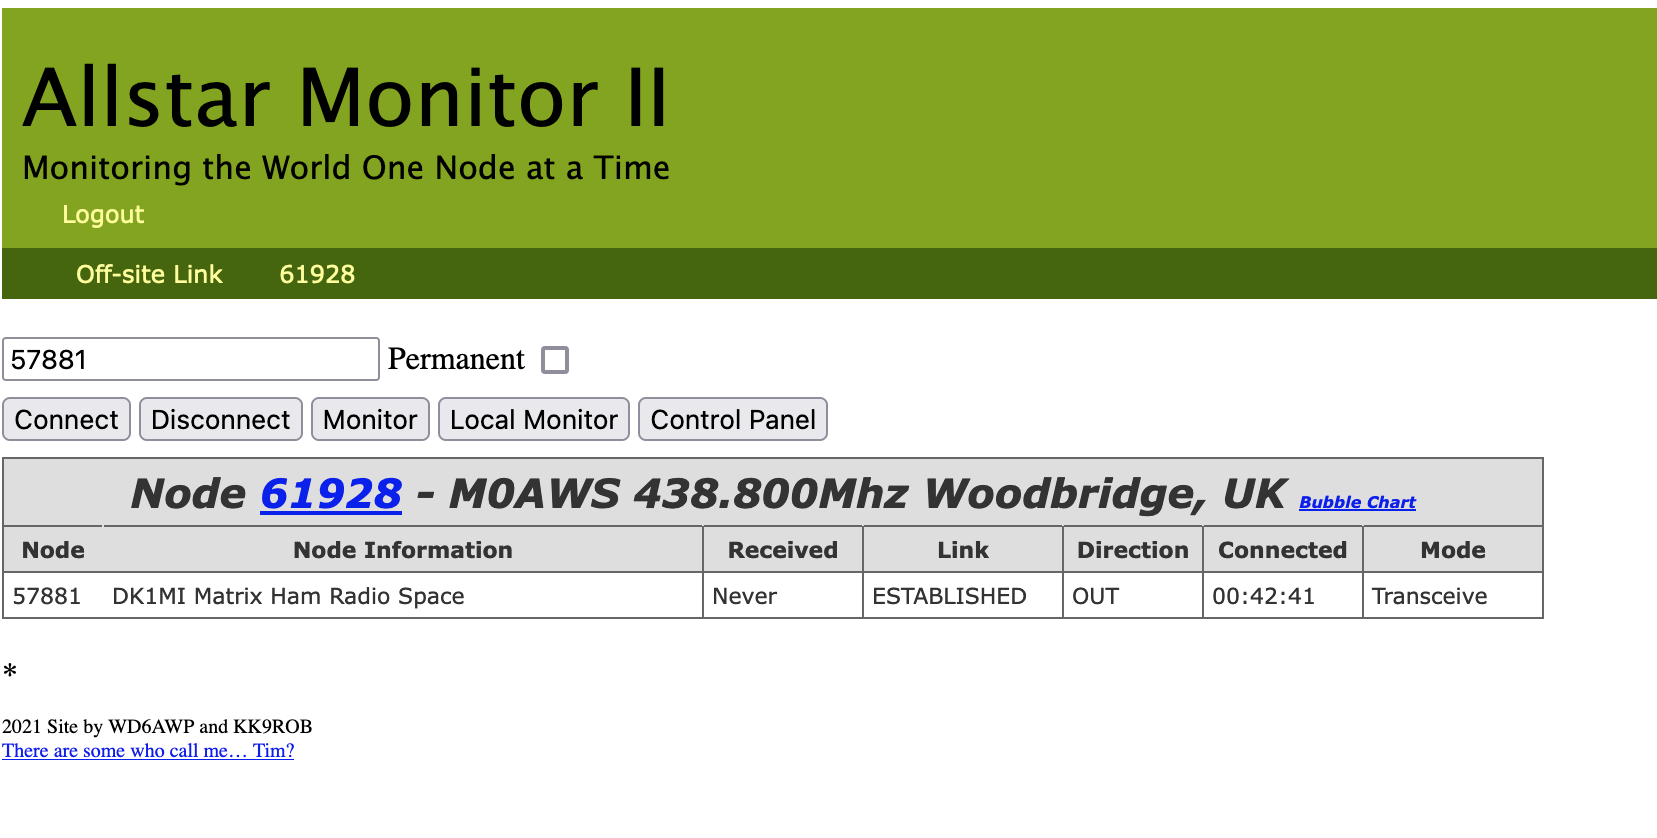
M0AWS - Allmon2 WebAdmin interface
M0AWS – Allmon2 WebAdmin interface

For those of you who prefer Supermon you an use the following URL:

http://your-RaspberryPi-IP-Address/supermon
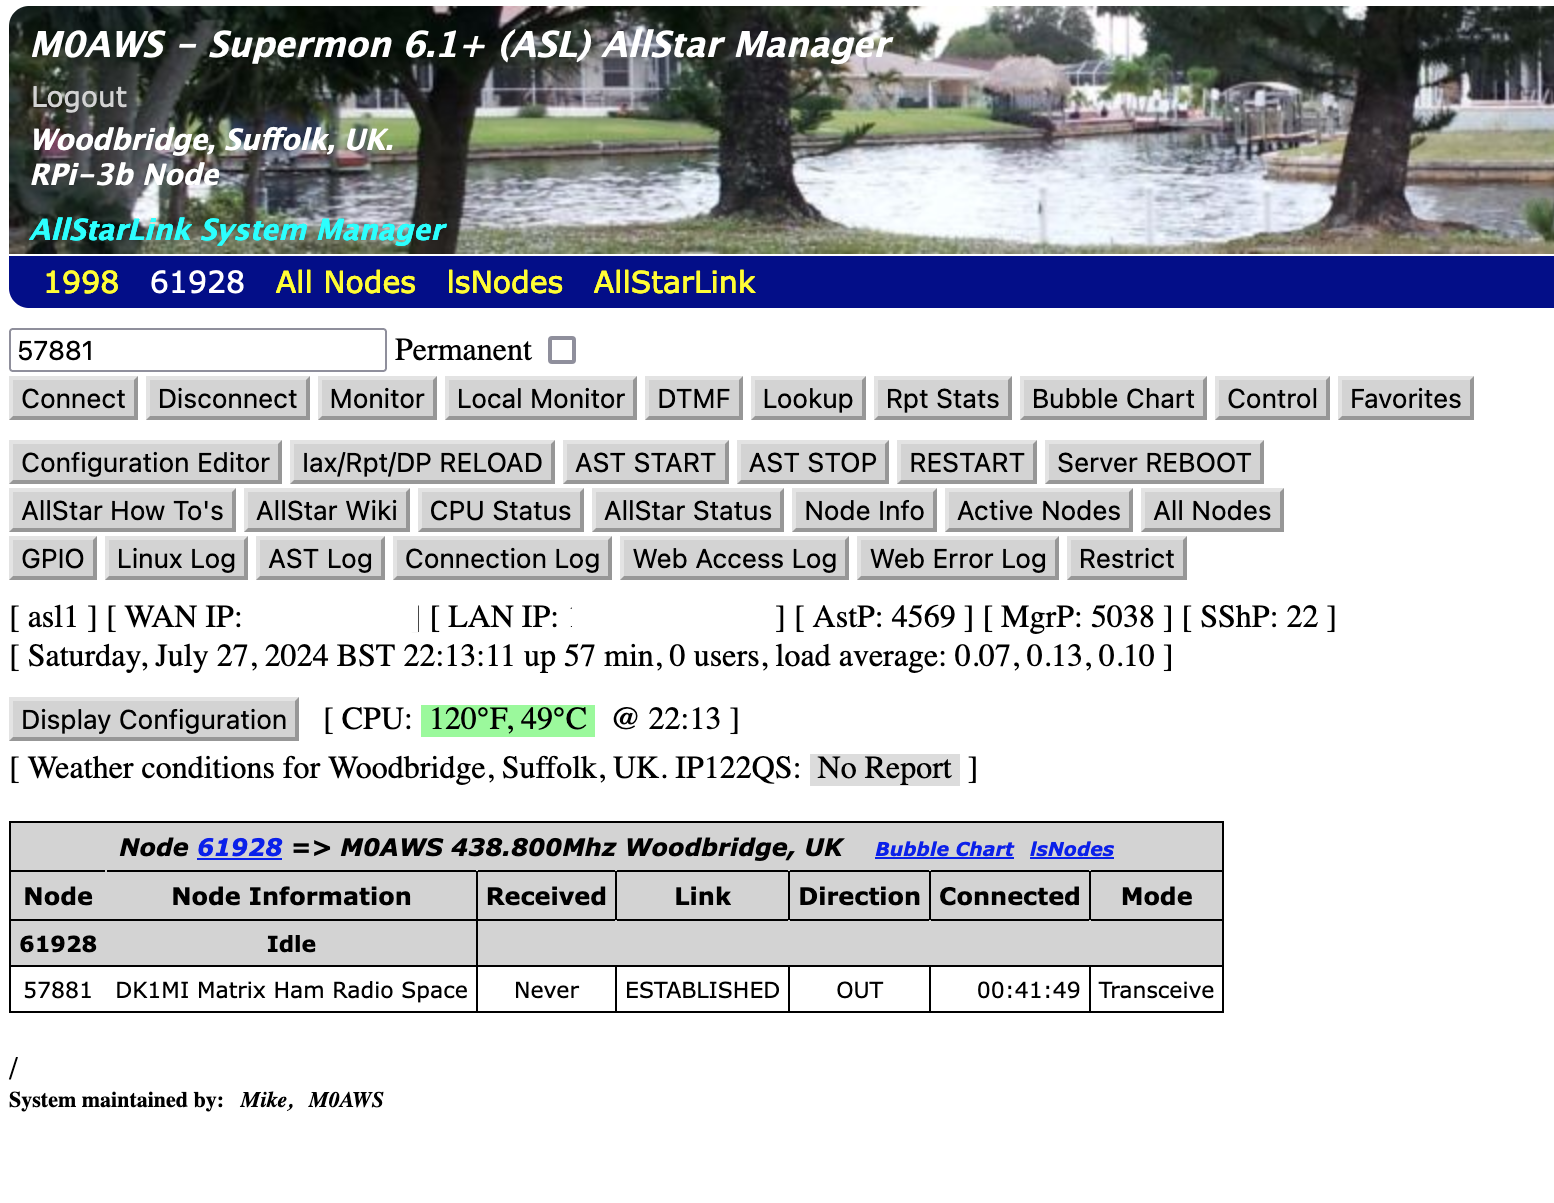
M0AWS - Supermon Web Admin view
M0AWS – Supermon Web Admin view

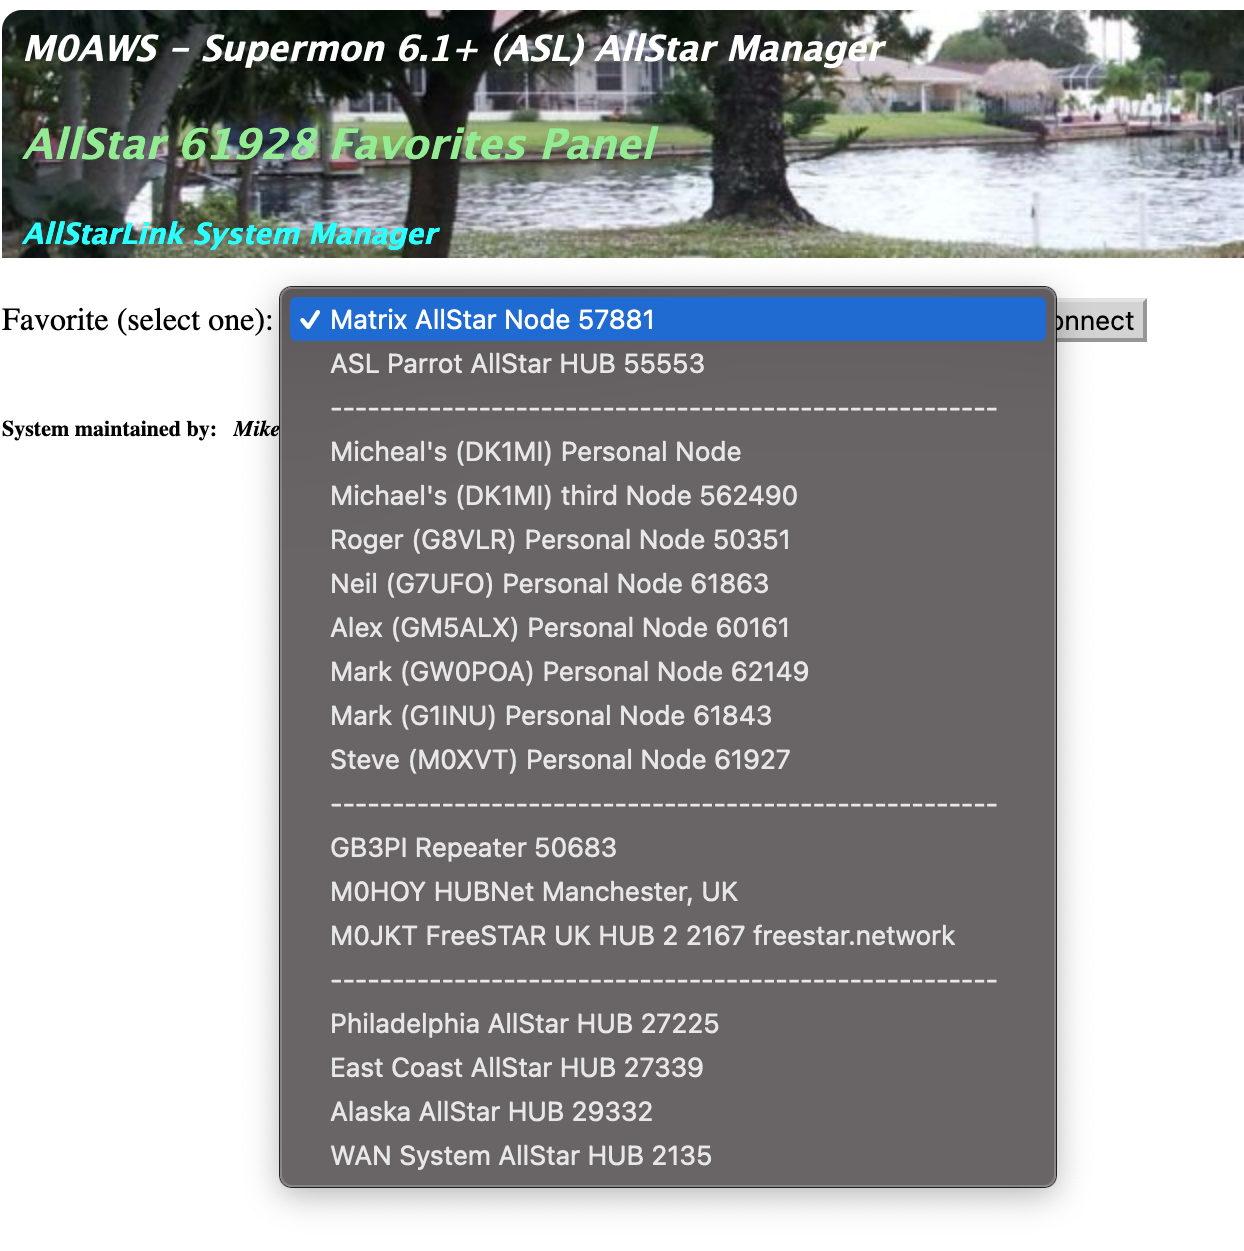
I have also pre-populated the Favorites button with a list of nodes that I use often. You can easily change these entries by editing the favorites.ini file in the /var/www/html/supermon directory as user root.

M0AWS - Supermon pre-populated Favourites drop down list
M0AWS – Supermon pre-populated Favourites drop down list

When you first login to your node via your web browser you’ll notice that it says your node isn’t in the database. You can update the database by using the following URL in your web browser:

http://your-RaspberryPi-IP-Address/allmon2/astdb.php

This will force an update of the database and your node information should now be displayed correctly.

Hopefully this will make it much easier for the non Linux people to build an AllStarLink node using a RaspberryPi 3b and a SHARI radio device.

More soon …

Building HAM Clock on an old RaspberryPi

I’ve got a couple of old RaspberryPi computers on the shelf in the shack and so decided it was time for me to put one of them to good use. The first model on the shelf is the oldest and is one of the very first RaspberryPi 1 computers that was released. (It’s the one with the yellow analog video signal output on the board!). This particular model is extremely slow but, I hang onto it just as a reminder of the first SBC in the line.

The second one is a RaspberryPi 2, a quad core machine that is only slightly faster than the first model but, it’s powerful enough to run HAM Clock.

It didn’t take long to install a vanilla Raspbian Desktop O/S and get it configured on the local LAN. I installed a few packages that I like to have available on all my Linux machines and then started on the HAM Clock install.

The first thing I needed to do was install the X11 development library that is required to compile the HAM Clock binary. To do this, open a terminal and enter the command below to install the package.

sudo apt install libx11-dev

You will need to type in your password to obtain root privileges to complete the installation process and then wait for the package to be installed.

The HAM Clock source code is available from the HAM Clock Website under the Download tab in .zip format. Once downloaded unzip the file and change directory into the ESPHamClock folder ready to compile the code.

cd ~/Downloads/ESPHamClock

Once in the ESPHamClock directory you can run a command to get details on how to compile the source code.

make help

This will check your system to see what screen resolutions are available and then list out the options available to you for compiling the code as shown below.

The following targets are available (as appropriate for your system)

    hamclock-800x480          X11 GUI desktop version, AKA hamclock
    hamclock-1600x960         X11 GUI desktop version, larger, AKA hamclock-big
    hamclock-2400x1440        X11 GUI desktop version, larger yet
    hamclock-3200x1920        X11 GUI desktop version, huge

    hamclock-web-800x480      web server only (no display)
    hamclock-web-1600x960     web server only (no display), larger
    hamclock-web-2400x1440    web server only (no display), larger yet
    hamclock-web-3200x1920    web server only (no display), huge

    hamclock-fb0-800x480      RPi stand-alone /dev/fb0, AKA hamclock-fb0-small
    hamclock-fb0-1600x960     RPi stand-alone /dev/fb0, larger, AKA hamclock-fb0
    hamclock-fb0-2400x1440    RPi stand-alone /dev/fb0, larger yet
    hamclock-fb0-3200x1920    RPi stand-alone /dev/fb0, huge

For my system 1600×960 was the best option and so I compiled the code using the command as follows.

make hamclock-1600x960

It’s no surprise that it takes a while to compile the code on such a low powered device. I can’t tell you how long exactly as I went and made a brew and did a few other things whilst it was running but, it took a while!

Once the compilation was complete you then need to install the application to your desktop environment and move the binary to the correct directory.

make install

Once the install is complete there should be an icon on the GUI desktop to start the app. If like mine it didn’t create the icon then you can start the HAM Clock by using the following command in the terminal.

/usr/local/bin/hamclock &

The first time you start the app you’ll need to enter your station information, callsign, location etc and then select the settings you want to use. There are 4 pages of options for configuring the app all of which are described in the user documentation.

M0AWS - HAM Clock running on RaspberryPi Computer
M0AWS – HAM Clock running on RaspberryPi Computer

Once the configuration is complete the map will populate with the default panels and data. I tailored my panels to show the items of interest to me namely, POTA, SOTA, International Beacon Project and the ISS space station track. I was hoping to be able to display more than one satellite at a time on the map however, the interface only allows for one bird to be tracked at a time.

You can access the HAM Clock from another computer using a web browser pointed at your RaspberryPi on your local LAN using either the IP address or the hostname of the device.

http://<hostname>:8081/live.html

or

http://<ip-address>:8081/live.html

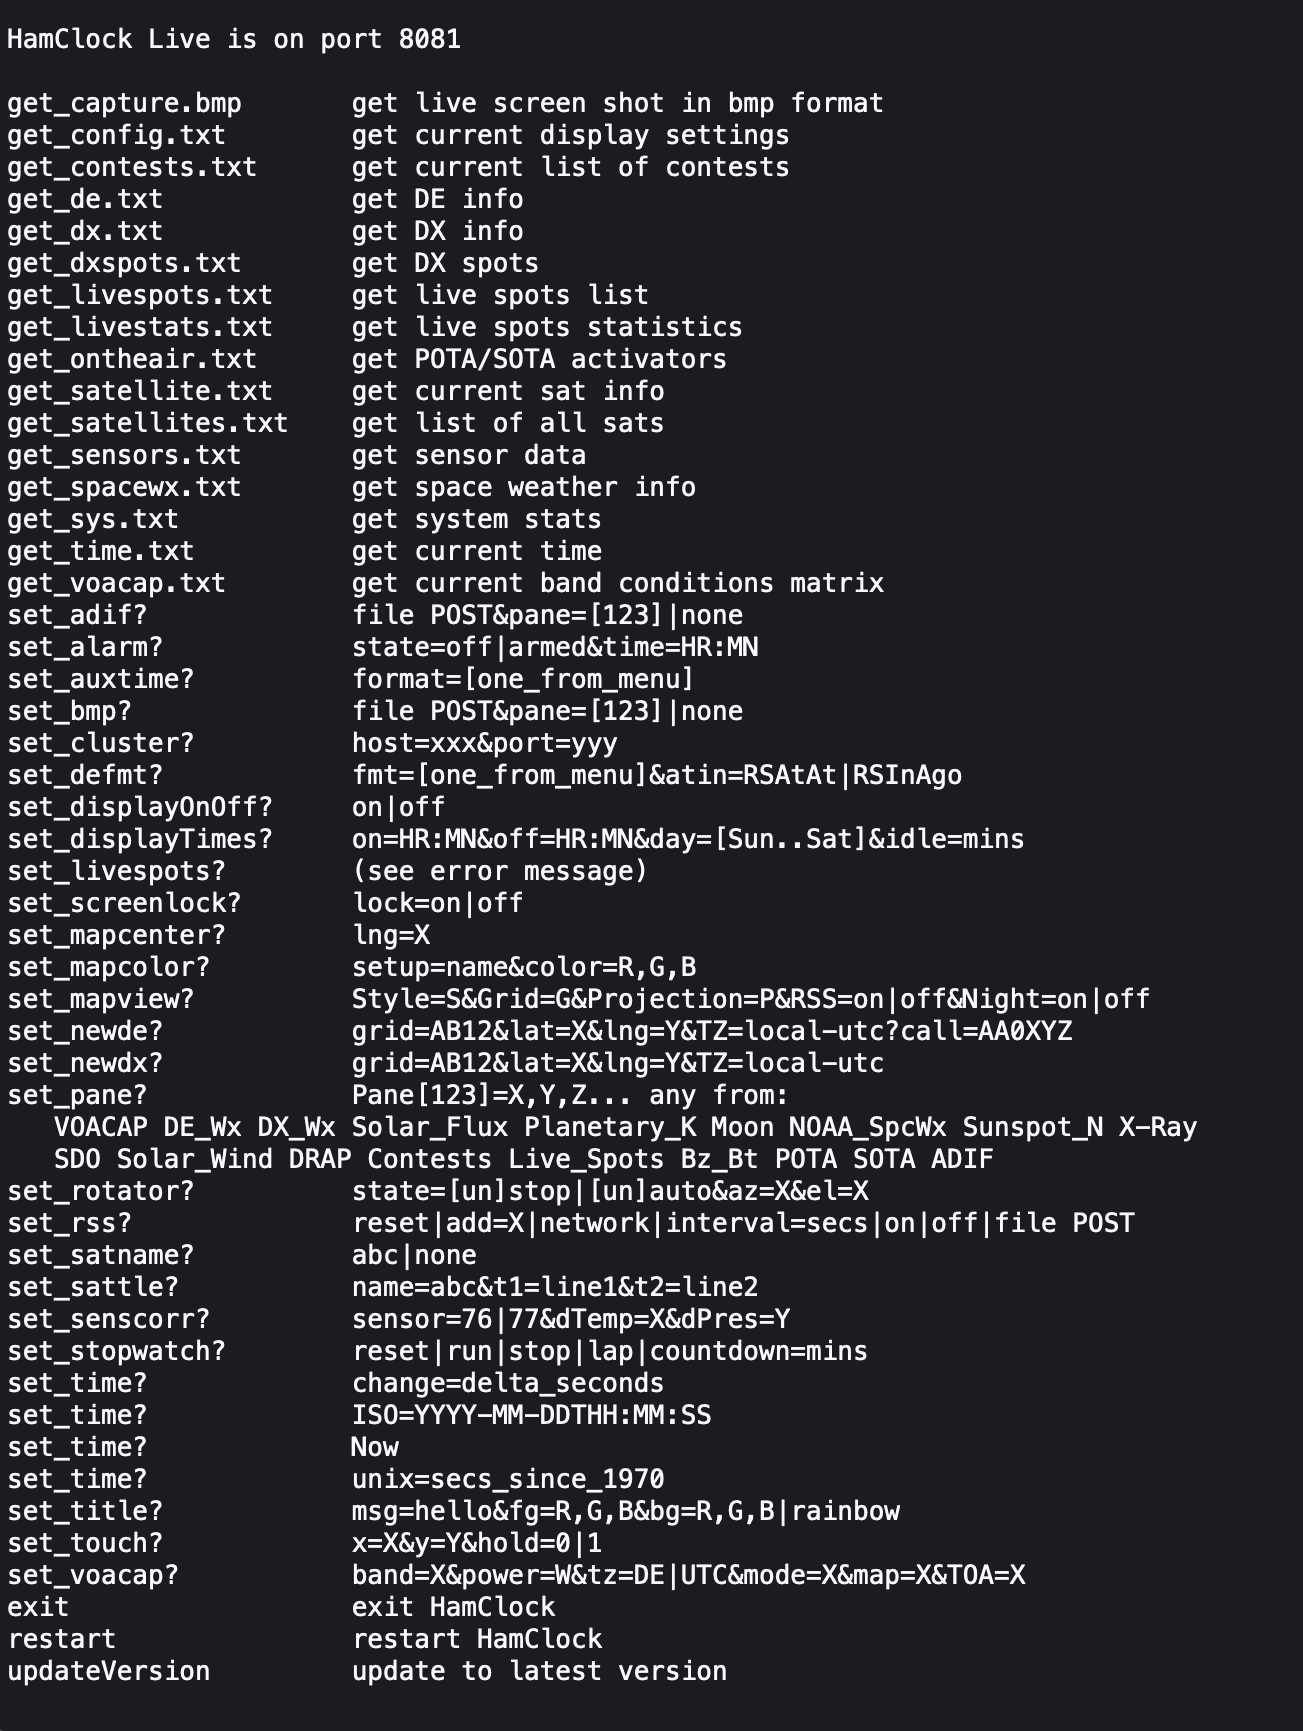
You can also control the HAM Clock remotely via web browser using a set of web commands that are detailed on port 8080 of the device.

http://<hostname or ip-address>:8080/

M0AWS - HAM Clock remote command set
M0AWS – HAM Clock remote command set

This is a great addition to any HAM shack especially if, like me you have an old HDTV on the wall of the shack that is crying out to display something useful.

More soon …

Loading Meshtastic Firmware onto Heltec ESP32 v3 Devices

The loading of the Meshtastic firmware on the Heltec ESP32 v3 devices is really simple if done via a Linux PC/RaspberryPi. There are of course other ways to load the firmware using a web browser that supports USB/Serial devices and this method is preferred by many however, being a Linux command line junkie I far prefer the simplicity of using the Linux command line to do the job.

So, how much experience with the Linux command line do you need?

In all honesty none at all. If you know how to use copy and paste then all you have to do is follow the simple steps I’ve detailed below. In reality it will only take a few minutes to do so, don’t be put off by the long article, I’ve just tried to cover everything and provide screen shots along the way.

To get started fire up your Linux PC/RaspberryPi and get yourself to the desktop. Next you will need to open a Linux command line terminal. This is often just called “Terminal” on most Linux desktop installations.

The first thing you need to do is check to see if you have python3 installed. This is done using the following command:

python3 --version

Running the above command you should see a result something like what is shown below.

Python3 command showing installed version

Next we need to check if pip3 is installed using the following command:

pip3 --version

If pip3 is installed then you should get a result similar to that shown below.

Pip3 command showing installed version

If your computer doesn’t have Python3 or Pip3 installed they can be easily installed from the command line. To install Python3 enter the following command into your terminal:

sudo apt install python3

You will be asked to enter your login password and then the installation will begin. You should see output in your terminal similar to that shown below.

Installing python3
Installing python3

To install Pip3 enter the following command into your terminal:

sudo apt-get install python3-pip

This will detail a long list of packages that will be installed on your computer, Enter Y to answer Yes and let the packages install.

M0AWS - Installing Pip3
M0AWS – Installing Pip3

You will see many messages scroll up the terminal screen such as getting, selecting, preparing, unpacking and setting up, this is all normal.

Once Pip3 is installed you should be dropped back at the command line with a terminal screen that looks something like the one below.

M0AWS - Pip3 install complete
M0AWS – Pip3 install complete

At this point you will now have Python3 and Pip3 available on your computer.

You are now ready to install the tool we are going to use to check your Meshtastic device is connected to your PC and install the firmware to it. (Do not connect your Meshtastic device to your PC just yet!)

Run the following command in your terminal to install the ESP Tool:

pip3 install --upgrade esptool

You will see an output from the installation process similar to that shown below.

M0AWS - Installing the ESP Tool
M0AWS – Installing the ESP Tool

Now that we have the ESP tool installed plug your Meshtastic device into your USB port on your computer and then run the following command to interrogate the device to find out what kind of device it is.

esptool chip_id

You should see the information about your device that looks similar to that shown below. This information should confirm the device type (ESP32) and which USB port it is connected on (/dev/tty/USB0).

M0AWS - Expected output from the ESPTool command showing device information
M0AWS – Expected output from the ESPTool command showing device information

Once you have this information you will need to download the firmware for your device from Github using the following URL:

https://github.com/meshtastic/firmware/releases

At the time of writing this I downloaded and used the v2.2.22.404d firmware which I have found to be extremely reliable.

In your terminal you now need to change directory (cd) into the Downloads directory where your downloaded firmware should be. (If you downloaded your firmware into another directory then you will need to cd into that directory). Use the following command to change directory into the Downloads directory.

cd ~/Downloads

Now we need to find the filename of the firmware we have just downloaded, we can use the list directory contents command to find the file using the simple command below.

ls -la firm*.zip
M0AWS - List firmware file name from the Linux command line
M0AWS – List firmware file name from the Linux command line

In the screenshot above we can see that the filename is called
firmware-2.2.22.404d0dd.zip.
We now need to unzip the file using the unzip command.

unzip firmware-2.2.22.404d0dd.zip

You’ll see lots of output from the unzip command about inflating files etc, this is normal.

Once the file has been unzipped you are ready to load the firmware onto your Heltec device. First you need to find the .bin file for your Heltec device. Use the following ls command to list the files available.

ls -la firmware-heltec*

This will list out all the firmware file options for the Heltec device as shown below.

M0AWS - List of Heltec firmware files
M0AWS – List of Heltec firmware files

The file you need to use for a new firmware installation on a Heltec v3 device is
firmware-heltec-v3-2.2.22.404d0dd.bin. (If you downloaded a different version then the version number in the file will be different).

Using the filename you found above enter the following command into your terminal.

./device-install.sh -f firmware-heltec-v3-2.2.22.404d0dd.bin

This will now clear down your Heltec device and will load the Meshtastic firmware. This will take a little time especially on slower computers like the RaspberryPi so, just let it run until it finishes. Do not interrupt the process whilst it is running.

Installing the Meshtastic firmware onto my Heltec ESP32 v3 using the Python command line tool

Once the firmware is loaded the Heltec device will reboot and you will see the Meshtastic banner on the OLED screen. Your device is now ready for configuration.

Now that you have Python3 and Pip3 installed you can load the firmware onto other devices just by downloading the firmware and then running the device-install.sh script file, you won’t need to install Python3 or Pip3 again.

If you want to update your device in the future to a newer version of the firmware then just use the update script and update binary file as shown below.

./device-update.sh -f firmware-heltec-v3-2.2.22.404d0dd-update.bin

That’s it, you are now a Linux Command line junkie!

More soon …