Joining the 3D Print Revolution

For some time I’ve been considering purchasing a 3D printer so that I can create parts for my HAM Radio projects. The issue has always been, what printer to buy?

Having searched online, watched many YouTube videos and endless reading I ended up even more confused and no closer to making a decision. In the end I decided to step away from the idea for a while and see where things went.

Some time much later I ventured back to the subject and discovered the Bambu Lab 3D printer range. These were getting rave reviews and were positioned as being ideal for the total 3D printing beginner.

Once again I read as much as I could about the Bambu Lab printers, watched endless videos and searched online for supplies, spare parts etc to ensure they were readily available.

Eventually I had all the boxes ticked.

  • Relatively easy to use software
  • MacOS/Linux supported
  • Can print using the filament types I need for my projects
  • Good size print plate
  • iPhone App
  • Wireless connectivity
  • Built in camera for time-lapse videos
  • Multi-colour filament delivery system
  • Sensibly priced filament
  • Readily available replacement parts
  • Active Eco System and community

Looking at all the current 3D printers available in the Bambu Lab range I decided to purchase the A1 Combo model. This has a 256 x 256mm build plate, 4 filament feed print head and the filament Automatic Management System (AMS) that makes multi-colour printing a breeze.

With the decision made all I had to do was find a supplier. Strangely enough buying direct from Bambu Lab gave the best price and with the £10 voucher and 28% off of filament bought at the same time as the printer it was a no brainer.

£528 later I had 10 rolls of filament and an A1 Combo 3D printer winging it’s way to me.
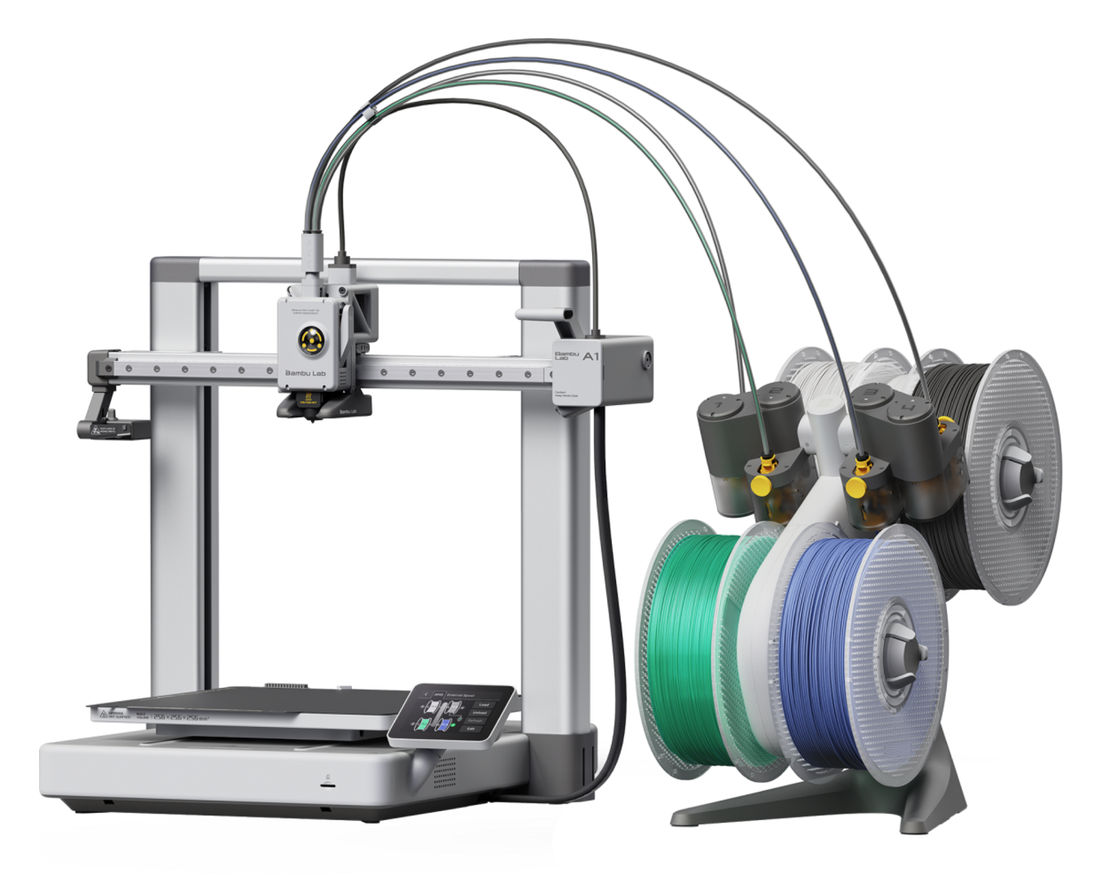
Bambu Lab A1 Combo 3D Printer

2 days later our local DPD delivery driver arrived with 2 large boxes and a comment about how heavy one of the boxes was.

Upon opening the printer box I found it was extremely well packed. The printer comes in a partially assembled form and requires some assembly by the end user. All the parts are really well labelled right down to each packet of screws being labelled with their exact use. All the tools needed to assemble the printer are included as is the easy to follow manual.
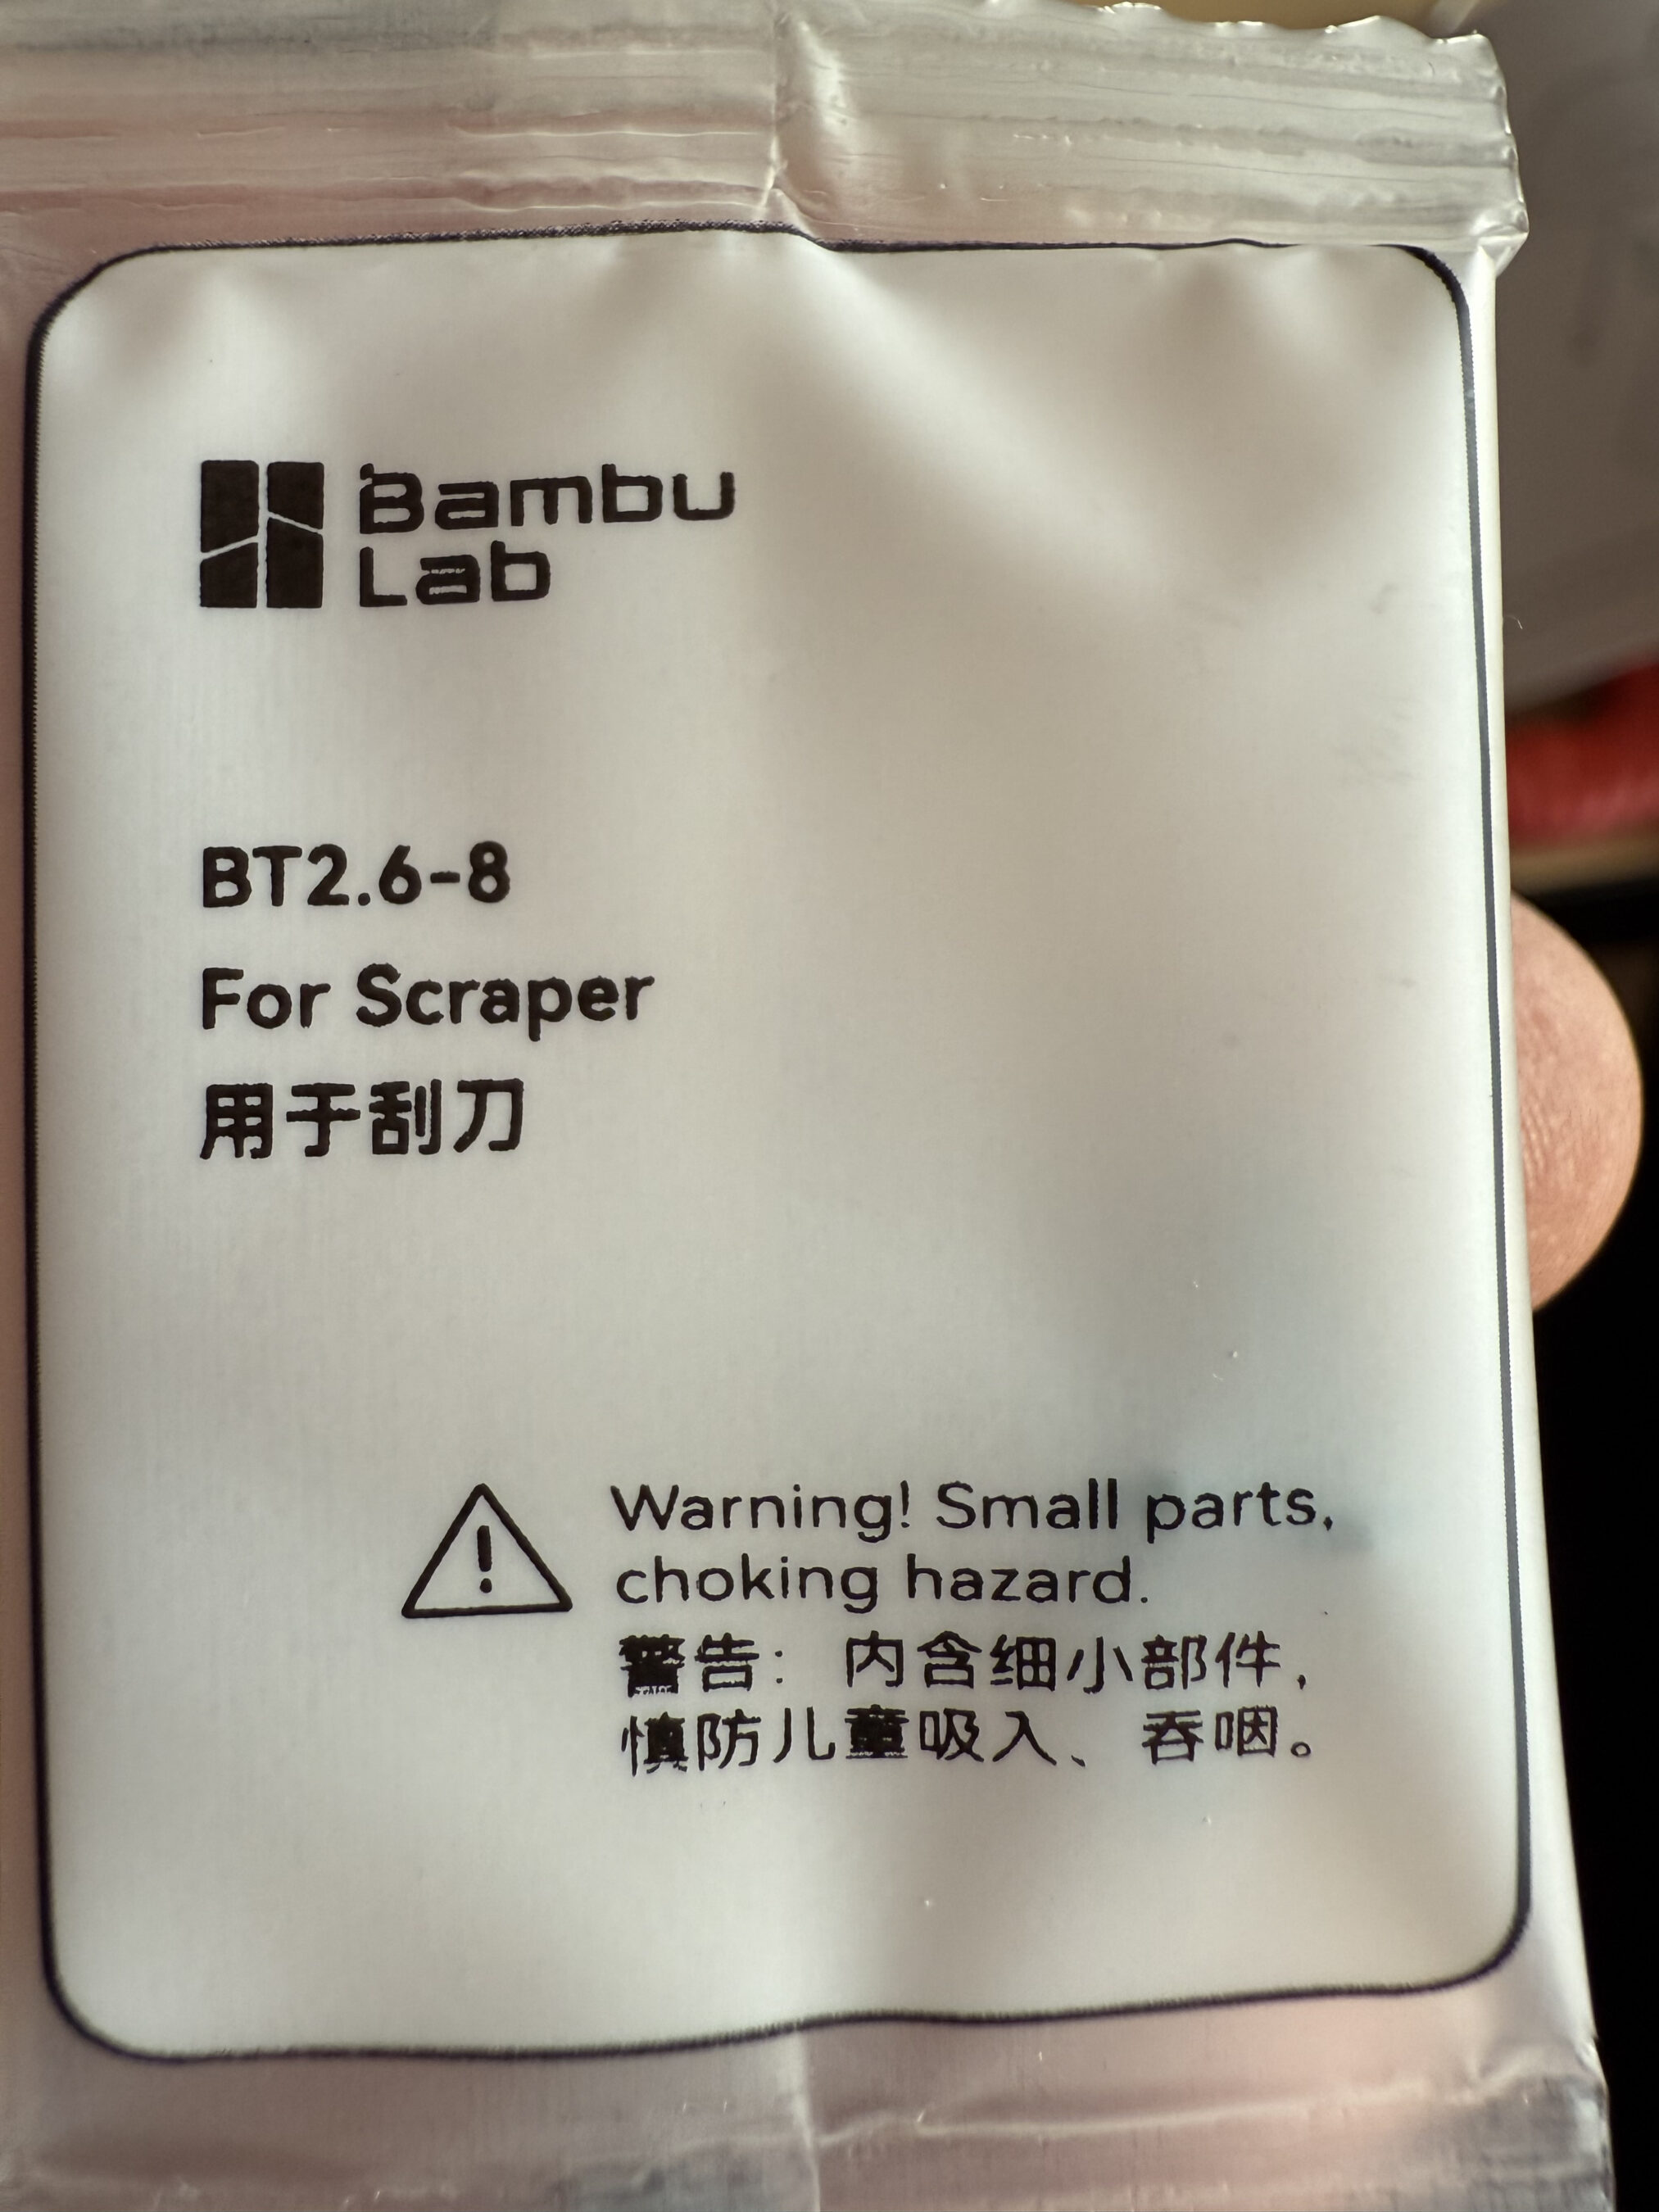
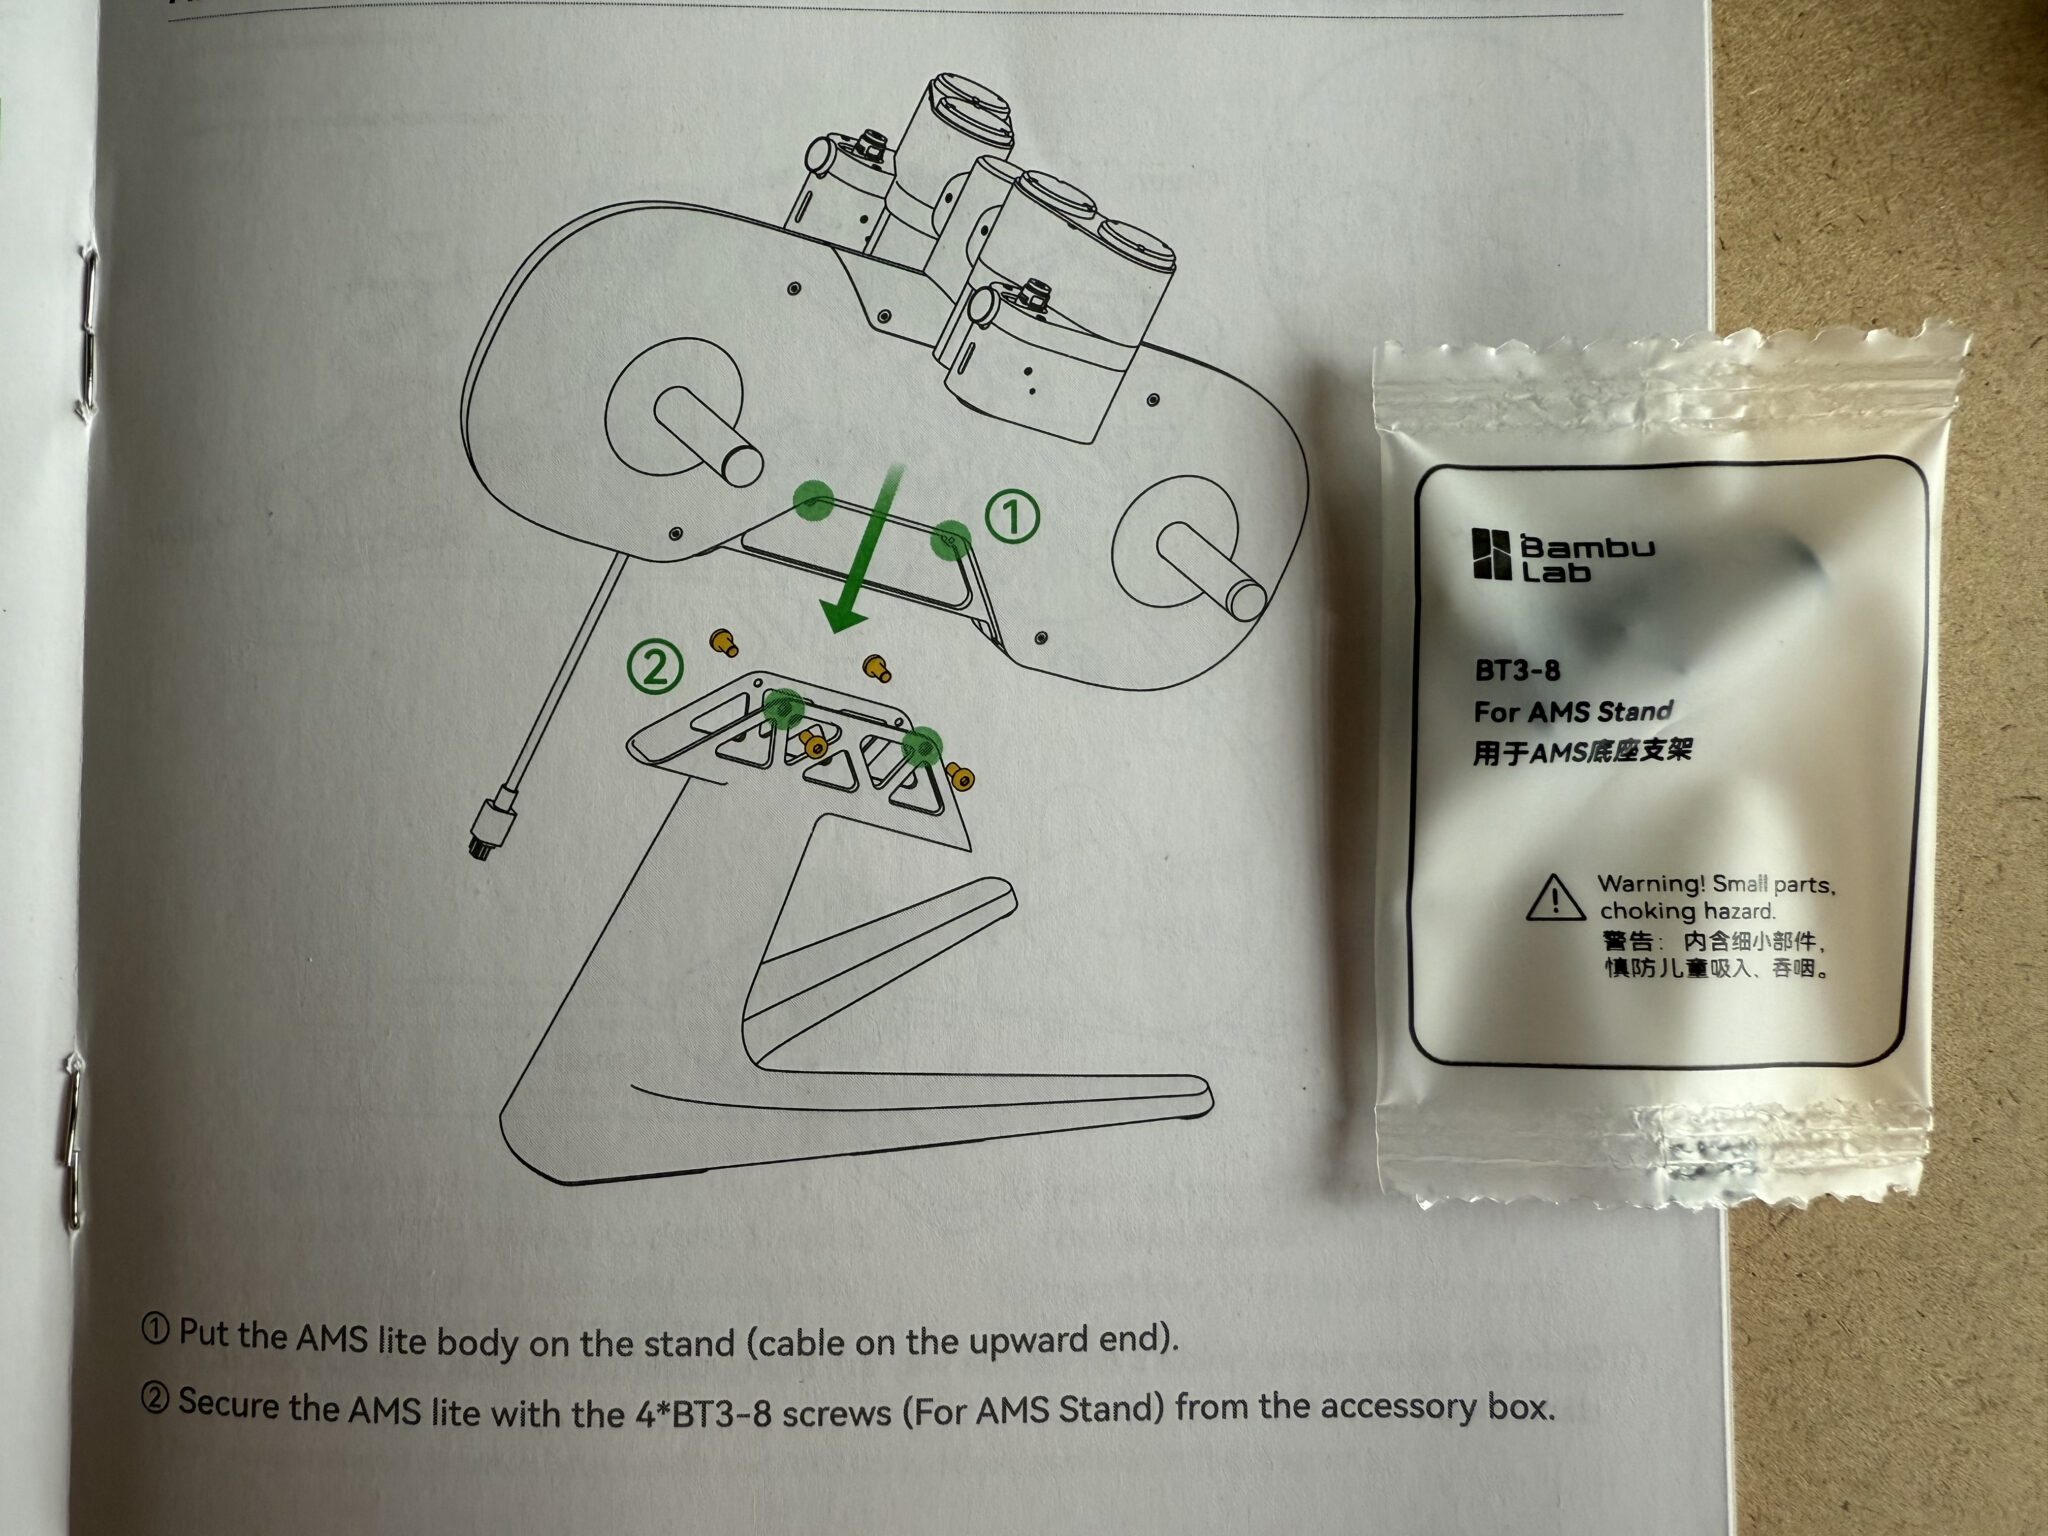
Another thing I really liked about Bambu Lab is that they supply you with screws for things that aren’t in the box, like the scraper screws shown above. At first I thought this was a bit weird but, in reality this makes complete sense as printing your own tool set is a great introduction to making your first prints.

Next I attacked the heavy box, this contained the 10 reels of filament I’d purchased at the same time. I’d ordered a good assortment of colours that would keep everyone in the family happy.

Installing the BambuStudio software on my MacBook Pro was a breeze. Using the account I setup at purchase time I was soon hooked into the Bambu Lab Makerworld community.

I immediately found the tools I needed to print and set about making my first 3D prints. The software has a lot of functionality, especially when it comes to the designing of your own objects. It’s fair to say the initial learning curve is vertical however, there are some great videos on YouTube on printing downloaded objects using the BambuStudio software.
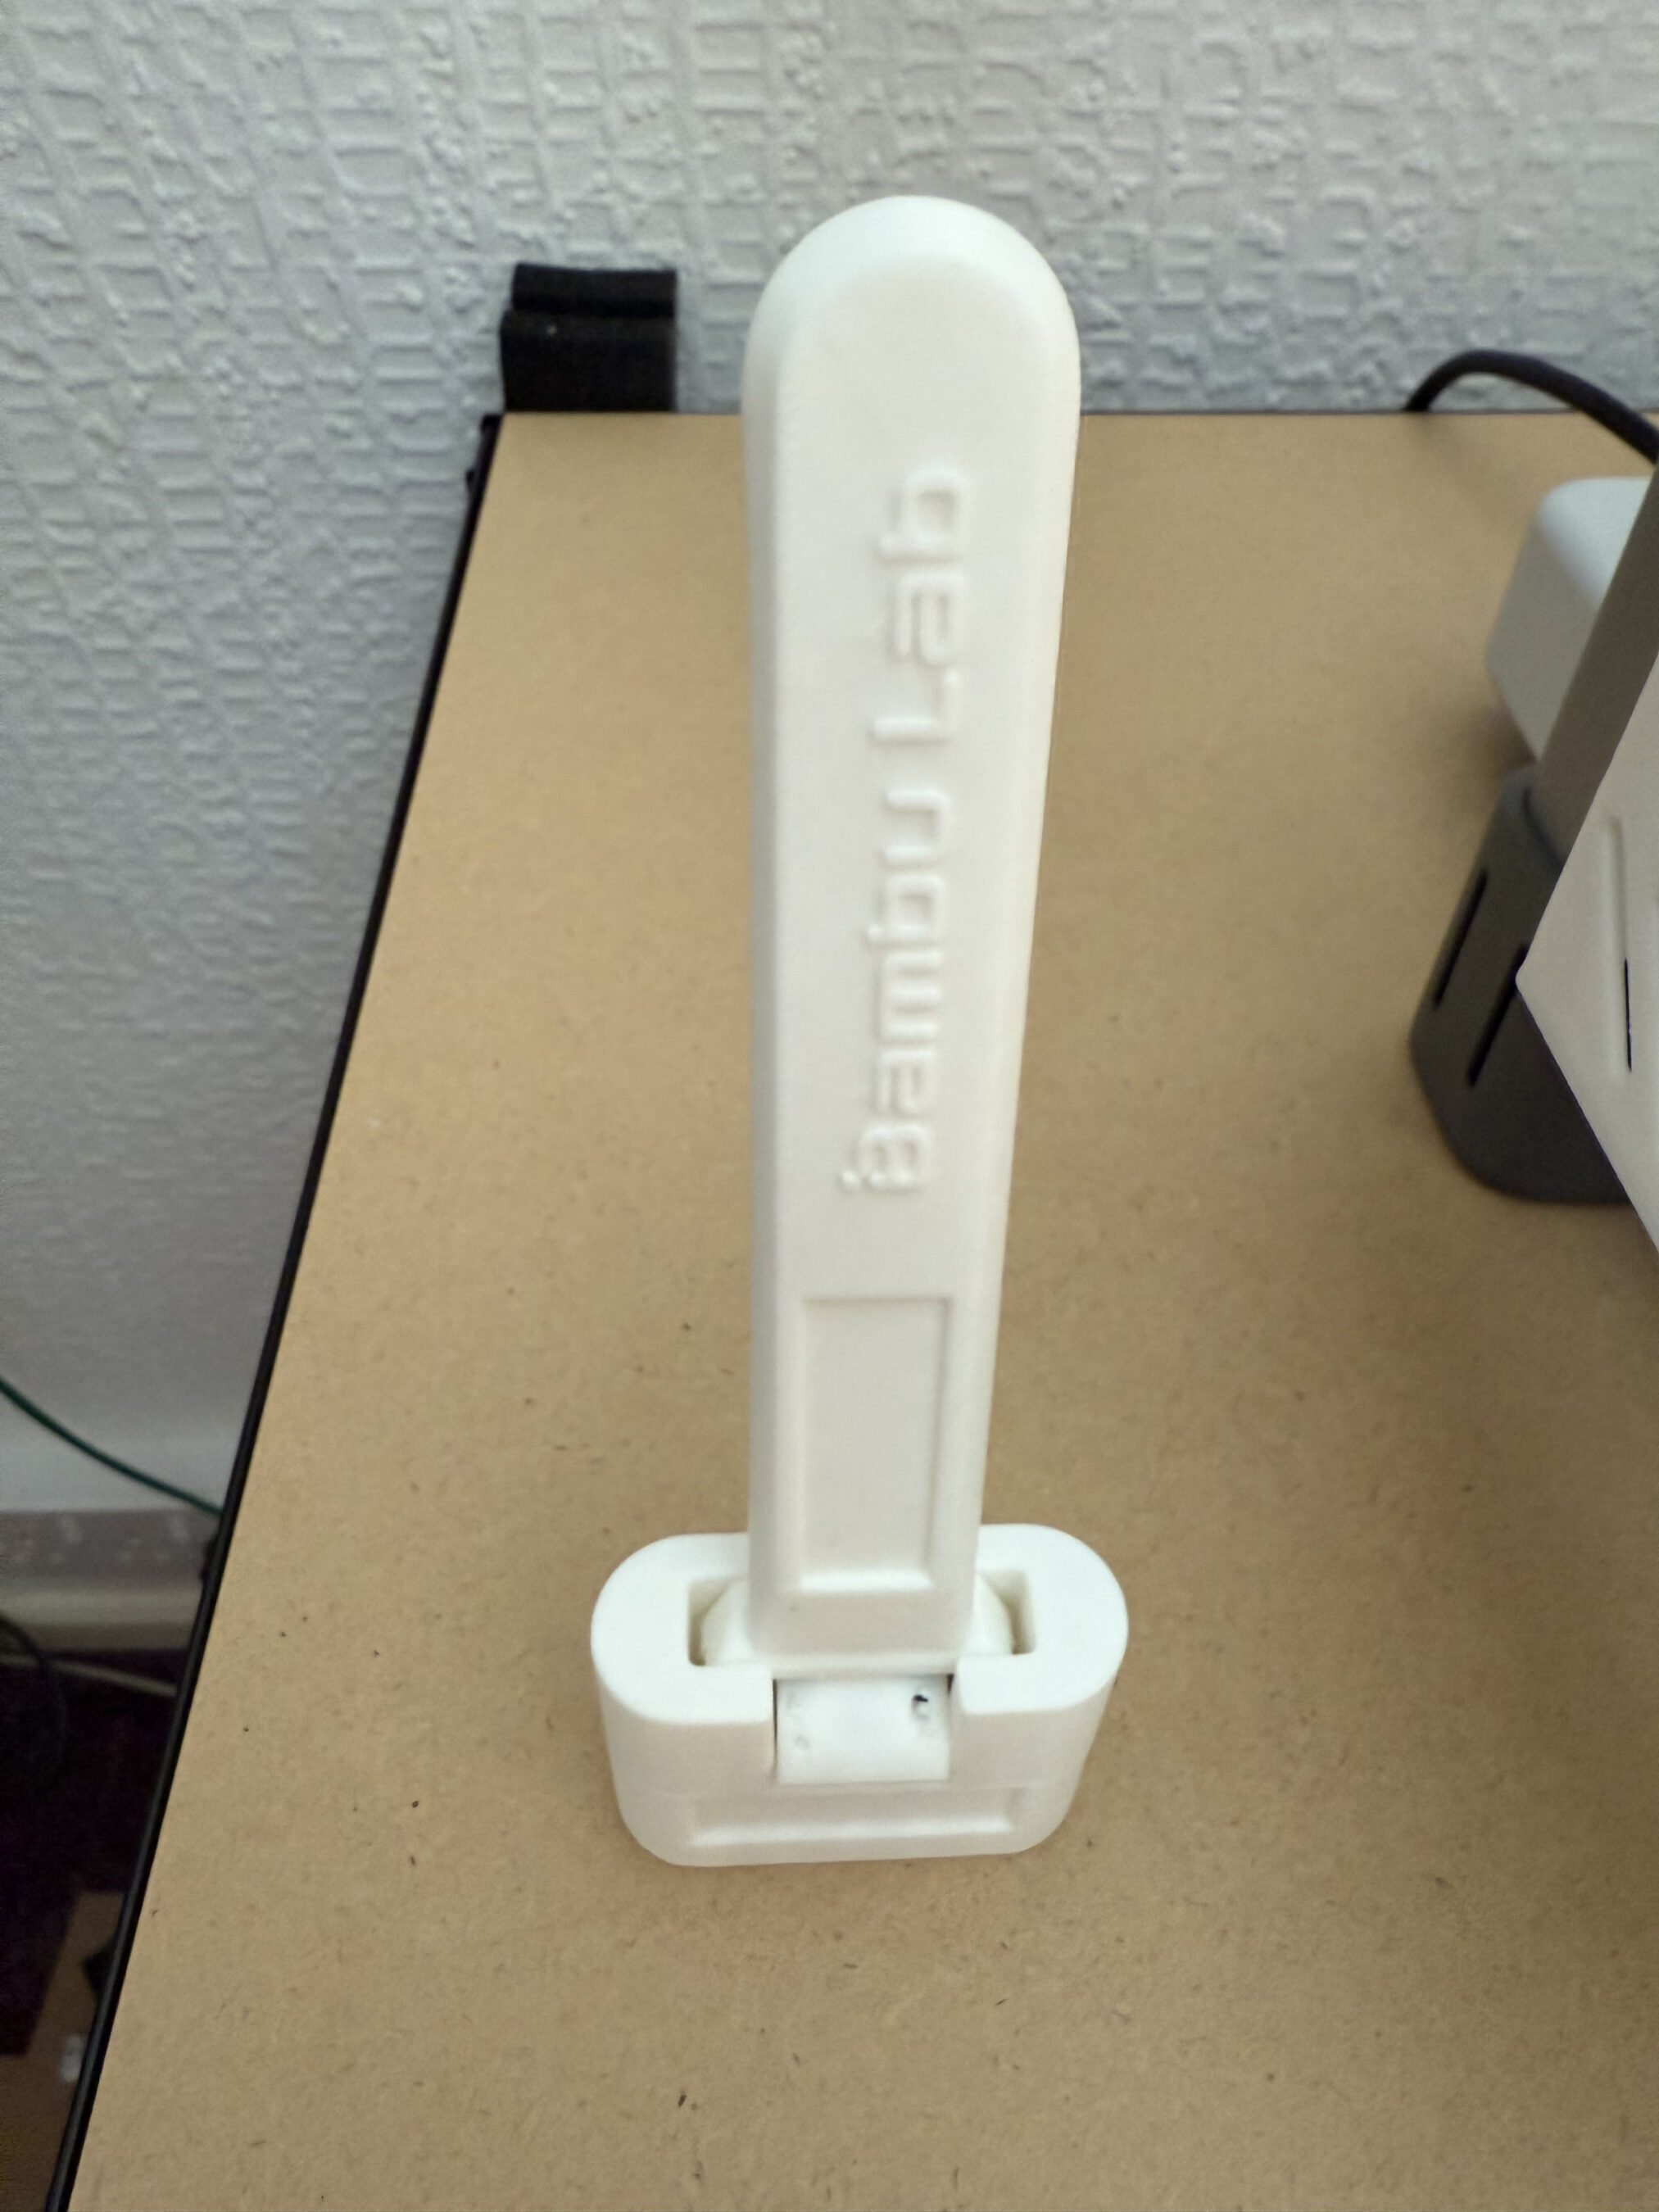
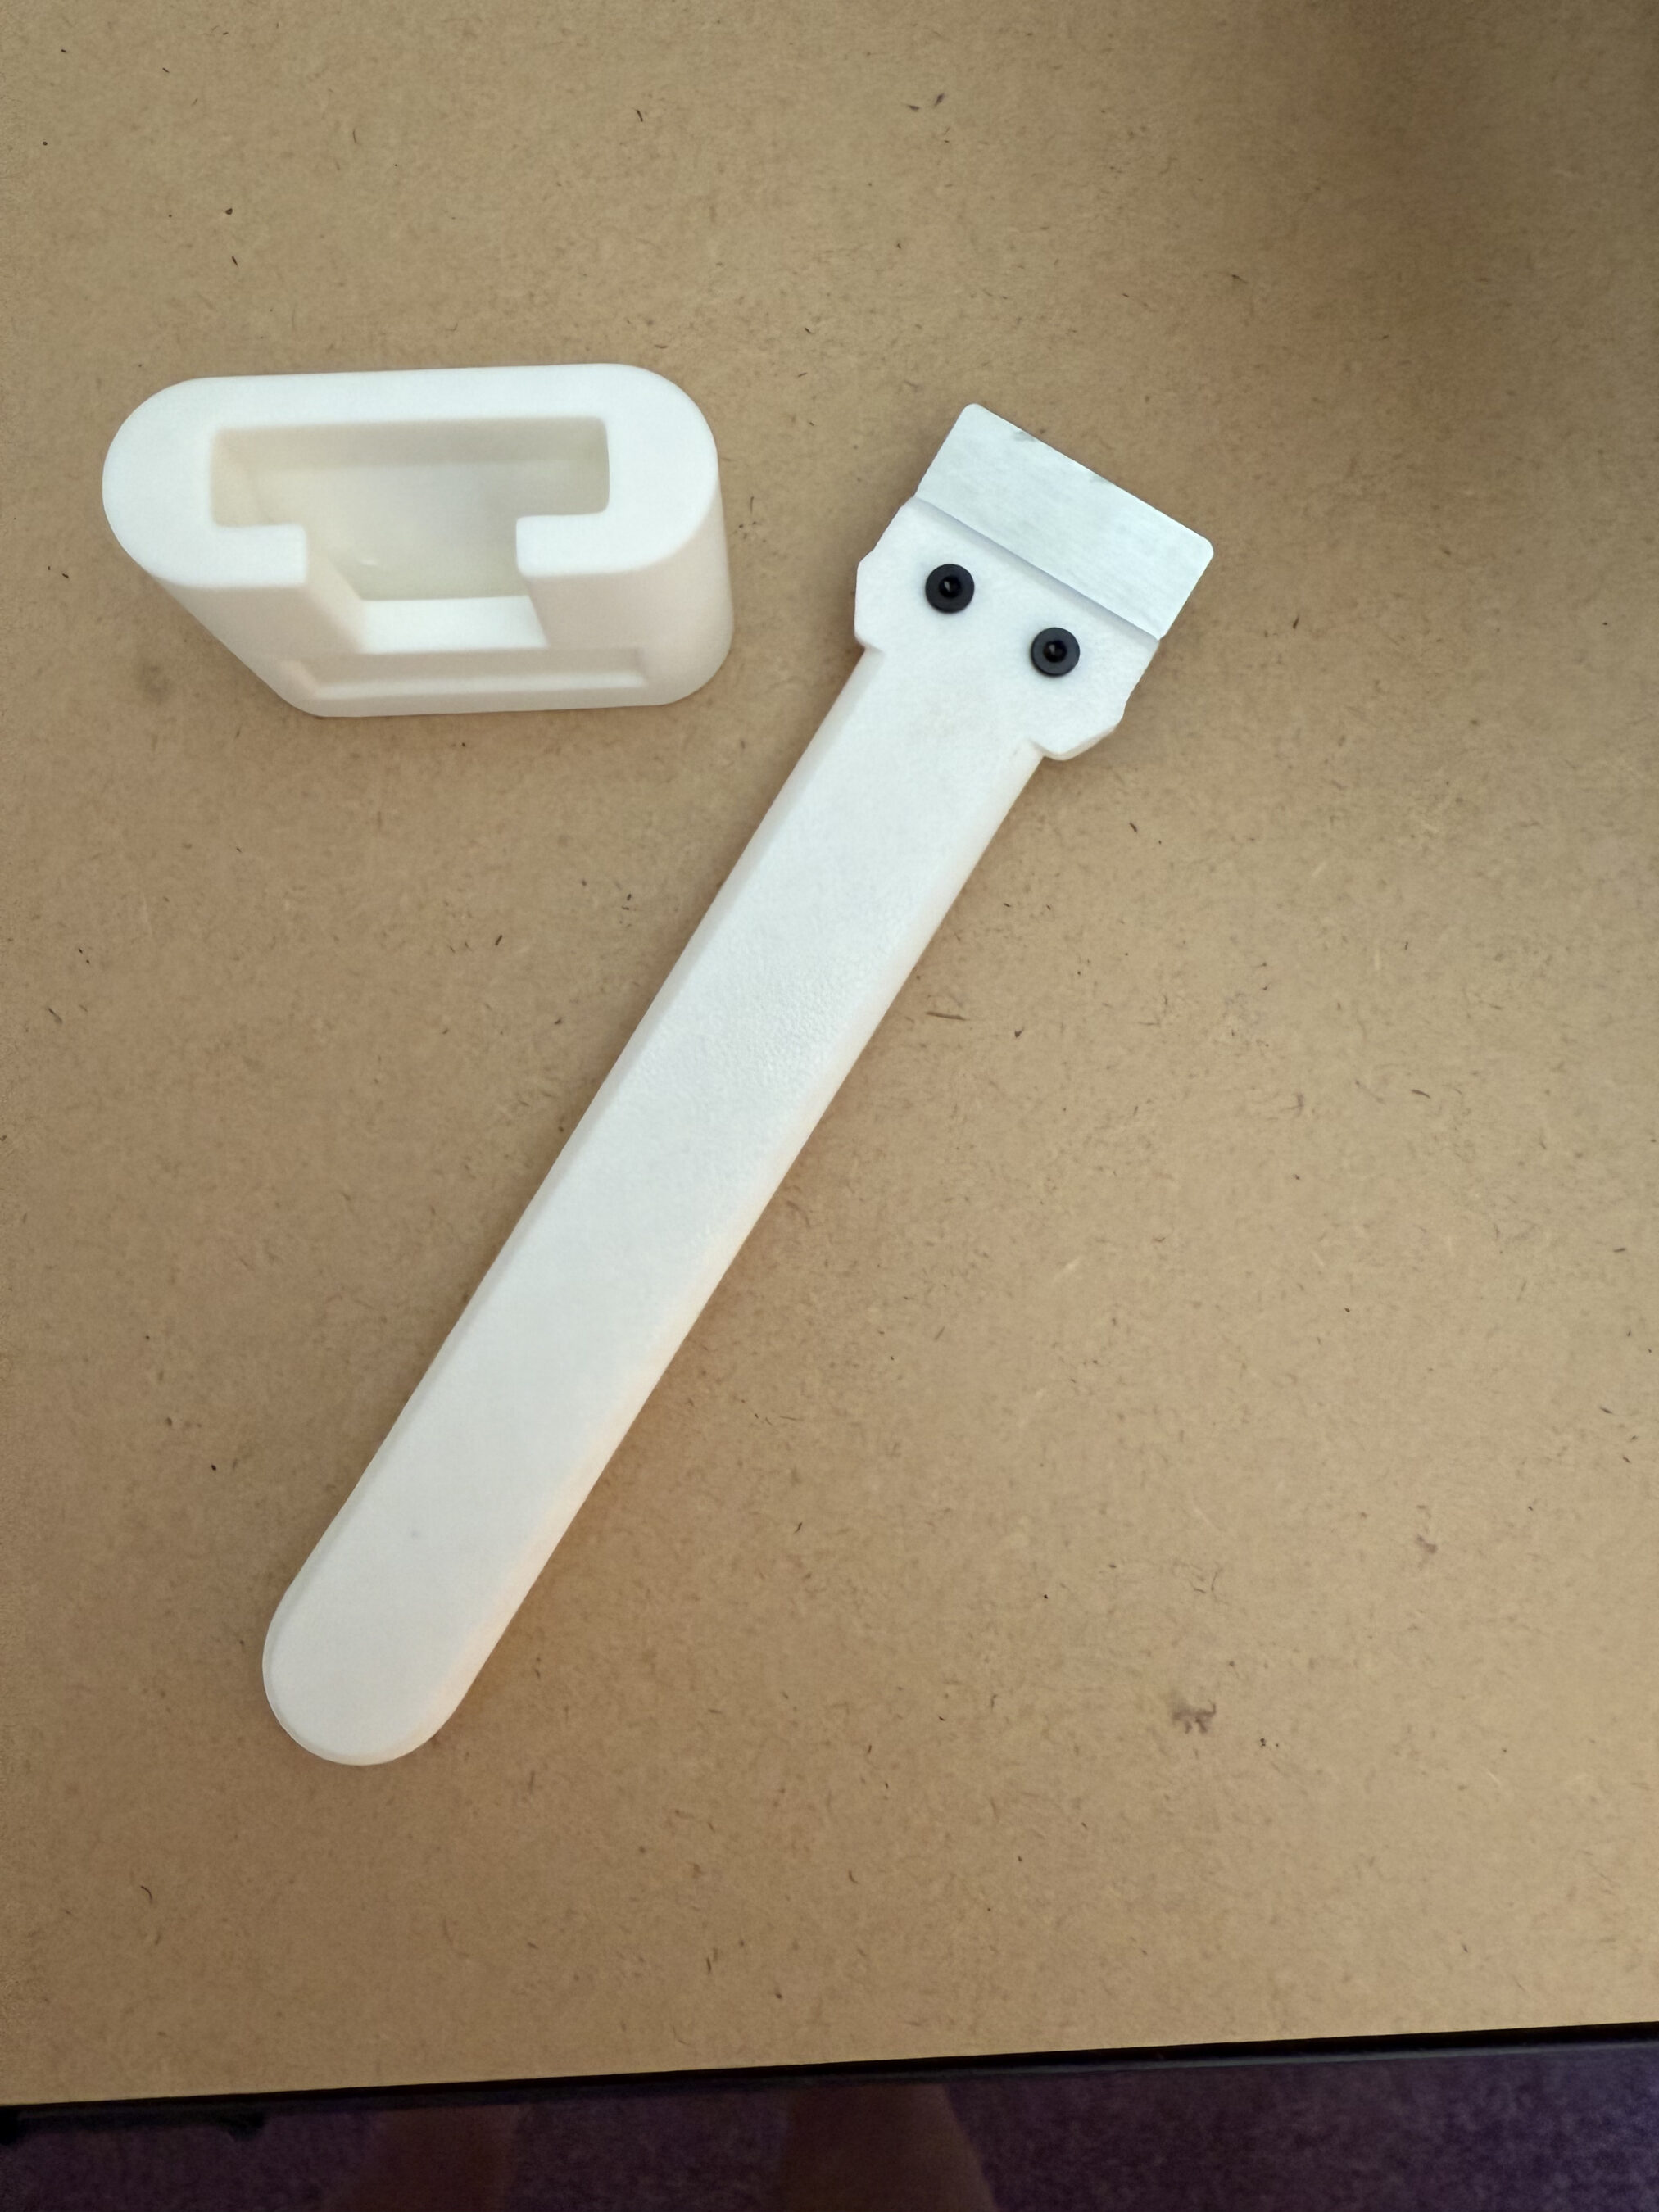
Whilst searching for 3D Print tools on the MakerWorld I stumbled across this really neat filament waste collector that fits nicely onto the X axis support. During the print there is a small amount of waste filament, especially if you are printing a multi-colour object as the print head has to be purged each time a new colour is required. Out the box there is nothing to catch the waste filament and so, it ends up on the floor. Fortunately the MakerWorld community resolved this issue with a multitude of options for collecting and storing the waste, all of which you can print yourself.
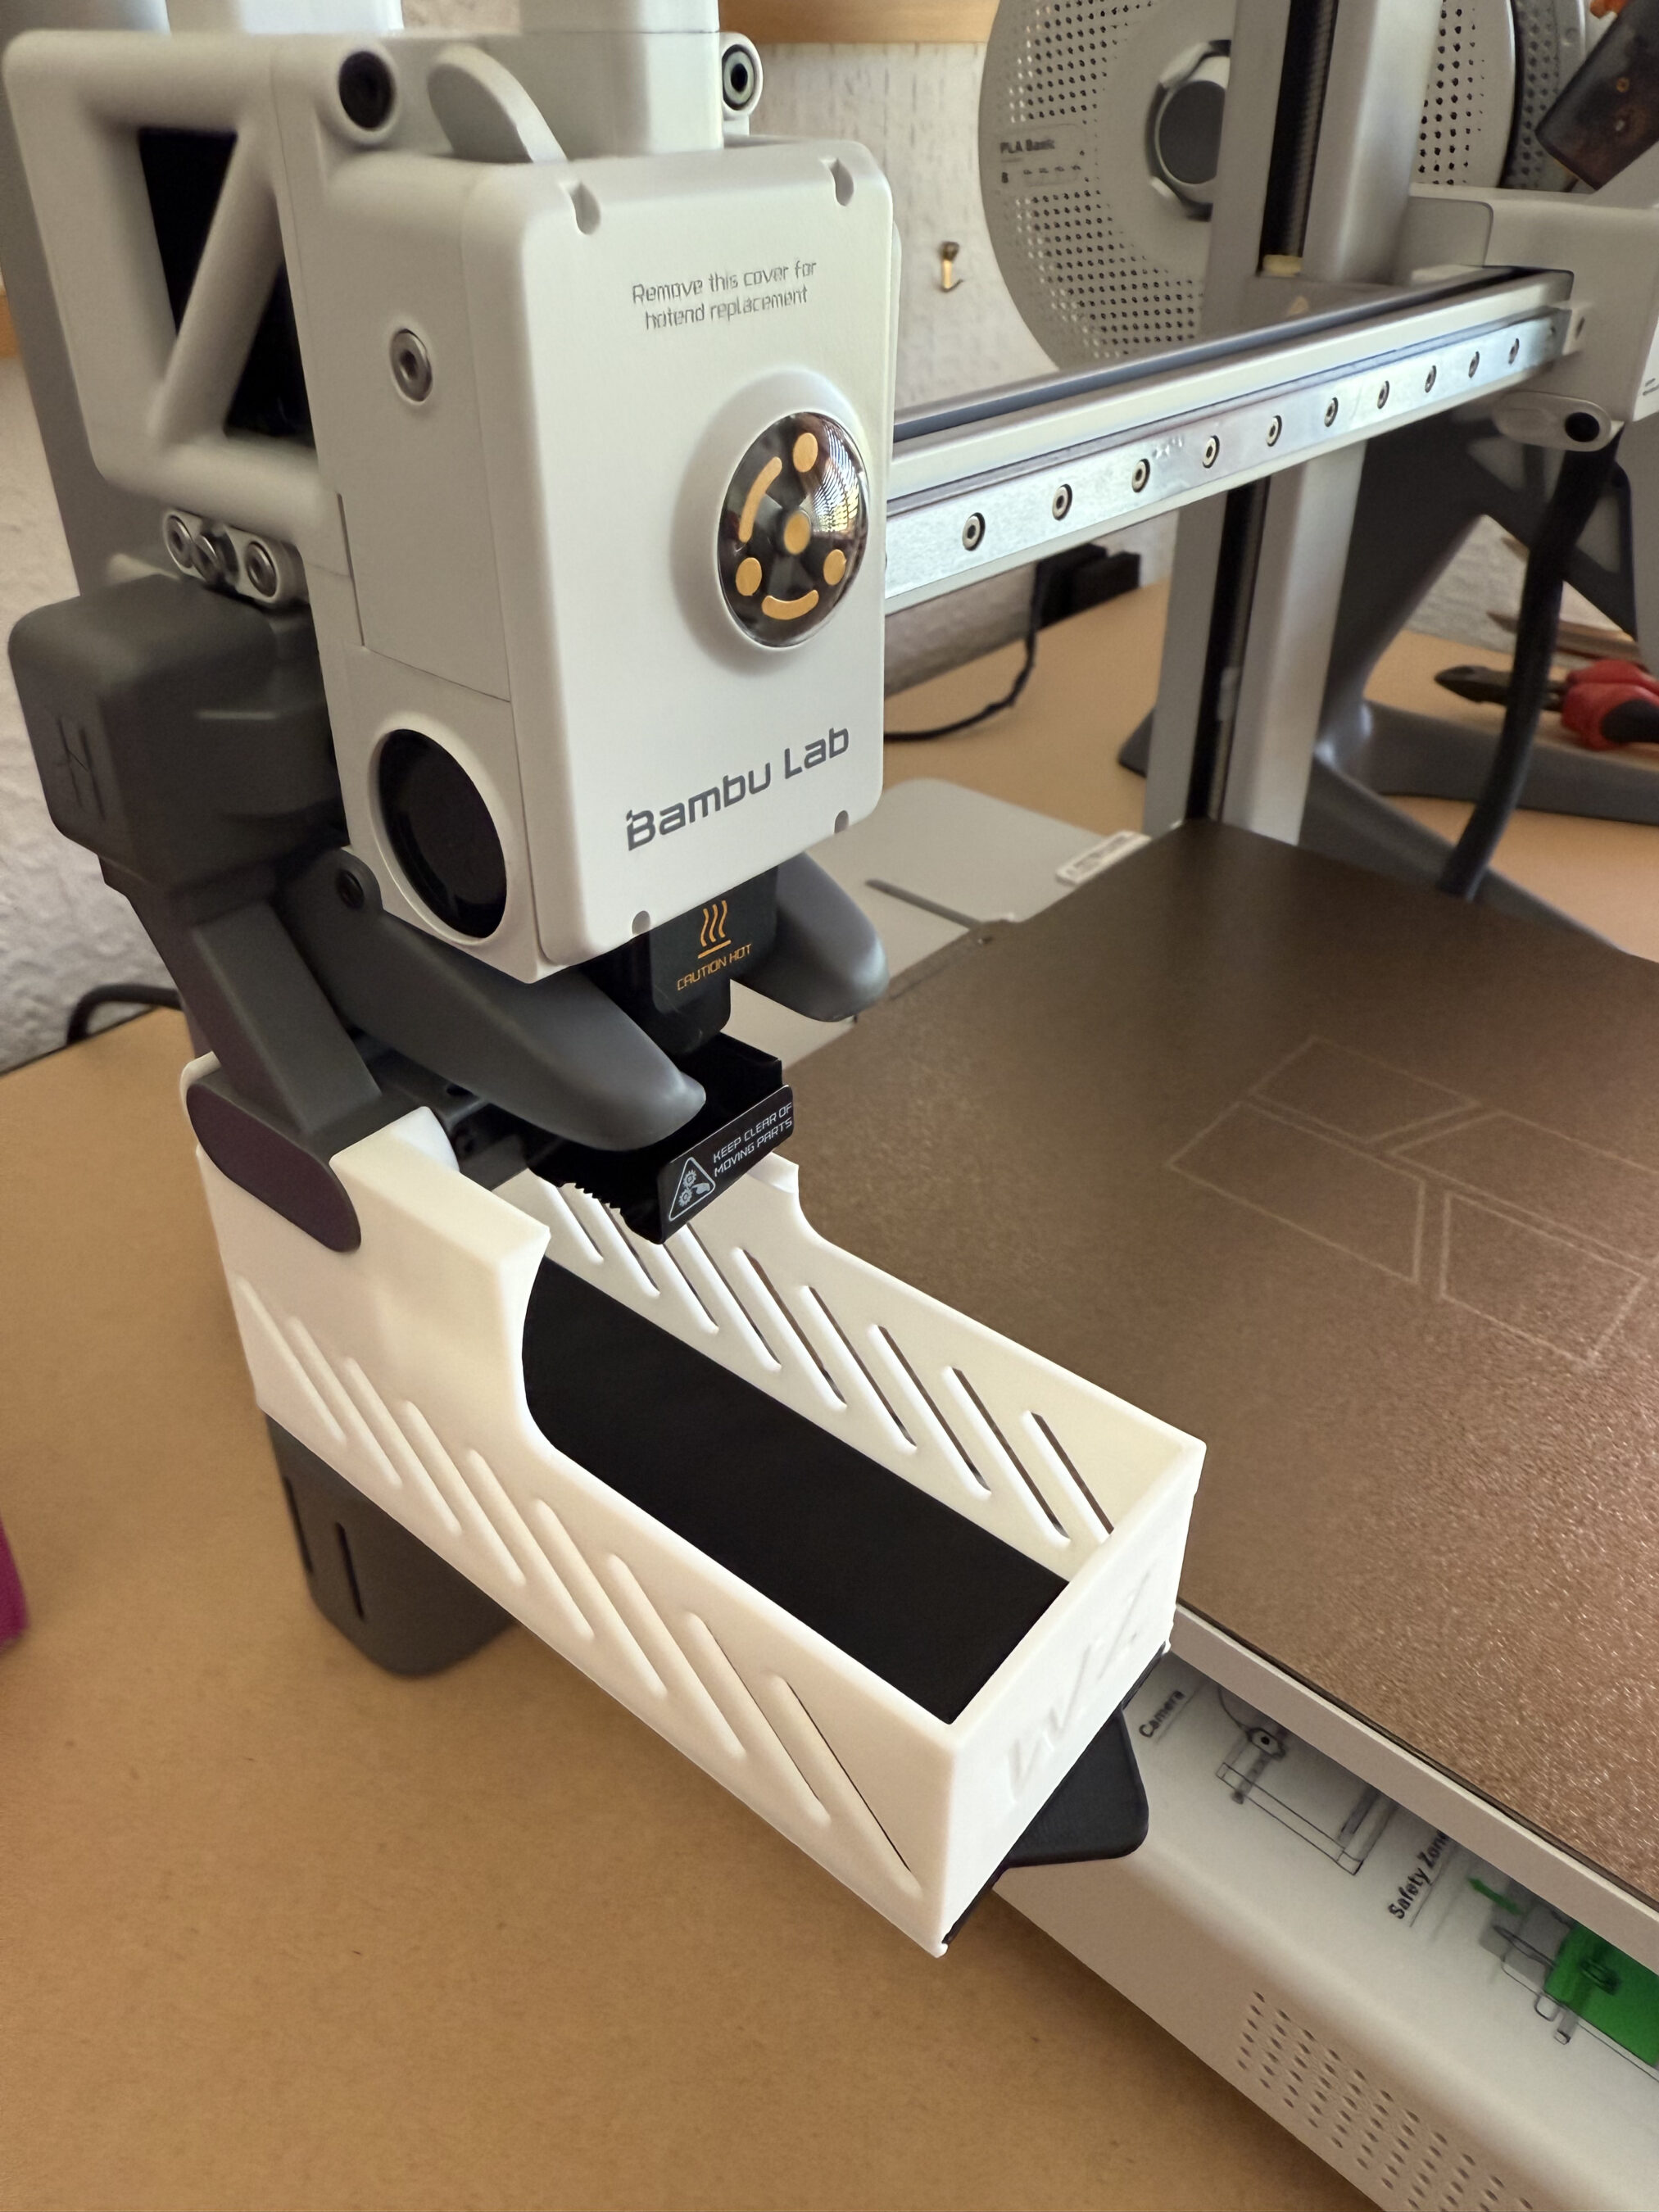
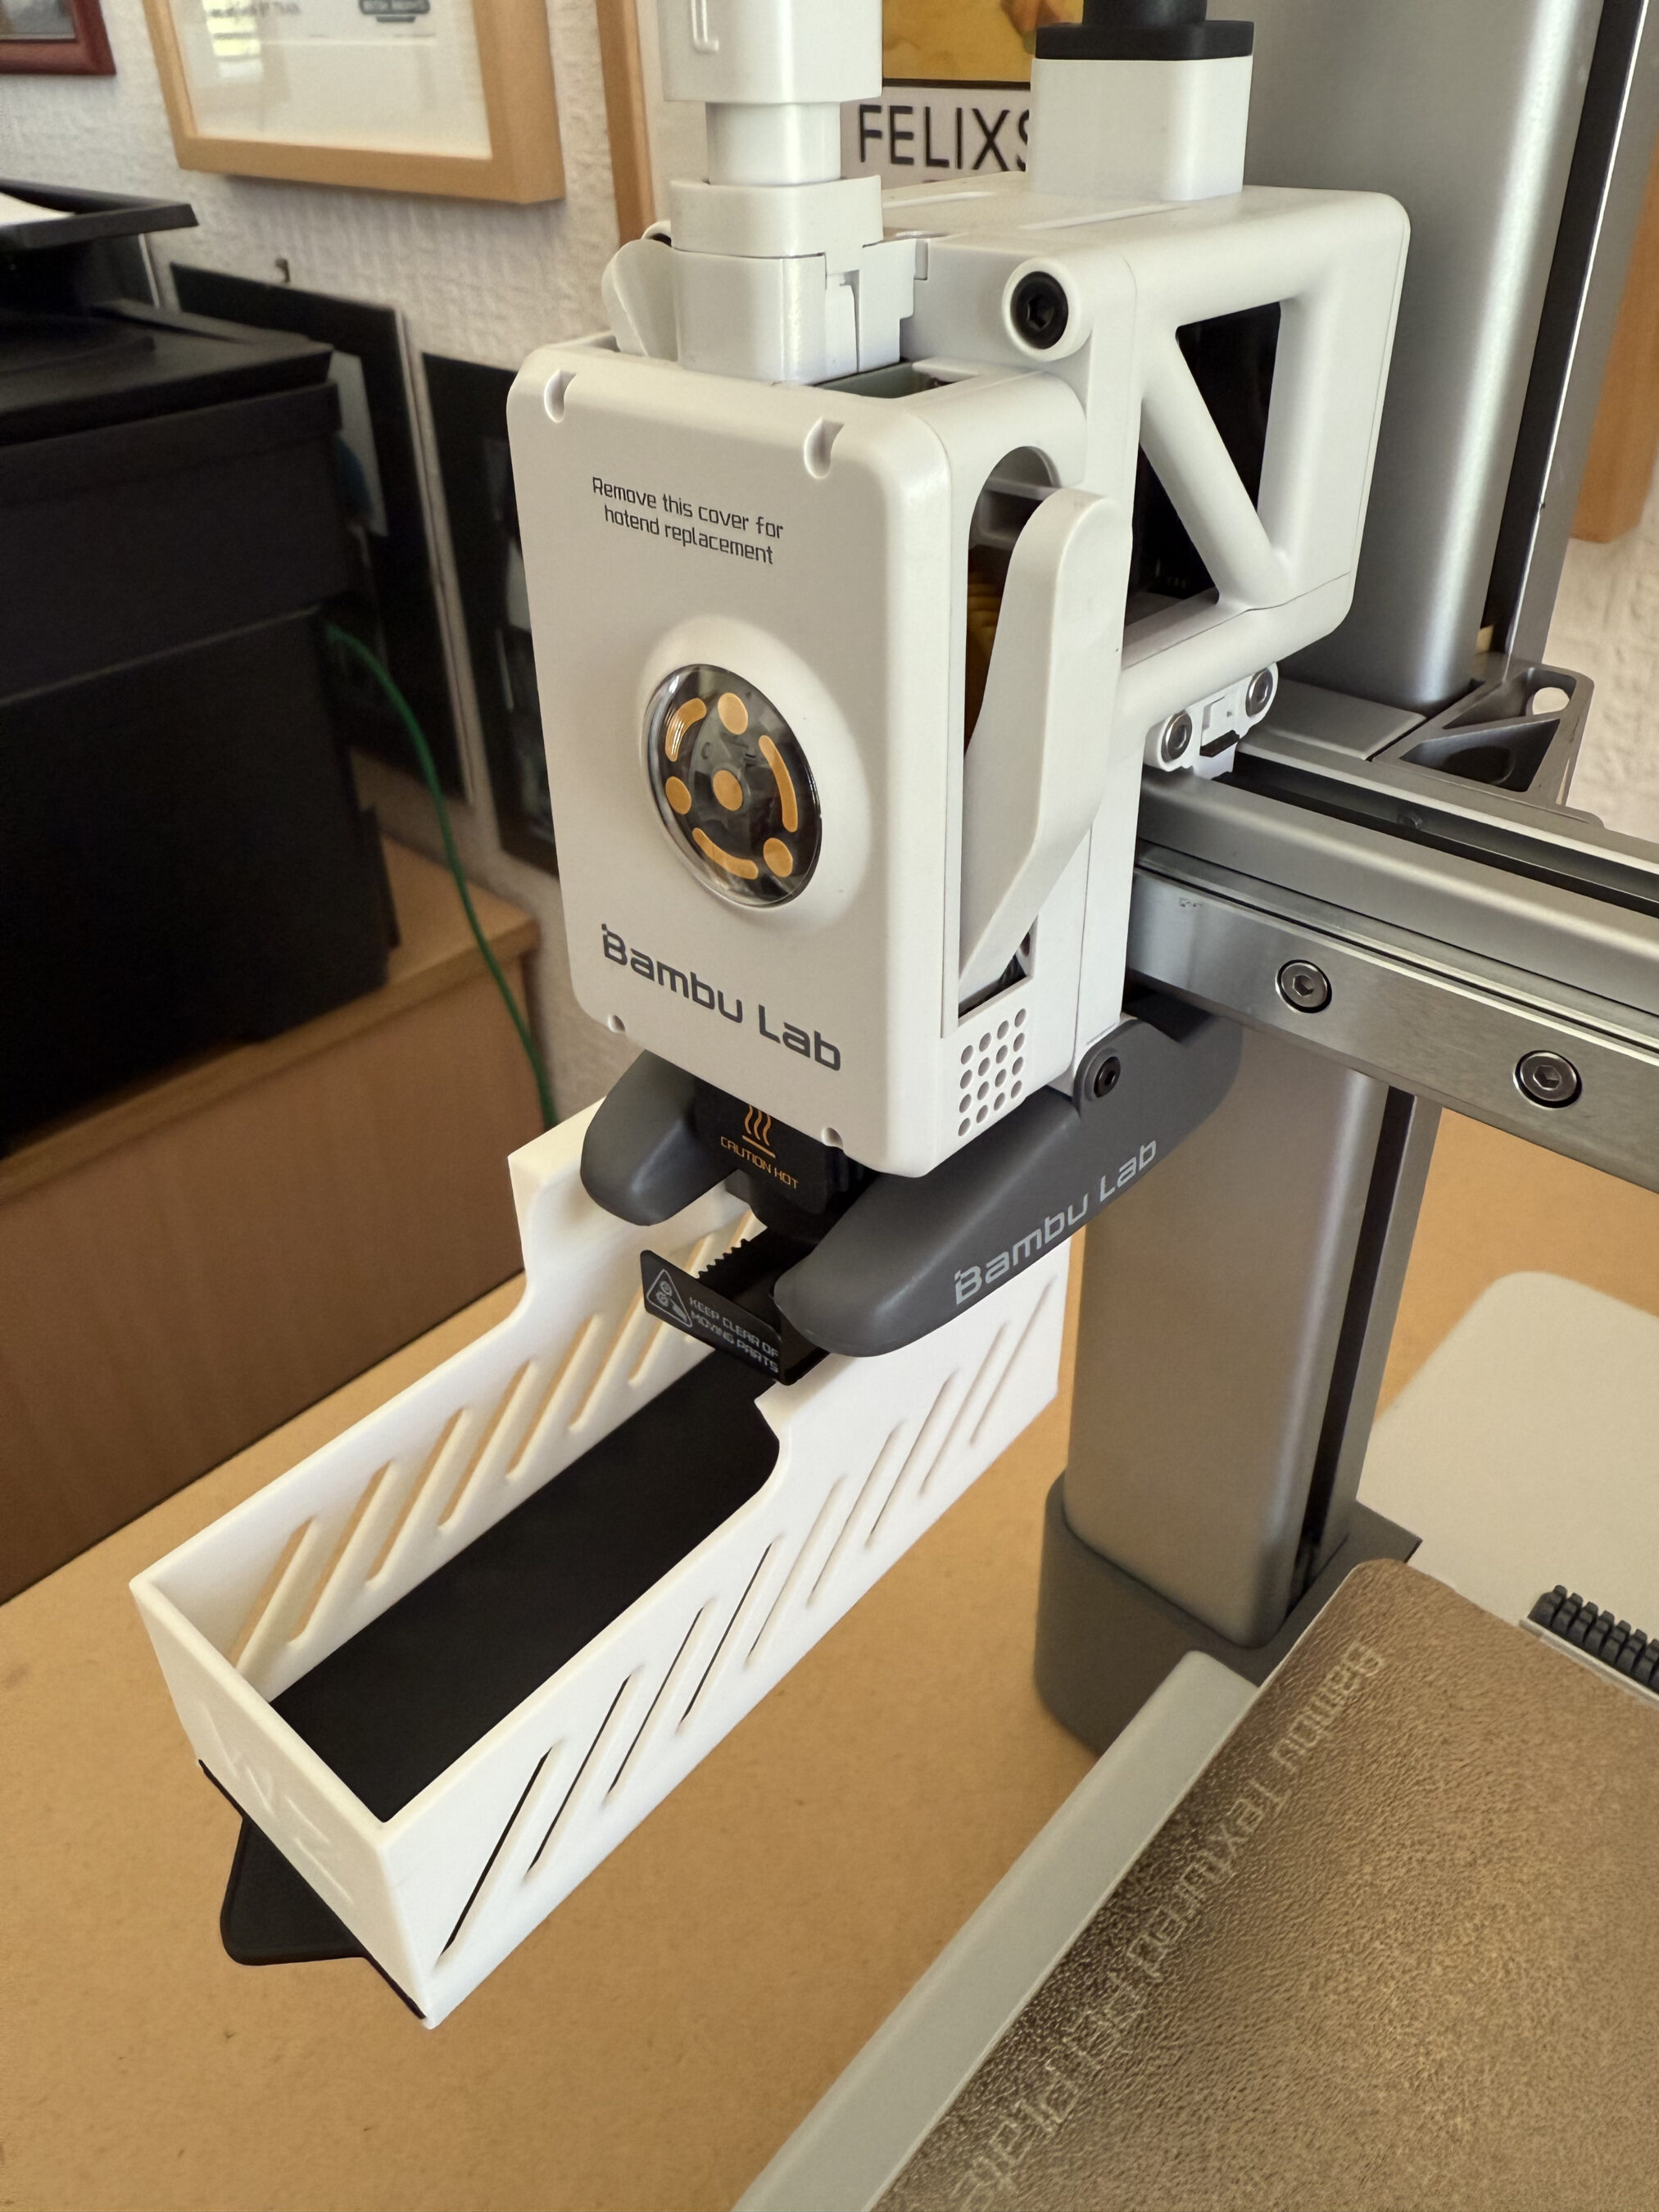
The print speed is incredibly quick, much quicker than I ever imagined and it’s addictive to stand and watch the print take form right in front of your eyes.

Printing an iPhone Stand for my sister-in-law

Once I’d printed the necessary tools and a few downloaded iPhone stands for the family I set about looking at designing my own objects.

The Bambu Studio software does have the capability to design objects built in but, the learning curve is vertical and there are very few videos on YouTube showing how to use the object creation section of the software. This lead me to look for an alternative 3D CAD package that had tutorials on how to create 3D print objects. After a little searching online i found that Tinkercad has a great range of tutorials online to get people started with designing their own 3D print objects.

In no time at all I had an account created on the tinkercad site and was going through the online tutorials to learn how to use all the functionality offered in the free tier.
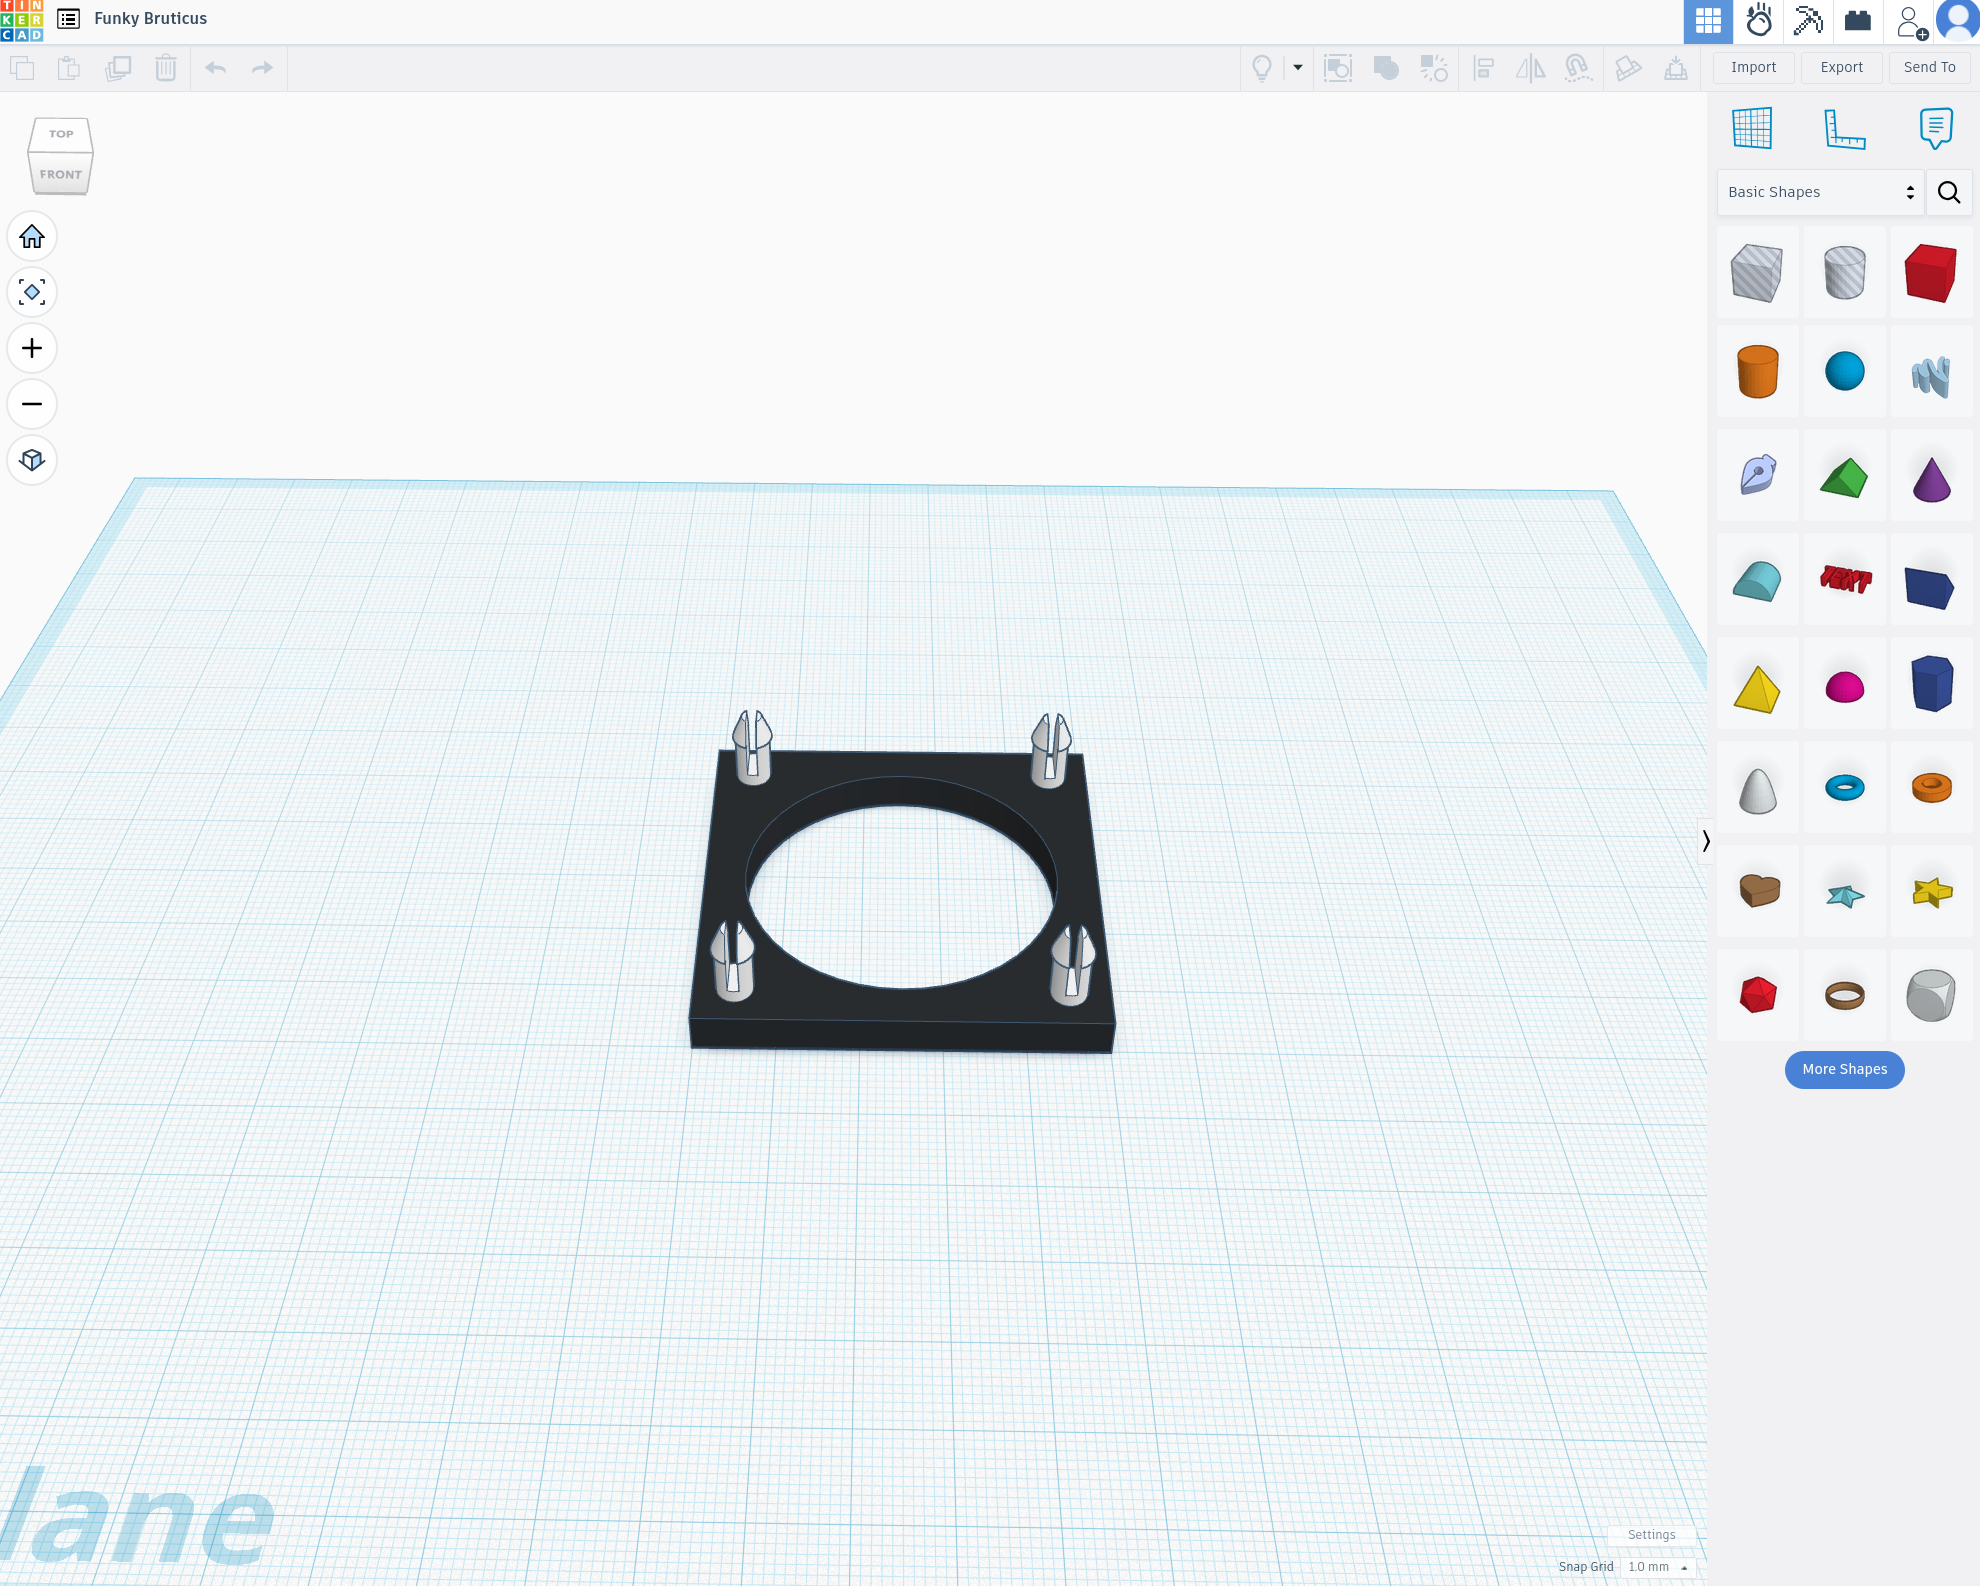
TinkerCAD - Designing a cooling fan mount
TinkerCAD – Designing a cooling fan mount

The online tutorials are very good and move along at a good pace with interactive examples that show you how things work. Once I’d completed the tutorials I dived straight into designing some objects of my own.

I’ve still got a lot to learn about 3D printing but, I have to say that TinkerCAD really does simplify the whole design process. Once my object designs were complete, all I had to do was export them in .stl format and then import the STL file into Bambu Studio and send it to the printer.

So far my prints have come out great and I’ve been really impressed with the quality of the finished articles.

I’ve now started on my list of HAM Radio 3D print projects and will document my progress over the next few weeks and months as I progress.

More soon …
AllStarLink Control Dashboard

Ever since I built my RaspberryPi/SHARI AllStarLink node I’ve had to manage connecting/disconnecting to/from other nodes using the Allmon2 or Supermon web admin interfaces. These work fairly well albeit, a bit clunky and buggy. It’s impossible to use from a mobile device though and so I have to get my Macbook out each time I want to connect/disconnect nodes.

Being a Node-RED fanatic I decided that I should put something together that was more portable, mobile friendly and much easier to use. A simple user interface is all that is required and can be achieved very easily using the standard Node-RED dashboard nodes.

Initially I started investigating the Linux command-line interface for Asterisk, the VOIP system that underpins AllStarLink (ASL). I very quickly discovered that the ASL node can be very easily controlled directly from the command-line and that this would be an ideal interface to use to enable node management via a Node-RED dashboard.

In very little time at all I had an experimental control dashboard working with the ASL node and was able to connect/disconnect to/from a single node. All that was required now was to extend this so that I could connect to a number of nodes with nothing more than a push of a button.

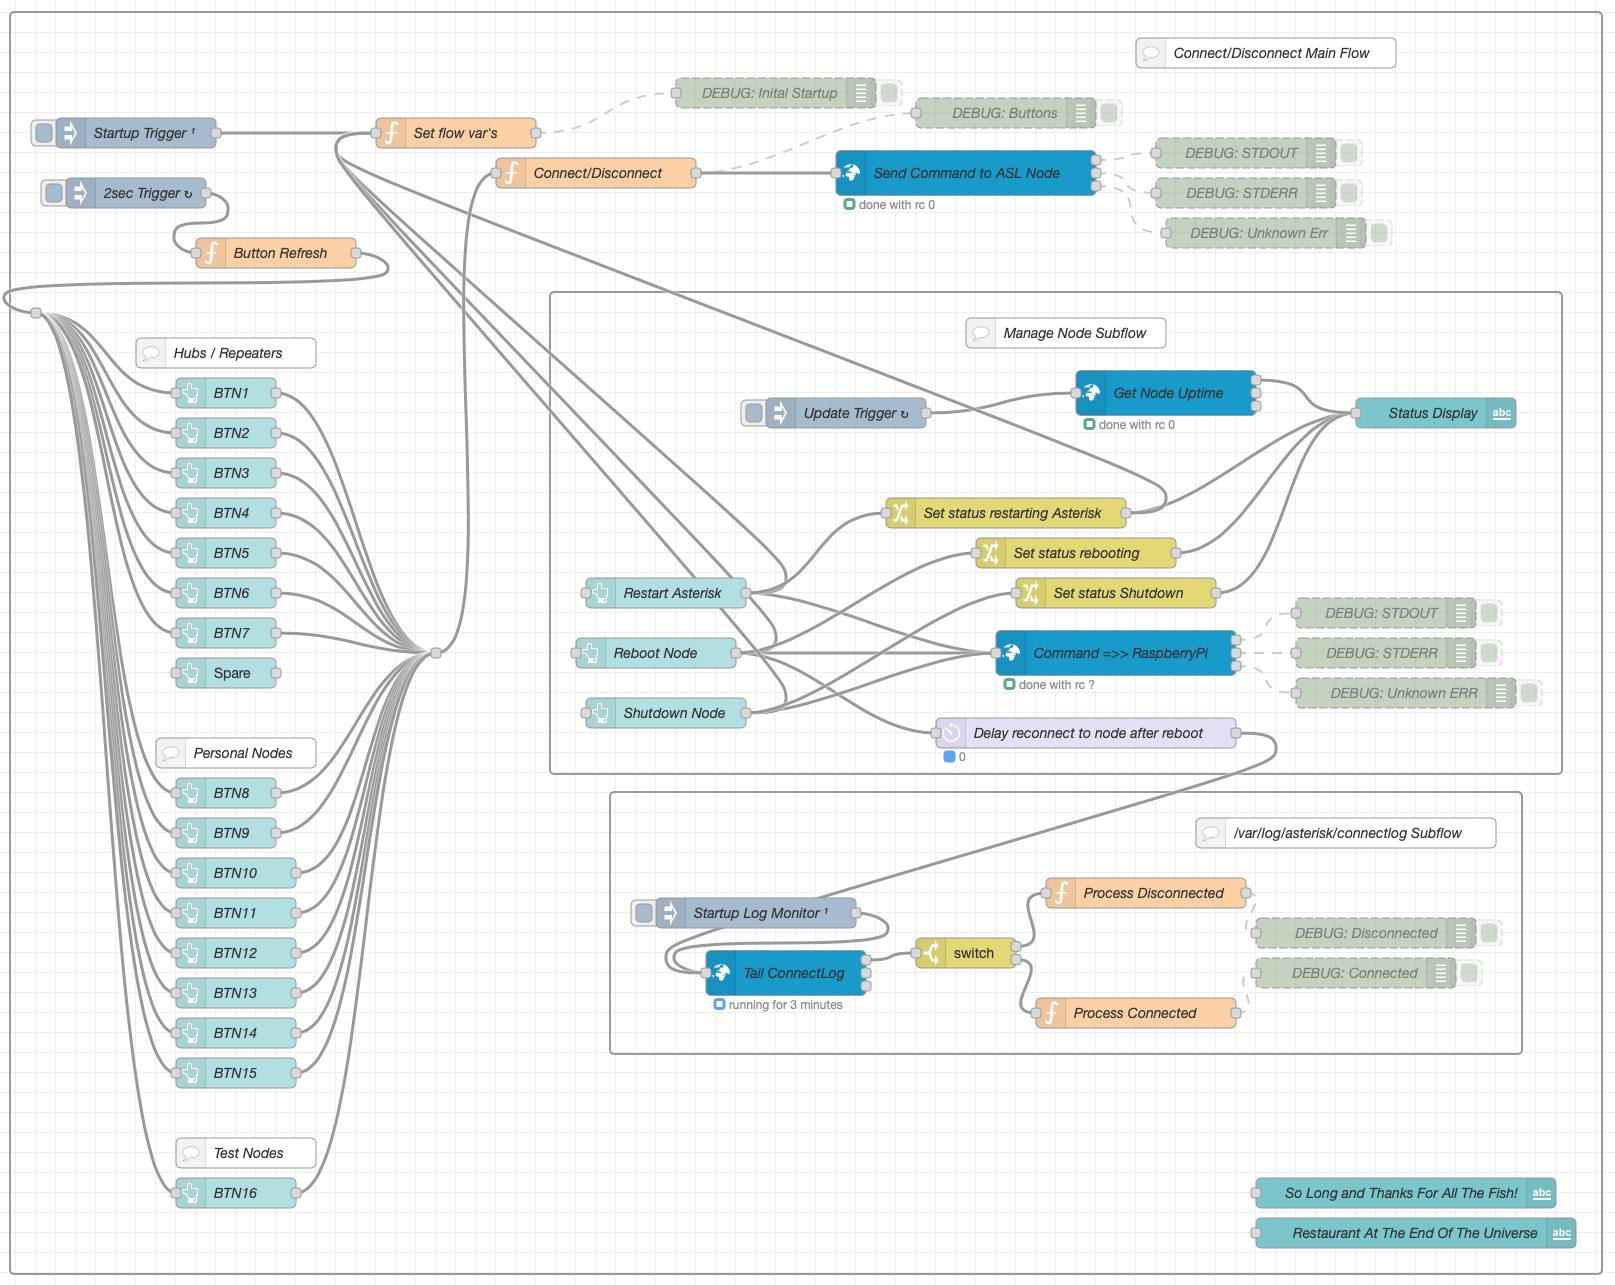
AllStarLink Control Dashboard - Node-RED Flow
Completed v1.0 AllStarLink Control Dashboard – Node-RED Flow

The resultant flow consists of 3 sections, Connect/Disconnect Main Flow, Manage Node Subflow and /var/log/asterisk/connectlog Subflow.

The Connect/Disconnect Main Flow handles all the input from the buttons on the dashboard and the communication to the underlying Asterisk VOIP system.

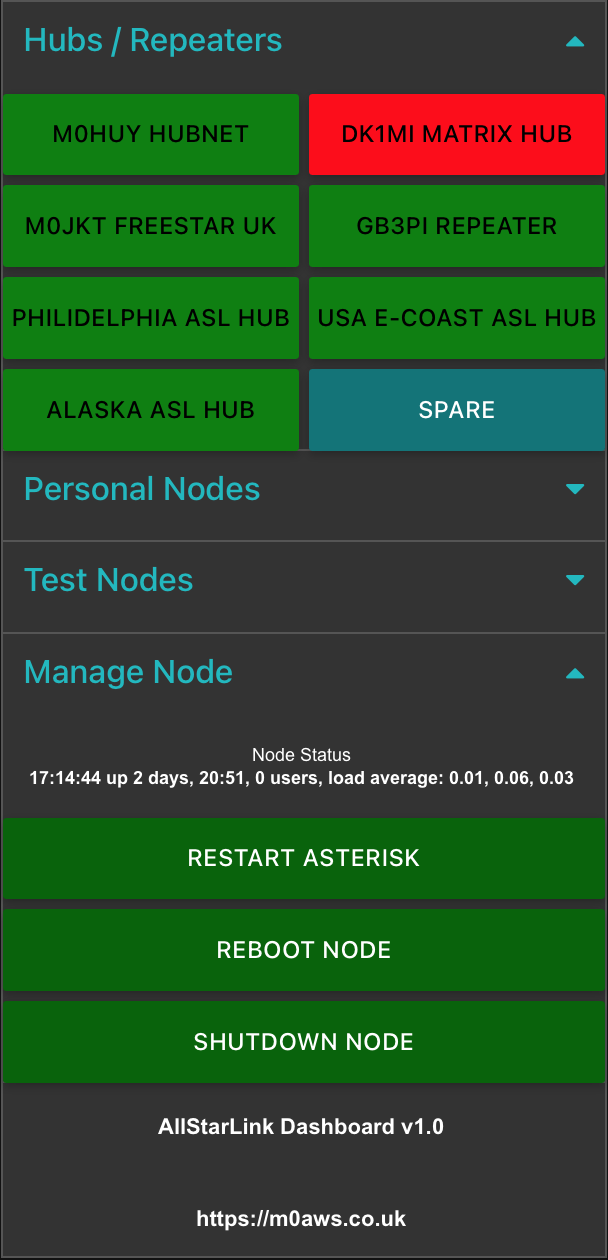
The button status is denoted by 3 colours, green (Ready to connect), orange (Transitioning to/from connect) and red (Connected). Each button is updated automatically by the button refresh function that is triggered every 2 seconds.

The Manage Node Subflow provides a simple interface to restart the Asterisk VOIP system, reboot the RaspberryPi and shutdown the RaspberryPi. The node status is automatically updated every 45 seconds and will show when the Asterisk subsystem is being restarted or the node is being rebooted or shutdown.

Finally the var/log/asterisk/connectlog Subflow monitors the Asterisk connectlog looking for connect/disconnect messages so that it can signal to update each button status.

Node-RED AllStarLink Dashboard

Each section of the dashboard can be collapsed/opened by touching/clicking the little blue arrows on the right of the dashboard. The dashboard works fine on Android, iOS, Windows, MacOS and Linux.

If you’re not familiar with Node-RED and haven’t yet installed it to your PC, take a look at the Node-RED Getting Started Page. The information takes you through installing Node-RED onto a multitude of devices including PC and RaspberryPi devices.

Once you have Node-RED installed all you need to do is download the AllStarLink Control Dashboard Flow and import it to your Node-RED flow editor.

Note: The link above is now for v1.2 of the flow which includes some critical bug fixes. You can read about the bug fixes in the v1.2 release article.

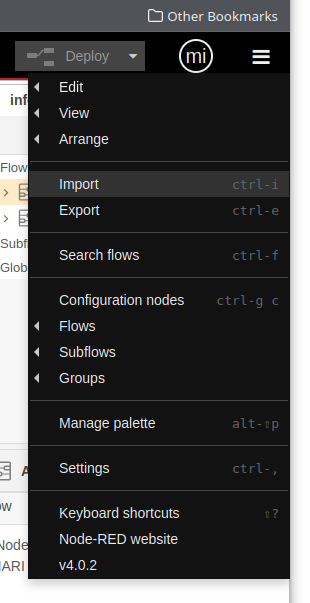
Once downloaded, select Import from the burger menu icon on the right-hand side of the flow editor as shown below and import the flow file.

Node-RED Flow Editor import Menu Item

Once imported you will find that some of the nodes in the flow are not available. This is because you need to add them to the flow editor palette before being able to deploy the flow.

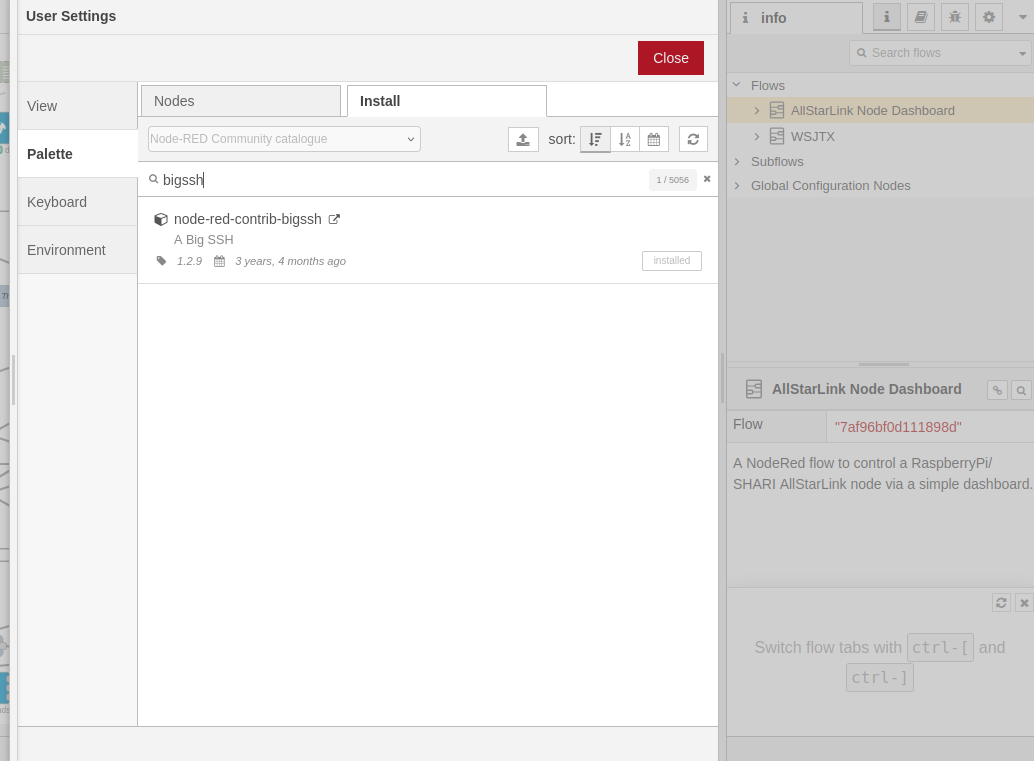
Drop down the same menu as shown above but, this time select Manage Palette. This will open another window where you will need to select the Install tab as shown below.

Node-RED Flow Editor Palette Install Tab

You need to install two node sets to complete the flow, node-red-contrib-bigssh and node-red-dashboard. Type in the name of each package one at a time in the search bar and then click the Install button.
Once the two packages are installed you then need to configure the credentials for logging into your RaspberryPi. This is simply done by double clicking the blue Send Command to ASL node at the top of the main flow and then clicking the Pencil button at the end of the Credentials field. This will open another window where you will need to type in the IP Address of your ASL RaspberryPi into the Host field, then enter 22 into the port field, add repeater into the Username field (repeater is the default username, if you have changed this then you will need to add the new username name in instead) and then the password associated with the repeater login into the Password field. (Normally allstarlink)

Once this is done, do the same on the other blue nodes, namely “Get Node Uptime“, “Command =>> RaspberryPi” and “Tail ConnectLog”.

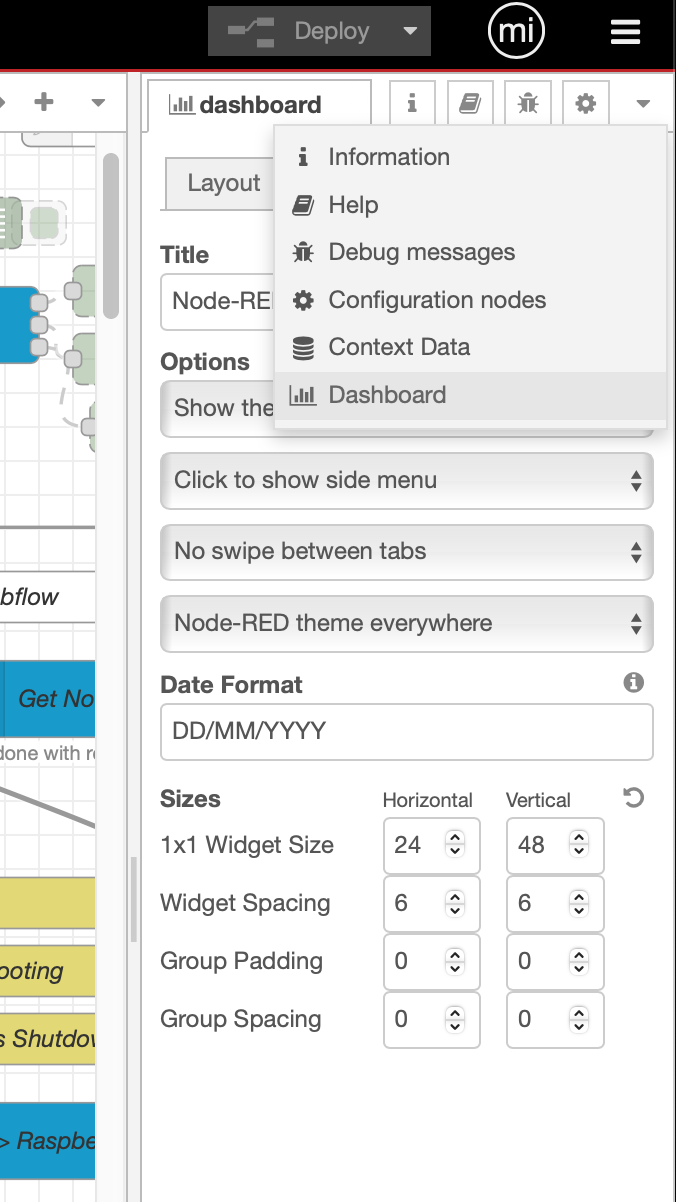
The final thing to setup is the dashboard size. Click on the downward pointing triangle at the top right of the menu bar (under the burger menu) and select dashboard. Check that the sizes are set the same as in the image below. For some reason, these settings aren’t always imported (Possible bug?) so, if your dashboard layout isn’t like shown above it will be because these settings failed to import.

ASL Dashboard Settings

You are now ready to deploy your AllStarLink Control Dashboard!
Press the red Deploy button at the top of the flow editor window.

To access the dashboard from any device, open your favourite web browser and enter the following URL: http://IP-Address-of-Node-RED-Computer:1880/ui

Finally, if you want to change the nodes that each button connects/disconnects you will need to edit the set flow var’s function at the top of the main flow. All you will need to do is replace the existing node numbers taking care not to alter the rest of the code in any way otherwise, it could stop the flow from working.

Once you’ve edited the node numbers, double click on the associated button node and change its Label to show the new node name.

Once your changes are complete, Deploy the flow again and your changes will be live.

This is version 1 of the ASL Dashboard, I already have ideas for version 2 that will also have the ability to enter a node number into a field and connect to it without the need to program it into a button.

More soon …

Social Media – Sucking the life out of our devices

Let me be up front from the outset, this isn’t a HAM Radio related article but, something that probably affects 99% of people today.

I’ve recently given up using social media. Like many of you reading this I had Instagram, Facebook, Twitter etc etc installed and active on all of my devices. Throughout the day and night my iPhone and iPad would be constantly notifying me of posts in the HAM Radio/Motorcycle/Adventure groups I was linked into, or that Jonny/Karen had posted something that I may be interested in, even though 99.99% of the time I wasn’t interested at all.

Even switching off notifications these apps still found ways to continually pester me, so annoying!

Then there was the toxicity, I was genuinely shocked at the constant barrage of hate and anger in the HAM Radio groups. If someone posted something about a radio/antenna/device and others disagreed there was this immediate attack and following argument that went on for days. These nearly always ended up with personal insults and hatred, whatever happened to respecting others opinions?

The HAM Radio groups weren’t the only ones either, the motorcycle groups were just as bad as were the adventure groups, social media really does bring out the worst in people.

Would we all really speak to each other in the same manner face-to-face? I doubt it!

So I deleted all my social media accounts and deleted the apps from all my devices and this is where something very positive happened.

Apart from the fact that my devices were no longer hounding me 24hrs a day, the batteries in my devices were lasting considerably longer.

With the social media apps installed my iPhone battery would barely last a day however, after deleting the apps I was amazed to find that after the next full charge my iPhone battery now lasted 2.5 days without a charge!

Even though I had my iPhone set not to allow the social media apps to update in the background and switched off notifications they were still consuming massive amounts of energy from the battery of the device even when the apps had been closed and were not being used.

Clearly the social media apps are busy skimming data in the background constantly collecting GPS information, movement, app usage etc etc building up a profile for targeted advertising. This data skimming is using considerable amounts of energy from the battery and it has to be questioned if this is reducing the life of device batteries overall.

I found the same on my iPad Pro too, battery life is now considerably longer, not quite as long as my iPhone but, it too is now lasting two days on a single charge even though I use it daily.

So, apart from no longer being exposed to the toxicity of social media, my device batteries are now lasting some 2 to 2.5 times longer allowing me to consume the content that interests me for longer rather than the batteries being discharged by the constant, silent collection of data for social media companies to sell on to advertisers.

If you are an avid social media user then perhaps now is a good time to consider deleting the apps from your devices and instead start using the website interface for each platform, this way you can still get your daily fix of targeted adverts but, without the constant drain on your battery.

Normal content will resume soon …..