Wouxun KG-UV9K Purchase


For some time I’ve wanted a full duplex 2m/70cm handheld so I could have a go at working the LEO FM satellites during the summer months from the garden.

Searching through all the handhelds available today I came across the Wouxun KG-UV9K dual band, full duplex VHF/UHF radio.

Since I already own a Wouxun KG-UV980PL Quad bander (6/4/2m & 70cm) I’m familiar with the menu system and the very good build quality so I decided to research it further.
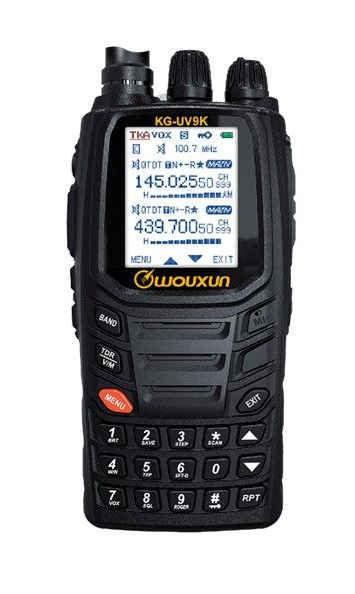
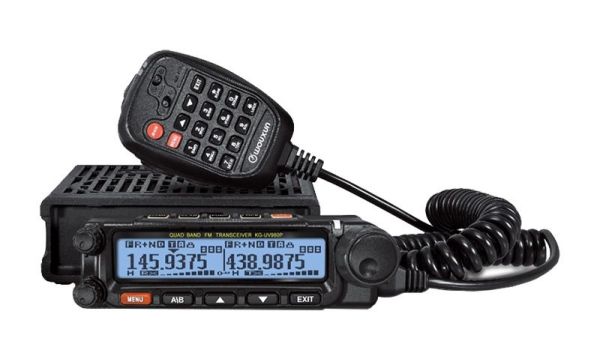
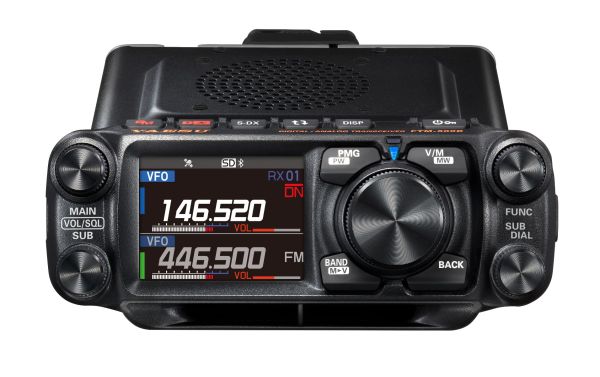
Wouxun KG-UV9K Full Duplex Hand Held
Wouxun KG-UV9K Full Duplex Handheld

Looking at the spec for the handheld it does everything I want and more whilst being reasonably priced.

Jumping onto the Martin Lynch and Sons website I found there were two listings, the radio on its own or the “Pro Pack”.

The radio on its own was £79.00 but, the Pro Pack was only £20 more at £99.00 and came with every option available for the handheld including a programming cable, 2 batteries and a rather nice carry case.
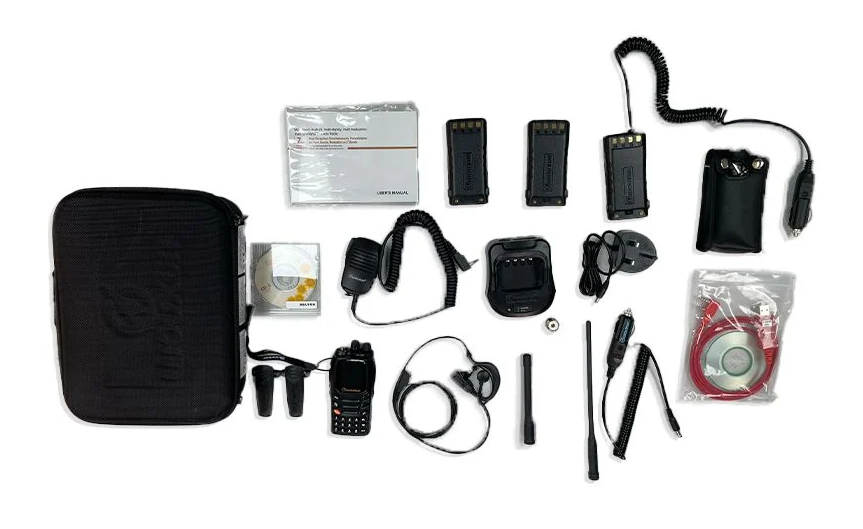
Wouxun KG-UV9K Pro Pack

The full specification and other details for the “Pro Pack” can be found on the ML&S website but, here’s a brief summary:

Pro pack contains:

KG-UV9K Transceiver with 2 antennas

Two batteries
Two belt-clips
Software and transfer data Cable
Fast charger dock and Power Supply
Hand speaker mic
Battery eliminator
Manual
Wrist strap
Leather case
In-car charger
SMA-SO239 adaptor
Hands-Free kit

Like my Wouxun quad bander the handheld can also be configured as a cross-band repeater, something I’ve not yet found a use for but an interesting feature. Of course being a full duplex radio with two receivers you can listen to signals on 2m and 70cm simultaneously or transmit on one and listen on the other, a feature I’ve wanted for LEO satellite operations.

The radio is really easy to programme using CHIRP and easy to setup via the very logical menu layout. The hand held has a good solid feel to it and I’ve found the battery lasts a good 3-4 days even though I use it to chat with other stations via my AllStarLink node most mornings and the radio is left monitoring all day.

The larger of the two supplied antennas works extremely well having a relatively good gain. I can now easily get into my two local repeaters on 2m & 70cm from within the house, something I’ve never been able to do with my old Retevis RT85 even with a high gain antenna on it.

The receivers in the UV9K are head and shoulders better than that of the Retevis RT85, I’m hearing signals much stronger now and can even get into repeaters that I’ve never even heard on the old Retevis handheld.

The display on the Wouxun is bright and easy to read, even in bright sunshine which is great as I plan to use it outside a lot during the summer months.

The supplied speaker mic gets good unsolicited audio reports on transmit and has clear audio on receive with plenty of volume. The speaker mic doesn’t have any radio control buttons on it sadly, something I really like about the Wouxun UV980PL quad bander as you can control every aspect of the radio without touching the front panel. Would be a nice upgrade for the handheld if it every became available.

Overall I’m really impressed with the Wouxun UV9K Pro Pack. The radio performs very well, comes with every optional extra available and is a bargain at just £99.00.

If you’re looking for a full duplex handheld radio then I recommend you grab the Pro Pack before the offer ends.

More soon …

Using Node-Red to build interactive log maps

I’ve not been on the radio much over the last few weeks as I’ve had my head down other radio related rabbit holes.

One of the rabbit holes is a Node-Red project to make my online logs a little more interactive. For sometime now my logs have been displayed on my website as nicely formatted, searchable HTML pages however, they don’t really allow the viewer (myself included) to see the global coverage of all the contacts so, I decided to write a Node-Red flow that would do just that.

M0AWS Interactive Log Flow

The flow itself isn’t too complicated and basically consists of reading in the individual ADIF formatted log files, processing the data and then sending the data in the correct format to the map node for display.

I’ve had to write a few functions to handle the processing of the ADIF formatted data but, these aren’t particularly complex and are fairly easy to understand even if like me, you’re not a Javascript programmer.

The flow is working perfectly however, I’m in the process of reworking the format generic payload function to reduce the amount of code and make it more efficient.

M0AWS SSB / CW / FreeDV Interactive Log World Map
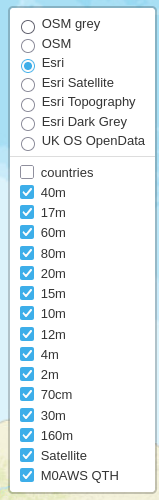
M0AWS Interactive Log Map Layers Menu


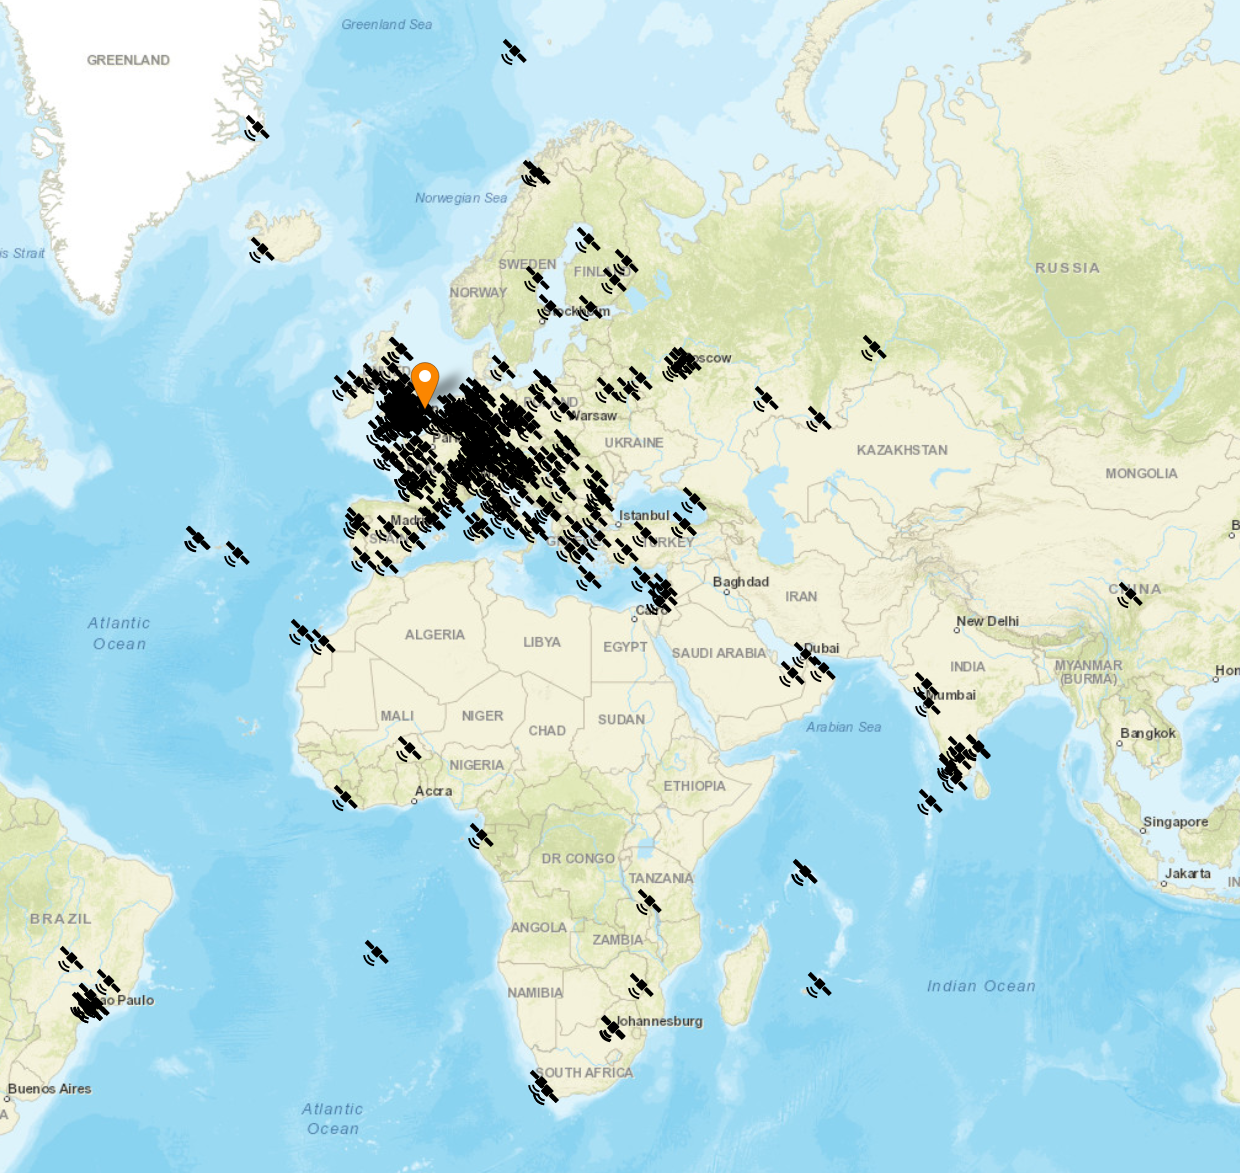
The flow generates two maps, one for voice / CW /Satellite contacts and the other for WSJT-X FT4/8 contacts. Every pin on the map is colour coded by band with satellite contacts being denoted by a satellite icon.

Each pin / icon on the map is clickable and reveals the data of the QSO being displayed.

In the top right-hand corner of the map there is a drop down layer menu that allows the viewer to filter by band thus reducing the number of icons on the screen at any one time.

Seeing the data presented on a map really brings my logs alive. An example of this is that I had no idea I’d worked so many stations in India on the QO-100 Satellite.

The small icons in the pins show a microphone for SSB/FM/FreeDV contacts and a downwards pointing triangle in a box for CW contacts. Sadly I couldn’t find a Morse key icon in the collection available.

M0AWS filtered view of QO-100 Satellite contacts

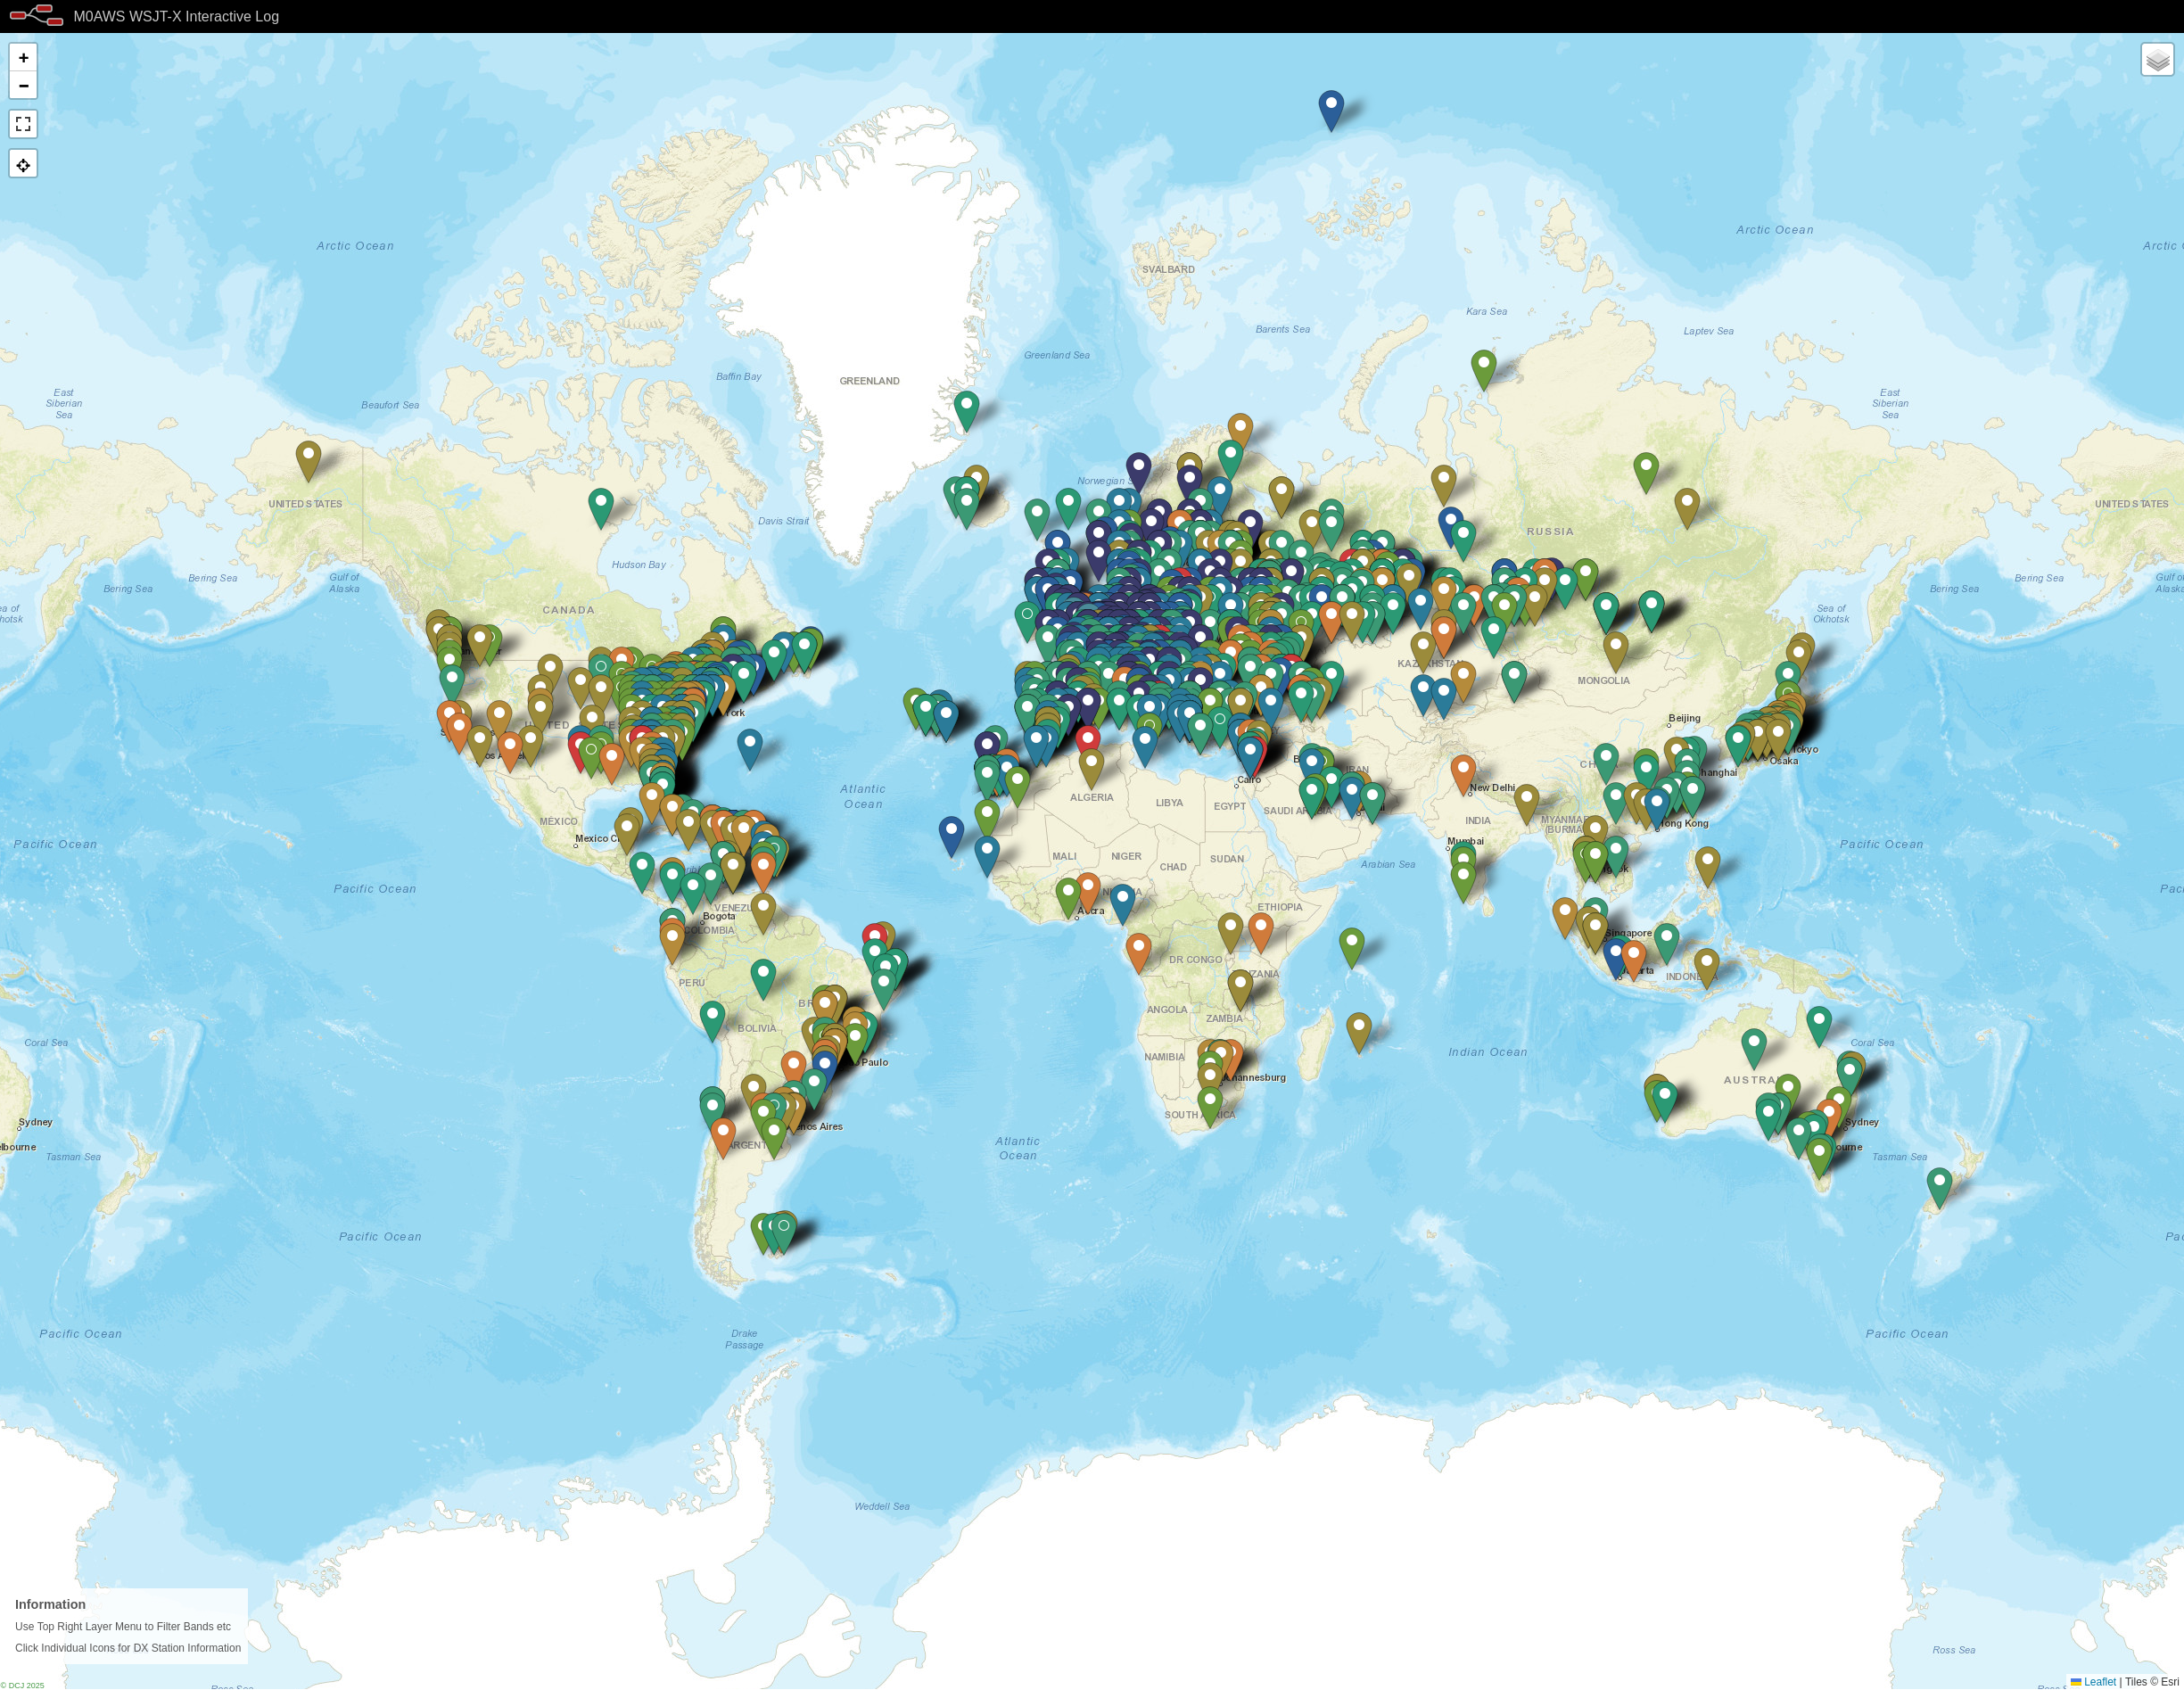
I only use FT4/8 for testing new antenna designs however, it’s interesting to see the global coverage accomplished with this weak signal mode.

M0AWS WSJT-X FT4/8 Interactive Log World Map

Once I’ve finished rewriting the format generic payload function I will make the flow available for download here so that others can also create an interactive view of their radio logs.

If you want to have a look at the maps and try them out for yourself, they are available under the Logs menu above.

This Node-Red instance is running in a virtual machine (VM) on a 16GB RAM RaspberryPi 5 that is also running a number of other VMs at the same time so, it’s safe to say it’s not heavy on CPU and will run on the older Pi4 as well.

More soon …

FreeDV audio routing with PiHPSDR and Hermes Lite 2

I’ve recently been trying out the FreeDV RADEv1 digital voice mode on the HF bands with great success. The audio quality is astounding when compared to the normal analog SSB mode. Using only 20w I’ve been surprised how successful I’ve been talking to stations in the UK and Europe as can be seen in my FreeDV Log.

FreeDV has been around for quite a few years with development being funded by an ARDC grant and financial sponsorship from the Software Freedom Conservancy.

So what is FreeDV?

To quote the FreeDV website:

FreeDV is a suite of digital voice modes for HF radio. Our flagship mode is the Radio Autoencoder (RADE). You can run RADE using a free GUI application for Windows, Linux and macOS that allows any SSB radio to be used for high quality digital voice.

And the most important part:

All software is open source, released under the (a) GNU Lesser Public License version 2.1 (GUI and legacy FreeDV modes) and two-clause BSD license (RADE).

FreeDV running under KDE-Plasma on Kubuntu PC

Looking at the digital voice (DV) community in the HAM Radio world, it’s stuffed full with proprietary DV modes from small software houses and black box transceiver manufacturers with no real OpenSource alternatives, until now.

Installing FreeDV is pretty simple regardless of which operating system (O/S) you use. Being a Linux user I grabbed the AppImage from the website and set about reading up on how it works and how it is configured.

I decided to take the two sound card approach since I have 2 USB sound cards connected to my shack Kubuntu Linux PC.

Configuring the audio routing isn’t straight forward as both the receive and transmit audio to/from the radio needs to be routed via the FreeDV app. To make this even more complicated I am using my Hermes Lite 2 SDR transceiver and PiHPSDR software, a complete OpenSource/OpenHardware Amateur Radio Station.

M0AWS FreeDV and PiHPSDR Audio Routing Diagram

Trying to clearly describe the audio routing using words alone would be impossible and very confusing so, I put together the diagram above.

Using two USB sound cards I’ve configured the system such that USB Sound Card 1 (an old Griffin iMic USB sound device) handles just the audio from/to the headphones and microphone. All the audio at this point in the system is analogue.

The second USB sound card, a cheap Plug and Play (PNP) USB audio device from Amazon, handles all the digitised signals from/to FreeDV and PiHPSDR.

Taking this 2 sound card approach keeps confusion to a minimum and separates the analogue and digital components of the audio routing.

So, how does this translate to the FreeDV and PiHPSDR audio settings?

Transmit Audio Chain

FreeDV Transmit Audio Settings

Starting at the beginning of the transmit audio chain, let’s look at the transmit audio settings in FreeDV.

Looking at the FreeDV Transmit audio settings screenshot below we can see that the
Input From Microphone to Computer device is set to:

alsa_input.usb-Griffin_Technology_Inc_iMic_USB_audio_system-00.analog-stereo

This is the microphone connection on the iMic USB device (USB Sound Card 1) and is the analogue transmit audio input to FreeDV.

The Output From Computer to Radio device is set to:

alsa_output.usb-0c76_USB_PnP_Audio_Device-00.analog-stereo

This is the digitised audio output from FreeDV (via USB Sound Card 2) to PiHPSDR and is used as the transmit audio that is sent to the Hermes Lite 2 transceiver.

FreeDV Transmit Audio Settings

PiHPSDR Transmit Audio Setting

To complete the transmit audio path we next need to look at the PiHPSDR transmit audio setting.

PiHPSDR Transmit Audio Settings

As can be seen in the screenshot above, the Local Microphone device in PiHPSDR is set to the Monitor of USB PnP Audio Device Analogue Stereo.

This effectively routes the digitised output audio from FreeDV (Output From Computer to Radio device) to the Input audio of PiHPSDR.

The reason for using the Monitor audio feed is because FreeDV does not recognise the Mic Input in PiHPSDR as a valid output device for FreeDV to use, hence we just need to monitor the FreeDV output device and use it as our input audio device in PiHPSDR.

This completes the transmit audio chain.

Receive Audio Chain

PiHPSDR Receive Audio Setting

Starting at the beginning of the receive audio chain we first look at the PiHPSDR receive audio setting.

PiHPSDR Receive Audio Setting

In the screenshot above we can see that the receive audio output from PiHPSDR is set to
USB PnP Audio Device Analogue Stereo (USB Sound Card2). This is the DX station’s digitised audio as received by the Hermes Lite 2.

FreeDV Receive Audio Settings

Next let’s look at the receive audio setting in FreeDV.

FreeDV Receive Audio Settings

The Input To Computer from Radio device is set to the monitor of the
USB PnP Audio Output Device:

alsa_output_usb_0c76_USB_PnP_Audio_Device-00.analog-stereo.monitor

This effectively routes the digitised audio output from the PiHPSDR receiver to the digitised audio input of FreeDV.

Once again we have to use the monitor of the USB PnP Audio Output device as FreeDV does not recognise the PiHPSDR output as a valid input device.

Next, the Output From Computer To Speaker/Headphones device is set to:

alsa_output.usb-Griffin_Technology_Inc_iMic_USB_audio_system-00.analog-stereo

This is the analogue audio output on the iMic USB Sound card (Sound Card 1) that routes the analogue audio to the headphones and completes the receive audio chain.

Summary

The audio routing required by FreeDV can appear very daunting when first attempting to configure it on the Linux platform but, hopefully the diagram and screenshots above will help in understanding the complete end-to-end audio chain that is required to make this mode work.

PiHPSDR can of course be replaced by your black box radio CODEC entries that will appear in the device lists shown above if you have your radio connected via USB. The config is basically the same but, just uses a different device instead of USB sound card 2 shown in the diagram above.

I hope this article is useful to those wanting to try FreeDV on the Linux platform and I look forward to hearing you on RADEv1.

More soon …

Hermes Lite 2 Audio

I often get unsolicited good audio reports whilst using my Hermes Lite 2 (HL2) on the HF bands with people asking what settings I am using so, I thought it was time I put together an article on the subject.

I use the DL1YCF enhanced fork of PiHPSDR to drive my HL2, a great OpenSource SDR software package that supports many SDR radios including some very high end, expensive models.

PiHPSDR is extremely configurable via it’s well laid out menu system. It’s possible to change the settings on almost everything which, when combined with really good hardware like the HL2 gives the operator the ability to create an extremely high spec transceiver at a fraction of the price of the typical black box commercial offerings.

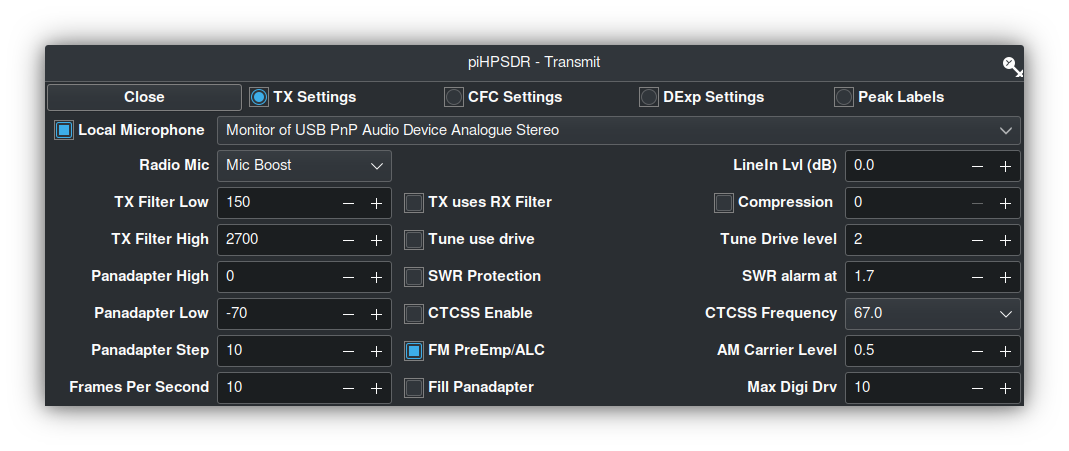
Starting at the beginning of the transmit audio chain the first settings to be changed are in the Transmit (TX) menu.

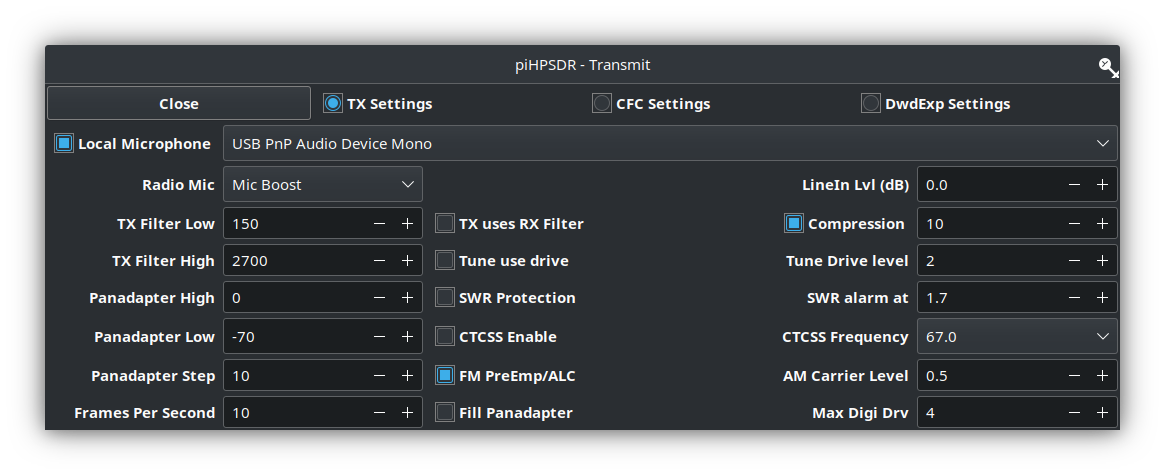
M0AWS Transmit filter settings

Using my Sennheiser headset I found I needed to set the Radio Mic setting to Mic Boost. This increases the audio level so that it drives the radio properly. It’s important to make sure that boosting the audio doesn’t cause distortion though.

Next I set the TX Filter Low to 150Hz. This ensures I don’t have that nasty bass sound that you hear often on the HF bands today.

The TX Filter High is set to 2700Hz. This gives me a transmit filter width of 2550Hz which is well within the 2700Hz standard for the HF bands.

I also set the compression level to +10dB to increase the average talk power of the audio.

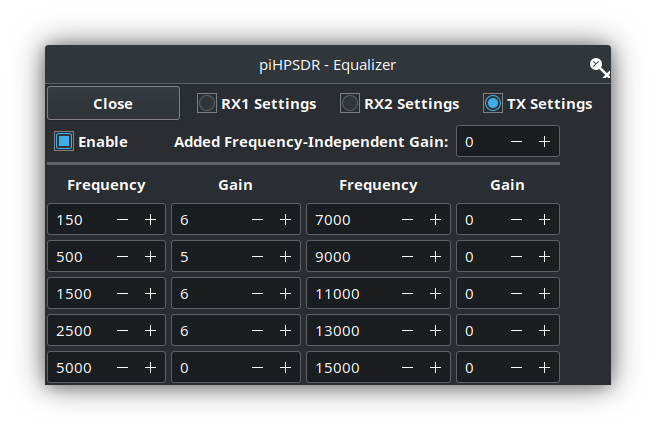
Next in the transmit audio chain is the TX Equalisation. The PiHPSDR software has a very good software defined Parametric EQ menu that provides all the audio tailoring capabilities any HAM operator will ever need.

Having watched many videos by the great Bob Heil, K9EID (SK) I understand that all the articulation in the voice is around the 2500hz range. Today on the HF bands you often hear bass heavy audio that sounds muddy and horrible. This is exactly the type of audio I don’t want to have so, to this end I have adjusted my EQ settings such that the articulation is accentuated to increase clarity and give a little pep to my rather dull sounding voice.

M0AWS PiHPSDR Transmit EQ Settings

Since the transmit filter width is set from 150Hz to 2700Hz there’s really no point in making EQ adjustments outside of this range. As show above I have made the following changes to the transmit EQ settings in PiHPSDR:

FrequencyGain
150hz+6dB
500Hz+5dB
1500Hz+6dB
2500Hz+6dB

The final part of the audio setup is the Mic Gain, I keep this set at 5. This keeps the audio nice and tidy with no IMD.

My HL2 TX Drive is set so that it puts out a maximum of 500mW, this is enough to drive my Xiegu XPA125B amplifier to 100W.

With these settings I find that the Sennheiser headset, PiHPSDR software and the Hermes Lite 2 combination gives me a great signal on all the HF bands.

I hope this helps all those who have asked how my audio is setup and have been so impressed by this great little radio.

More soon …

Wouxun KG UV-980PL Quad Band Radio

I recently decided to look into a 2m/70cm FM radio for the shack for use on the local 2m/70cm repeaters and was considering the offerings from Yaesu and Icom however, the Wouxun KG UV-980PL caught my eye as it is a quad band, full duplex radio. Not knowing much about Wouxun radios I had to do some research to get an idea of what it’s like. Generally the radio gets very good reviews and most mention the excellent build quality.

There are two versions of the 980P radio, the 980PL that offers 6/4/2m and 70cm bands and the 980P that offers 10/6/2m and 70cm. The 4m is a band I’ve been wanting to try for some time and the 980PL with it’s 4m band coverage became even more appealing.

Wouxun KG UV-980PL Quad Band FM Duplex Transceiver

I decided to take a trip down to Martin Lynch and Sons (MLANDS), a good 2 hours or more drive for me, so that I could get hands on with the radios that I had been looking at.

I invited Alan, G1SQB along for the ride and a day out playing with radios as he lives 3 miles away and we often chat on air.

Arriving at the store we grabbed a hot brew and set about playing with the great selection of radios on display.

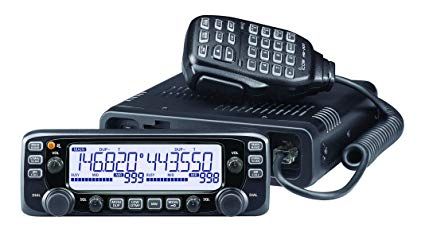
I initially looked at the Icom IC-2730E, a dual band full duplex transceiver that has been around for about 10 years and has good reviews. As expected the build quality is excellent and very easy to use. I found I was soon able to set up memories etc via the front panel controls. The only draw back is that it isn’t supported by the CHIRP programming software that I use. Other than that it certainly meets all the requirements for a 2m/70cm FM transceiver

Icom Ic-2730E Duplex FM Transceiver
Icom IC-2730E FM Duplex Transceiver

Next I moved on to the offerings from Yaesu including the FTM-500DE 2m/70cm transceiver. The colour screen is very nice and the menu system very easy to use however, the price is getting on for close to double that of the other radios and it doesn’t really offer anything more that interests me since I’m only looking for an analog radio.

Yaesu FTM-500DR dual band FM Transceiver

Sadly there wasn’t a Wouxun UV-980PL out on display and so I had to persuade the salesman to get one out of stock for me to play with. Unpacking the radio I was surprised at how good the build quality is, it really is comparable to the other radios that I had been looking at.

The Wouxun menu system is fairly easy to use once you’ve looked at the manual and got to grips the abbreviations used. The big plus is that this radio is CHIRP compatible with an optional programming cable (£19) and so loading the memories with repeaters etc will be extremely easy.

The Wouxun has dual receivers built in with a quad-plexer so, you can transmit on one band whilst listening to another band on the other receiver. One thing to note is that the 1st receiver covers all the bands, 6/4/2m and 70cm however, the 2nd receiver only covers 2m and 70cm so, it’s not possible to receive 4m and 6m at the same time. The radio also only has one antenna connection on the rear, would had been great if it had one connector for each receiver.

The really good thing about the Wouxun UV-980PL is that it comes with everything you will need, apart from the programming cable!

After much tinkering I decided to purchase the Wouxun KG UV-980PL, a Diamond V2000 6/2m and 70cm antenna plus 20m of Hyperflex-13 coax cable and connectors.

In the box you’ll find two mounting options for the removable head. There is a short connecting cable for use when the head is mounted directly on the radio body and a 5m long connecting cable for mounting the head remotely. This is really useful as I wanted to mount the head on a mic boom arm so that it’s easily accessible and didn’t clutter the desk space in the shack.

M0AWS Shack
Wouxun KG UV-980PL head mounted on a Mic boom arm

Since the radio also comes with the mobile mount I’ve fixed the radio body on the wall behind the PC monitor out the way. This setup has proven to be extremely good as I can see what’s happening on the display at a glance and easily grab the mic if called.

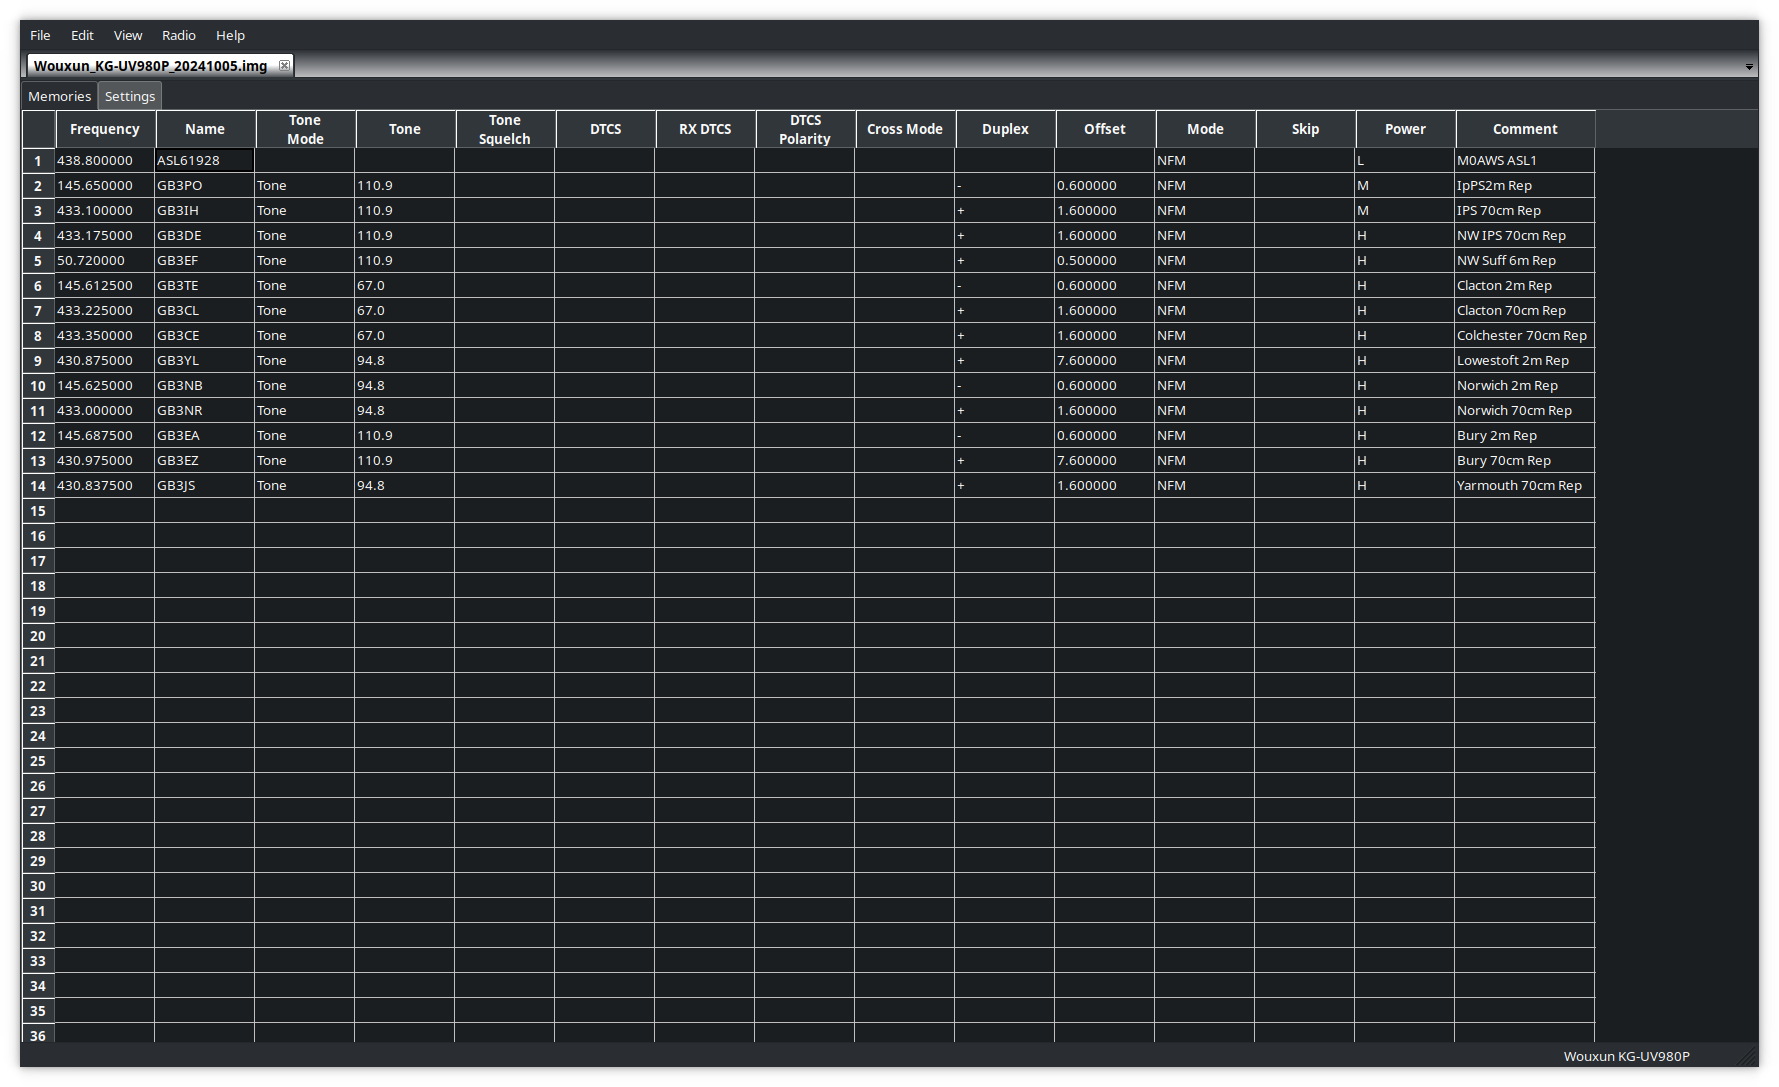
Programming the radio memories is extremely quick and easy using CHIRP. I had the local repeaters and my AllStarLink node frequencies and offsets uploaded to the radio in no time at all and was soon on air.

Programming the memories on the Wouxun UV-980PL using CHIRP

The microphone that comes with the radio is extremely good. You can operate most of the controls on the radio directly from the mic with ease and it has a good feel in the hand. Audio reports have also been very good and there’s no need to change it.

I’ve not yet got the new Diamond V2000 antenna erected but, I’ve been using the radio with my homebrew 2m/70cm end fed vertical dipole and my 4m band end fed vertical dipole and am getting excellent results. I can access all the local repeaters using the lowest power output setting and only have to use the medium/high setting for the repeaters that are further afield.

On the 4m band the radio performs well and I’ve been surprised at the distances I’ve been able to cover even though my 4m antenna is only 6-7m above the ground currently.

A few days after I got the new Wouxun radio there was an ARISS event whereby a group of Girl Guides would be talking to Astronaut Sunita Williams aboard the ISS. This was a great opportunity to test the receive capability of the radio and so I setup ready for the pass. Using just my simple 2m/70cm end fed vertical dipole I got great reception as can be heard in the video below.

Overall I’m extremely pleased with the Wouxun KG UV-980PL quad band radio and considering it’s much cheaper than the offerings from the main radio manufacturers it’s well built and performs extremely well. If you’re looking for a simple, analog FM radio for 6/4/2m/70cms then you can’t beat it!

More soon …

The Art of Articulation

Since I’ve been using my Icom IC-705 on the QO-100 satellite I’ve been getting no end of unsolicited great audio reports with one Op even saying I have the best audio he’s ever heard on the satellite.

Most people are surprised when I tell them that I am using the stock fist mic that comes with the radio. It’s nothing special, in fact it’s rather cheap and plastic, not particularly good quality however, it does seem to have a good sounding mic insert.

The other great thing about the IC-705 is that it has a two channel parametric equaliser built into the radio. Many people don’t realise this and miss out on the massive improvement they can make to their transmitted audio with just a few simple adjustments.

The stock fist mic has a very flat response across the audio frequency range out of the box and doesn’t sound particularly inspiring. Many see this as a negative and often just replace the mic with either a headset (probably from Heil), a boom mic (again probably from Heil) or another, better quality fist mic. All of these options cost varying amounts of money when in reality none of them are necessary.

Starting from a flat audio response is actually a good thing as it makes the equaliser adjustments more pronounced, making it easier to adjust the settings to suit your voice.

We all have different voices but, there is one thing that is pretty much the same for everyone and that’s the frequency range in which the articulation of the words and sounds we make can be found. It’s this part of the voice that is often lacking when we struggle to understand what the DX station is saying.

It’s become common place on the HAM bands these days for stations to boost the bass frequencies and reduce the mid and high frequencies with the net result of a horrible bass ringing sound and muddy mid range often making it very difficult to understand what is being said.

Having spent some considerable time watching the great videos on audio from the late Bob Heil, K9EID it’s clear that the most important frequencies to enhance are those around 2.5khz as this is where all the articulation is in the human voice.

To this end I set about setting up the audio on my IC-705 QRP radio so that my voice sounded such that it is easy to comprehend even in the most difficult of situations on air. This doesn’t mean that it has to be very harsh and overly bright, quite the opposite in that to be heard clearly in all conditions on air one’s audio needs to be balanced across the frequency range with an enhancement in the 2.5Khz frequency range.

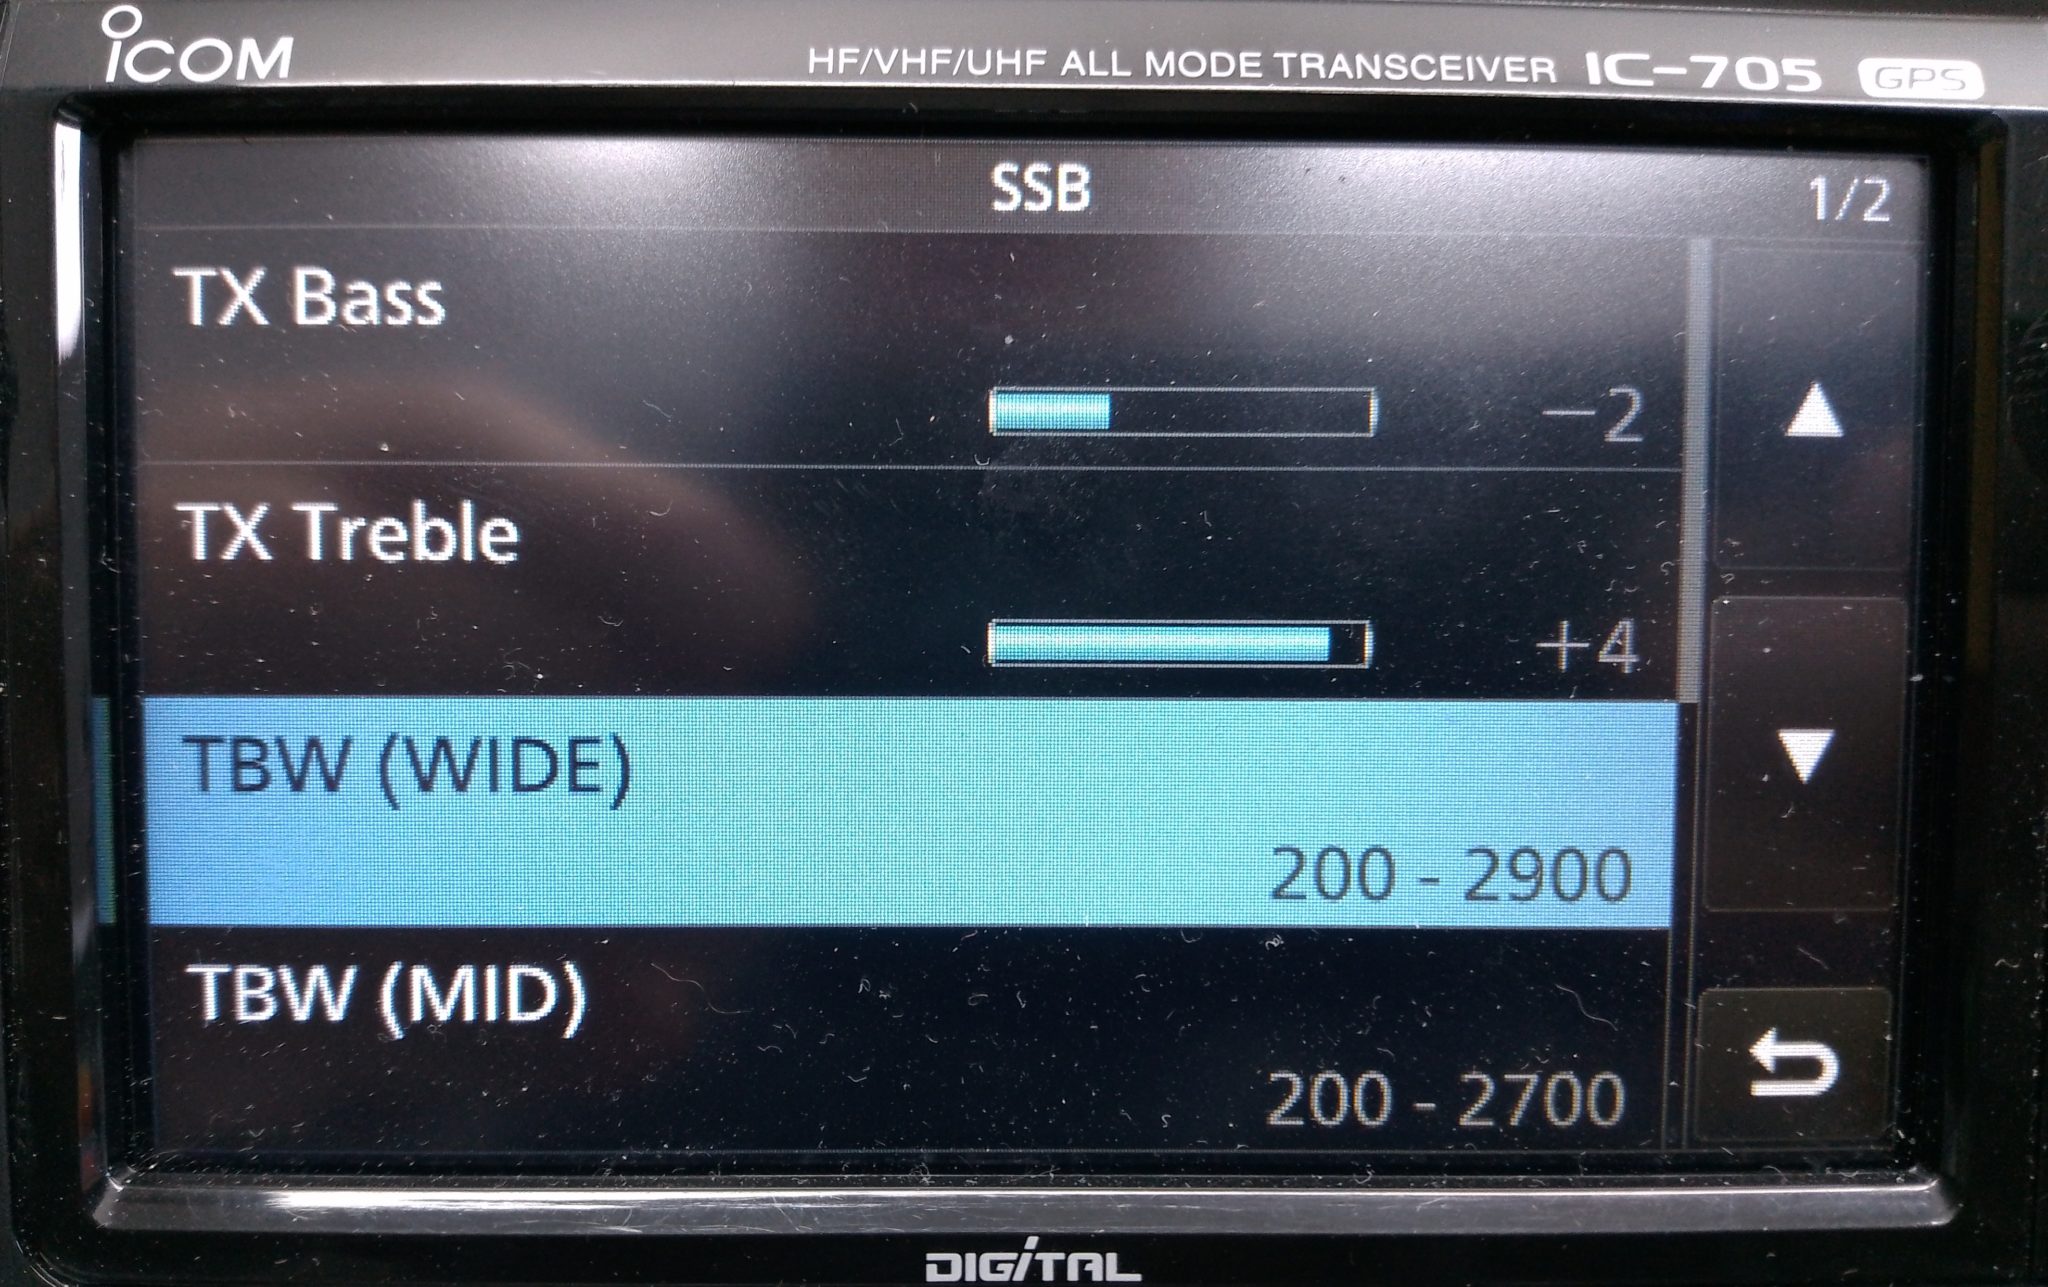
M0AWS IC-705 Transmit audio settings - part 1
M0AWS IC-705 Transmit audio settings – part 1

To reduce the unwanted, muddy bass the first thing to do is change the transmit bandwidth for the “Wide” setting to 200-2900Hz. This will cut off the bottom 100Hz from the voice reducing the overall bass output from the standard fist mic that comes with the radio. This will ensure a 2700Hz wide SSB signal, the recommended max for QO-100 operations and the preferred bandwidth on the HF bands.

On top of this I made a further reduction of 2dB on the TX Bass setting to help balance out the overall audio response of the mic insert.

Next I set about enhancing the higher frequency response of the mic insert and found that it required an increase of 4dB to bring out the articulation of my voice. This enhanced my audio considerably compared to the standard output from the fist mic and improved the intelligibility of my voice considerably, especially in difficult band conditions.

To complete the setup I set the compression to 3 and mic gain to 35 so that the overall drive level is increased slightly giving a greater average output from the radio.

M0AWS IC-705 Audio Settings - part 2
M0AWS IC-705 Audio Settings – part 2

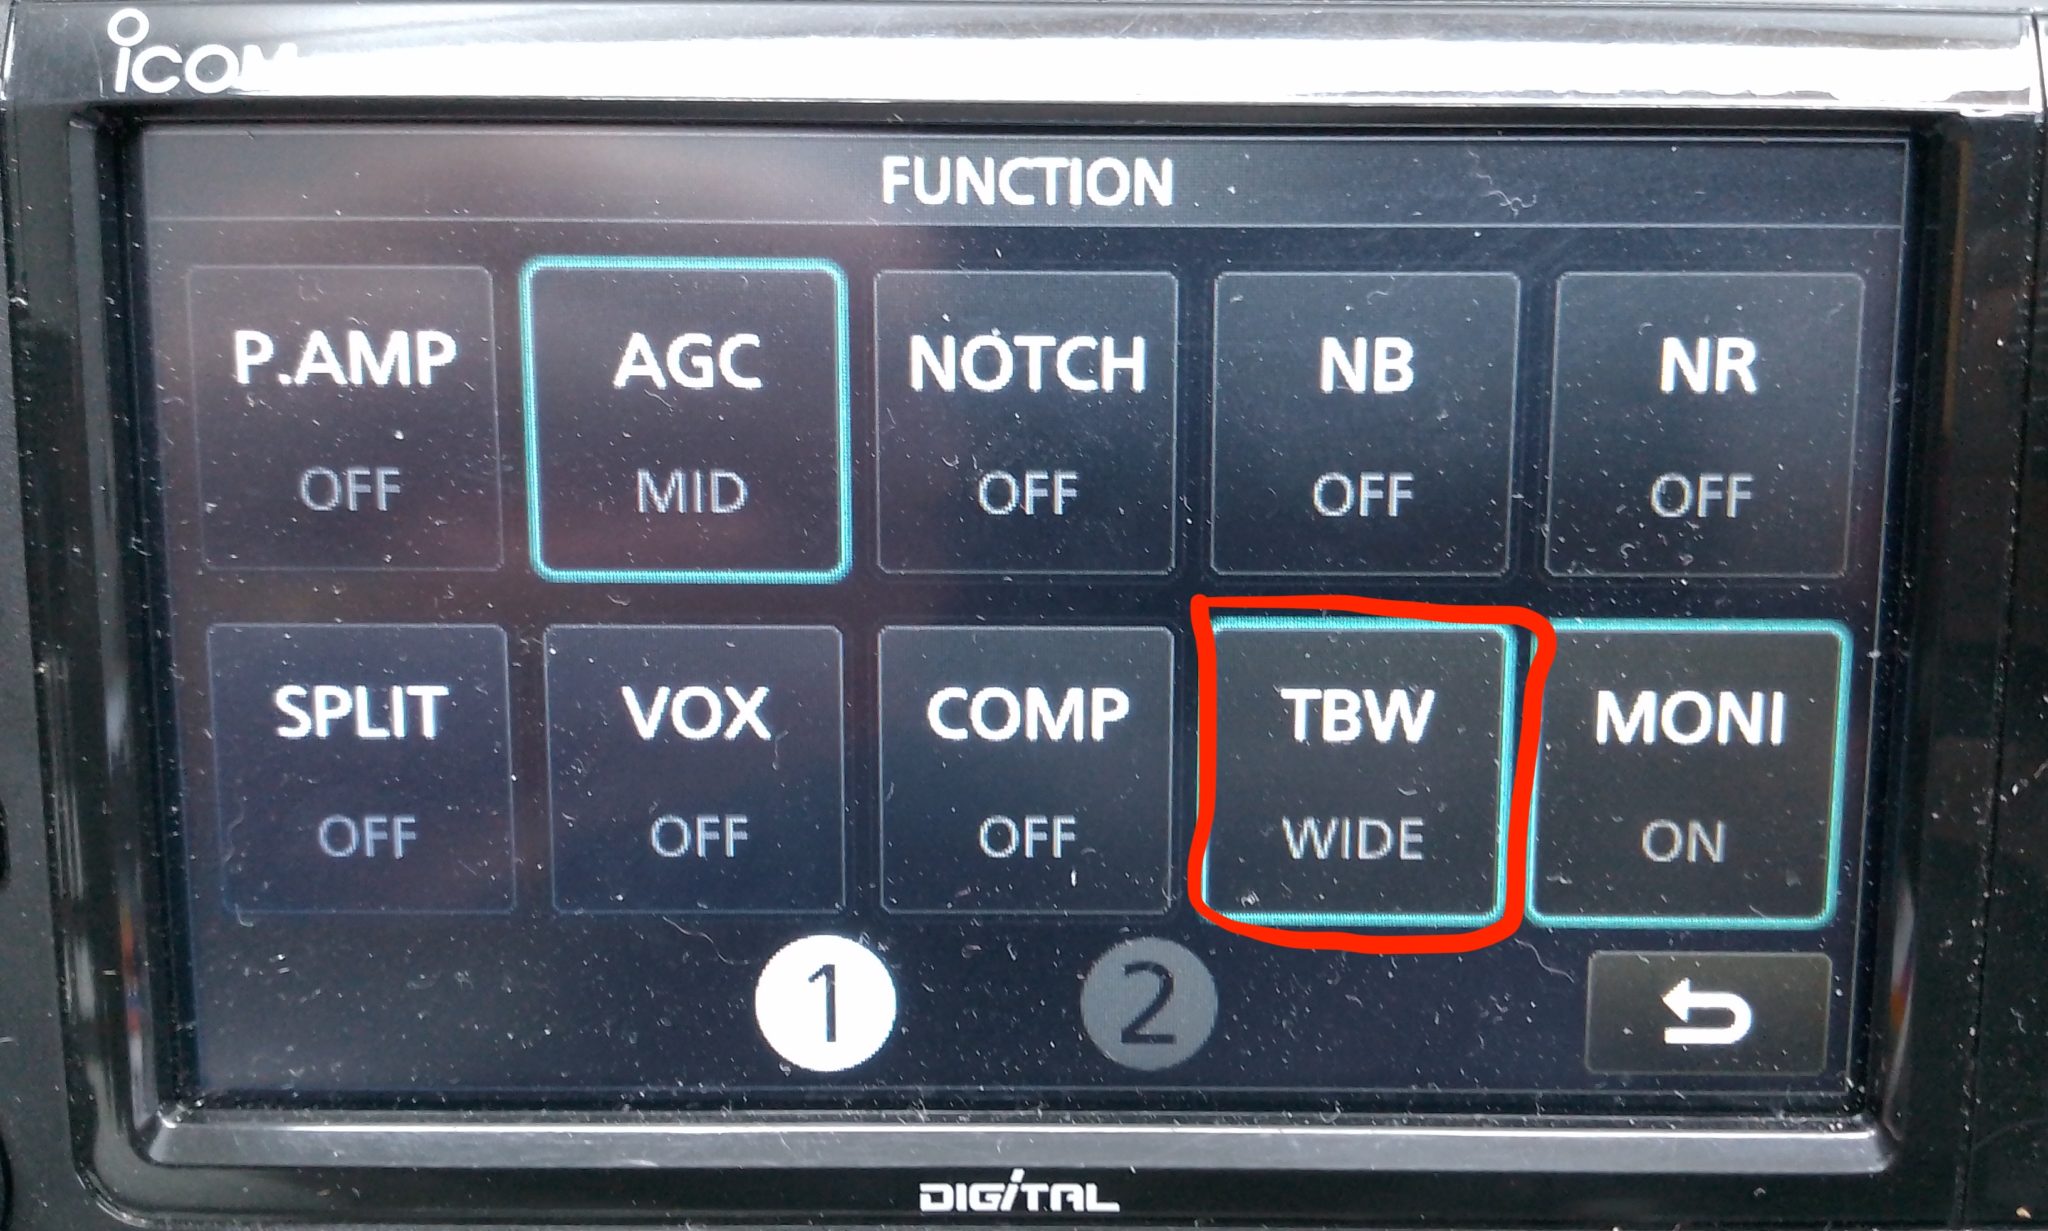
Once I’d got the audio setup correctly I enabled the configuration by setting the Transmit Bandwidth (TBW) to the “Wide” config in the IC-705 Function menu so that the correct settings were made active.

Ever since making these relatively easy changes I have had no end of unsolicited great audio reports from stations asking me what mic I am using and how I’ve managed to get such good audio from the IC-705. Many are surprised that I am using the OEM fist mic that comes with the radio and I’m sure there are those who don’t believe me!

Of course all voices are slightly different and these settings may not be perfect for your voice but, all those that have tried these settings have told me that their audio sounds better than ever and that DX stations often comment on how good their audio is.

I also went through the same exercise with my Yaesu FTDX10 with it’s standard fist mic and again achieved excellent results with it’s 3 channel parametric equaliser. I’ll go through the somewhat more complicated setup for the FTDX10 in another article soon.