I’m a big fan of the RaspberryPi single board computers (SBCs) and have been using them since the very first model was released. (I still have the first model even now!)
Over the years I have used RaspberryPi computers for all sorts of things. These days I use them for running services on the local LANs here at home along with a number of virtual machines providing services both locally and publicly on the internet. (Yes, you can run virtual machines (VMs) on RaspberryPi computers)
I currently have 4 x RaspberryPi 5 SBCs running 24/7 and have had them stored in a simple rack that I designed when I first got into 3D printing. The rack worked ok but, it was difficult to get access to the Pi’s without removing those around the one I wanted to access. This is a real nuisance when you have services running on them all.
I’ve now had my 3D printer for a while and decided it was time to design a better solution. Before I set about diving into the CAD software I decided to have a look on Makerworld to see if anyone else had already come up with something more suitable.
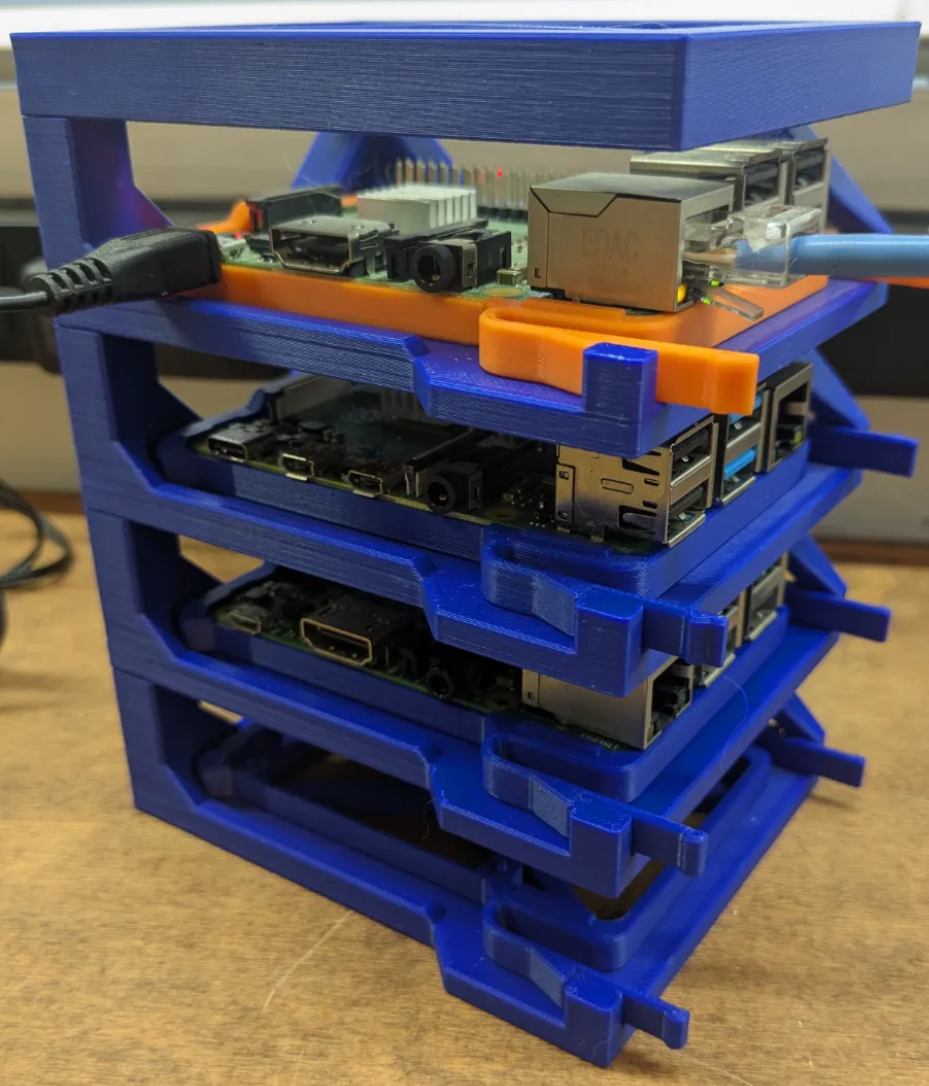
The nice thing about this design is that each Pi module connects to the other using a simple sliding, locking pin system. This means that over time you can add more and more modules to the rack as your RaspberryPi collection grows. The other nice thing is that each Pi SBC is held on its own removable sled making it possible to remove each Pi with ease and without disturbing any of the others.
I downloaded the design into BambuStudio and went through all the component parts. I was really pleased to see that there were two sizes of module available, a single board Pi only module and a tall module for housing a RaspberryPi with a HAT installed.
Since the 4 x Pi5’s that I am using have either an NVME + 2nd Gigabit Ethernet HAT or a NVME SSD Baseboard installed I will need the taller module for each unit.
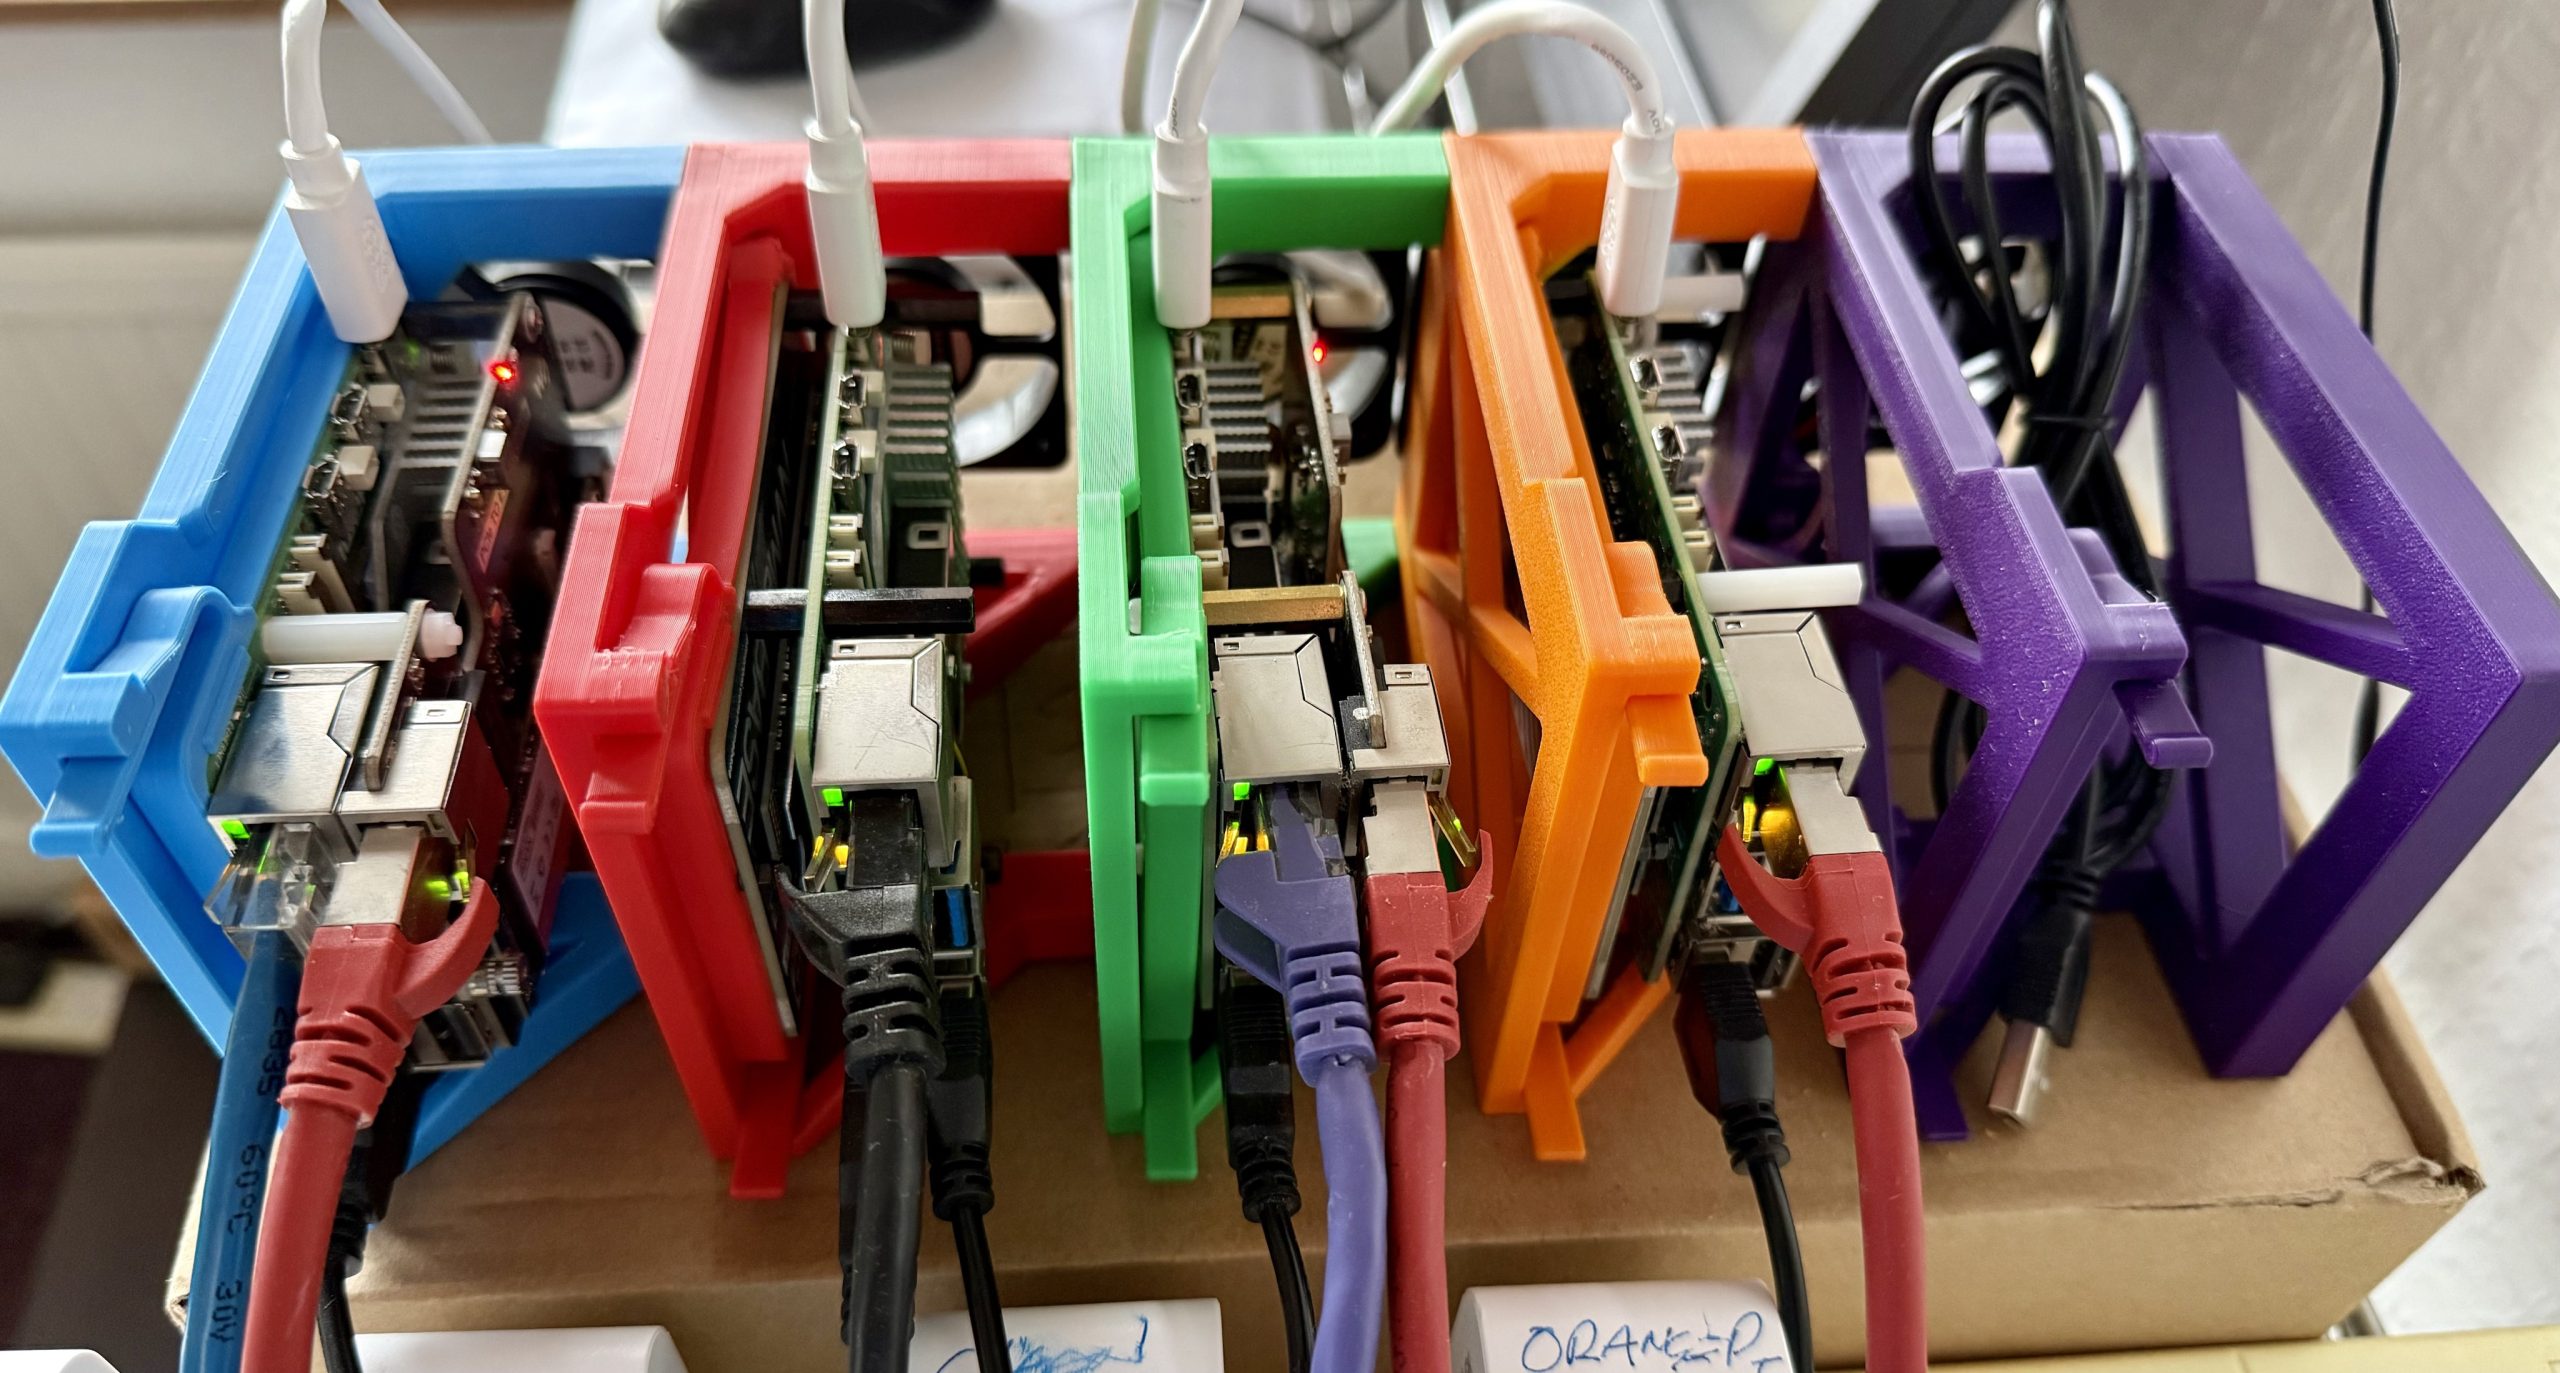
To make it easy to identify each SBC in the rack I printed each module in the same colour as the hostname of the Pi, bluepi, redpi, greenpi, orangepi and a spare slot for purplepi when I get it.
My RaspberryPi rack with 4 x Pi5’s in place and operational
These 4 little Pi’s work hard and CPU temperatures can exceed 50 degrees Celsius very easily. They all have the Official Pi Cooler with fan installed however, this doesn’t come on until the CPU reaches 50c and so I decided to added some extra cooling in the form of a small USB fan onto the back of each module. This reduces the operating temperature of each Pi down to around 25c under full load.
The purple slot on the end is a spare ready to house another Pi SBC. I’d love another Pi5 16GB model but, at the current ridiculous prices it makes no sense to invest in another and so I will fit my spare Pi4 into the slot for now and find something for it to do.
This has been a fun little project to print and put together and will provide the perfect solution to my Pi management woes.
In December 2024 the RaspberryPi 500 was announced with great fanfare in the maker world. Following on from the RaspberryPi 400 series, the 500 model moved the keyboard based 80’s style desktop computer to the new faster CPU and RP1 I/O chip technology that came with the RaspberryPi 5 model.
This was hailed as a big step forward in performance for the 500 series however, for me it was disappointing. The problem with the 500 is that it didn’t come with an M.2 NVME SSD connector and was based around the much slower SD card storage solution.
All of my Pi5 models have been upgraded with the Pimoroni SSD Baseboard and a 250GB M.2 NVME SSD drive making a huge improvement in performance for the little single board computer (SBC).
Along comes the Raspberry Pi 500 and once again it’s hobbled by the fact that it has no SSD support on the motherboard. What was ridiculous was that all the pads and tracks were on the circuit board but, not populated. This annoyed many in the RaspberryPi community, myself included as the new faster machine was once again held back by slow SD card I/O.
What made it even worse was the fact that the 500 didn’t have the facility to add an M.2 NVME SSD via the PCIe interface like on the Pi5, making it even more disappointing.
Needless to say I, along with many others didn’t put my hand in my pocket to purchase a 500 as it would be a huge step backwards from my Pi5’s.
Step forward to September 2025 and RaspberryPi announce the new RaspberryPi 500+, the computer we all hoped for 12 months earlier.
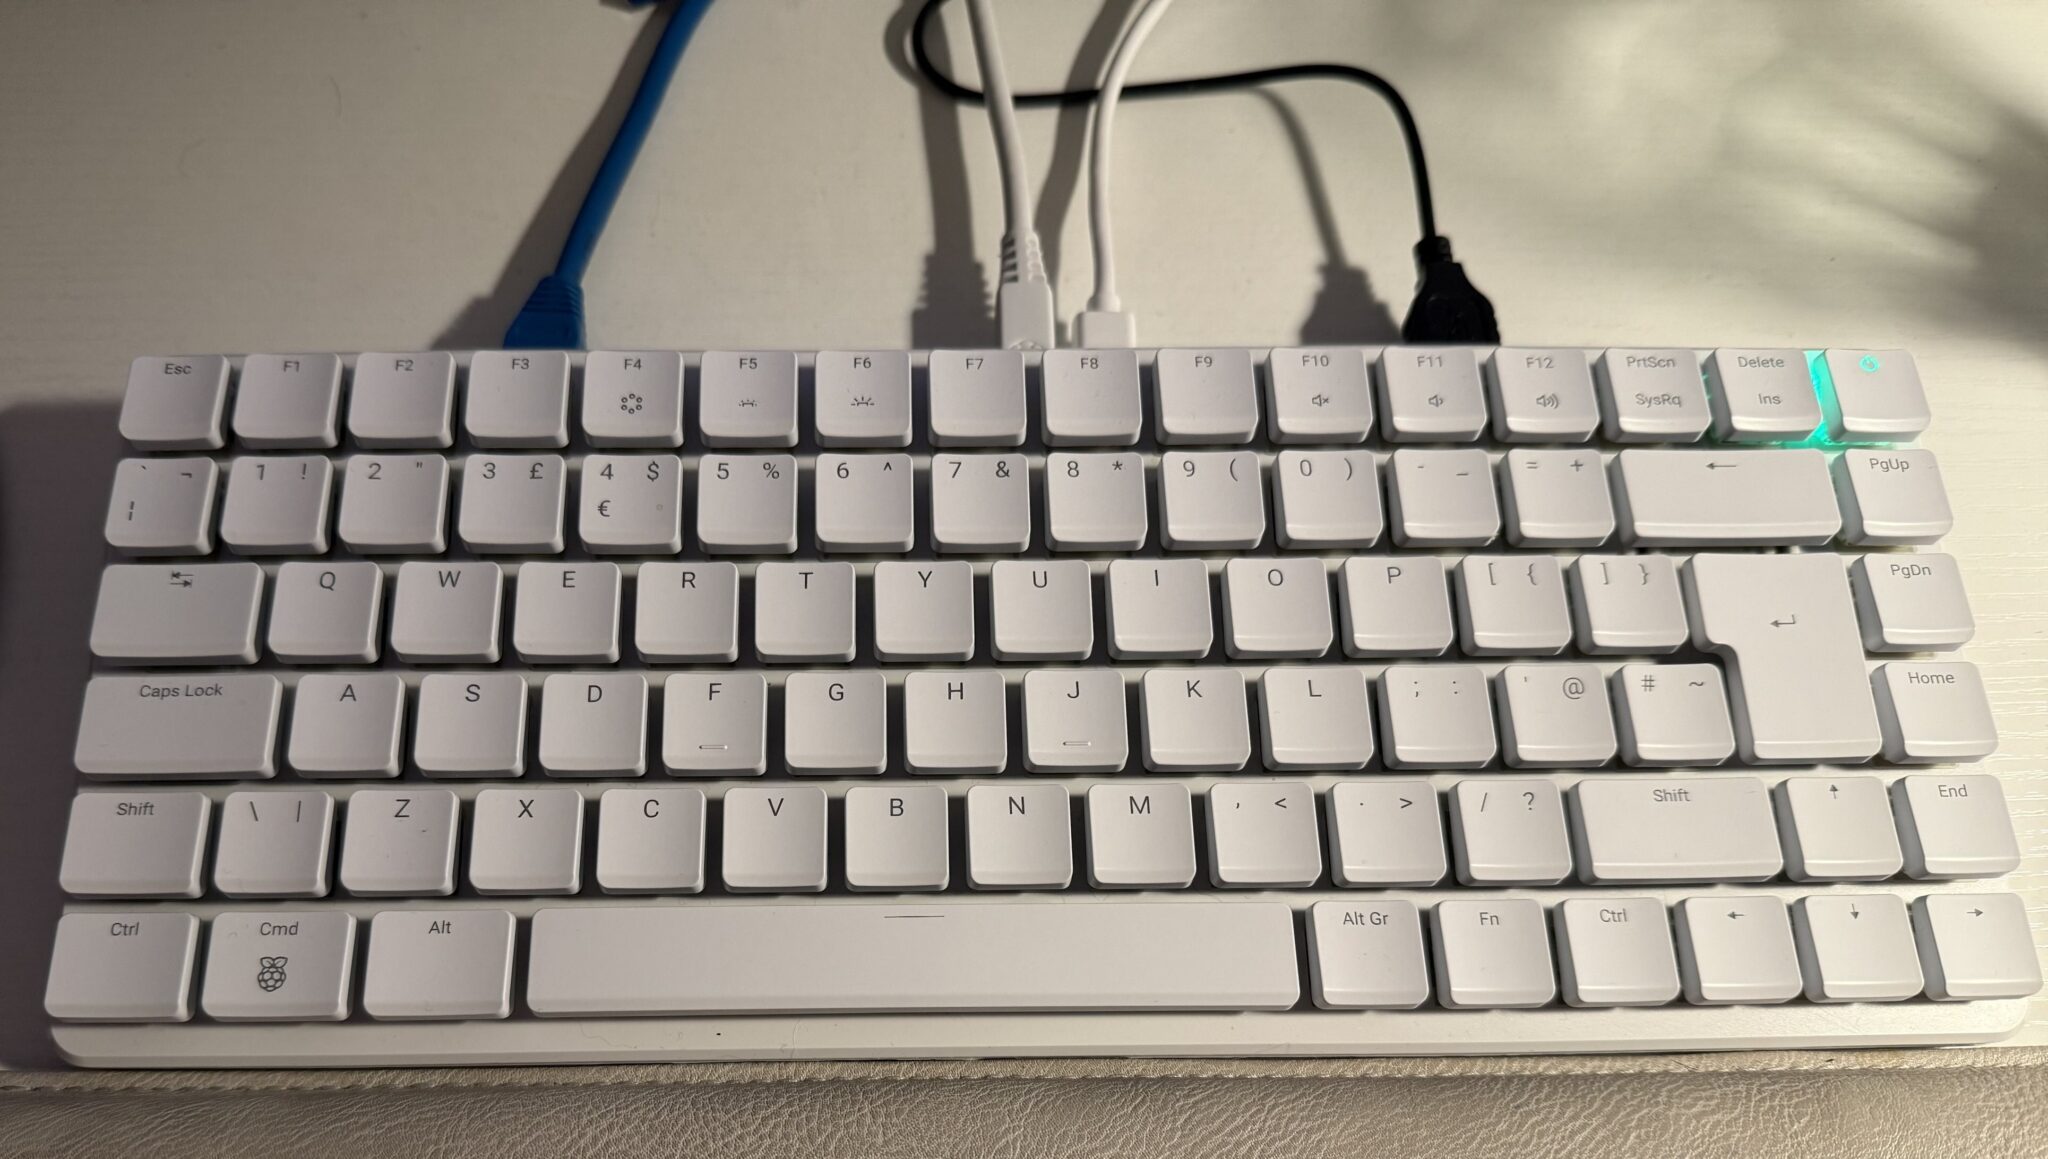
My RaspberryPi 500+ that I’m using to write this article
I ordered my 500+ from Pimoroni the moment the email saying it was available with its new high spec dropped into my inbox. Being one of the first to splash the cash I got a 20% discount off the price too, which made the purchase even easier.
A few days later the 500+ landed on my doorstep and I hastily unpacked it.
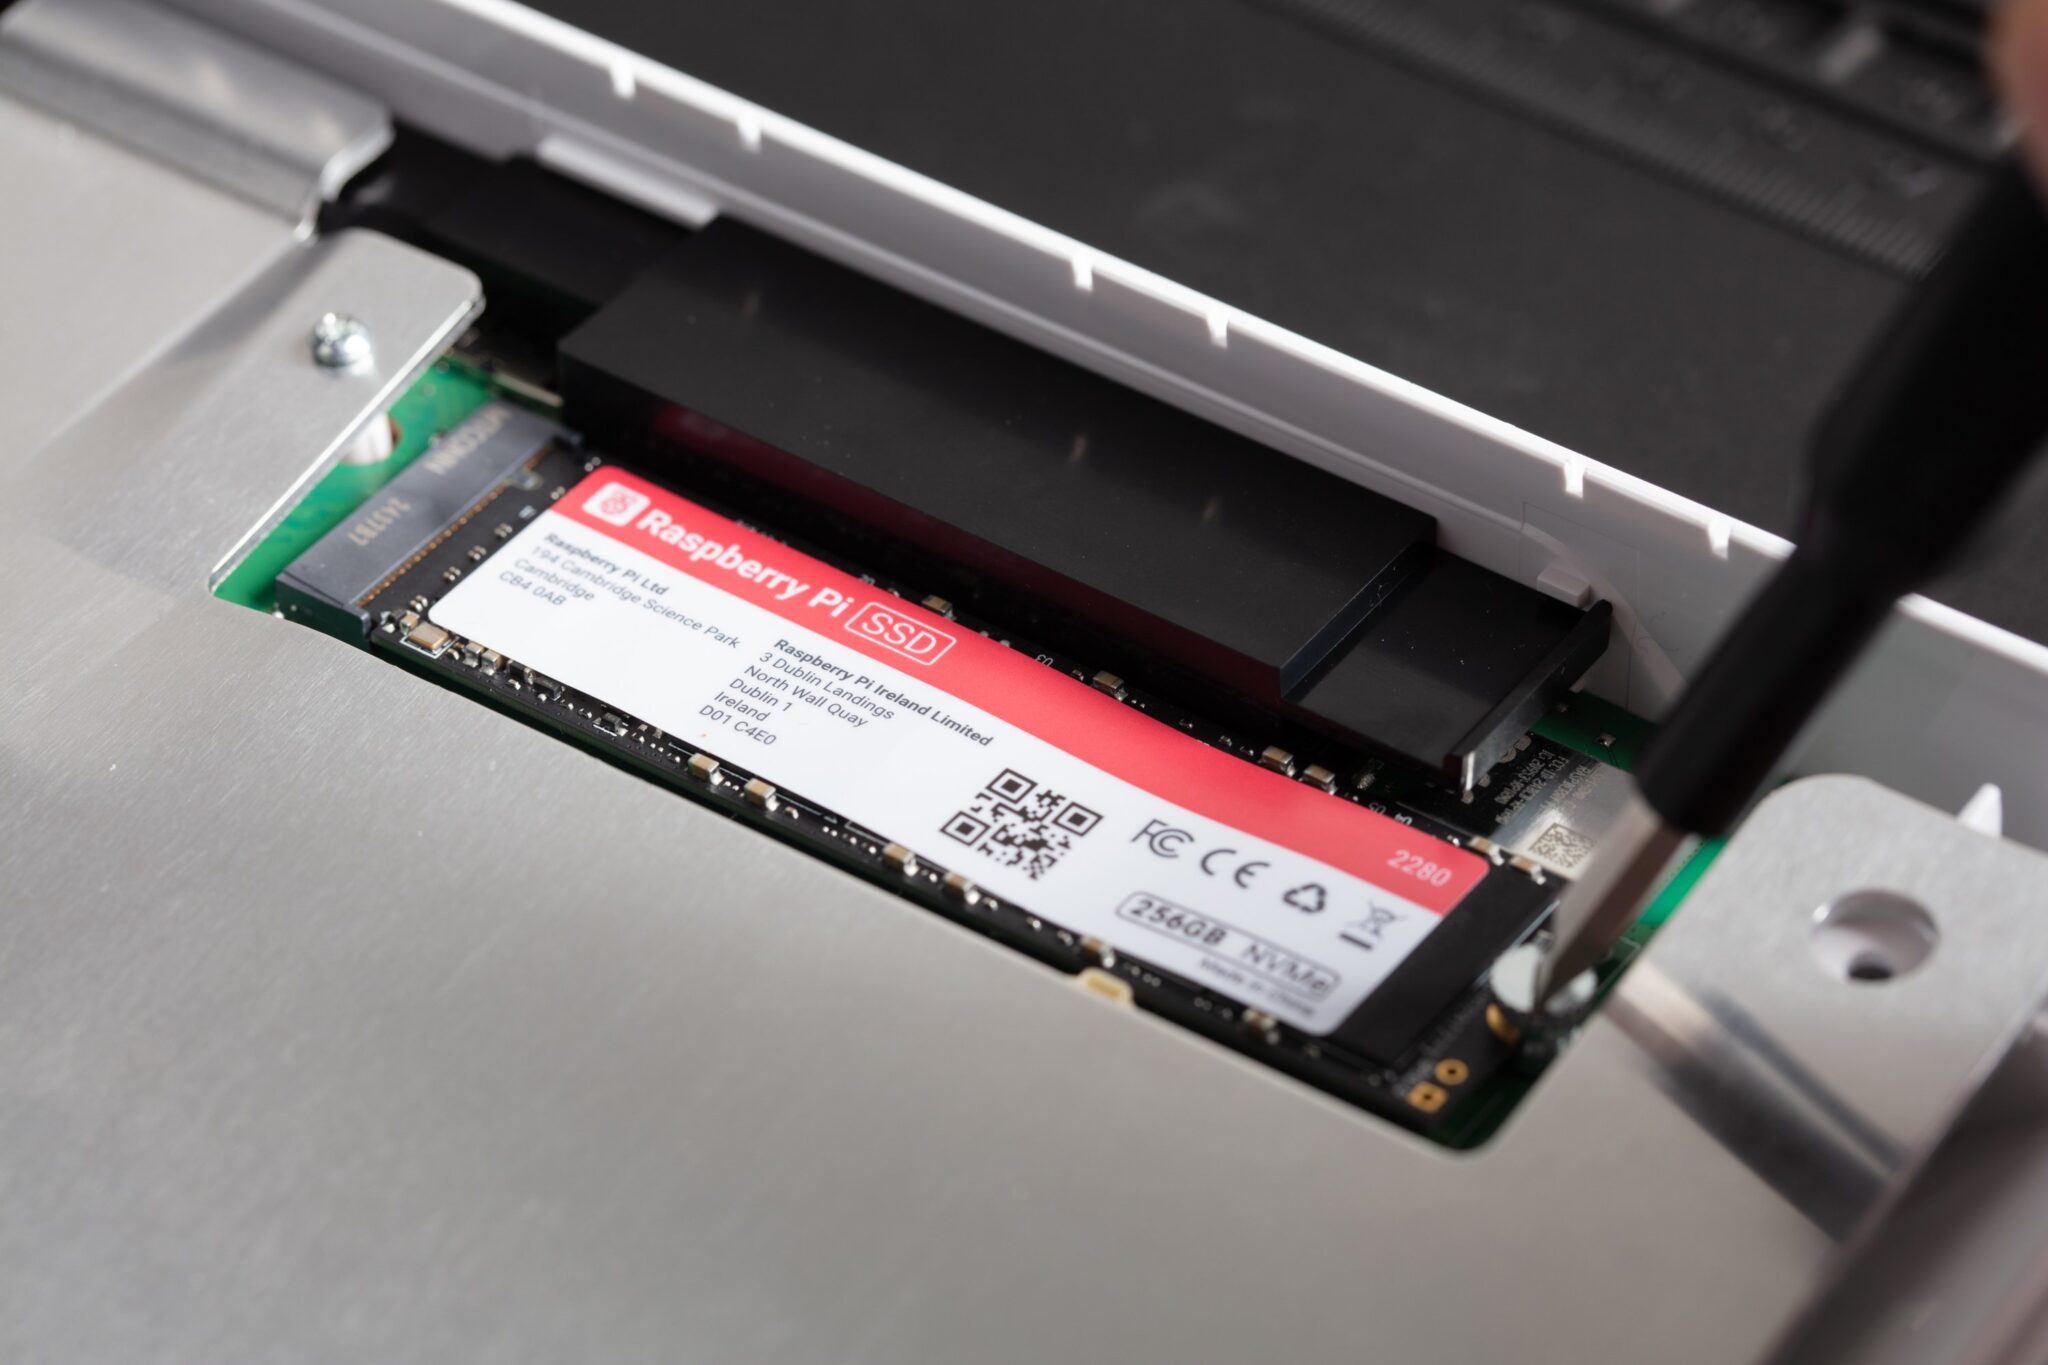
The 500+ comes with 16GB of RAM and a 256GB M.2 NVME SSD drive from the factory, exactly what we all wanted from the original 500. To everyone’s surprise the 500+ also comes with a new Clicky Gateron Blue KS-33 mechanical keyboard. This isn’t something I was expecting but, it was a nice surprise!
Connecting the 500+ to my mouse, ethernet cable, 4K monitor and official PSU it burst into life. The SSD comes preloaded with RaspberryPi OS and boots first time, no messing with loading ISO images to SD cards here!
The first thing I noticed was that the 500+ feels snappier than my Pi5, even though they both have the same SSD drive. Apps start just that bit quicker on the 500+ and copying files around feels quicker too.
Could this be because the SSD is now directly on the motherboard rather than at the end of a ribbon cable like on the Pi5?
The new keyboard is very different to use compared to the old 400/500 and the official RaspberryPi keyboard for the Pi SBC’s. It’s very clicky and slightly wider with more space between the keys. Initially this is annoying as it creates typo hell but, after some time your muscle memory adjusts and your typing gets back to it’s normal typo free experience.
The new keyboard is a nice improvement over the original 500 and makes the hiked price of £178.00 (with 20% discount) worth paying. The new keyboard is also backlit and can be adjusted to a range of colours and effects. I settled on having the keys light up in red once pressed as this is much easier on the eyes.
Since I’d been using a Pi5 with SSD as my desktop PC in the home office for over a year now I wanted to move my custom KDE-Plasma setup over to my new 500+ in place of the rather sparse RaspberryPi OS desktop that comes as standard on the 500+ SSD.
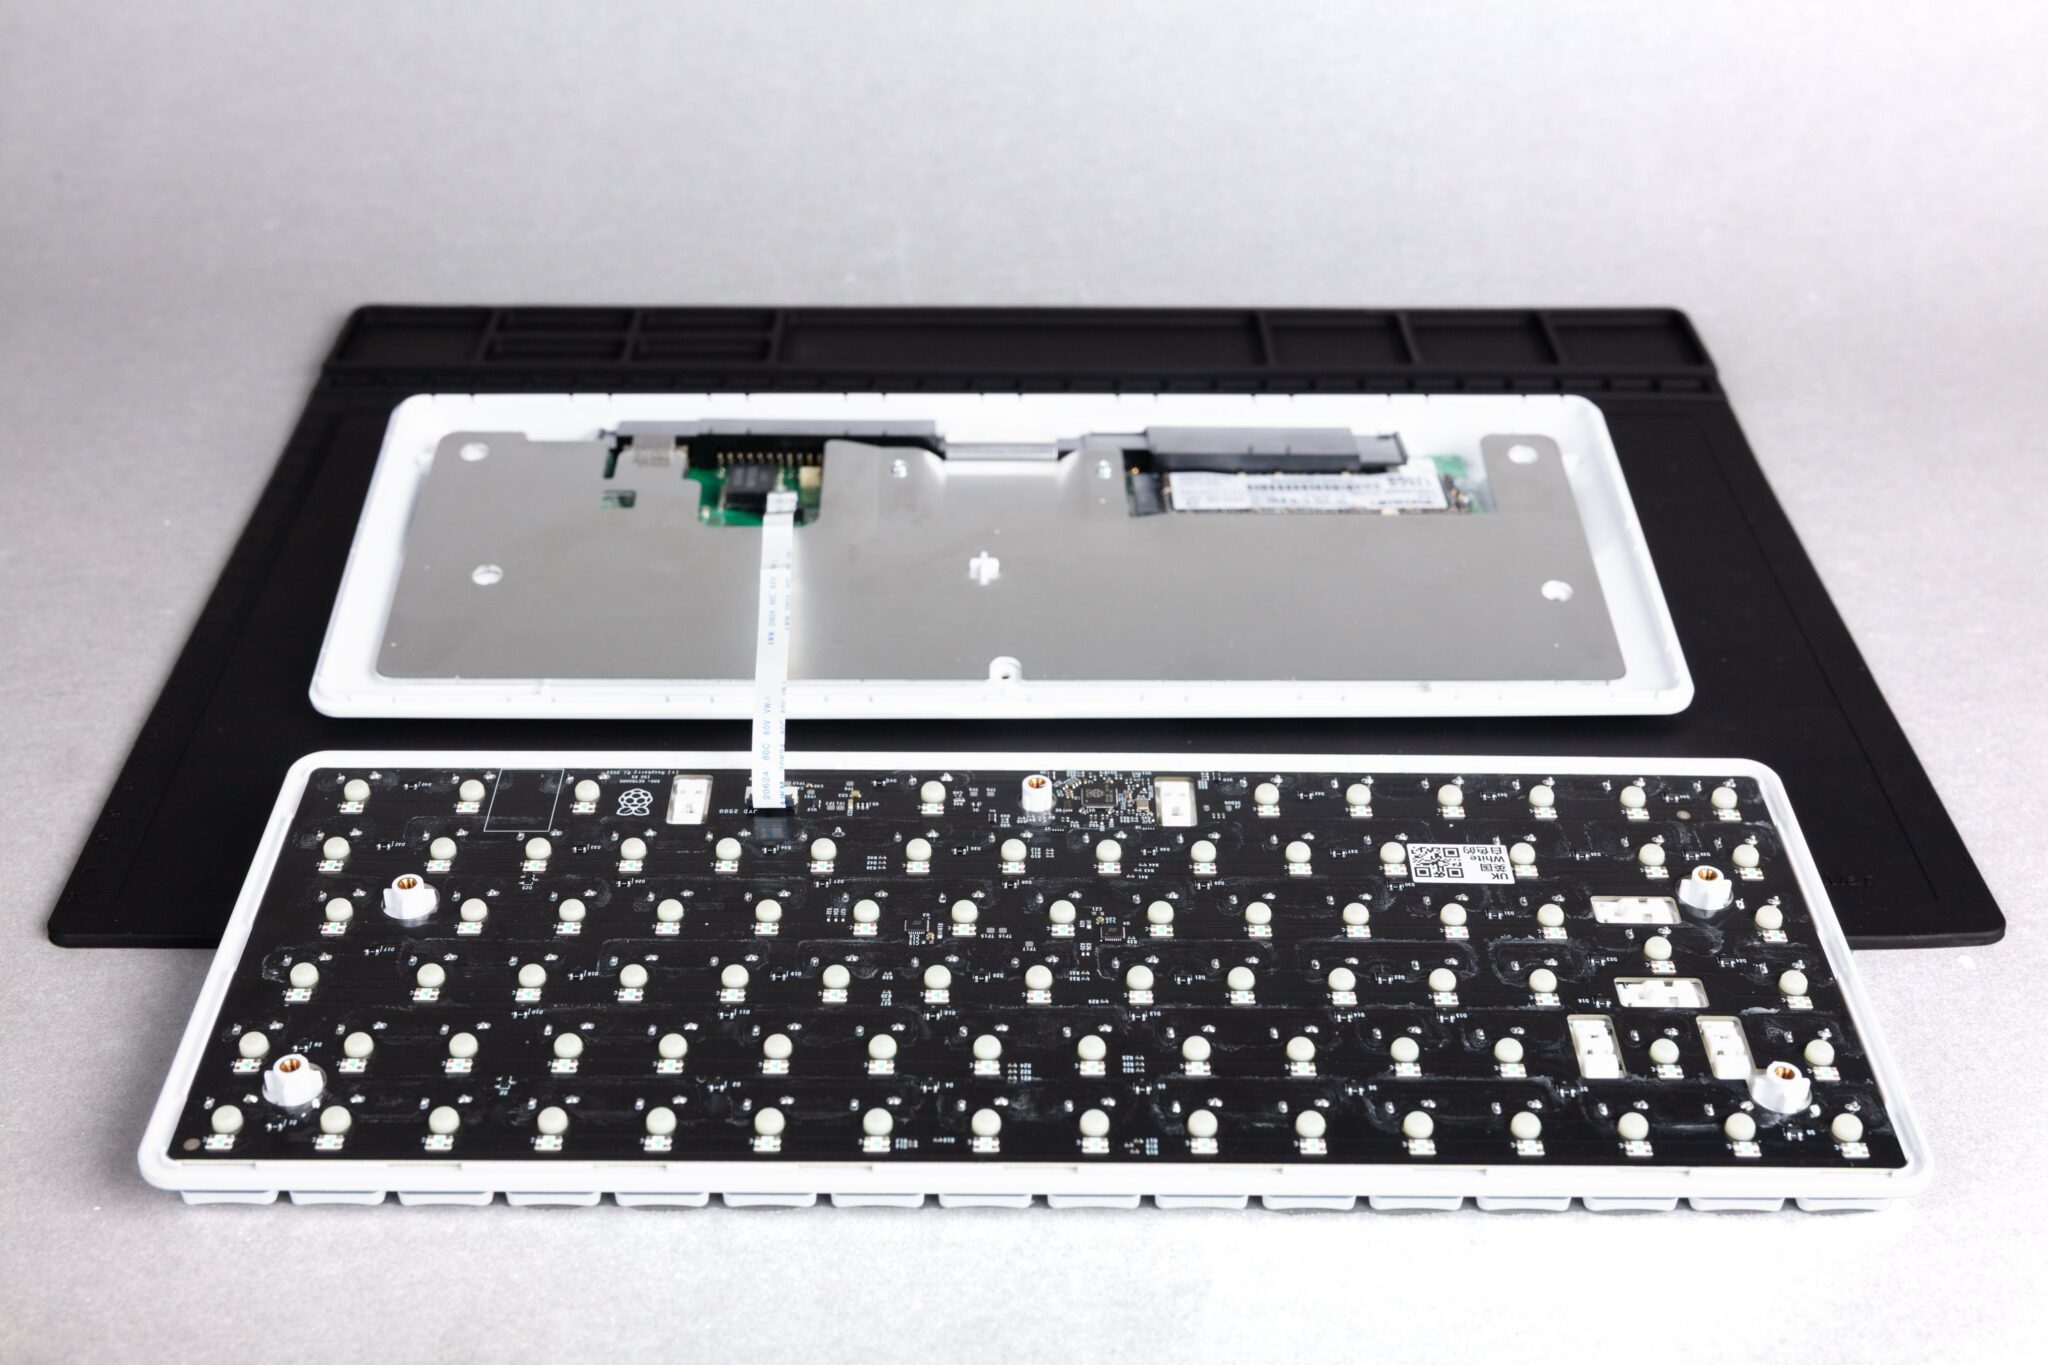
RaspberyPi 500+ open for SSD replacementRaspberryPi 500+ M.2 NVME SSD Drive
Opening the 500+ is relatively easy using the supplied spudger to tease the keyboard top and bottom apart once the screws have been removed.
Upon splitting the top and bottom sections you immediately become aware of the rather fragile looking ribbon cable that connects the keyboard to the motherboard. Access to the SSD drive is very good and it only took a minute to swap the drives over.
Gently clicking the keyboard back to the bottom half of the case and inserting all the screws I reconnected the computer to all my peripherals and switched it on.
In no time at all my favourite KDE-Plasma desktop and all my files and apps were at my fingertips just as they had been for the last year on my Pi5. An easy transition to the new 500+ now means I have a spare Pi5 and 250GB SSD for another project.
I must say that it would had been much nicer if there was a little removable panel on the bottom of the 500+ providing access to the SSD. This would had made it so much simpler to change the SSD drive without having to find the necessary tools to take the unit apart. Maybe an improvement for the 600+ next year!
The other thing I’ve noticed is that the 500+ runs considerably cooler than the Pi5 with the official cooler. My Pi5 would often reach 50 deg C however, the 500+ rarely gets above 30 deg C.
Overall I’m really pleased with my new RaspberryPi 500+, it’s the RaspberryPi I’ve been wanting in my home office for some time and finally it’s arrived.
Was it worth waiting for? Absolutely! It’s everything the 500 should had been at the outset.
Regular readers of my blog will already know that I am a huge fan of the Linux operating system, it’s clearly evident in most of the content on this website.
I am also a very enthusiastic user of one of the first credit card sized computers that came to be, namely the RaspberryPi. I own all the iterations of this wonderful little computer from the very first version to the latest and greatest, RaspberryPi 5.
This little computer has done more for computing in education than Microsoft and Apple will ever achieve and it’s done it at an incredibly low price making it more accessible to schools, colleges and students than any other platform.
The RaspberryPi has what most consider to be the best support on the planet when it comes to single board computers (SBCs). From the dedicated team that build Raspberry Pi OS, to all the amazing projects and forums that are available, for free on the internet today.
The RaspberryPi computer really has revolutionised computing for the masses.
My RaspberryPi 5 that I am using to write this article.
Raspberry Pi OS really is very good. It’s based on the great Debian distro’ that many of us seasoned Linux users dearly love. It’s light weight, fast and meets the needs of everyone that is venturing into the exciting world of Linux and SBCs for the first time.
Overtime as we all become more experienced with Linux on the RaspberryPi we become more demanding and start to find the Raspberry Pi OS desktop environment lacking. Sure it can be enhanced by adding more and more to it however, it never quite reaches the point of satisfaction and we are always wishing for something more.
With the Pi-5, the latest iteration of this great credit card sized computer, users are now able to seriously think about building a more powerful desktop environment for their little berry flavoured computers.
On my desktop PCs dotted around the house I have used Kubuntu for decades. It’s a slick and powerful desktop environment that has met my needs for many years and I love it more than any other Linux desktop. Sadly Kubuntu isn’t easily available out the box for the RaspberryPi and so I decided that it was time to replicate it as closely as possible on my new, super powerful RaspberryPi 5.
When I ordered my RaspberryPi 5 from Pimoroni I added the NVMe base and 250GB M.2 SSD drive to the order. Up until now I’d always used SD cards however, they are slow and unreliable and so I decided that since the Pi-5 has PCIe it was time to take the step away from SD cards and start using SSD technology.
Getting the OS onto the SSD is a two stage affair. First you have to create a bootable SD card to boot the Pi-5 from and then use it via the RaspberryPi Imager to install the OS onto the SSD. It’s a bit long winded but, easy enough.
Since I’m a huge Kubuntu fan I decided my desktop of choice for my new Pi-5 was going to be KDE-Plasma. I had tried to install this desktop before on older model Pi’s however, it ran so slow that it was unusable. With the new Pi-5’s increased computing power and the speed of the SSD I was confident that this was now possible.
I started out installing the Lite version of Raspberry Pi OS on the SSD. This is a command line only version of Linux that doesn’t include any desktop environment, a nice clean slate to start from.
RaspberryPi Imager showing Pi OS Lite (64bit)
Once the Lite version of the OS was installed on the SSD I shutdown the Pi-5 and removed the SD card and then powered the Pi-5 back up again so that it booted from the SSD.
Upon booting I was presented with the simple Linux Login prompt. After entering my username and password as setup during OS install I landed at the Linux command prompt.
sudo su -
I used sudo to become root user as shown above and then set about building my new KDE based super computer. First I needed to update the operating system with all the latest patches and security fixes.
apt update && apt dist-upgrade
The update and upgrade process ran for a while but, it was soon complete.
reboot
I issued the reboot command and then logged back in again, I was now ready to start building the KDE desktop environment.
sudo su -
apt install kde-plasma-desktop gldriver-test
Becoming root again I type the command to install the KDE-Plasma desktop and the graphics-related config services. There’s a lot of packages to download and install so, I left it to do its thing.
A little while later all the packages were installed and ready to go. I now needed to tell the system to boot into the new graphical user interface instead of the command prompt using systemctl.
systemctl set-default graphical.target
Once this was done I needed to make a change to the display settings using the raspi-config program.
raspi-config
Selecting No.2 on the menu, Display Options and then D2 Screen Blanking, I disabled screen blanking so that I got the full 4K support for my KDE Desktop.
Once the system had been configured for a graphical user interface there was only one thing left to do and that was to shutdown the RaspberryPi.
shutdown -h now
The beautiful KDE-Plasma Desktop on RaspberryPi 5
Powering the Pi-5 back up again I was greeted by the standard KDE Plasma login screen and then, after logging in I was transported to the beautiful KDE desktop. I was now smiling like a Cheshire cat!
The KDE desktop is incredibly snappy on the Pi-5 with an SSD, app’s open instantly and run with minimum CPU exertion. It was now time to load the rest of the KDE application suite to complete the build. Popping open a terminal I hit the command line once more.
sudo su -
apt install kde-full vim yakuake vlc firefox rsyslog
This loads the full set of KDE applications adding just about everything you’ll ever need to the desktop environment. It’s about 1GB of packages and so depending on your internet speed it could take a while but, it’s well worth the wait.
Once complete you are ready to go with a fully functional, snappy, powerful desktop.
I’m extremely pleased with the performance of the Pi-5. KDE is super fast, snappy and responsive. With 8GB of RAM on tap the RaspberryPi has no problem with performance. The Pi-5 and KDE-Plasma really do make a great desktop computer at an incredible cheap price.
Looking for a new computer?
Add a cheap USB sound card and a pair of speakers and this little setup will meet the needs of 90% of the population with ease and go on to satisfy the more seasoned, demanding Linux user or programmer without breaking the bank.
More soon …
We use cookies to ensure that we give you the best experience on our website. If you continue to use this site we will assume that you are happy with it.