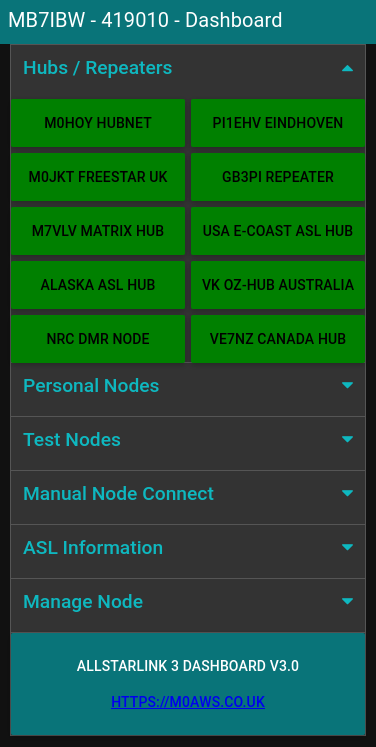
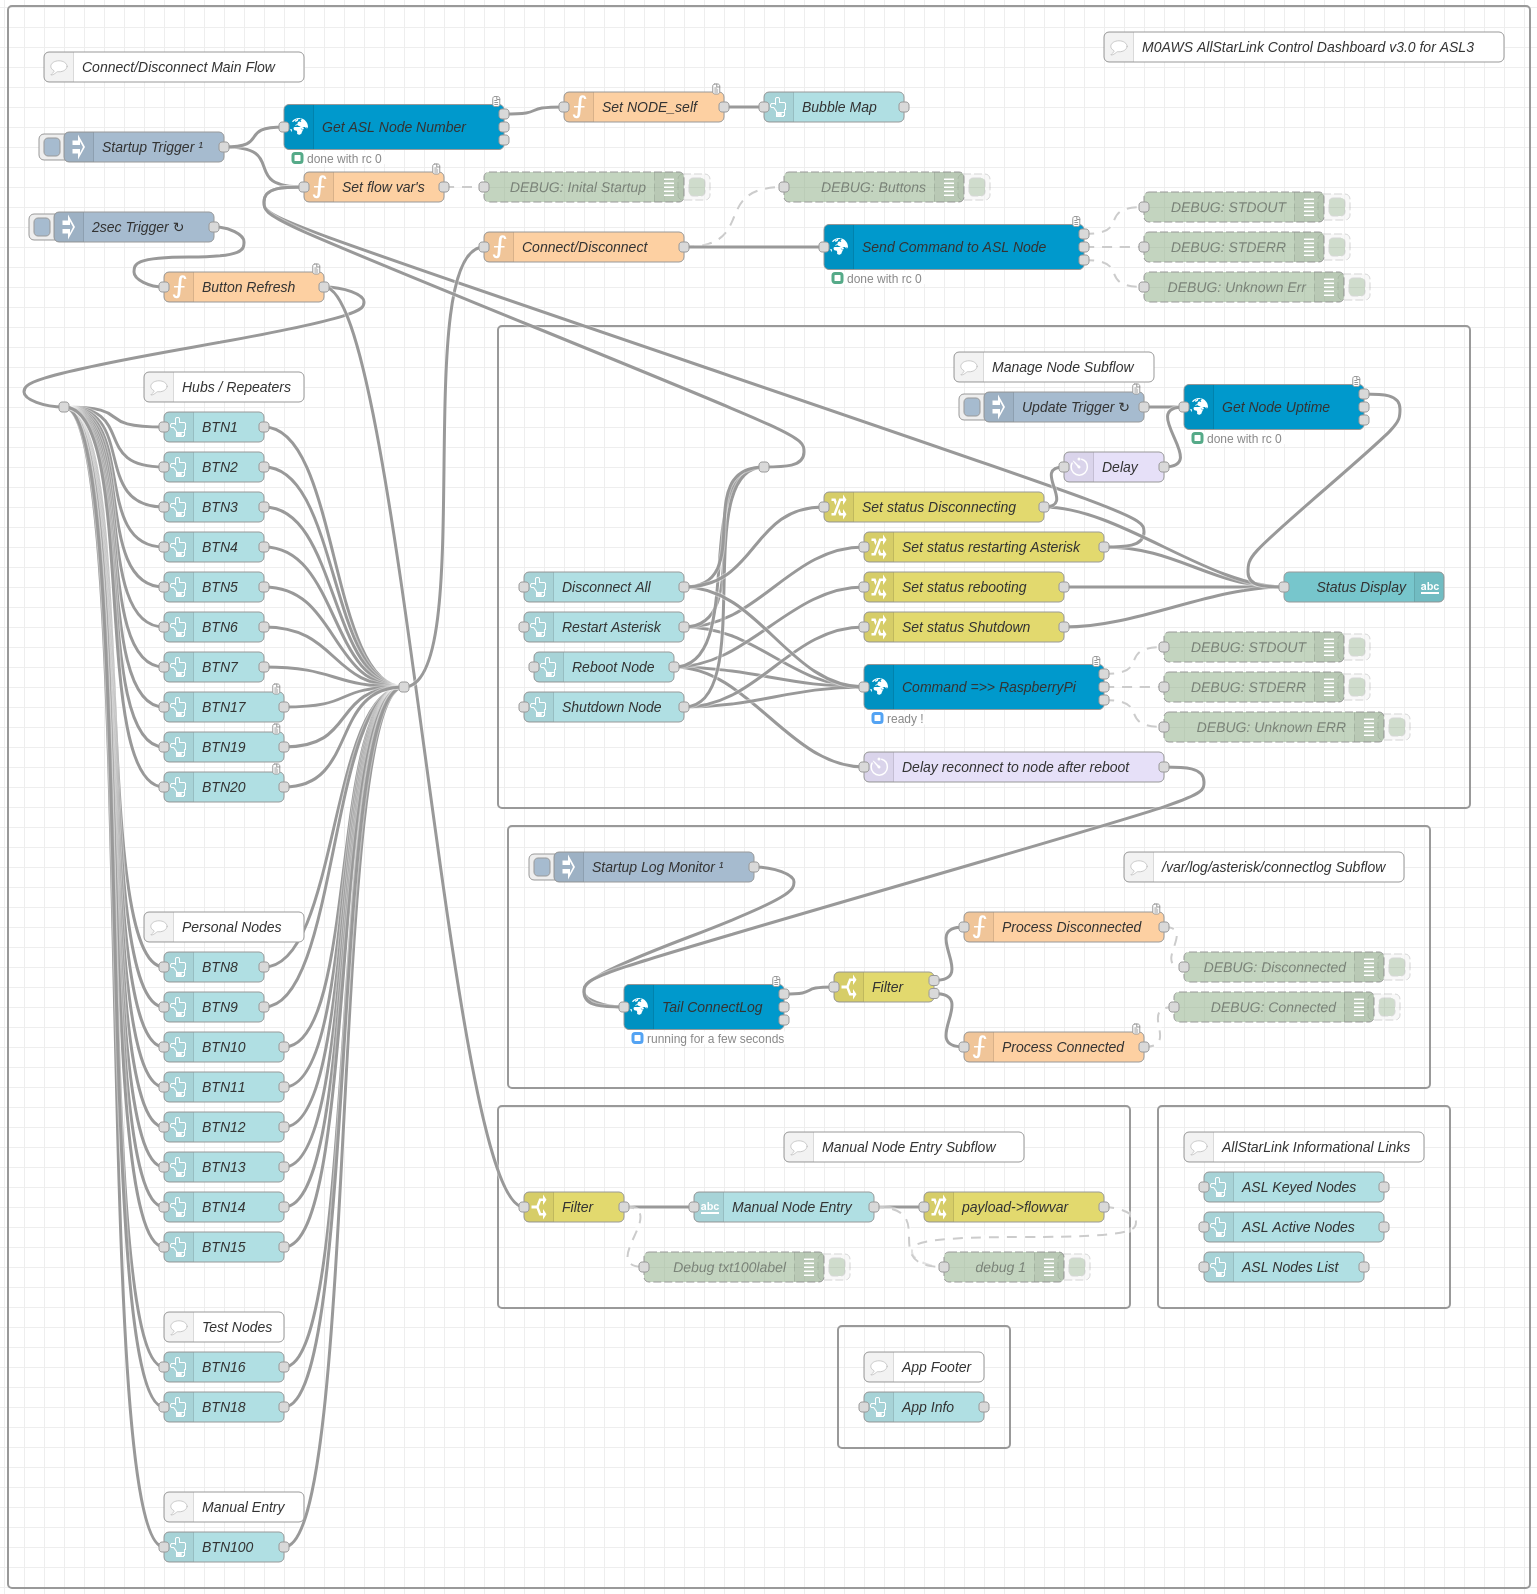
Node-Red Control Dashboard for AllStarLink 3

I’ve recently built a new AllStarLink (ASL) node for my MB7IBW gateway that I have recently brought up on air on the 2m band.

AllStarLink 3 has a lot of changes in it when compared to the previous version and this of course impacts my Node-Red Control Dashboard that I’ve been using to manage my first ASL node for well over a year now.

To build the node I used the RaspberryPi imager and added the AllStarlink 3 image as detailed on the allstarlink.org website.

Installing the system this way makes it pretty easy compared to previous installs but, it comes with some quirks which cause issues with Node-Red.

From the outset the plan has always been to have AllStartLink 3 and Node-Red running on the same Pi4 to keep it totally self contained. This was easy enough to achieve and works without issue.

Node-Red Control Dashboard for AllStarLink 3

Installing Node-Red onto a Pi4 is really easy and is fully documented on the Node-Red Website.

Once the AllStarLink 3 operating system was installed on my SD card, booted and operational I installed Node-Red. I soon realised that there were a few things I had to do before loading the Node-Red flow.

AllStarLink 3 no longer logs connect and disconnect messages in the connectlog like it did in AllStarLink 2. To get logging working again I had to create two new BASH scripts as detailed below and put them into /etc/asterisk/myscripts.

For the connect information I created the BASH script as detailed below.

#!/bin/bash

# /etc/asterisk/myscripts/connectlog.sh

echo $1 Connected $2  on $(date +"%T") - $(date +"%m-%d-%Y")  >> /var/log/asterisk/connectlog

For the disconnect information I created the 2nd script detailed below.

#!/bin/bash

# /etc/asterisk/myscripts/disconnectlog.sh

echo $1 Disconnected $2  on $(date +"%T") - $(date +"%m-%d-%Y")  >> /var/log/asterisk/connectlog

Once these scripts were created I had to change the ownership and privileges as detailed below.

cd /etc/asterisk/myscripts
chown asterisk:asterisk ./*
chmod 750 ./*

I also had to change ownership/privileges of /etc/asterisk/myscripts.

cd /etc/asterisk
chown asterisk:asterisk ./myscripts
chmod 755 ./myscripts

Once the two scripts were in place I had to alter the asterisk config so that it called the scripts as part of the connect/disconnect process.

I found the connpgm and discpgm entries in /etc/asterisk/rpt.conf and changed them as shown below.

connpgm = /etc/asterisk/myscripts/connectlog.sh

discpgm = /etc/asterisk/myscripts/disconnectlog.sh

Next I disabled the temporary filesystems that are used by default for the apache and asterisk logging as it’s useful to keep the apache logs for debugging and I needed the asterisk logs for the Node-Red dashboard.

Disabling the temporary file system is very easy to do, just edit the /etc/fstab and comment out the two lines as shown below.

# Comment out the next line for persistent Apache logs
#tmpfs  /var/log/apache2        tmpfs   defaults,noatime,nosuid,nodev,noexec,mode=0775,size=32M 0 0

# Comment out the next line for persistent Asterisk logs
#tmpfs  /var/log/asterisk       tmpfs   defaults,noatime,nosuid,nodev,noexec,mode=0775,size=32M,uid=102,gid=106 0 0 

# Note: These lines are wrapped, should be on 1 line in the /etc/fstab

Once the entries in the /etc/fstab were commented out I rebooted the Pi4 to get persistent filesystems.

The final thing that had to be done was to allow user repeater to use sudo without a password so that it could be used to perform reboot/shutdown/process restart as user root from within the dashboard.

# /etc/sudoers

# Allow repeater sudo without password
repeater ALL=(ALL) NOPASSWD: ALL

Once this was all done I imported the Node-Red flow, configured the SSH nodes with login credentials for the Pi4 (important to use the user repeater for SSH), clicked deploy and the dashboard was ready for use.

Node Red AllStarLink3 Control Dashboard Flow

I’ve been using the dashboard for a few weeks now and it’s running perfectly, without error.

If you want to build your own Node-Red Control Dashboard for your AllStarLink 3 node then, just download the flow using the button below and import it into your flow editor.


More soon …

Node-Red Dashboard for AllStarLink 3 Nodes

I’ve spent some time this afternoon modifying my Node-Red Dashboard for controlling AllStarLink nodes to work with the new AllStarLink version 3.

My original AllStarLink Control Dashboard was designed to work with AllStarLink 2 which I have running on an old RaspberryPi 3b on the 70cm band. The dashboard has worked reliably ever since deployment and is in use daily.

With the release of AllStarLink 3 and all the changes that it entails I’ve had to make a few changes to the dashboard flows in order to make it compatible with AllStarLink 3 nodes.

This entails not only flow changes but also the addition of two new bash scripts that are called by Asterisk to log connect and disconnect messages as they are not logged by default any more. (Seems a bit of a step backwards)

Node-Red AllStarLink Control Dashboard v3.0 for ASL3

The changes also entail disabling the temporary filesystems used by default in the new ASL3 build so that log files etc become persistent.

I’ll spend some time using the new dashboard to ensure it’s working correctly and then will release it into the wild for all those that are brave enough to move over to AllStarLink 3.

More soon …

Xiegu XPA125B Button Press

For some time now I’ve been using my Xiegu XPA125B amplifier with my Hermes Lite 2 + I/O board combo with great success. With the amp changing bands automatically it really is nice to use.

With the multitude of remote controlled smart plugs available today I’ve now got the ability to switch the station on remotely however, there’s been one issue that has plagued me until now and that’s the Xiegu amp doesn’t come on when power is applied to it, you have to press the power button on the front of the amp before it will fire up.

This of course stops me from being able to fully use the station remotely as there’s no one there to press the power button on the amp, until now.

Chatting with Steve, M0XVT he discovered that if the power button is held pressed all the time the amp will come on when power is applied. This then gave me the idea of designing a button press device that I could 3D print and clip onto the front of the amp so that the button is always pressed.

M0AWS Xiegu XPA125B Clip on Power Button Press

The Xiegu amp has a very nice flange around the front edge of the amp case that lends itself nicely to clip on a simple button press device as shown above in my 3D design software.

The button press is designed so that the top is put on first and then the bottom is just snapped into place with a gentle push. This makes it easy to get on and off without marking the amplifier.

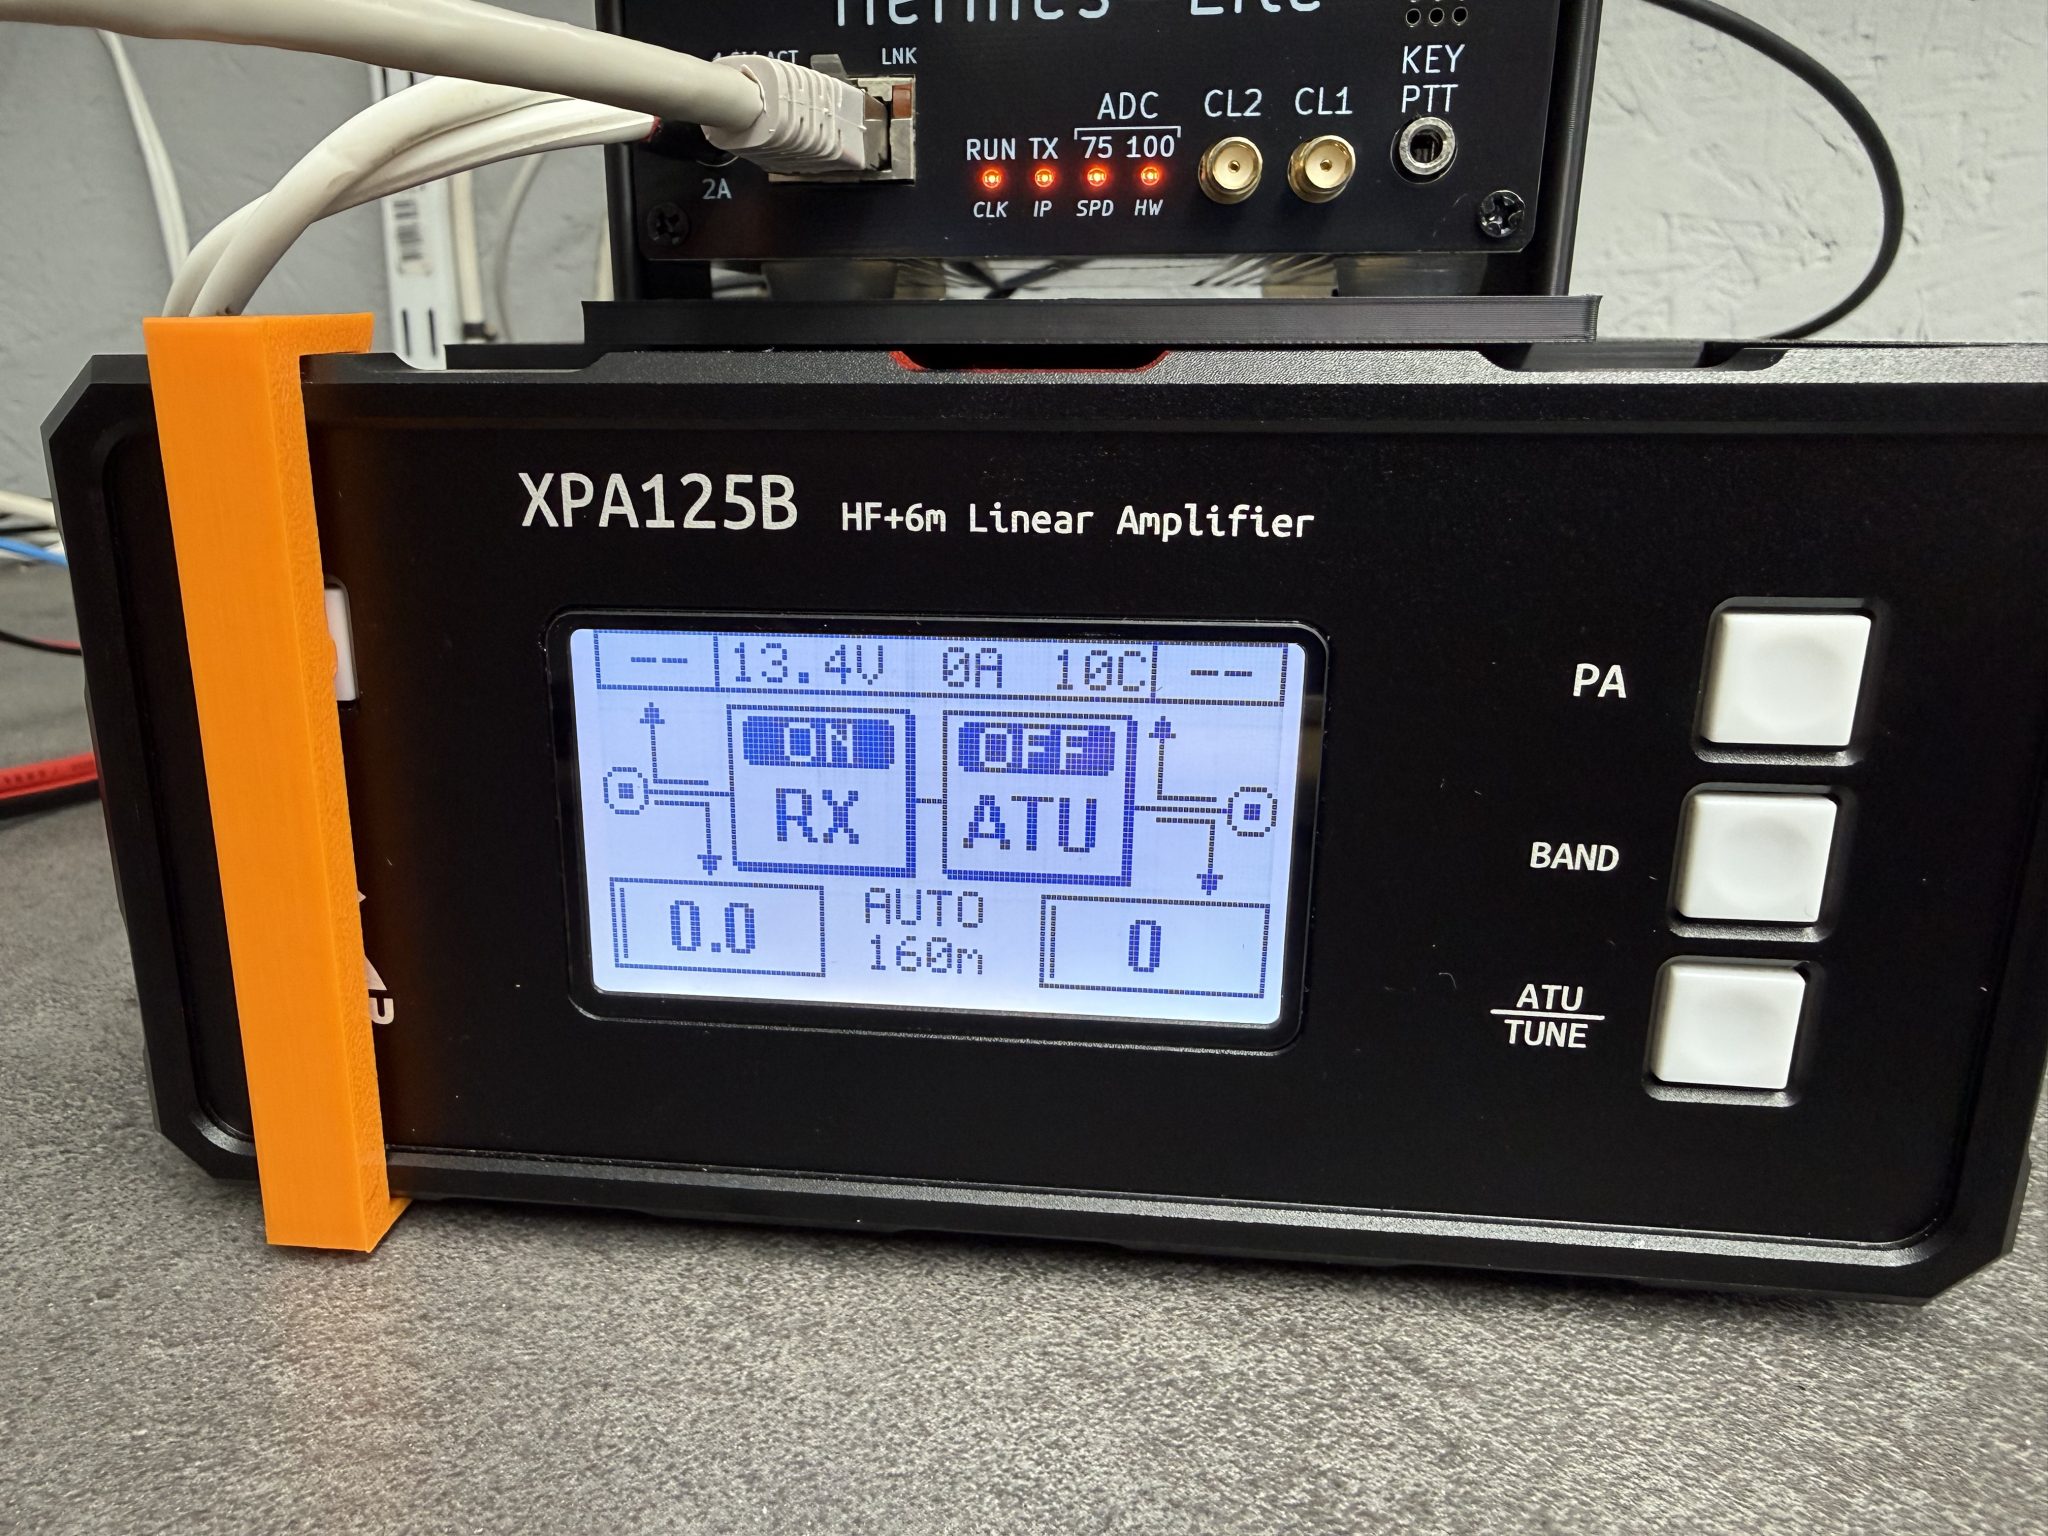
M0AWS Xiegu XPA125B Clip on Power Button Press

In just a few minutes I had the button press design uploaded to my Bambu Lab A1 Combo 3D printer and in no time at all the button press was ready for use.

As you can see in the photo above it fits snugly to the front of the amp gently holding the power button in so that the amp comes on when power is applied. Simple but, effective.

I’m sure I’m not the first person to have this problem and so, I’ve made the .STL 3D print file available for download below.


I hope this is of use to people who want to be able to use their Xiegu amp remotely without leaving the power on all the time.

More soon …