Building MB7IBW 2m AllStarLink Internet Gateway

I’ve recently built another AllStarLink node to compliment my personal 70cm band SHARI node as I thought since I have a full duplex dual band handheld it would be great to have another node that I could connect to FreeStar or HUBNet at the same time as monitoring the Matrix node.

Rather than build another personal node I decided this time I would build a public node, obtain a callsign from the RSGB and make it available to the HAM’s locally on the 2m band.

This would make it possible for me to monitor both nodes at the same time using my Wouxun KG-UV9K full duplex dual band handheld whilst providing the local HAM community with access to the AllStarLink network.

Initially I thought I may be able to use my old Retevis RT85 handheld and AIOC board for the 2m node but, after a little testing it soon became apparent that it overheats during long overs (which are common on AllStarLink) and so, I needed to find another solution.
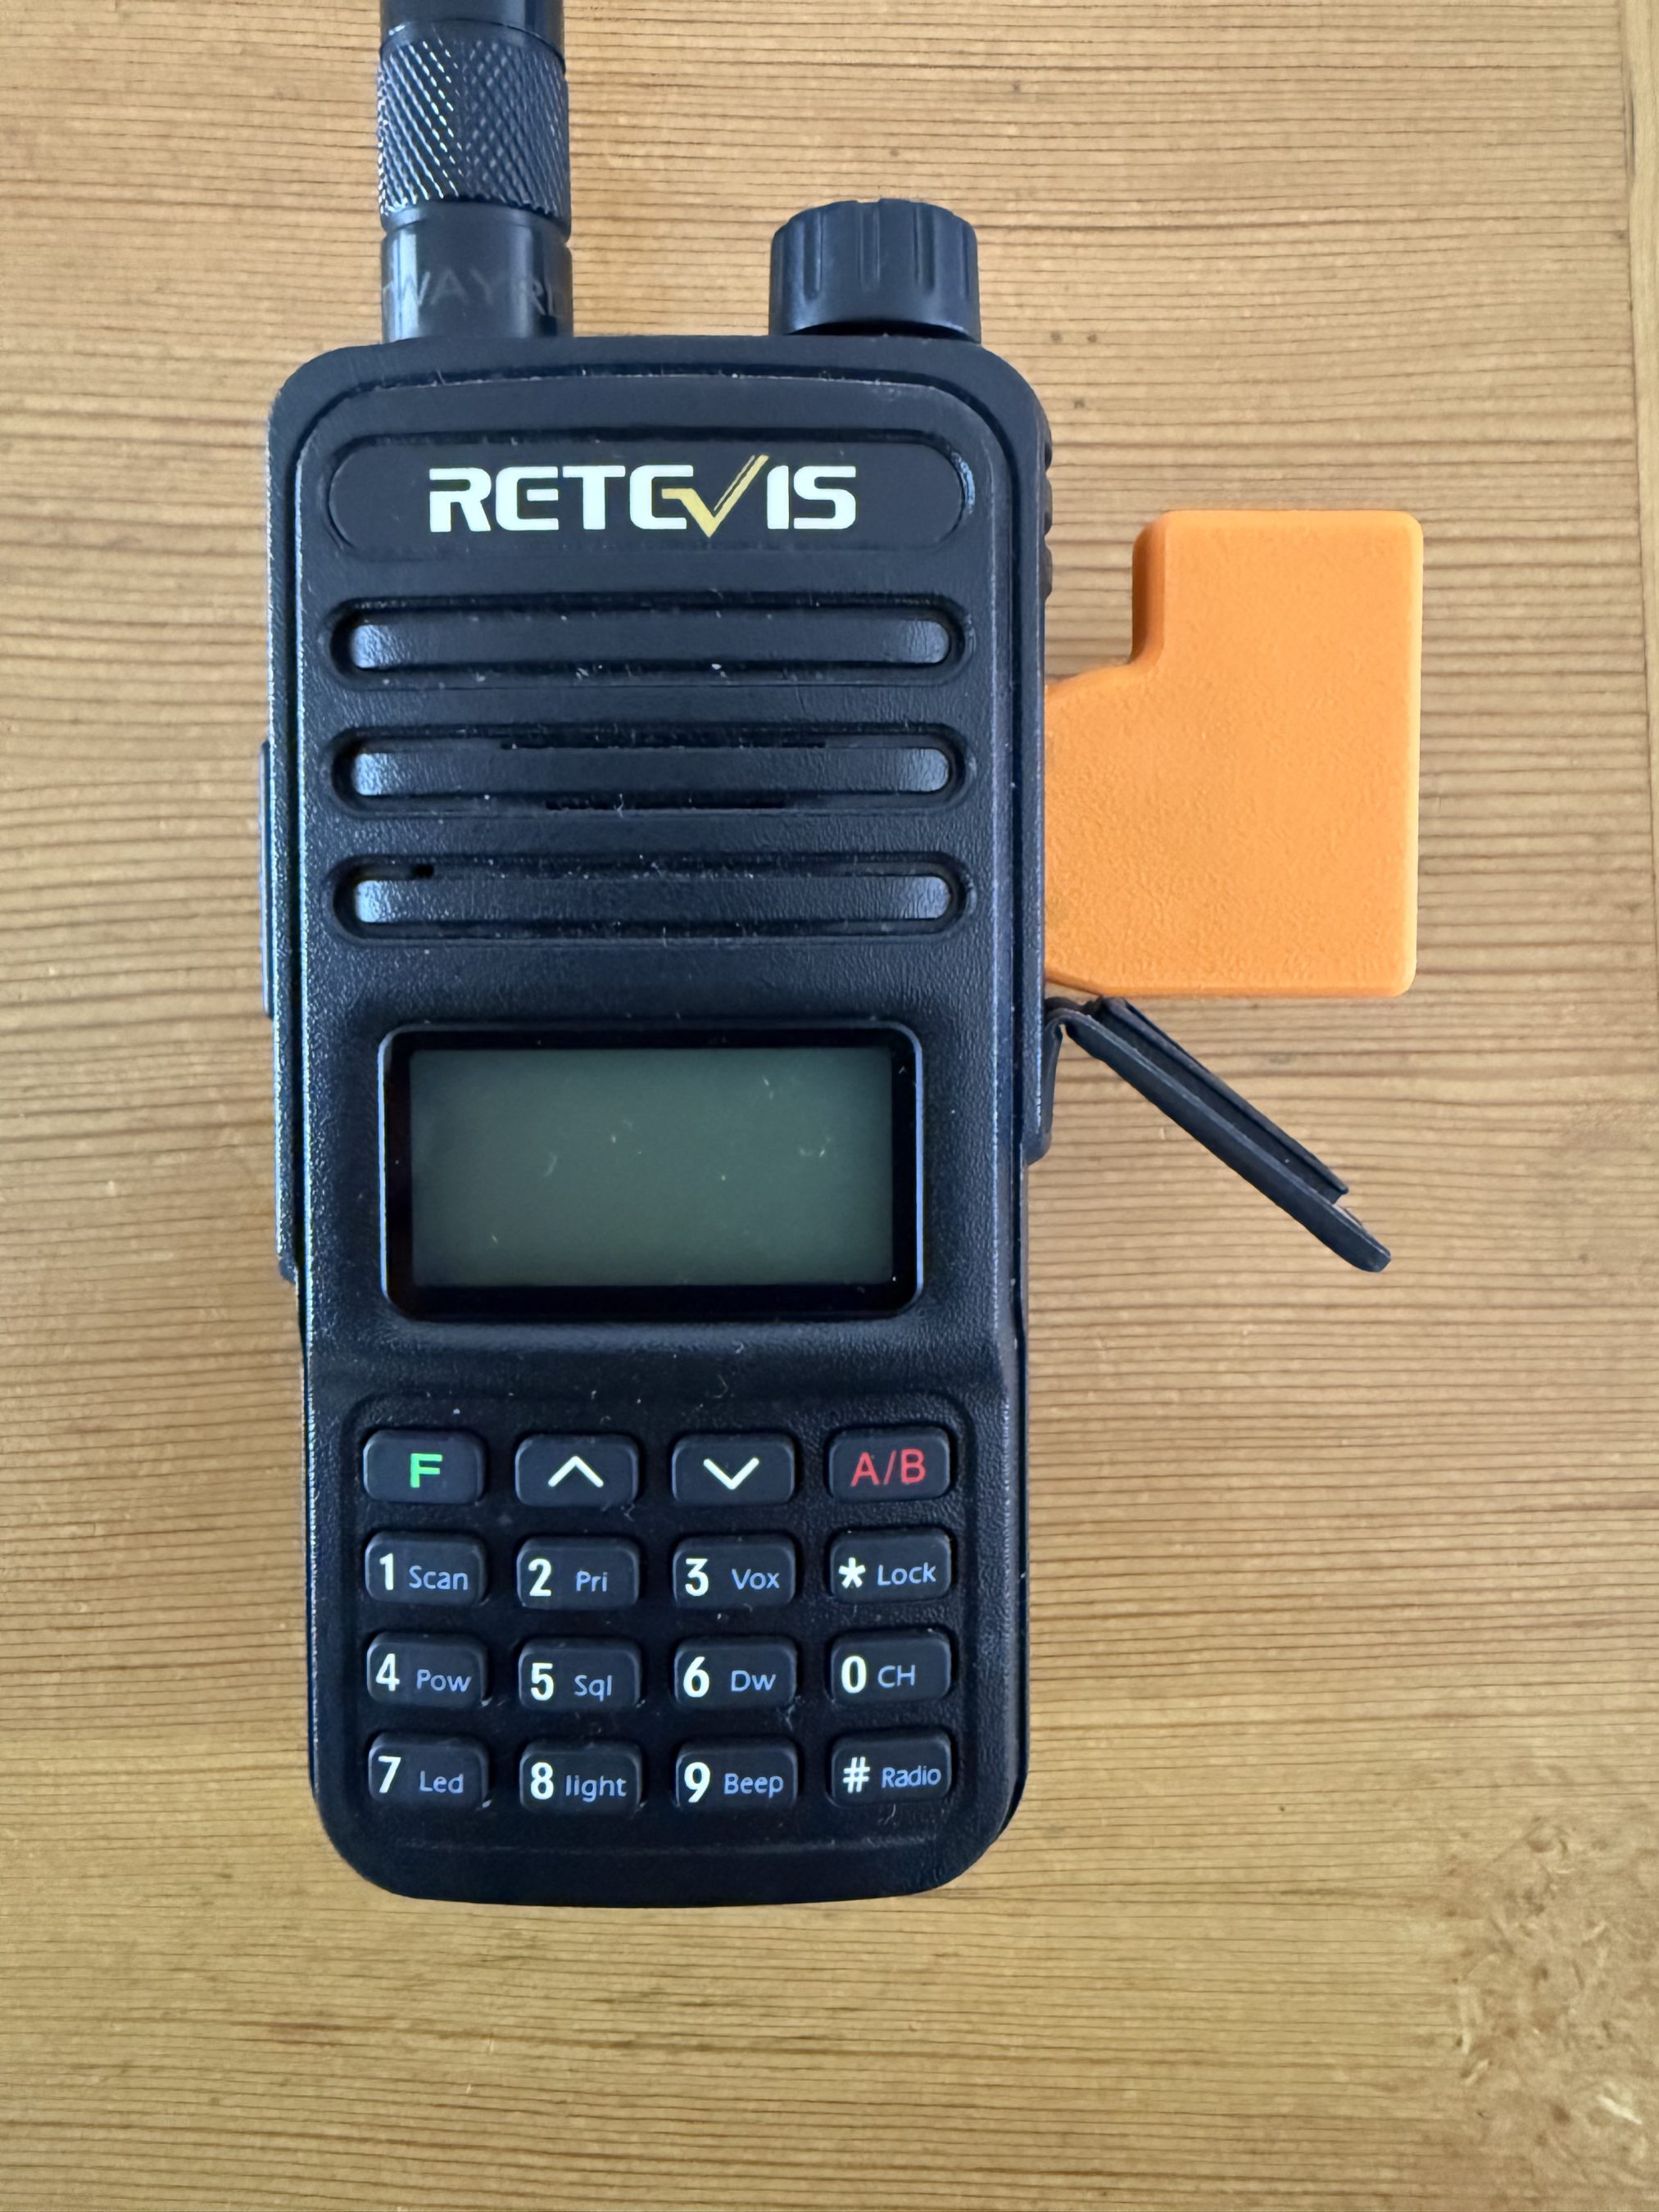
AIOC connected to the Retevis RT85.

Chatting about this in the main Matrix HAM Radio room Steve, M0XVT sent me a message saying he had an old Key KM-4000 converted PMR radio that had been reprogrammed for the 2m band that he was looking to sell and that it might be ideal for the new node. Wasting no time, we came to an agreement and I was soon the proud owner of a converted PMR transceiver.
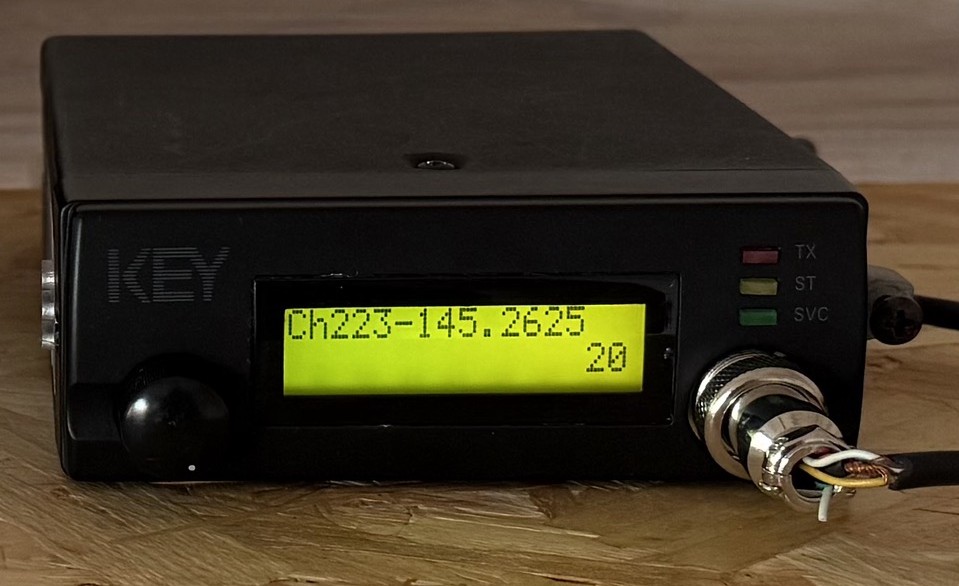
Key KM4000 2m Band PMR Radio

The KM4000 transceiver has a standard output of 15w, 10w more than I needed for the gateway and so I had to reduce the output. A quick search on the internet and I found the Thames Valley Repeater Group website that had all the information required to turn down the output.

I also had to reprogramme channel 1 to the frequency and CTCSS tone allocated to me by the RSGB so that in the event of a power outage when the radio came back on it automatically jumps to channel 1 which would be correctly setup for operation.

Unfortunately the software for programming the radio is only available for windows and so I had to build a virtual machine running windows 10 to be able to reprogramme the radio.

Once this was done I rewired the AIOC USB audio device to work with the KM4000 radio and built the AllStarLink node on a spare RaspberryPi 4.

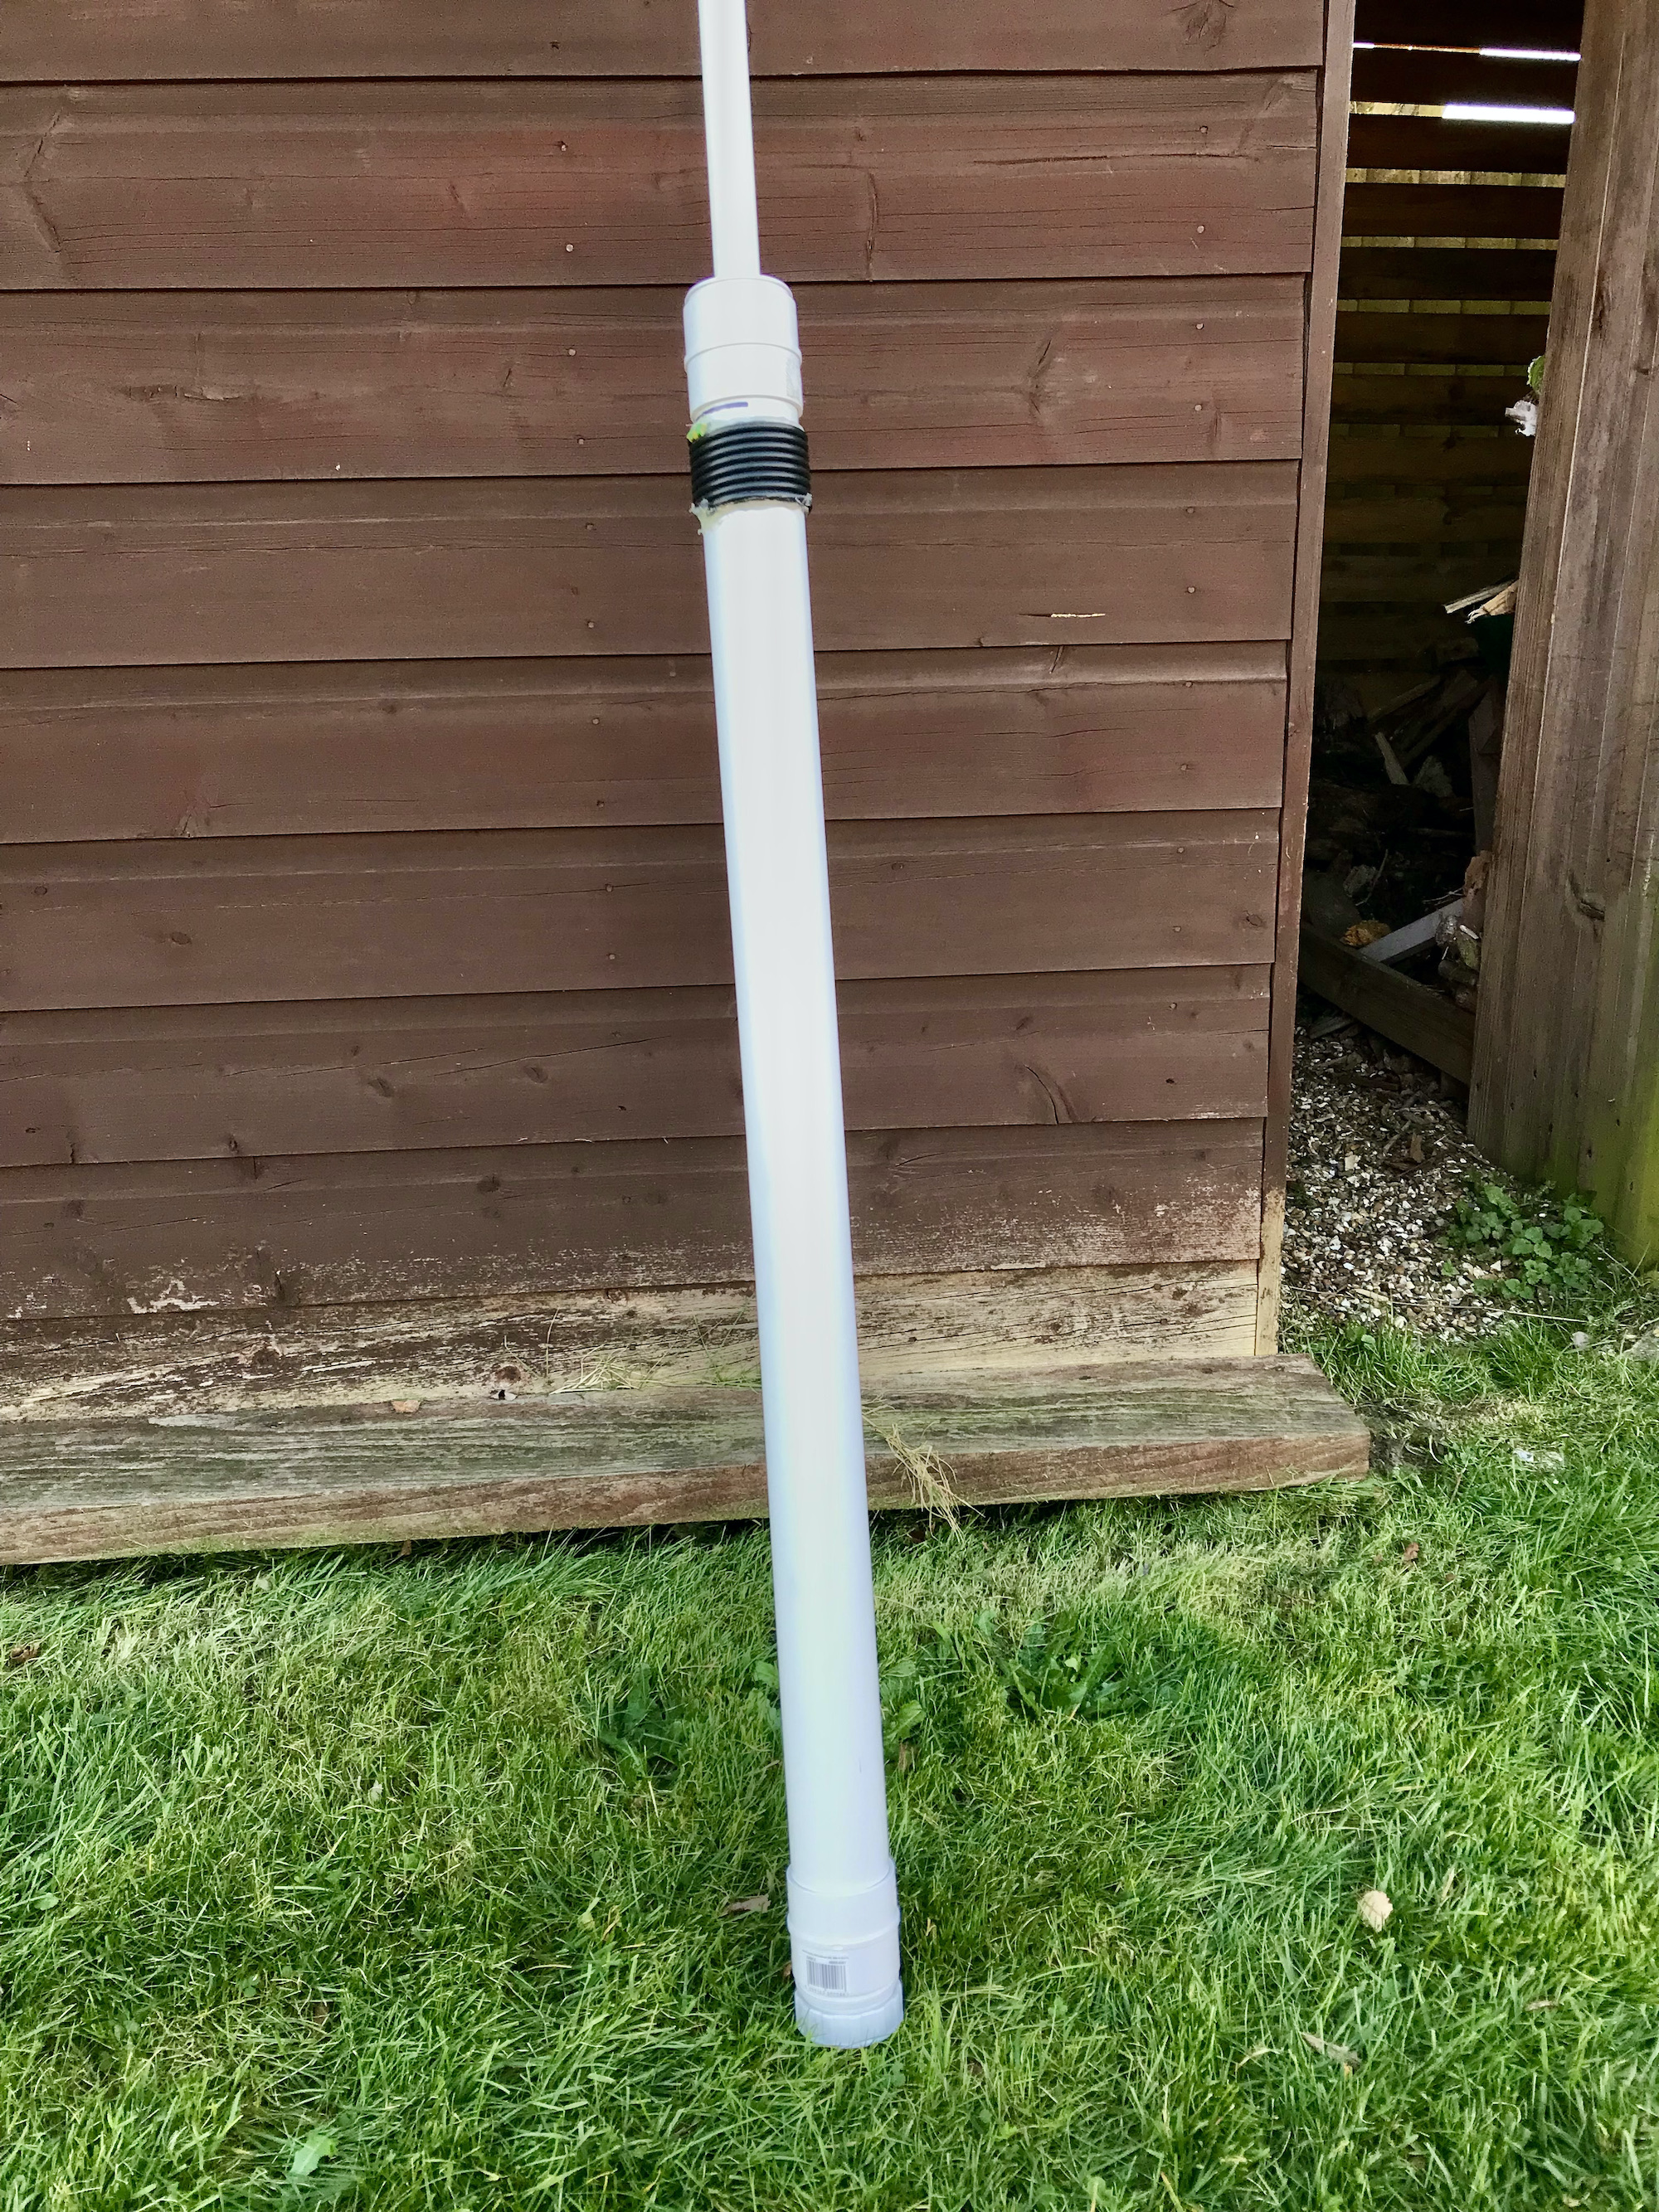
For an antenna I made a simple end fed vertical dipole from some RG58 coax and mounted it 8m up on one of my Spiderpoles in the garden. Running a coax feed out to the antenna I did some tests into the Parrot to get the audio levels setup and checked that the DTMF codes were interpreted correctly and that the node switched connections without error.
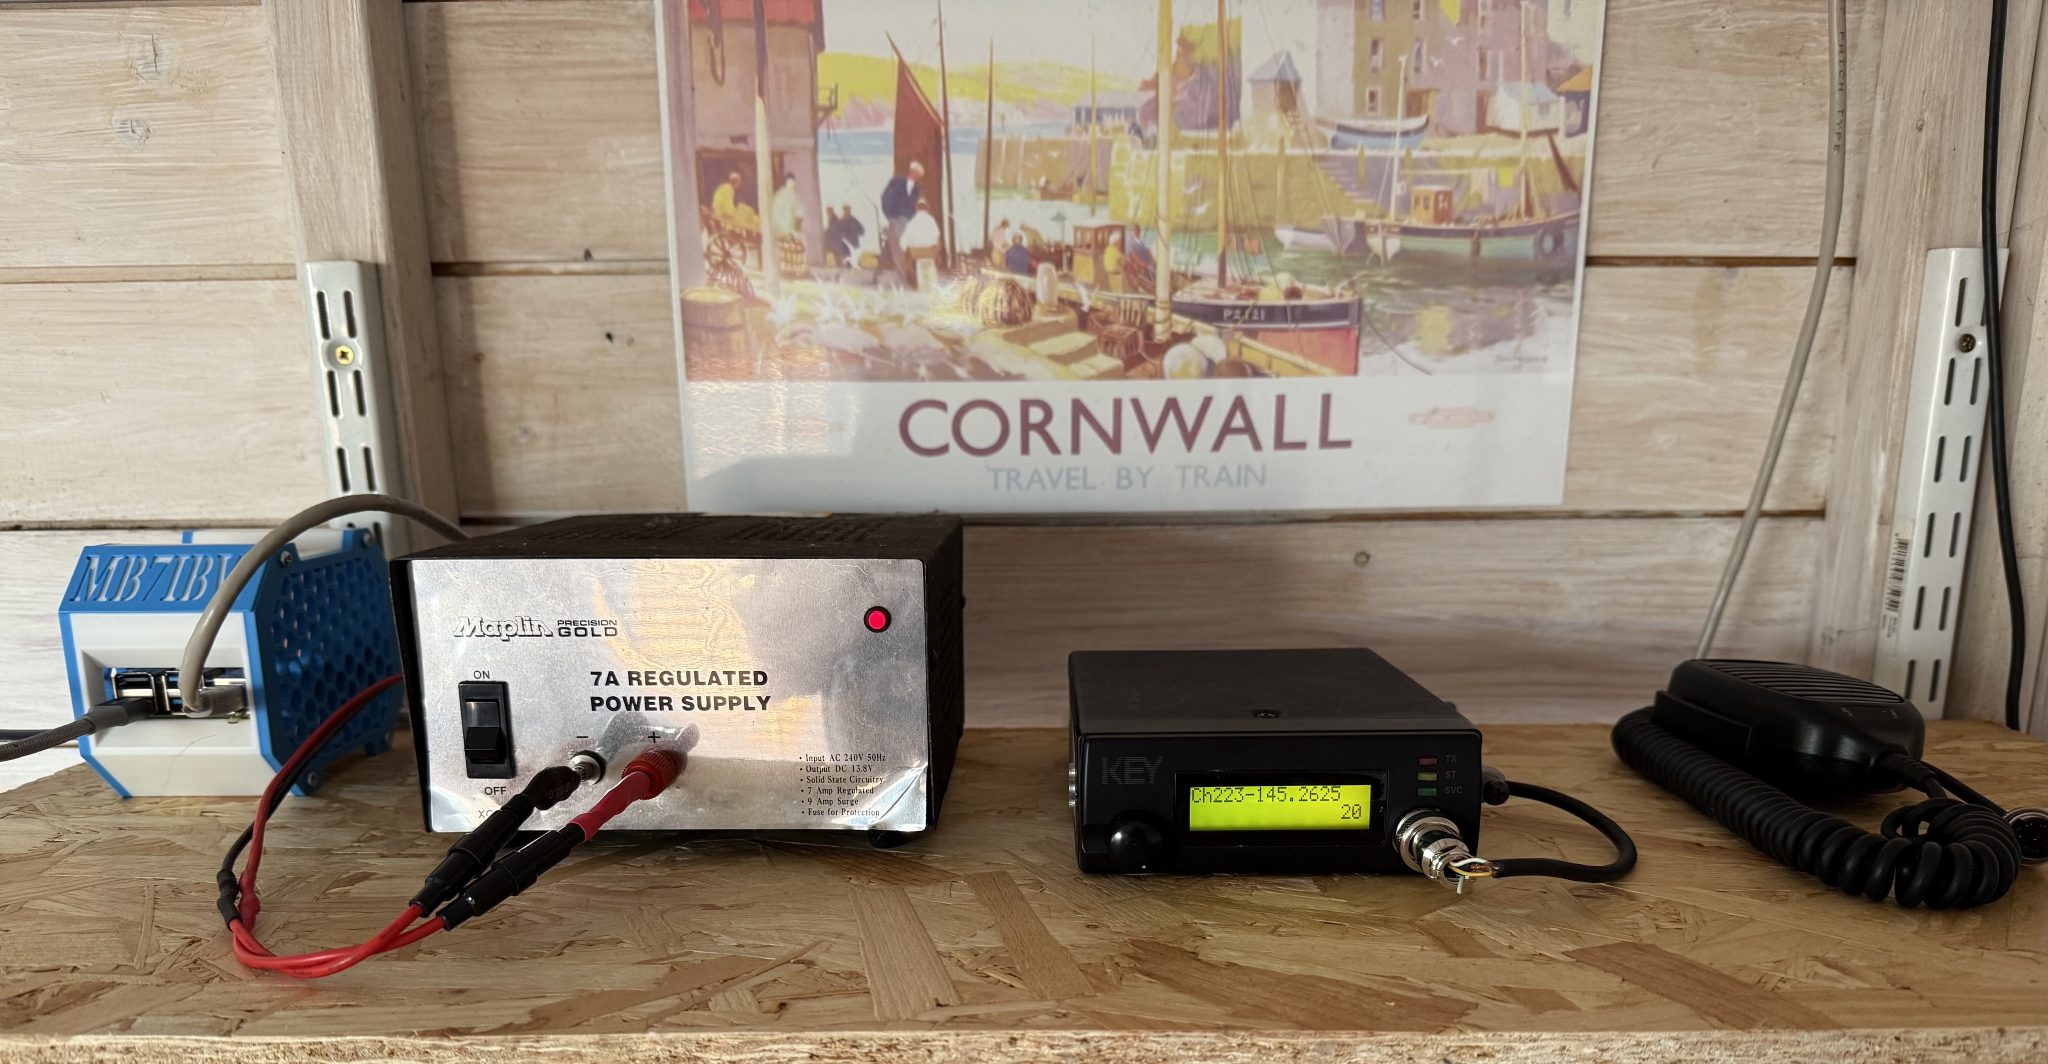
MB7IBW Internet Gateway hardware at the M0AWS QTH

Once this was done I had a few test conversations with stations on the Matrix node and FreeStar to ensure all was fine and then set the gateway status to “Operational” on the RSGB website.

This worked fine for a while with myself and some local stations using the node regularly but, then the hot weather arrived and things started to overheat. The transceiver was getting incredibly hot in the 30c+ summer temperatures and the power supply was also running extremely hot and so I decided to add some cooling.

Cooling the PSU was simple, it has a perforated top panel to which I strapped a cooling fan. This worked great and brought the temperature of the PSU down considerably.

The radio wasn’t so easy to cool. It has a solid case cover top and bottom and so cooling wasn’t going to be a simple affair.

I decided to remove the covers and drill some holes into them to allow airflow through the unit and strapped a fan to the top cover to pull the hot air out. This worked well however, on both transmit and receive I now had a warbling sound on the audio that was caused by the motor of the fan when powered up.

I found that lifting the fan up away from the case of the radio the warbling audio disappeared and things were back to normal and so, I decided to design a cooling tube to fit to the top of the radio to allow full airflow from the fan but, with the fan raised up away from the radio to resolve the audio problem.

Jumping into my CAD software I quickly designed a cooling tower to fit on the top of the radio that would allow the fan to sit far enough away from the radio so as to not affect the audio whilst at the same time pulling the hot air out of the radio and drawing cooler air in through the bottom of the case.

I sent the design through to my Bambu Lab A1 Combo 3D printer and set the print job running.
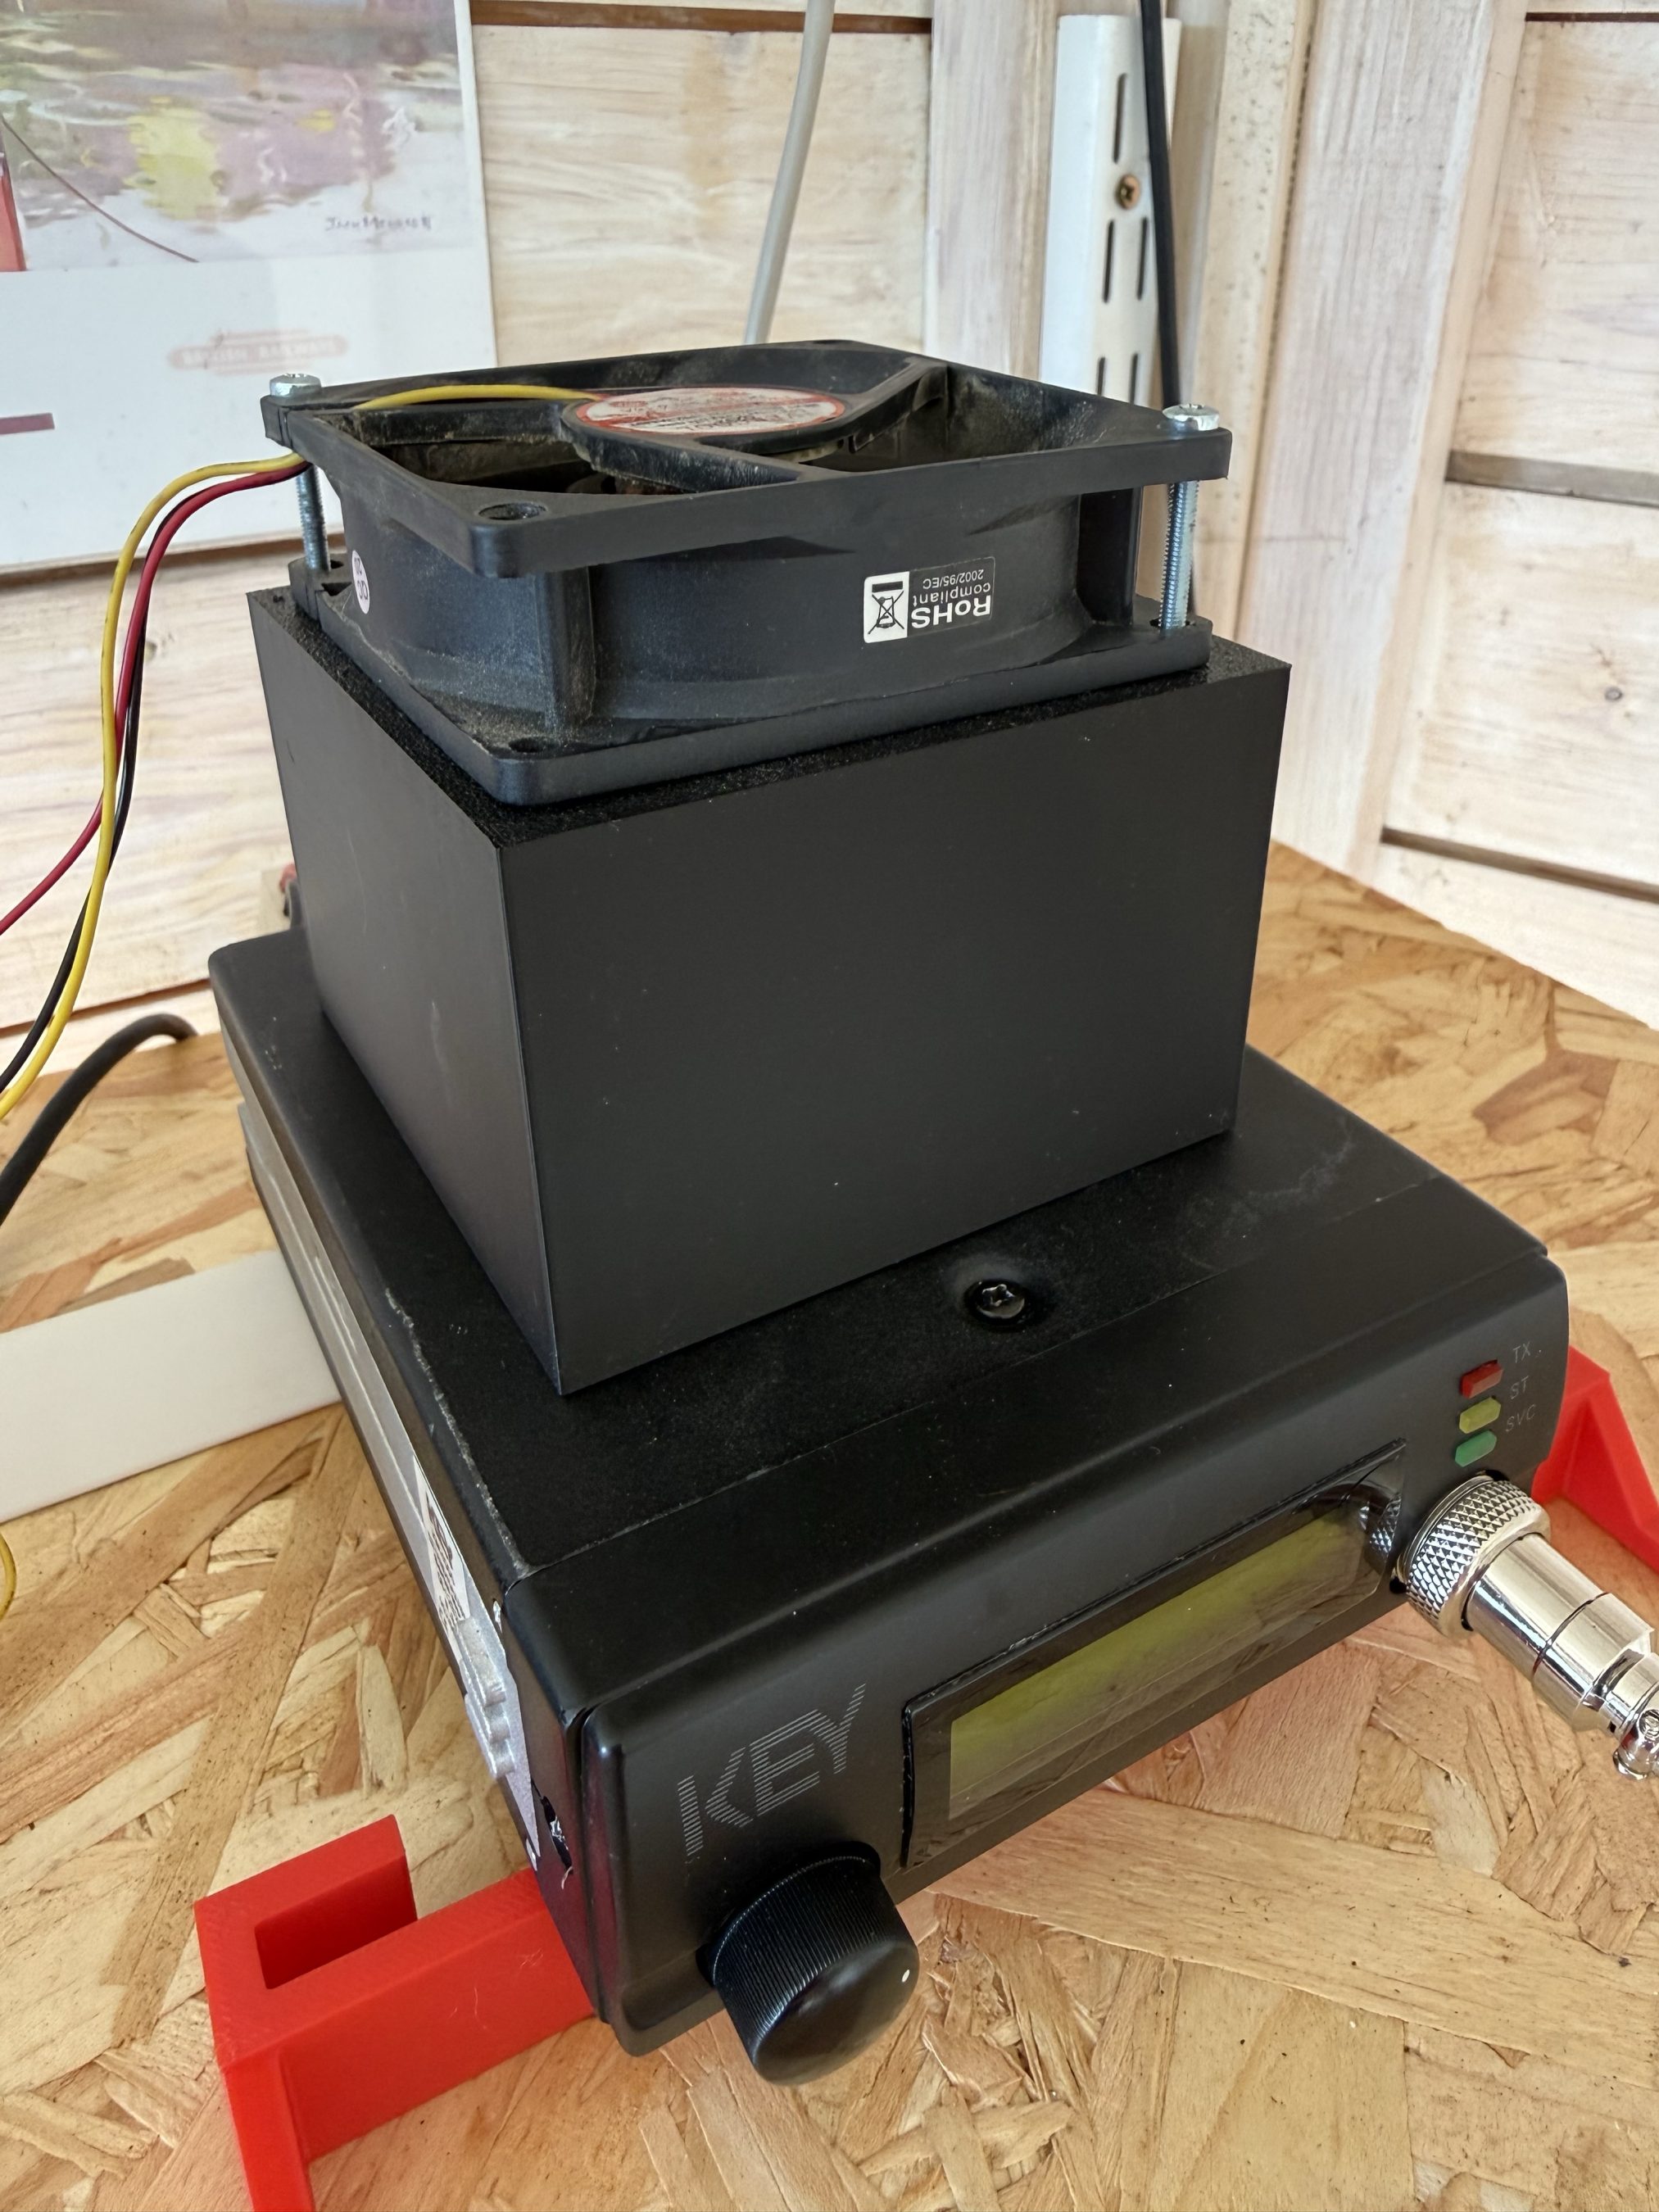
Key KM4000 Cooler
Key KM4000 Cooler

The cooler worked great with the radio staying cool to the touch and no longer overheating and reducing O/P power.

It’s amazing how much dust and dirt is in the air from all the farming activities going on at the end of our garden and how much of it is sucked in by the cooling fan. Regular cleaning is a must!

The MB7IBW Internet Gateway has been on air since mid June 2026 and has worked well. It spends most of its time connected to either FreeStar or HUBNet with connections to the Matrix Node when we have our nets.

Details on Frequency, CTCSS etc can be found under the MB7IBW menu above.

Sadly the initial interest from local HAMs has now wained and I am mostly the only user of the gateway. I was hoping more people would use it and bring some life to the 2m band, I guess time will tell.

It’s been a fun project and was interesting to go through the callsign allocation process with the RSGB representative. It was much easier than I thought it would be.

I now have all the parts to build another Internet Gateway for the 4m band. Hopefully that may attract some more interest. It’s certainly worth a try!

More soon …
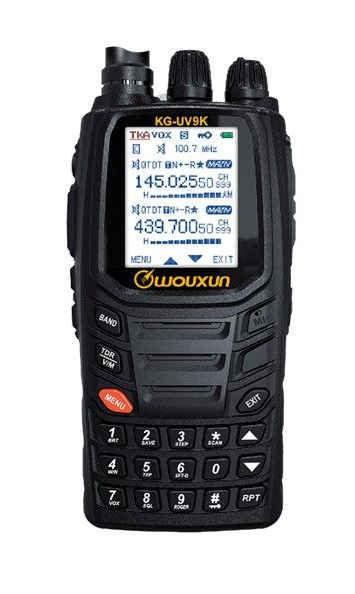
Wouxun KG-UV9K Purchase


For some time I’ve wanted a full duplex 2m/70cm handheld so I could have a go at working the LEO FM satellites during the summer months from the garden.

Searching through all the handhelds available today I came across the Wouxun KG-UV9K dual band, full duplex VHF/UHF radio.

Since I already own a Wouxun KG-UV980PL Quad bander (6/4/2m & 70cm) I’m familiar with the menu system and the very good build quality so I decided to research it further.

Wouxun KG-UV9K Full Duplex Hand Held
Wouxun KG-UV9K Full Duplex Handheld

Looking at the spec for the handheld it does everything I want and more whilst being reasonably priced.

Jumping onto the Martin Lynch and Sons website I found there were two listings, the radio on its own or the “Pro Pack”.

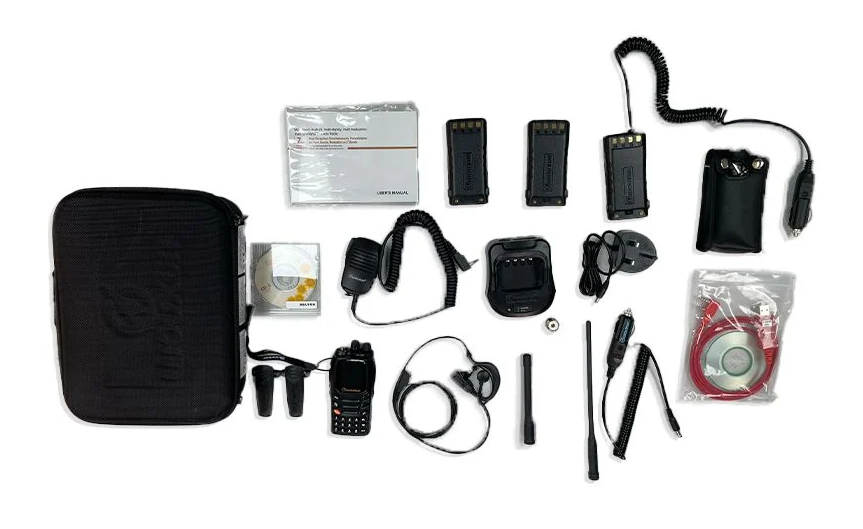
The radio on its own was £79.00 but, the Pro Pack was only £20 more at £99.00 and came with every option available for the handheld including a programming cable, 2 batteries and a rather nice carry case.

Wouxun KG-UV9K Pro Pack

The full specification and other details for the “Pro Pack” can be found on the ML&S website but, here’s a brief summary:

Pro pack contains:

KG-UV9K Transceiver with 2 antennas

Two batteries
Two belt-clips
Software and transfer data Cable
Fast charger dock and Power Supply
Hand speaker mic
Battery eliminator
Manual
Wrist strap
Leather case
In-car charger
SMA-SO239 adaptor
Hands-Free kit

Like my Wouxun quad bander the handheld can also be configured as a cross-band repeater, something I’ve not yet found a use for but an interesting feature. Of course being a full duplex radio with two receivers you can listen to signals on 2m and 70cm simultaneously or transmit on one and listen on the other, a feature I’ve wanted for LEO satellite operations.

The radio is really easy to programme using CHIRP and easy to setup via the very logical menu layout. The hand held has a good solid feel to it and I’ve found the battery lasts a good 3-4 days even though I use it to chat with other stations via my AllStarLink node most mornings and the radio is left monitoring all day.

The larger of the two supplied antennas works extremely well having a relatively good gain. I can now easily get into my two local repeaters on 2m & 70cm from within the house, something I’ve never been able to do with my old Retevis RT85 even with a high gain antenna on it.

The receivers in the UV9K are head and shoulders better than that of the Retevis RT85, I’m hearing signals much stronger now and can even get into repeaters that I’ve never even heard on the old Retevis handheld.

The display on the Wouxun is bright and easy to read, even in bright sunshine which is great as I plan to use it outside a lot during the summer months.

The supplied speaker mic gets good unsolicited audio reports on transmit and has clear audio on receive with plenty of volume. The speaker mic doesn’t have any radio control buttons on it sadly, something I really like about the Wouxun UV980PL quad bander as you can control every aspect of the radio without touching the front panel. Would be a nice upgrade for the handheld if it every became available.

Overall I’m really impressed with the Wouxun UV9K Pro Pack. The radio performs very well, comes with every optional extra available and is a bargain at just £99.00.

If you’re looking for a full duplex handheld radio then I recommend you grab the Pro Pack before the offer ends.

More soon …

Using Node-Red to build interactive log maps

I’ve not been on the radio much over the last few weeks as I’ve had my head down other radio related rabbit holes.

One of the rabbit holes is a Node-Red project to make my online logs a little more interactive. For sometime now my logs have been displayed on my website as nicely formatted, searchable HTML pages however, they don’t really allow the viewer (myself included) to see the global coverage of all the contacts so, I decided to write a Node-Red flow that would do just that.

M0AWS Interactive Log Flow

The flow itself isn’t too complicated and basically consists of reading in the individual ADIF formatted log files, processing the data and then sending the data in the correct format to the map node for display.

I’ve had to write a few functions to handle the processing of the ADIF formatted data but, these aren’t particularly complex and are fairly easy to understand even if like me, you’re not a Javascript programmer.

The flow is working perfectly however, I’m in the process of reworking the format generic payload function to reduce the amount of code and make it more efficient.

M0AWS SSB / CW / FreeDV Interactive Log World Map
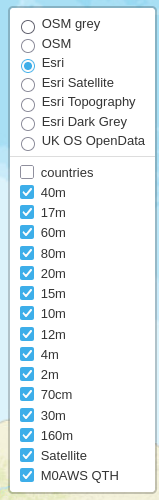
M0AWS Interactive Log Map Layers Menu


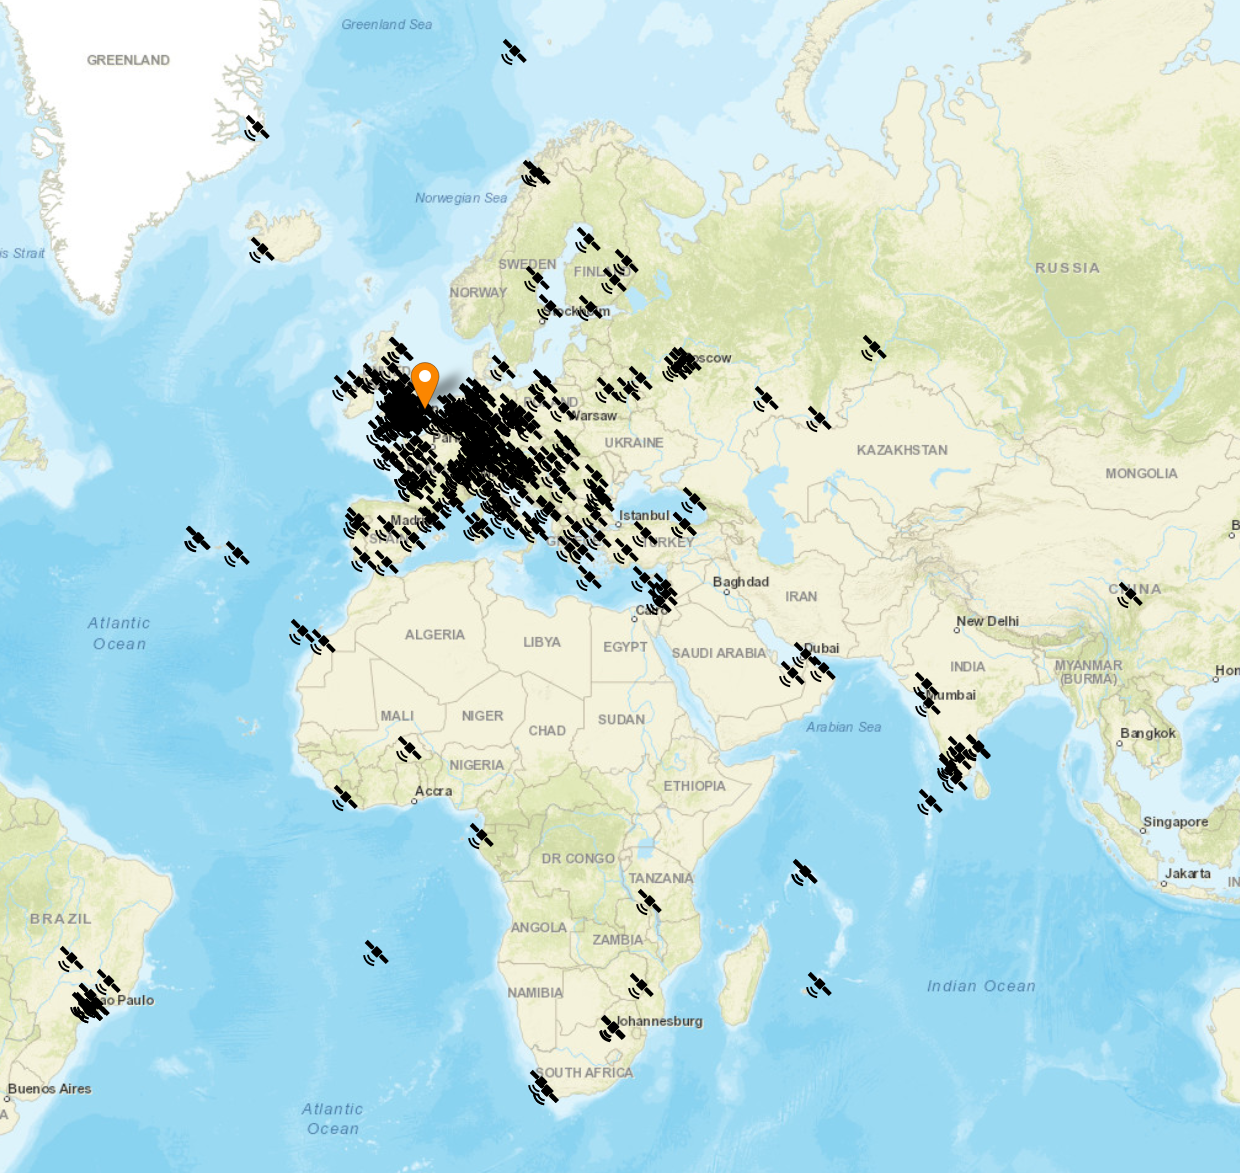
The flow generates two maps, one for voice / CW /Satellite contacts and the other for WSJT-X FT4/8 contacts. Every pin on the map is colour coded by band with satellite contacts being denoted by a satellite icon.

Each pin / icon on the map is clickable and reveals the data of the QSO being displayed.

In the top right-hand corner of the map there is a drop down layer menu that allows the viewer to filter by band thus reducing the number of icons on the screen at any one time.

Seeing the data presented on a map really brings my logs alive. An example of this is that I had no idea I’d worked so many stations in India on the QO-100 Satellite.

The small icons in the pins show a microphone for SSB/FM/FreeDV contacts and a downwards pointing triangle in a box for CW contacts. Sadly I couldn’t find a Morse key icon in the collection available.

M0AWS filtered view of QO-100 Satellite contacts

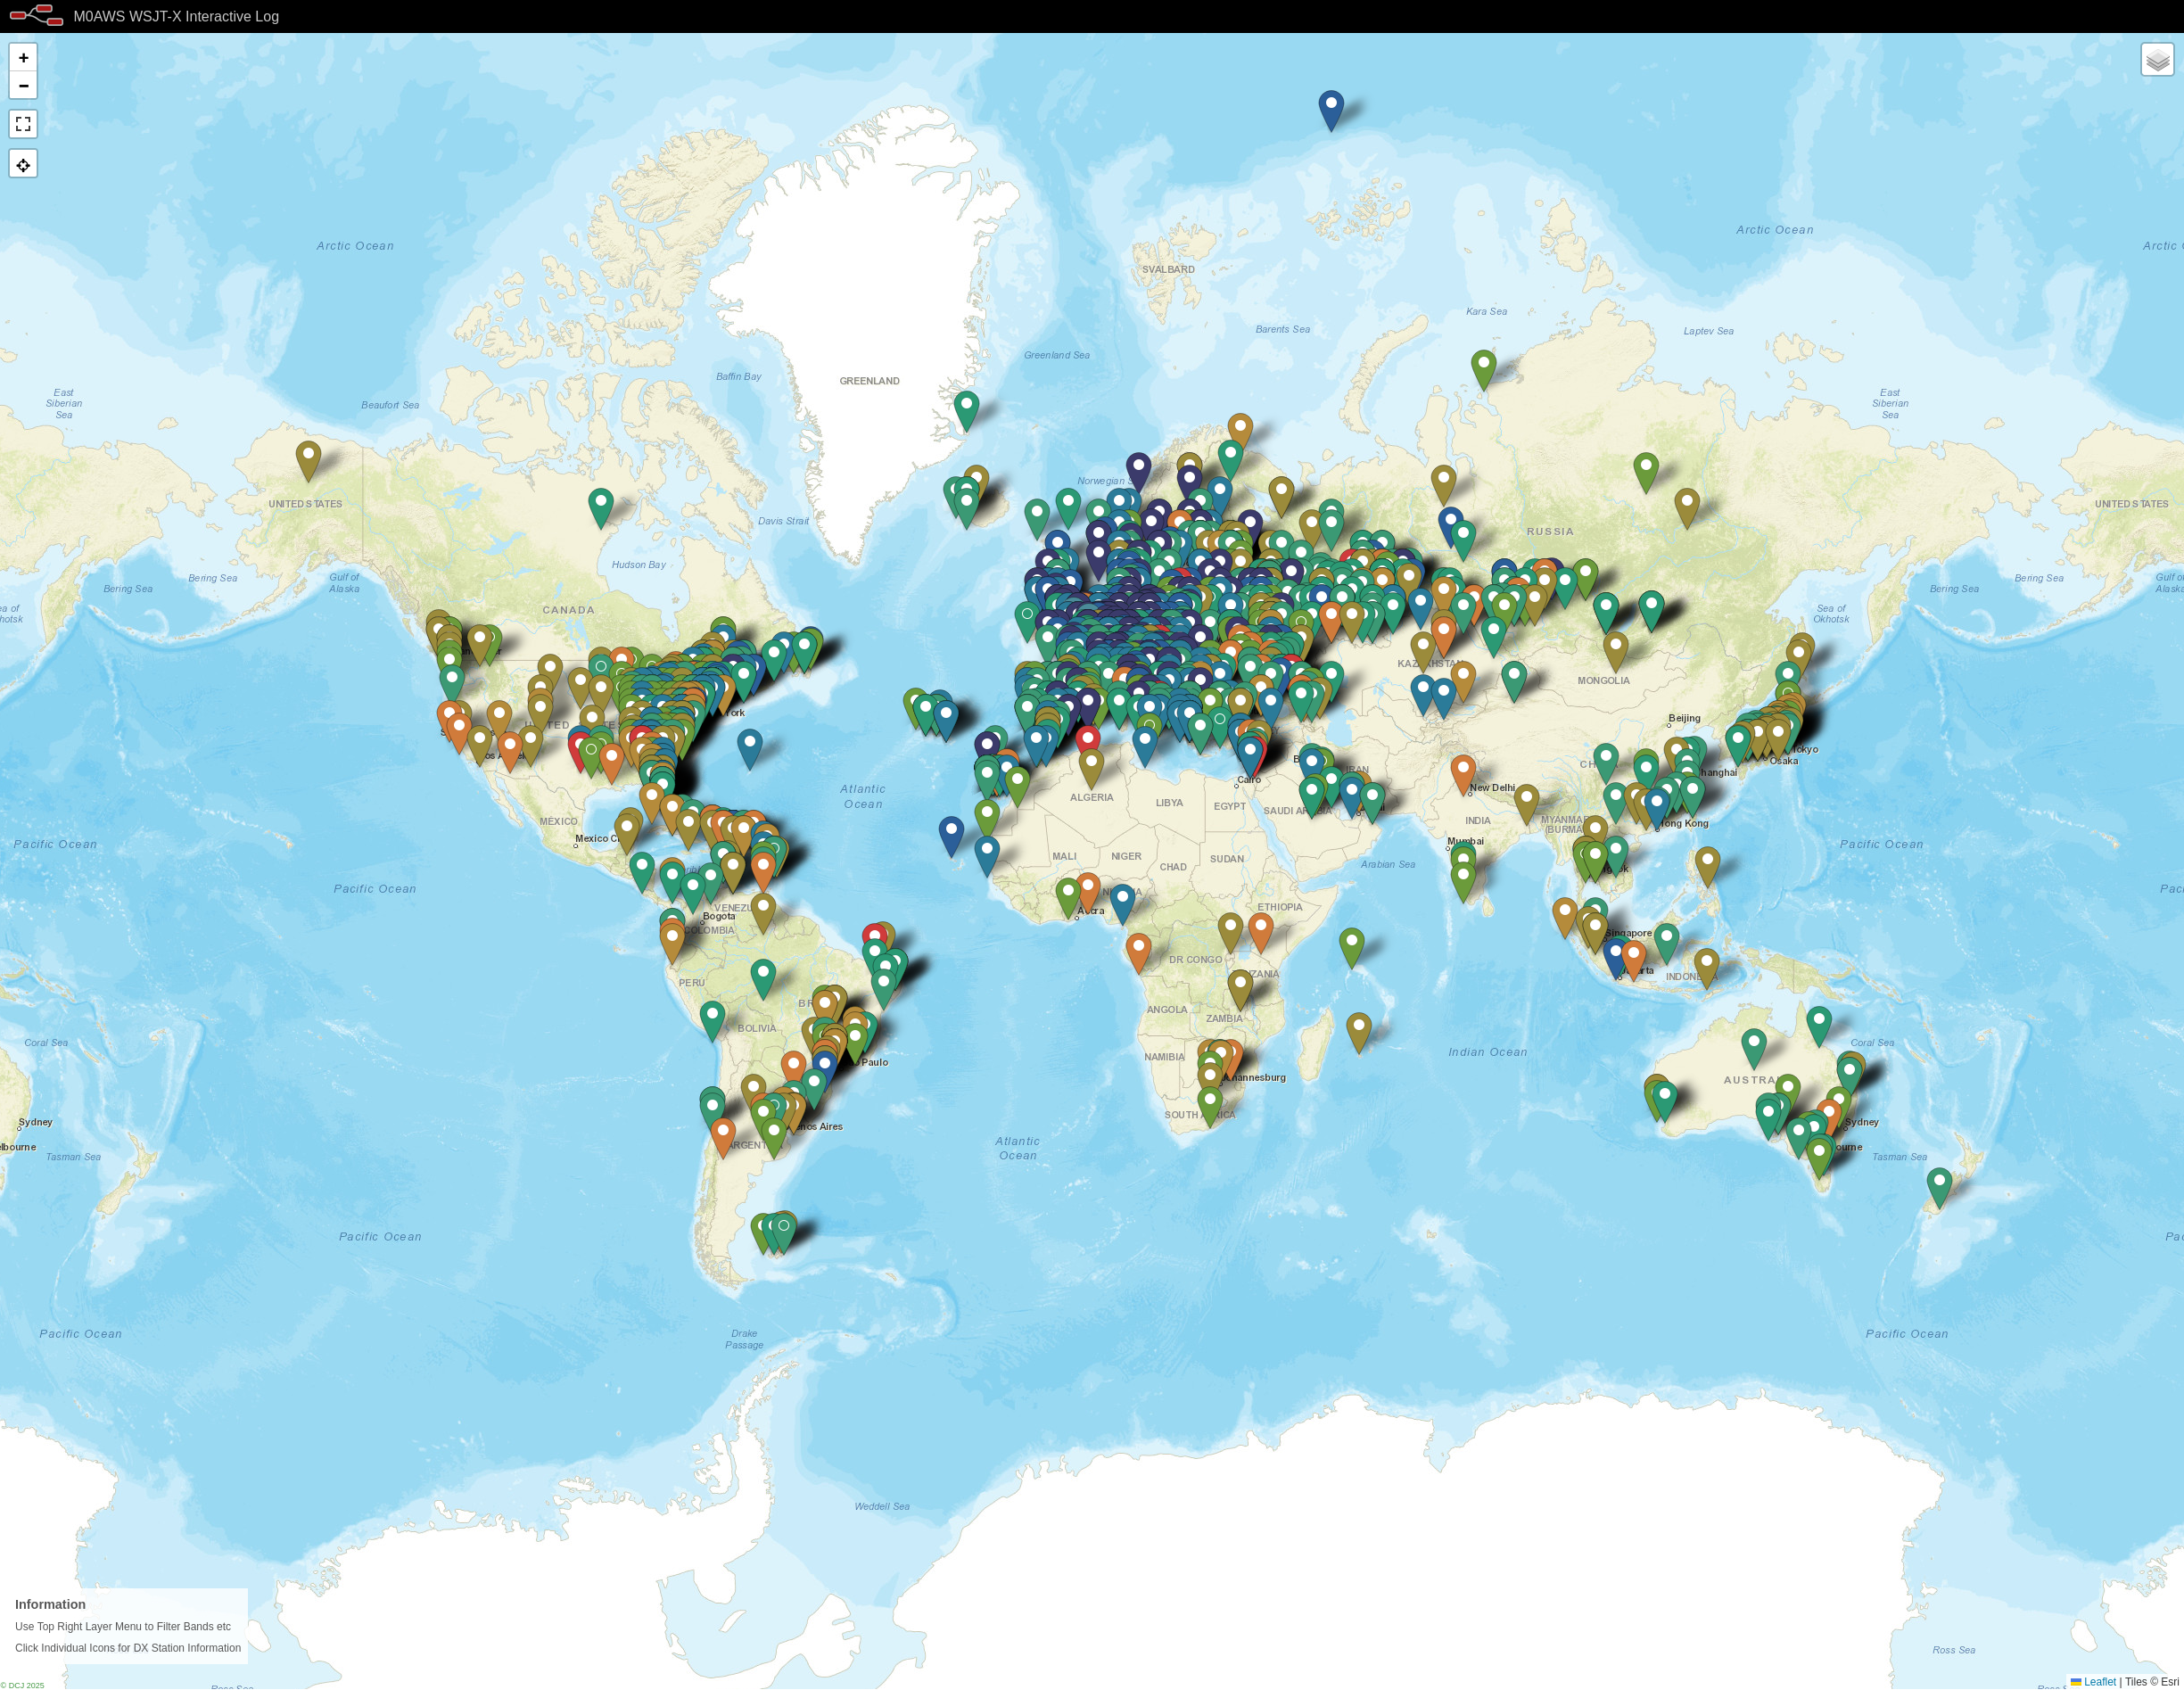
I only use FT4/8 for testing new antenna designs however, it’s interesting to see the global coverage accomplished with this weak signal mode.

M0AWS WSJT-X FT4/8 Interactive Log World Map

Once I’ve finished rewriting the format generic payload function I will make the flow available for download here so that others can also create an interactive view of their radio logs.

If you want to have a look at the maps and try them out for yourself, they are available under the Logs menu above.

This Node-Red instance is running in a virtual machine (VM) on a 16GB RAM RaspberryPi 5 that is also running a number of other VMs at the same time so, it’s safe to say it’s not heavy on CPU and will run on the older Pi4 as well.

More soon …

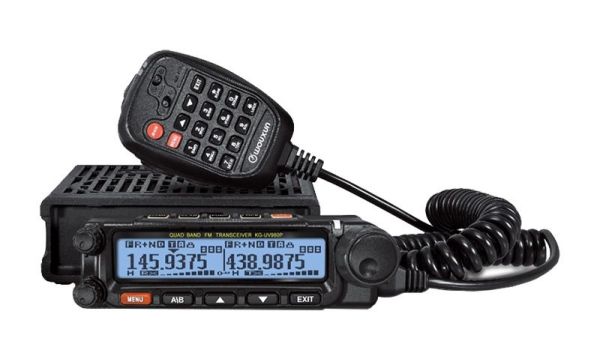
Wouxun KG UV-980PL Quad Band Radio

I recently decided to look into a 2m/70cm FM radio for the shack for use on the local 2m/70cm repeaters and was considering the offerings from Yaesu and Icom however, the Wouxun KG UV-980PL caught my eye as it is a quad band, full duplex radio. Not knowing much about Wouxun radios I had to do some research to get an idea of what it’s like. Generally the radio gets very good reviews and most mention the excellent build quality.

There are two versions of the 980P radio, the 980PL that offers 6/4/2m and 70cm bands and the 980P that offers 10/6/2m and 70cm. The 4m is a band I’ve been wanting to try for some time and the 980PL with it’s 4m band coverage became even more appealing.

Wouxun KG UV-980PL Quad Band FM Duplex Transceiver

I decided to take a trip down to Martin Lynch and Sons (MLANDS), a good 2 hours or more drive for me, so that I could get hands on with the radios that I had been looking at.

I invited Alan, G1SQB along for the ride and a day out playing with radios as he lives 3 miles away and we often chat on air.

Arriving at the store we grabbed a hot brew and set about playing with the great selection of radios on display.

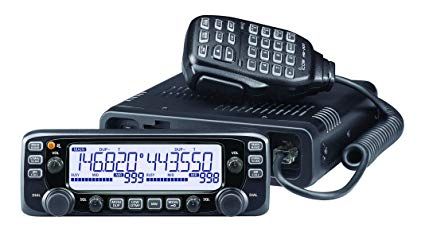
I initially looked at the Icom IC-2730E, a dual band full duplex transceiver that has been around for about 10 years and has good reviews. As expected the build quality is excellent and very easy to use. I found I was soon able to set up memories etc via the front panel controls. The only draw back is that it isn’t supported by the CHIRP programming software that I use. Other than that it certainly meets all the requirements for a 2m/70cm FM transceiver

Icom Ic-2730E Duplex FM Transceiver
Icom IC-2730E FM Duplex Transceiver

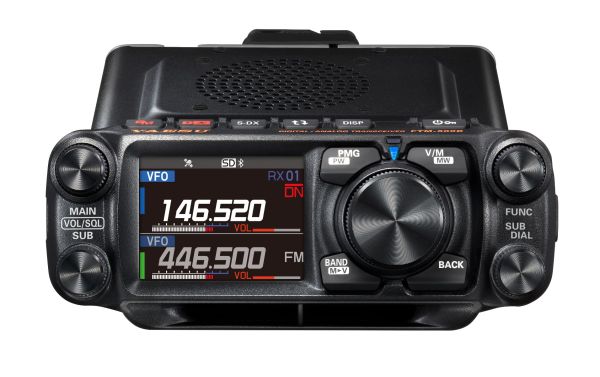
Next I moved on to the offerings from Yaesu including the FTM-500DE 2m/70cm transceiver. The colour screen is very nice and the menu system very easy to use however, the price is getting on for close to double that of the other radios and it doesn’t really offer anything more that interests me since I’m only looking for an analog radio.

Yaesu FTM-500DR dual band FM Transceiver

Sadly there wasn’t a Wouxun UV-980PL out on display and so I had to persuade the salesman to get one out of stock for me to play with. Unpacking the radio I was surprised at how good the build quality is, it really is comparable to the other radios that I had been looking at.

The Wouxun menu system is fairly easy to use once you’ve looked at the manual and got to grips the abbreviations used. The big plus is that this radio is CHIRP compatible with an optional programming cable (£19) and so loading the memories with repeaters etc will be extremely easy.

The Wouxun has dual receivers built in with a quad-plexer so, you can transmit on one band whilst listening to another band on the other receiver. One thing to note is that the 1st receiver covers all the bands, 6/4/2m and 70cm however, the 2nd receiver only covers 2m and 70cm so, it’s not possible to receive 4m and 6m at the same time. The radio also only has one antenna connection on the rear, would had been great if it had one connector for each receiver.

The really good thing about the Wouxun UV-980PL is that it comes with everything you will need, apart from the programming cable!

After much tinkering I decided to purchase the Wouxun KG UV-980PL, a Diamond V2000 6/2m and 70cm antenna plus 20m of Hyperflex-13 coax cable and connectors.

In the box you’ll find two mounting options for the removable head. There is a short connecting cable for use when the head is mounted directly on the radio body and a 5m long connecting cable for mounting the head remotely. This is really useful as I wanted to mount the head on a mic boom arm so that it’s easily accessible and didn’t clutter the desk space in the shack.

M0AWS Shack
Wouxun KG UV-980PL head mounted on a Mic boom arm

Since the radio also comes with the mobile mount I’ve fixed the radio body on the wall behind the PC monitor out the way. This setup has proven to be extremely good as I can see what’s happening on the display at a glance and easily grab the mic if called.

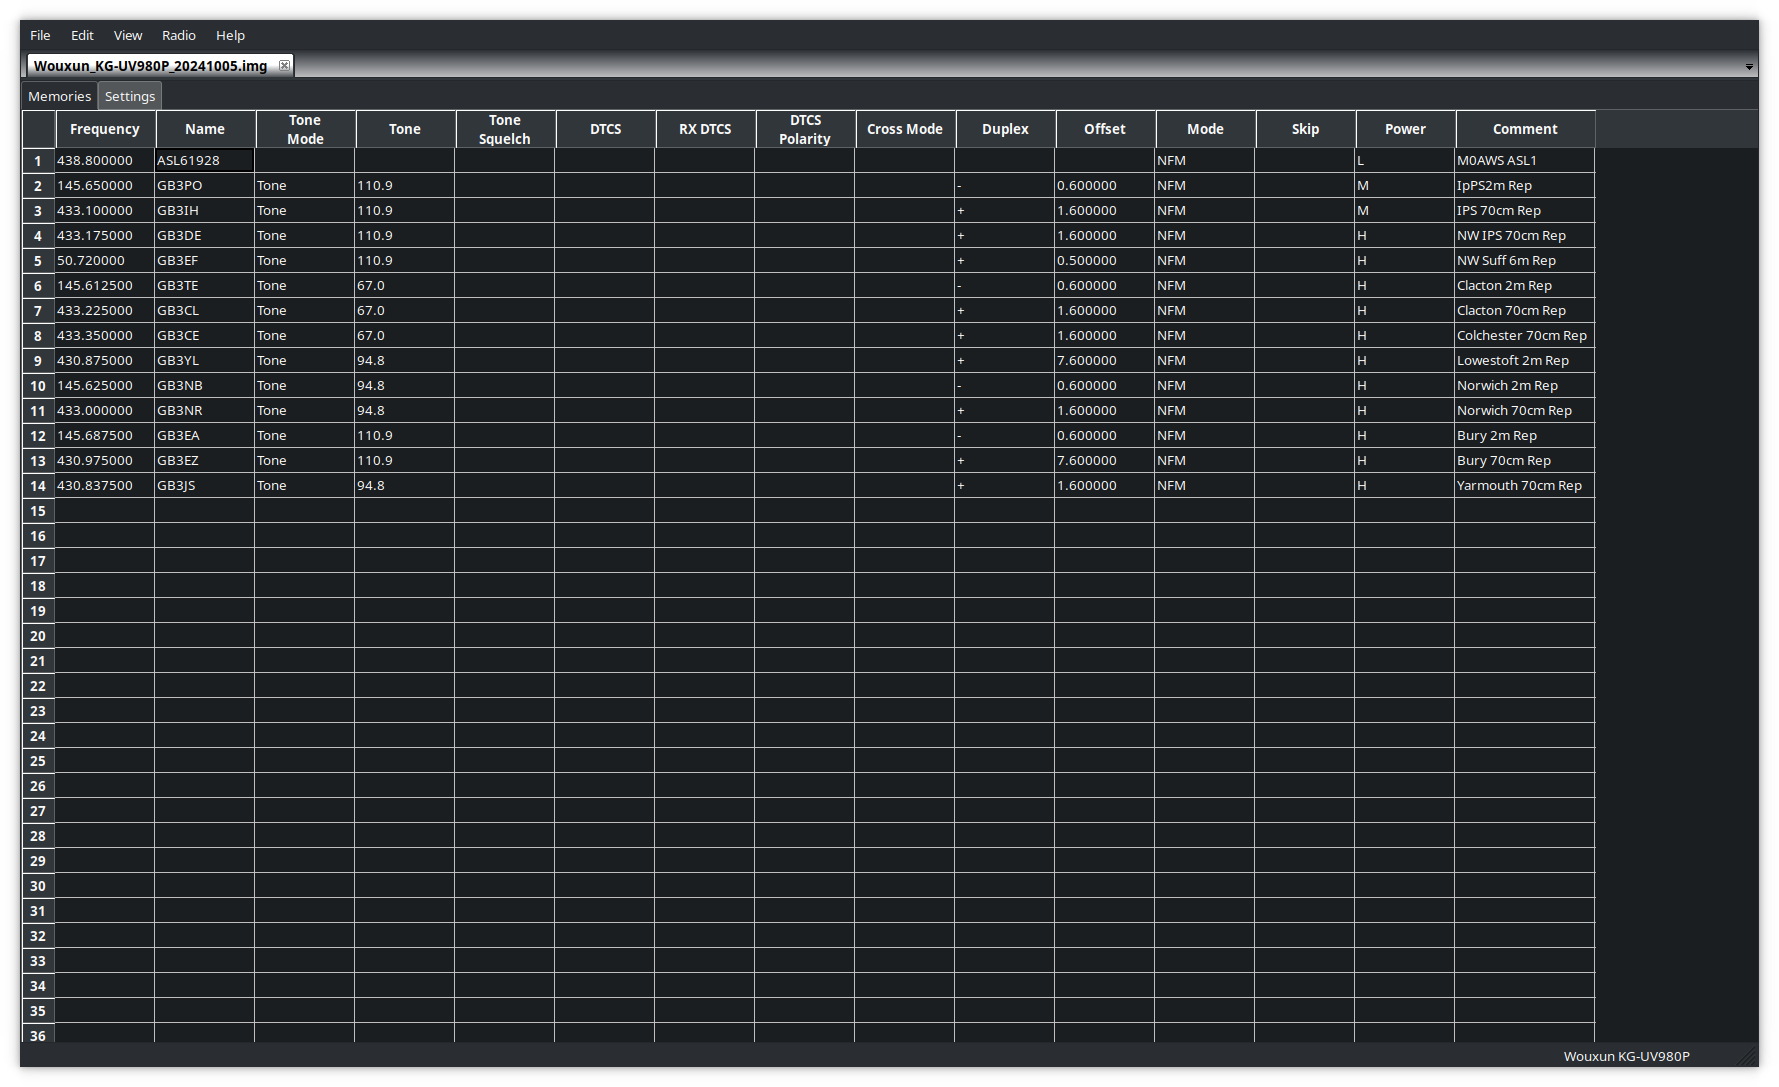
Programming the radio memories is extremely quick and easy using CHIRP. I had the local repeaters and my AllStarLink node frequencies and offsets uploaded to the radio in no time at all and was soon on air.

Programming the memories on the Wouxun UV-980PL using CHIRP

The microphone that comes with the radio is extremely good. You can operate most of the controls on the radio directly from the mic with ease and it has a good feel in the hand. Audio reports have also been very good and there’s no need to change it.

I’ve not yet got the new Diamond V2000 antenna erected but, I’ve been using the radio with my homebrew 2m/70cm end fed vertical dipole and my 4m band end fed vertical dipole and am getting excellent results. I can access all the local repeaters using the lowest power output setting and only have to use the medium/high setting for the repeaters that are further afield.

On the 4m band the radio performs well and I’ve been surprised at the distances I’ve been able to cover even though my 4m antenna is only 6-7m above the ground currently.

A few days after I got the new Wouxun radio there was an ARISS event whereby a group of Girl Guides would be talking to Astronaut Sunita Williams aboard the ISS. This was a great opportunity to test the receive capability of the radio and so I setup ready for the pass. Using just my simple 2m/70cm end fed vertical dipole I got great reception as can be heard in the video below.

Overall I’m extremely pleased with the Wouxun KG UV-980PL quad band radio and considering it’s much cheaper than the offerings from the main radio manufacturers it’s well built and performs extremely well. If you’re looking for a simple, analog FM radio for 6/4/2m/70cms then you can’t beat it!

More soon …

Venturing onto the 4m Band

The 4m band isn’t a band that I’ve ever used before. The main reason for this is that I’ve never had a radio that had 4m capability built in. Most HF rigs today come with the 6m band but, very few have the 4m band, that is until now.

Having recently purchased a Yaesu FTDX10 I now have access to the 4m band with a max power of 50w. (You do need to reset the radio into UK mode to get the 4m band)

From reading online I understand that the 4m band is very much like the 6m band propagation wise but, with fewer users. Since the 2m and 70cm bands are completely dead in the Woodbridge area I thought that perhaps there might be a few local HAMs on the 4m band.

Now having a transceiver for the band I needed to think about an antenna too.

Searching online I came across an article by G4AQB referencing a 4m band antenna built by Tim, G6TM. Both of these articles incorrectly refer to the antenna design as an EFHW for 4m, it is in fact a Sleeved Dipole or sometimes referred to as an End Fed Vertical Dipole for the 4m band. If it was an EFHW it would have a very high impedance and would need a 49:1 Unun to match it to 50 ohm coax.

Since this antenna is just a dipole it presents an almost perfect impedance match to 50 Ohm coax without the need for any matching circuit.

Working from G4AQB’s build notes as detailed on his blog it’s very quick and easy to cut the coax to the right length, strip part of the outer shield and create the choke using 8 turns of the same coax cable.

Since I wanted to make this a permanent fixture in the garden I decided to make an enclosure for the antenna so that it is weather proof and easy to mount.

Using a mix of 25mm conduit, 50mm plastic tubing, a screw cap and a reducer I put together a very tidy 4m band sleeved dipole vertical antenna.

Home brew 4m sleeved dipole in plastic enclosure

Looking at the photo above you can see I used the 25mm conduit to house the sleeved dipole, I then used a reducer to join the 50mm tube to the 25mm conduit. Drilling two holes in the 50mm tube I brought the coax out and wound it 8 times around the tube to form the choke coil and then passed the coax back into the 50mm tubing so that it continued down to the SO239 socket on the bottom cap. I used some hot glue to hold the choke coil in place.

SO239 mounted in the bottom of the 50m tubing

I strapped the antenna to the top of the washing line post to check the SWR and found it’s a perfect match. With an SWR of 1:1 at the bottom of the band and 1.1:1 at the top of the band.

Overall I’m really pleased with the simple design and build.

I listened to the 4m band for a few hours whilst doing other things and didn’t hear a single soul, I do hope it’s not dead like the 2m band!

More soon …