For some time I’ve wanted a full duplex 2m/70cm handheld so I could have a go at working the LEO FM satellites during the summer months from the garden.
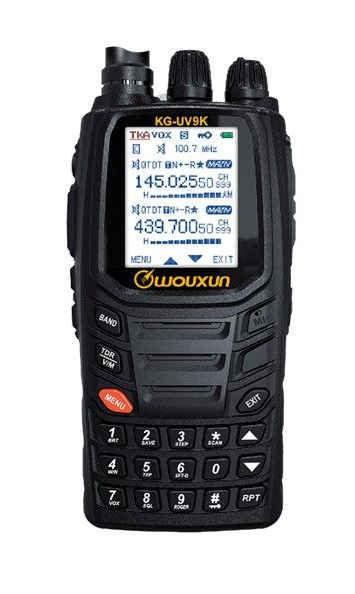
Searching through all the handhelds available today I came across the Wouxun KG-UV9K dual band, full duplex VHF/UHF radio.
Since I already own a Wouxun KG-UV980PL Quad bander (6/4/2m & 70cm) I’m familiar with the menu system and the very good build quality so I decided to research it further.
Wouxun KG-UV9K Full Duplex Handheld
Looking at the spec for the handheld it does everything I want and more whilst being reasonably priced.
Jumping onto the Martin Lynch and Sons website I found there were two listings, the radio on its own or the “Pro Pack”.
The radio on its own was £79.00 but, the Pro Pack was only £20 more at £99.00 and came with every option available for the handheld including a programming cable, 2 batteries and a rather nice carry case.
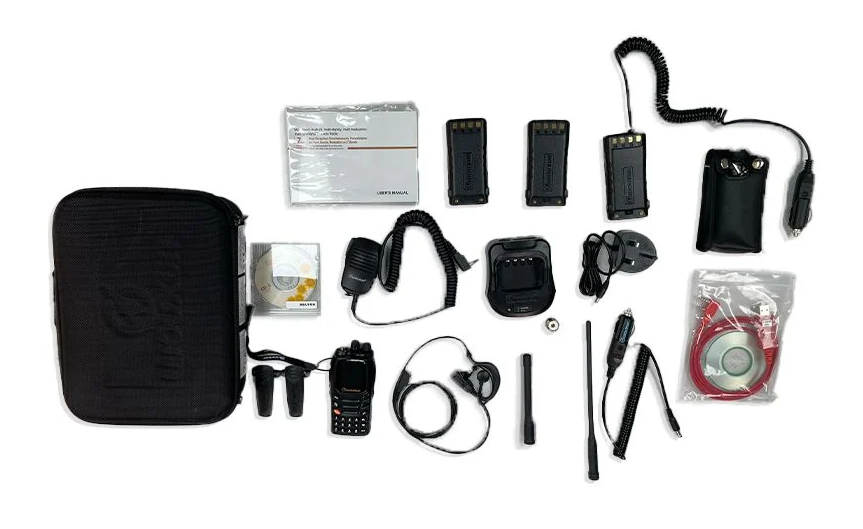
Wouxun KG-UV9K Pro Pack
The full specification and other details for the “Pro Pack” can be found on the ML&S website but, here’s a brief summary:
Pro pack contains:
KG-UV9K Transceiver with 2 antennas
Two batteries Two belt-clips Software and transfer data Cable Fast charger dock and Power Supply Hand speaker mic Battery eliminator Manual Wrist strap Leather case In-car charger SMA-SO239 adaptor Hands-Free kit
Like my Wouxun quad bander the handheld can also be configured as a cross-band repeater, something I’ve not yet found a use for but an interesting feature. Of course being a full duplex radio with two receivers you can listen to signals on 2m and 70cm simultaneously or transmit on one and listen on the other, a feature I’ve wanted for LEO satellite operations.
The radio is really easy to programme using CHIRP and easy to setup via the very logical menu layout. The hand held has a good solid feel to it and I’ve found the battery lasts a good 3-4 days even though I use it to chat with other stations via my AllStarLink node most mornings and the radio is left monitoring all day.
The larger of the two supplied antennas works extremely well having a relatively good gain. I can now easily get into my two local repeaters on 2m & 70cm from within the house, something I’ve never been able to do with my old Retevis RT85 even with a high gain antenna on it.
The receivers in the UV9K are head and shoulders better than that of the Retevis RT85, I’m hearing signals much stronger now and can even get into repeaters that I’ve never even heard on the old Retevis handheld.
The display on the Wouxun is bright and easy to read, even in bright sunshine which is great as I plan to use it outside a lot during the summer months.
The supplied speaker mic gets good unsolicited audio reports on transmit and has clear audio on receive with plenty of volume. The speaker mic doesn’t have any radio control buttons on it sadly, something I really like about the Wouxun UV980PL quad bander as you can control every aspect of the radio without touching the front panel. Would be a nice upgrade for the handheld if it every became available.
Overall I’m really impressed with the Wouxun UV9K Pro Pack. The radio performs very well, comes with every optional extra available and is a bargain at just £99.00.
If you’re looking for a full duplex handheld radio then I recommend you grab the Pro Pack before the offer ends.
Many years ago when I lived in France I had a Flex-3000 transceiver, one of the first fully SDR transceivers on the market. It was paired with a proprietary Windows XP application called PowerSDR (now Opensource and called Thetis) and connected via a firewire connection.
17 years later I am once again venturing into the world of SDR transceivers in the form of a Hermes Lite 2. (HL2)
The HL2 hardware is available via the Makerfabs website in kit form. I ordered the HL2 motherboard, the N2ADR Filter Board to ensure a clean signal from the transceiver and the enclosure. Total cost for all the parts and shipping was £288.00 including all taxes.
The kit took about 10 or so days to arrive and was very easy to put together making sure to fit the PA transistor heat sink the right way round so that it doesn’t short out the main board. (There are many videos about this on YouTube)
Once the hardware was put together I needed to install some software to control/drive the HL2. Being a heavy weight Linux user my software choice had to come from the Opensource world.
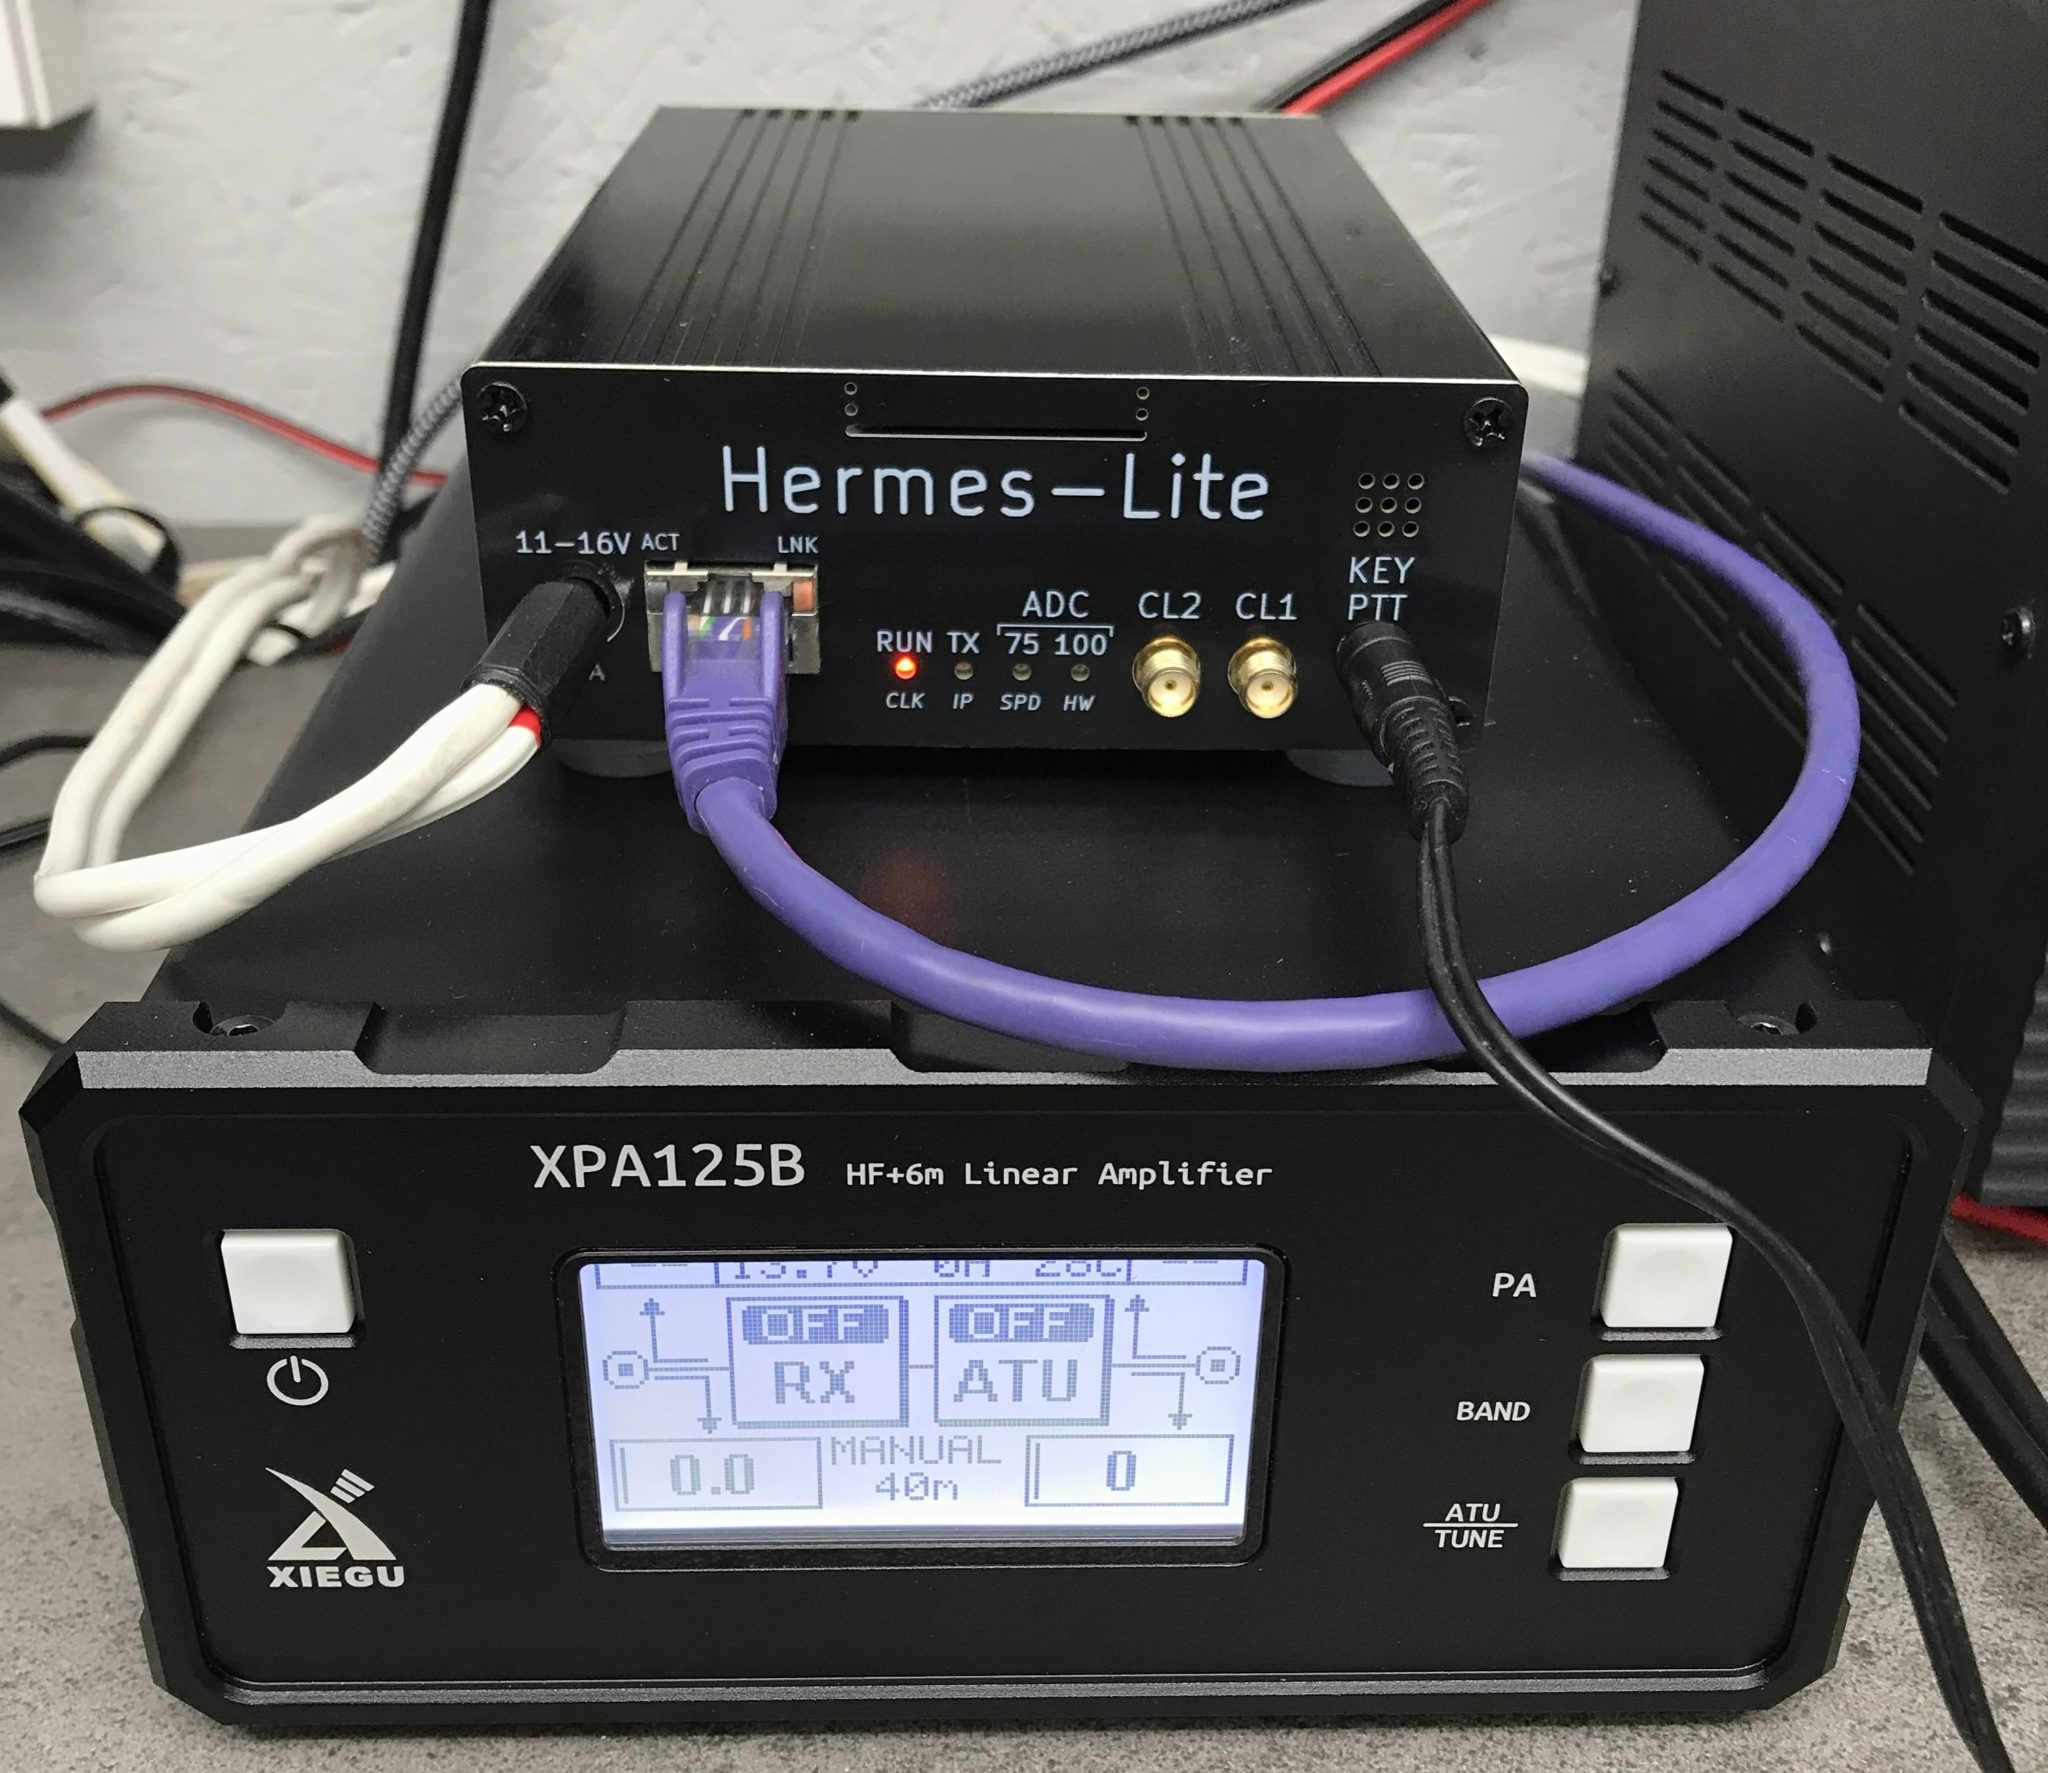
M0AWS Hermes Lite 2 SDR Trasnceiver and Xiegu XPA125B Amplifier
After much research and chatting with other HAMs on the Matrix who have the HL2 I found that most people use the closed source SDR Console software to control the transceiver. Since this software is for Windows it’s not something I can use as I don’t have any Windows PCs, they’re all Linux only.
To this end I started researching Linux SDR software for the HL2 and decided that PiHPSDR was the one I was going to try first.
PiHPSDR was originally written for the RaspberryPi 3/4/5 single board computers (SBCs) but, I wanted to have a go at compiling it on my Kubunu Linux desktop PC. I found it straight forward to follow the instructions in the pihpsdr-install.pdf file and in no time at all I had the software compiled and running.
PiHPSDR running on Kubuntu Linux 22.04LTS
PiHPSDR is infinitely configurable and thus it feels like it has an infinite number of menus and options. Since the HL2 has two separate receivers, it’s possible to listen to two bands at the same time. This is the one feature I really missed more than anything with my FTDX10 so, I’m glad to have dual receive capability back once more!
Going through all the settings I realised that the A and B VFOs have individual settings. Initially I setup the software using just VFO A but, when I switched over to VFO B none of my settings were there. I then had the realisation that the settings apply only to the active VFO. I quickly went through all the settings again for VFO B and all was well.
In no time at all I was on the air with just 5w as my Xiegu amp hadn’t arrived. Not being perturbed I tuned up on the 15m band and started searching for stations. Interestingly it was CQWW SSB weekend and the band was full of contest stations. Working my way along the spectrum I found I was able to work quite a few stations with ease using my vertical and inverted-L antennas.
Contacts of note were VE3KG at 3406 Miles, VE3JM at 3382 Miles, RW9DX at 2380 Miles, KC1XX at 3331 Miles and N1DE at 3600 Miles. I also worked a bunch of European stations and had a great time giving away points with my little QRP rig.
Contests are a good time to try out new radios as all the big stations with good ears are on the bands and make the effort to get us QRP guys in their logs.
I have been extremely impressed with the receivers in the HL2 radio. It handles both strong and weak stations exceptionally well. PiHPSDR really does have brick-wall filtering and I was able to work the weaker stations right next to large contest stations with ease. At no time did the front-end of the receiver get overloaded.
Below is a short video clip of a conversation on the 80m band. The band was quite noisy however, with a reduction of the AGC gain and the 2700Hz filter it’s possible to remove almost all the noise.
Hermes Lite 2 SSB reception on the 80m Band
On CW the radio is a real delight. With the filtering and AGC gain control I am able to use extremely narrow receive filters without any ringing whatsoever. I would say that on CW the HL2 is as good as my FTDX10 when it comes to receiving even the weakest of stations.
I’m sure on paper the FTDX10 receiver has better numbers however, to the ear there really is no discernible difference.
Below is a short video clip of D4DX on CW on the 80m band. The band was noisy but, with the 100Hz filter enabled and clever use of the AGC Gain I was able to remove almost all the noise completely, reducing fatigue on the ears and making reception very easy even though there was some fairly deep QSB at times.
Receiving D4DX on CW on the 80m band using 100Hz filter and reduced AGC gain
A few days later my Xiegu XPA125B amplifier arrived. Unfortunately the amp didn’t come with the normal PTT lead that comes from the factory and is detailed in the user manual. For some bizarre reason this is a chargeable option when you buy the amp from Martin Lynch and Sons even though it is included from the factory.
This meant I had to make a lead which was a problem as I didn’t have one of the mini DIN plugs required for the connection to the amplifier. Jumping onto Amazon I ordered a packet of two and sat back and waited for their arrival.
A couple of days later the DIN plugs arrived and I quickly made up the necessary phono/RCA to mini DIN lead and got the amp operational.
The Xiegu XPA125B isn’t cheap but, it’s a really nice bit of kit. The neat little LCD display keeps you informed of power O/P, I/P and O/P SWR, voltage, current draw, temperature and band selected.
With just 0.7w of input from the HL2 I’m able to get a full 100w O/P from the amp. On the lower bands I have to reduce the O/P from the Hermes Lite 2 even further so that I don’t over drive the amp.
Being an avid Short Wave Listener (SWL) I wanted to see how the HL2 performed when listening to the big AM broadcast stations. To my surprise it makes an excellent SWL receiver with better AM demodulation than many of the more expensive radios. Having the option to select receive filters up to 16Khz wide I found I was able to get the best audio possible from many of the broadcast stations including Radio Caroline on 648Khz. It’s quite an improvement over the 12Khz maximum on the FTDX10.
Listening to AM Broadcast stations
What makes this project even more exciting is that both the hardware and software are from the OpenHardware/OpenSource world. The complete circuit diagram, PCB layout and information is available for all to download, something you don’t often see these days!
PiHPSDR is one of the nicest SDR applications I’ve seen in the Linux world and even comes with a 200 page downloadable user manual. Something you don’t see in many Opensource projects. The source code for the application is downloadable and you are able to make your own changes to it without restriction.
Overall I am really pleased with the Hermes Lite 2 SDR transceiver. It has two excellent receivers, is infinitely configurable via the PiHPSDR software and performs extremely well under all conditions. Since getting the radio I haven’t even switched on the FTDX10.
I recently decided to look into a 2m/70cm FM radio for the shack for use on the local 2m/70cm repeaters and was considering the offerings from Yaesu and Icom however, the Wouxun KG UV-980PL caught my eye as it is a quad band, full duplex radio. Not knowing much about Wouxun radios I had to do some research to get an idea of what it’s like. Generally the radio gets very good reviews and most mention the excellent build quality.
There are two versions of the 980P radio, the 980PL that offers 6/4/2m and 70cm bands and the 980P that offers 10/6/2m and 70cm. The 4m is a band I’ve been wanting to try for some time and the 980PL with it’s 4m band coverage became even more appealing.
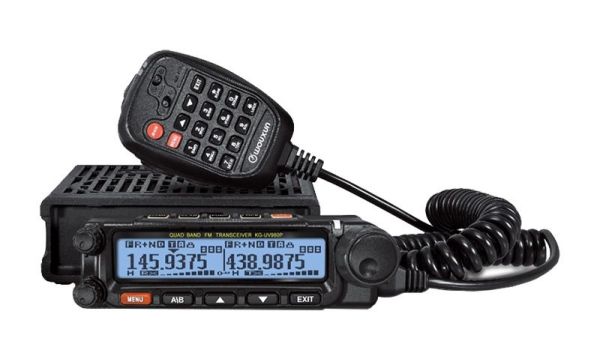
Wouxun KG UV-980PL Quad Band FM Duplex Transceiver
I decided to take a trip down to Martin Lynch and Sons (MLANDS), a good 2 hours or more drive for me, so that I could get hands on with the radios that I had been looking at.
I invited Alan, G1SQB along for the ride and a day out playing with radios as he lives 3 miles away and we often chat on air.
Arriving at the store we grabbed a hot brew and set about playing with the great selection of radios on display.
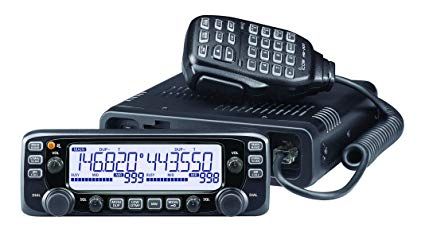
I initially looked at the Icom IC-2730E, a dual band full duplex transceiver that has been around for about 10 years and has good reviews. As expected the build quality is excellent and very easy to use. I found I was soon able to set up memories etc via the front panel controls. The only draw back is that it isn’t supported by the CHIRP programming software that I use. Other than that it certainly meets all the requirements for a 2m/70cm FM transceiver
Icom IC-2730E FM Duplex Transceiver
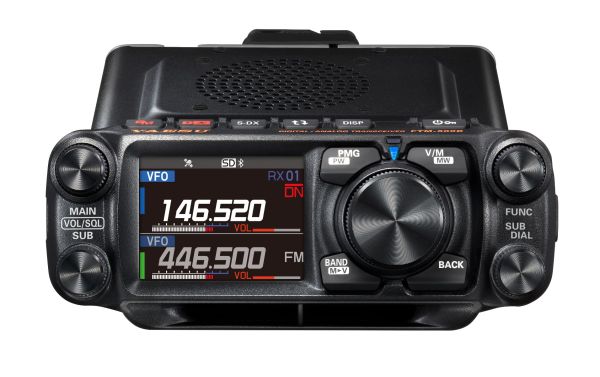
Next I moved on to the offerings from Yaesu including the FTM-500DE 2m/70cm transceiver. The colour screen is very nice and the menu system very easy to use however, the price is getting on for close to double that of the other radios and it doesn’t really offer anything more that interests me since I’m only looking for an analog radio.
Yaesu FTM-500DR dual band FM Transceiver
Sadly there wasn’t a Wouxun UV-980PL out on display and so I had to persuade the salesman to get one out of stock for me to play with. Unpacking the radio I was surprised at how good the build quality is, it really is comparable to the other radios that I had been looking at.
The Wouxun menu system is fairly easy to use once you’ve looked at the manual and got to grips the abbreviations used. The big plus is that this radio is CHIRP compatible with an optional programming cable (£19) and so loading the memories with repeaters etc will be extremely easy.
The Wouxun has dual receivers built in with a quad-plexer so, you can transmit on one band whilst listening to another band on the other receiver. One thing to note is that the 1st receiver covers all the bands, 6/4/2m and 70cm however, the 2nd receiver only covers 2m and 70cm so, it’s not possible to receive 4m and 6m at the same time. The radio also only has one antenna connection on the rear, would had been great if it had one connector for each receiver.
The really good thing about the Wouxun UV-980PL is that it comes with everything you will need, apart from the programming cable!
After much tinkering I decided to purchase the Wouxun KG UV-980PL, a Diamond V2000 6/2m and 70cm antenna plus 20m of Hyperflex-13 coax cable and connectors.
In the box you’ll find two mounting options for the removable head. There is a short connecting cable for use when the head is mounted directly on the radio body and a 5m long connecting cable for mounting the head remotely. This is really useful as I wanted to mount the head on a mic boom arm so that it’s easily accessible and didn’t clutter the desk space in the shack.
Wouxun KG UV-980PL head mounted on a Mic boom arm
Since the radio also comes with the mobile mount I’ve fixed the radio body on the wall behind the PC monitor out the way. This setup has proven to be extremely good as I can see what’s happening on the display at a glance and easily grab the mic if called.
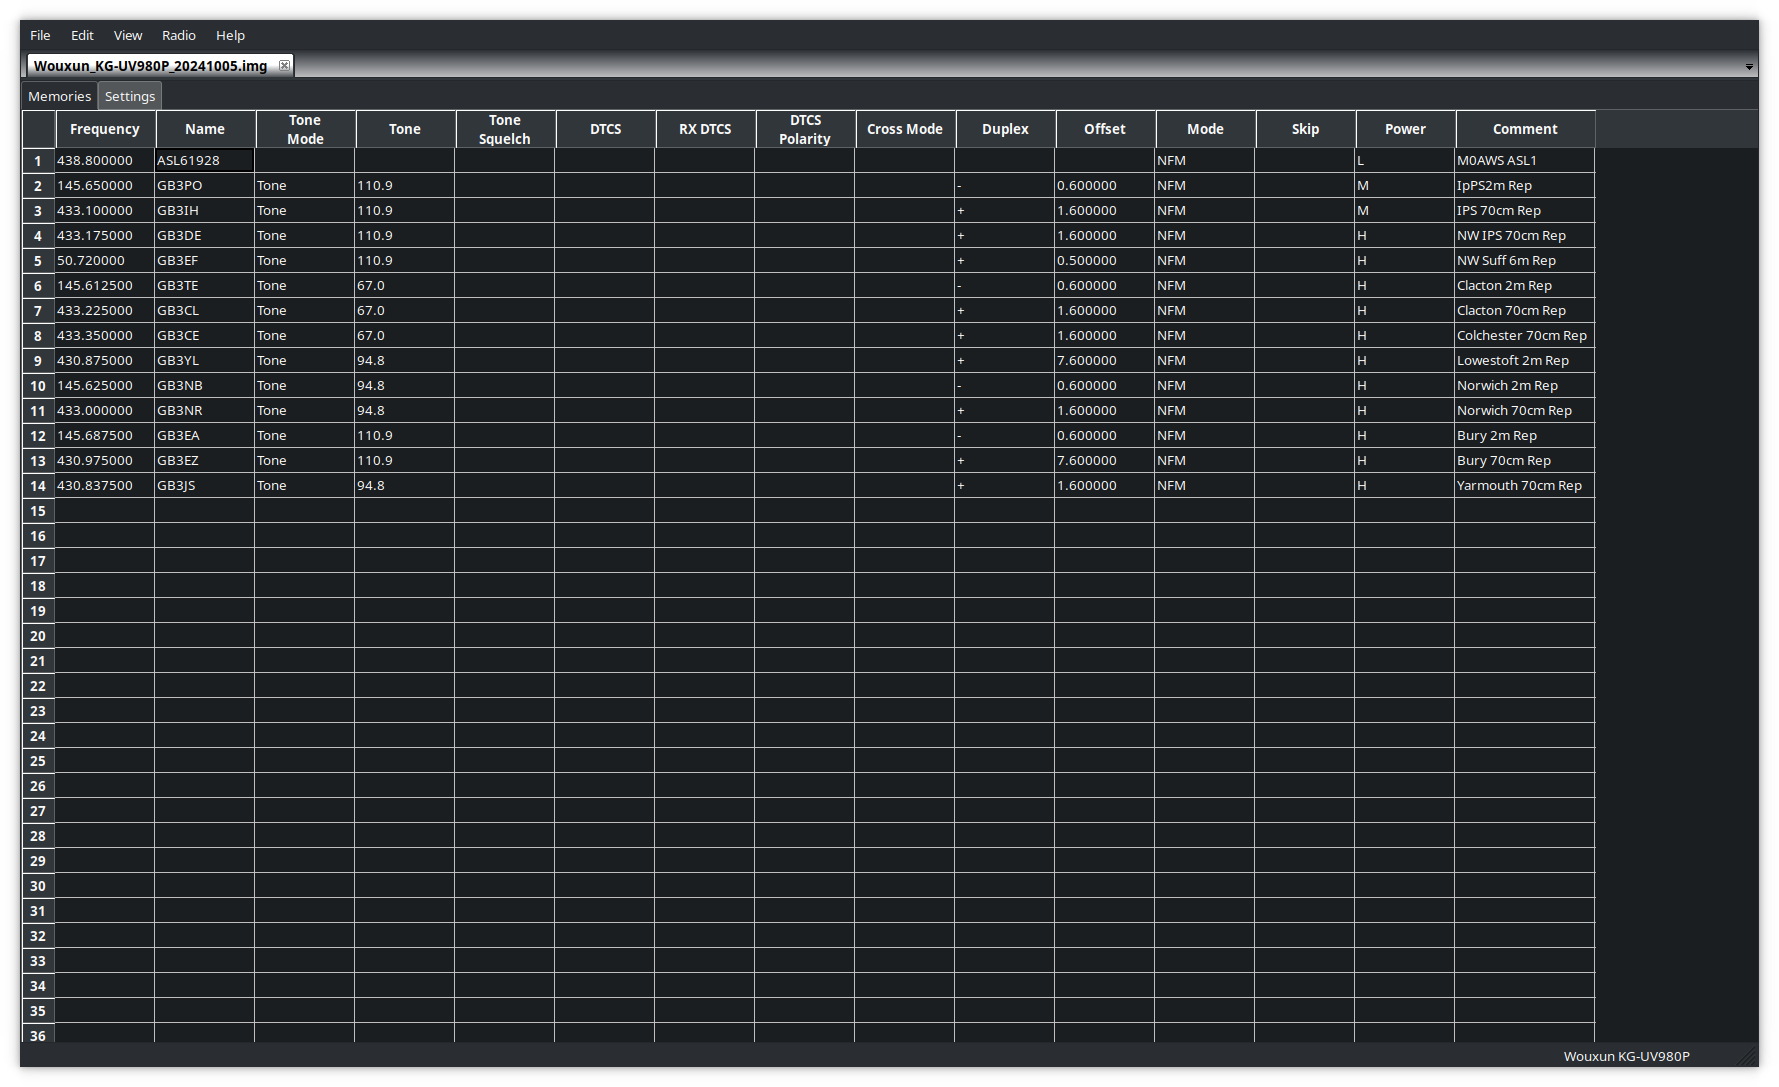
Programming the radio memories is extremely quick and easy using CHIRP. I had the local repeaters and my AllStarLink node frequencies and offsets uploaded to the radio in no time at all and was soon on air.
Programming the memories on the Wouxun UV-980PL using CHIRP
The microphone that comes with the radio is extremely good. You can operate most of the controls on the radio directly from the mic with ease and it has a good feel in the hand. Audio reports have also been very good and there’s no need to change it.
I’ve not yet got the new Diamond V2000 antenna erected but, I’ve been using the radio with my homebrew 2m/70cm end fed vertical dipole and my 4m band end fed vertical dipole and am getting excellent results. I can access all the local repeaters using the lowest power output setting and only have to use the medium/high setting for the repeaters that are further afield.
On the 4m band the radio performs well and I’ve been surprised at the distances I’ve been able to cover even though my 4m antenna is only 6-7m above the ground currently.
A few days after I got the new Wouxun radio there was an ARISS event whereby a group of Girl Guides would be talking to Astronaut Sunita Williams aboard the ISS. This was a great opportunity to test the receive capability of the radio and so I setup ready for the pass. Using just my simple 2m/70cm end fed vertical dipole I got great reception as can be heard in the video below.
Overall I’m extremely pleased with the Wouxun KG UV-980PL quad band radio and considering it’s much cheaper than the offerings from the main radio manufacturers it’s well built and performs extremely well. If you’re looking for a simple, analog FM radio for 6/4/2m/70cms then you can’t beat it!
I recently put up a 38m Inverted-L antenna (10m vertical/28m horizontal) and tuned it on the 160m band using a home-brew Pi-Network ATU. It’s working great on top band and I’m really pleased with performance so far.
I decided today that it would be good to try the inverted-L out on some of the other low bands too. Since my other HF antenna is a large vertical that’s great for DXing but, terrible for Inter-G I thought perhaps the Inverted-L would fill the inter-G gap.
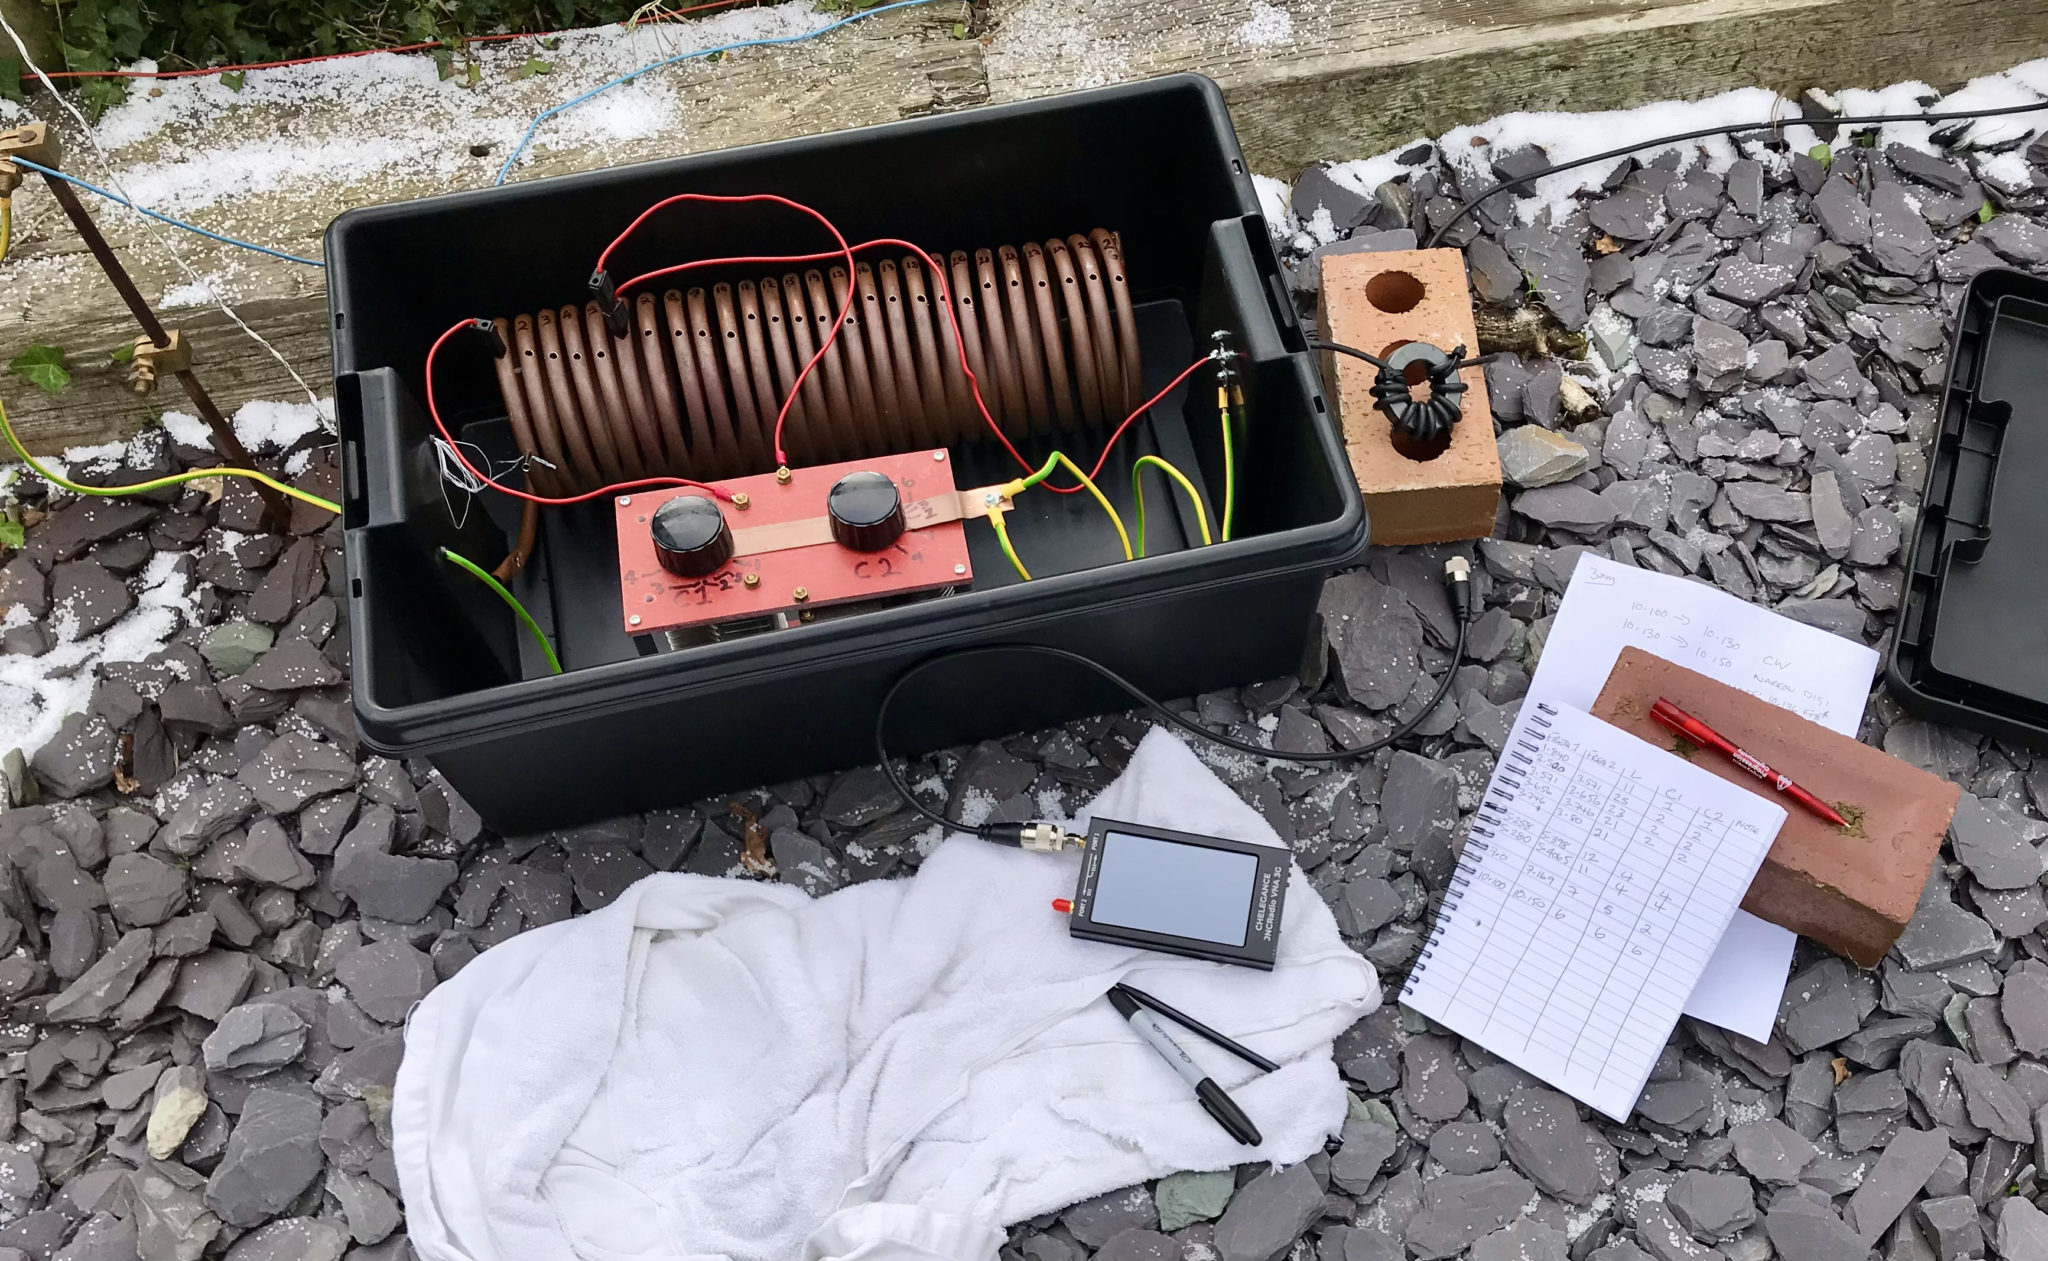
M0AWS Pi-Network ATU using my JNCRadio VNA to find the ATU setting for each band
Having recently purchased a JNCRadio VNA from Martin Lynch and Sons it made tuning the ATU for each band really easy. When it comes to antenna resonance I like my antennas to have an SWR of less than 1.2:1. With the VNA connected it is really easy to tune the antenna for a 1:1 SWR on a particular frequency, make a note of the tune information and then move to the next frequency and start again.
M0AWS Pi-Network ATU Inductor with turns countM0AWS Pi-Network ATU Capacitor 1 and 2 settings
I marked up each turn on the large copper inductor so I could record the position of the input wire onto the inductor. I then added some markings on the two capacitors of the Pi-Network ATU for the resonance points on each band/frequency I wanted to resonate the antenna on.
M0AWS Pi-Network ATU settings noted for each band
After about 40mins I had all the settings recorded on a pad ready for testing from the shack end of the coax run. Connecting my Yaesu FTDX10 to the coax I ran through each band setting checking the SWR as I went. All bands tuned up perfectly 160m through 30m and receiving of Inter-G on the bands that were active was excellent.
Wanting to test the antenna on 40m for the first time I found Nick, M7NHC calling CQ and gave him a call using just 5w output. He came straight back to me and we had a quick chat.
Nick was using an Icom IC-7300 using just 10w into an end-fed long wire from Eastbourne down on the south coast so, we were both QRP. Nick was a 5/7 with QSB and he gave me a 5/8 with QSB, not bad at all consider how much power we were using.
I’m hoping to have a chat with some of the guys from the Matrix this evening on 60m SSB so, it will be interesting to see how the antenna performs on 5Mhz.
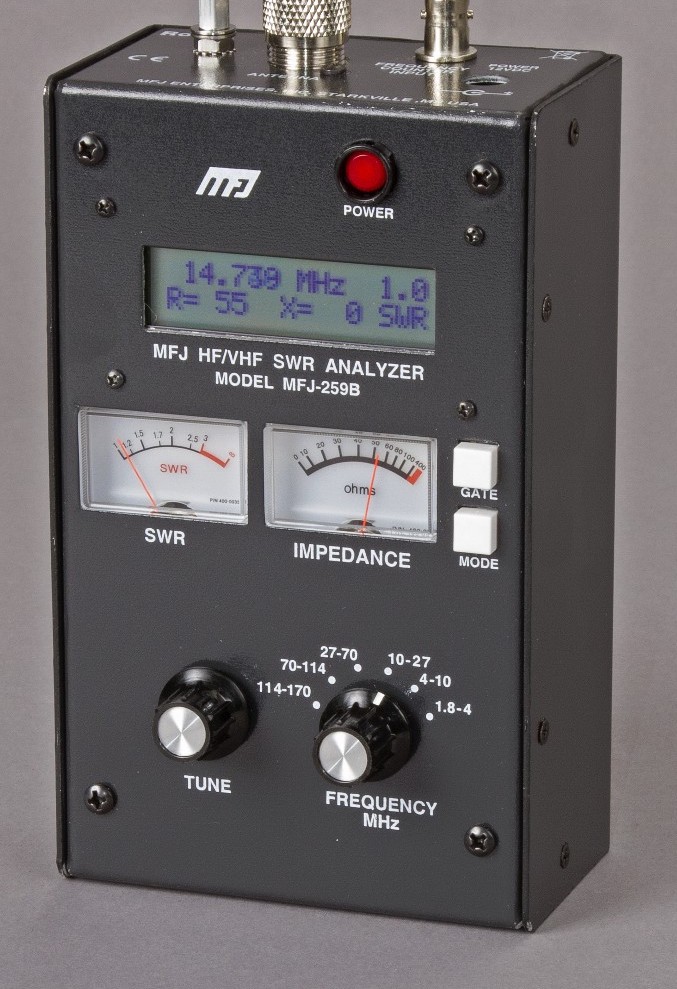
Many years ago I had an MFJ-259B antenna analyser that I used for all my HF antenna projects. It was a simple device with a couple of knobs, an LCD display and a meter but, it provided a great insight into the resonance of an antenna.
MFJ-259B Antenna Analyser
Today things have progressed somewhat and we now live in a world of Vector Network Analysers that not only display SWR but, can display a whole host of other information too.
Being an avid antenna builder I’ve wanted to buy an antenna analyser for some time but, now that I’m into the world of QO-100 satellite operations using frequencies at the dizzy heights of 2.4GHz I needed something more modern.
If you search online there are a multitude of Vector Network Analysers (VNAs) available from around the £50.00 mark right up to £1500 or more. Many of the VNAs you see on the likes of Amazon and Ebay come out of China and reading the reviews they aren’t particularly reliable or accurate.
After much research I settled on the JNCRadio VNA 3G, it gets really good reviews and is very sensibly priced. Putting a call into Gary at Martin Lynch and Sons (MLANDS) we had a long chat about various VNAs, the pros and cons of each model and the pricing structure. It was tempting to spend much more on a far more capable device however, my sensible head kicked in and decided many of the additional features on the more expensive models would never get used and so I went back to my original choice.
Gary and I also had a long chat about building a QO-100 ground station, using NodeRed to control it and how to align the dish antenna. The guys at MLANDS will soon have a satellite ground station on air and I look forward to talking to them on the QO-100 transponder.
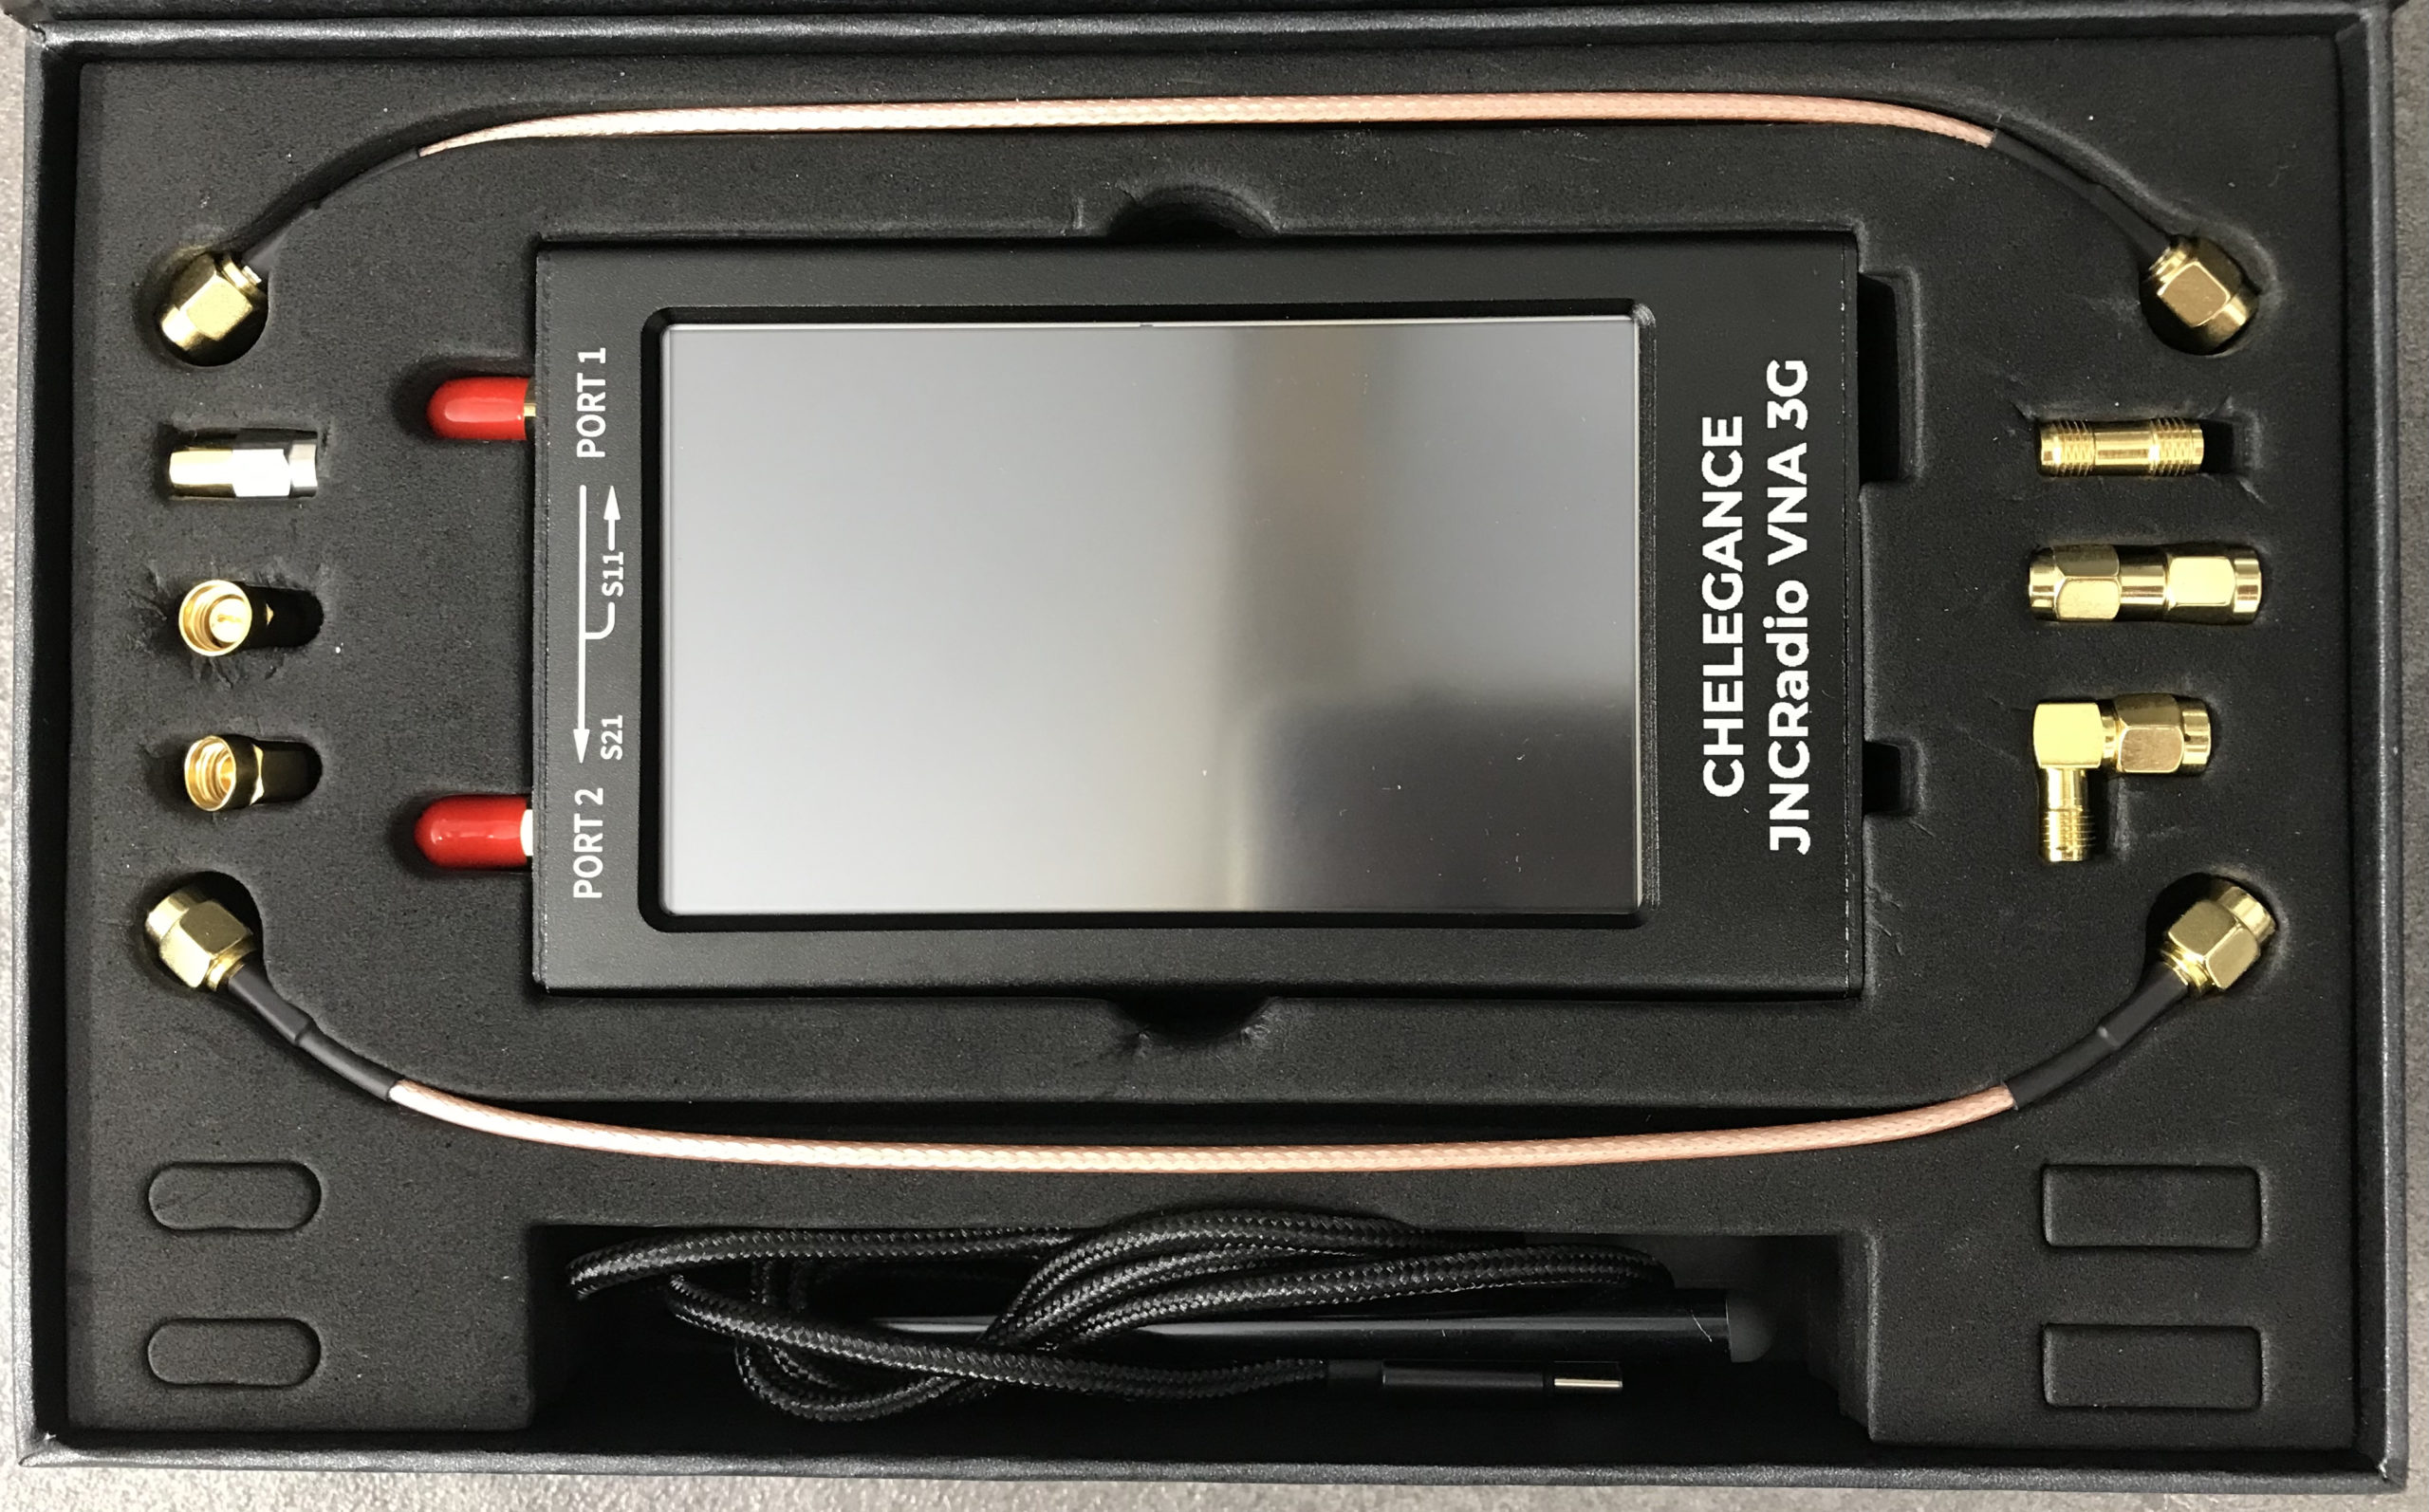
M0AWS – JNCRadio VNA 3G PackagingM0AWS – JNCRadio VNA 3G in box with connectors and cables
Initially I wanted to check the SWR of my QO-100 2.4GHz IceCone Helix antenna on my satellite ground station to ensure it was resonant at the right frequency. Hooking the VNA up to the antenna feed was simple enough using one of the cables provided with the unit and I set about configuring the start and stop stimulus frequencies (2.4GHz to 2.450GHz) for the sweep to plot the curve.
The resulting SWR curve showed that the antenna was indeed resonant at 2.4GHz with an SWR of 1.16:1. The only issue I had was that in the bright sunshine it was hard to see the display and impossible to get a photo. Setting the screen on the brightest setting didn’t improve things much either so this is something to keep in mind if you plan on using the device outside in sunny climates.
(My understanding is that the Rig Expert AA-3000 Zoom is much easier to see outside on a sunny day however, it will cost you almost £1200 for the privilege.)
A couple of days later I decided to check the SWR of my 20m band EFHW vertical antenna. I’ve known for some time that this antenna has a point of resonance below 14MHz but, the SWR was still low enough at the bottom of the 20m band to make it useable.
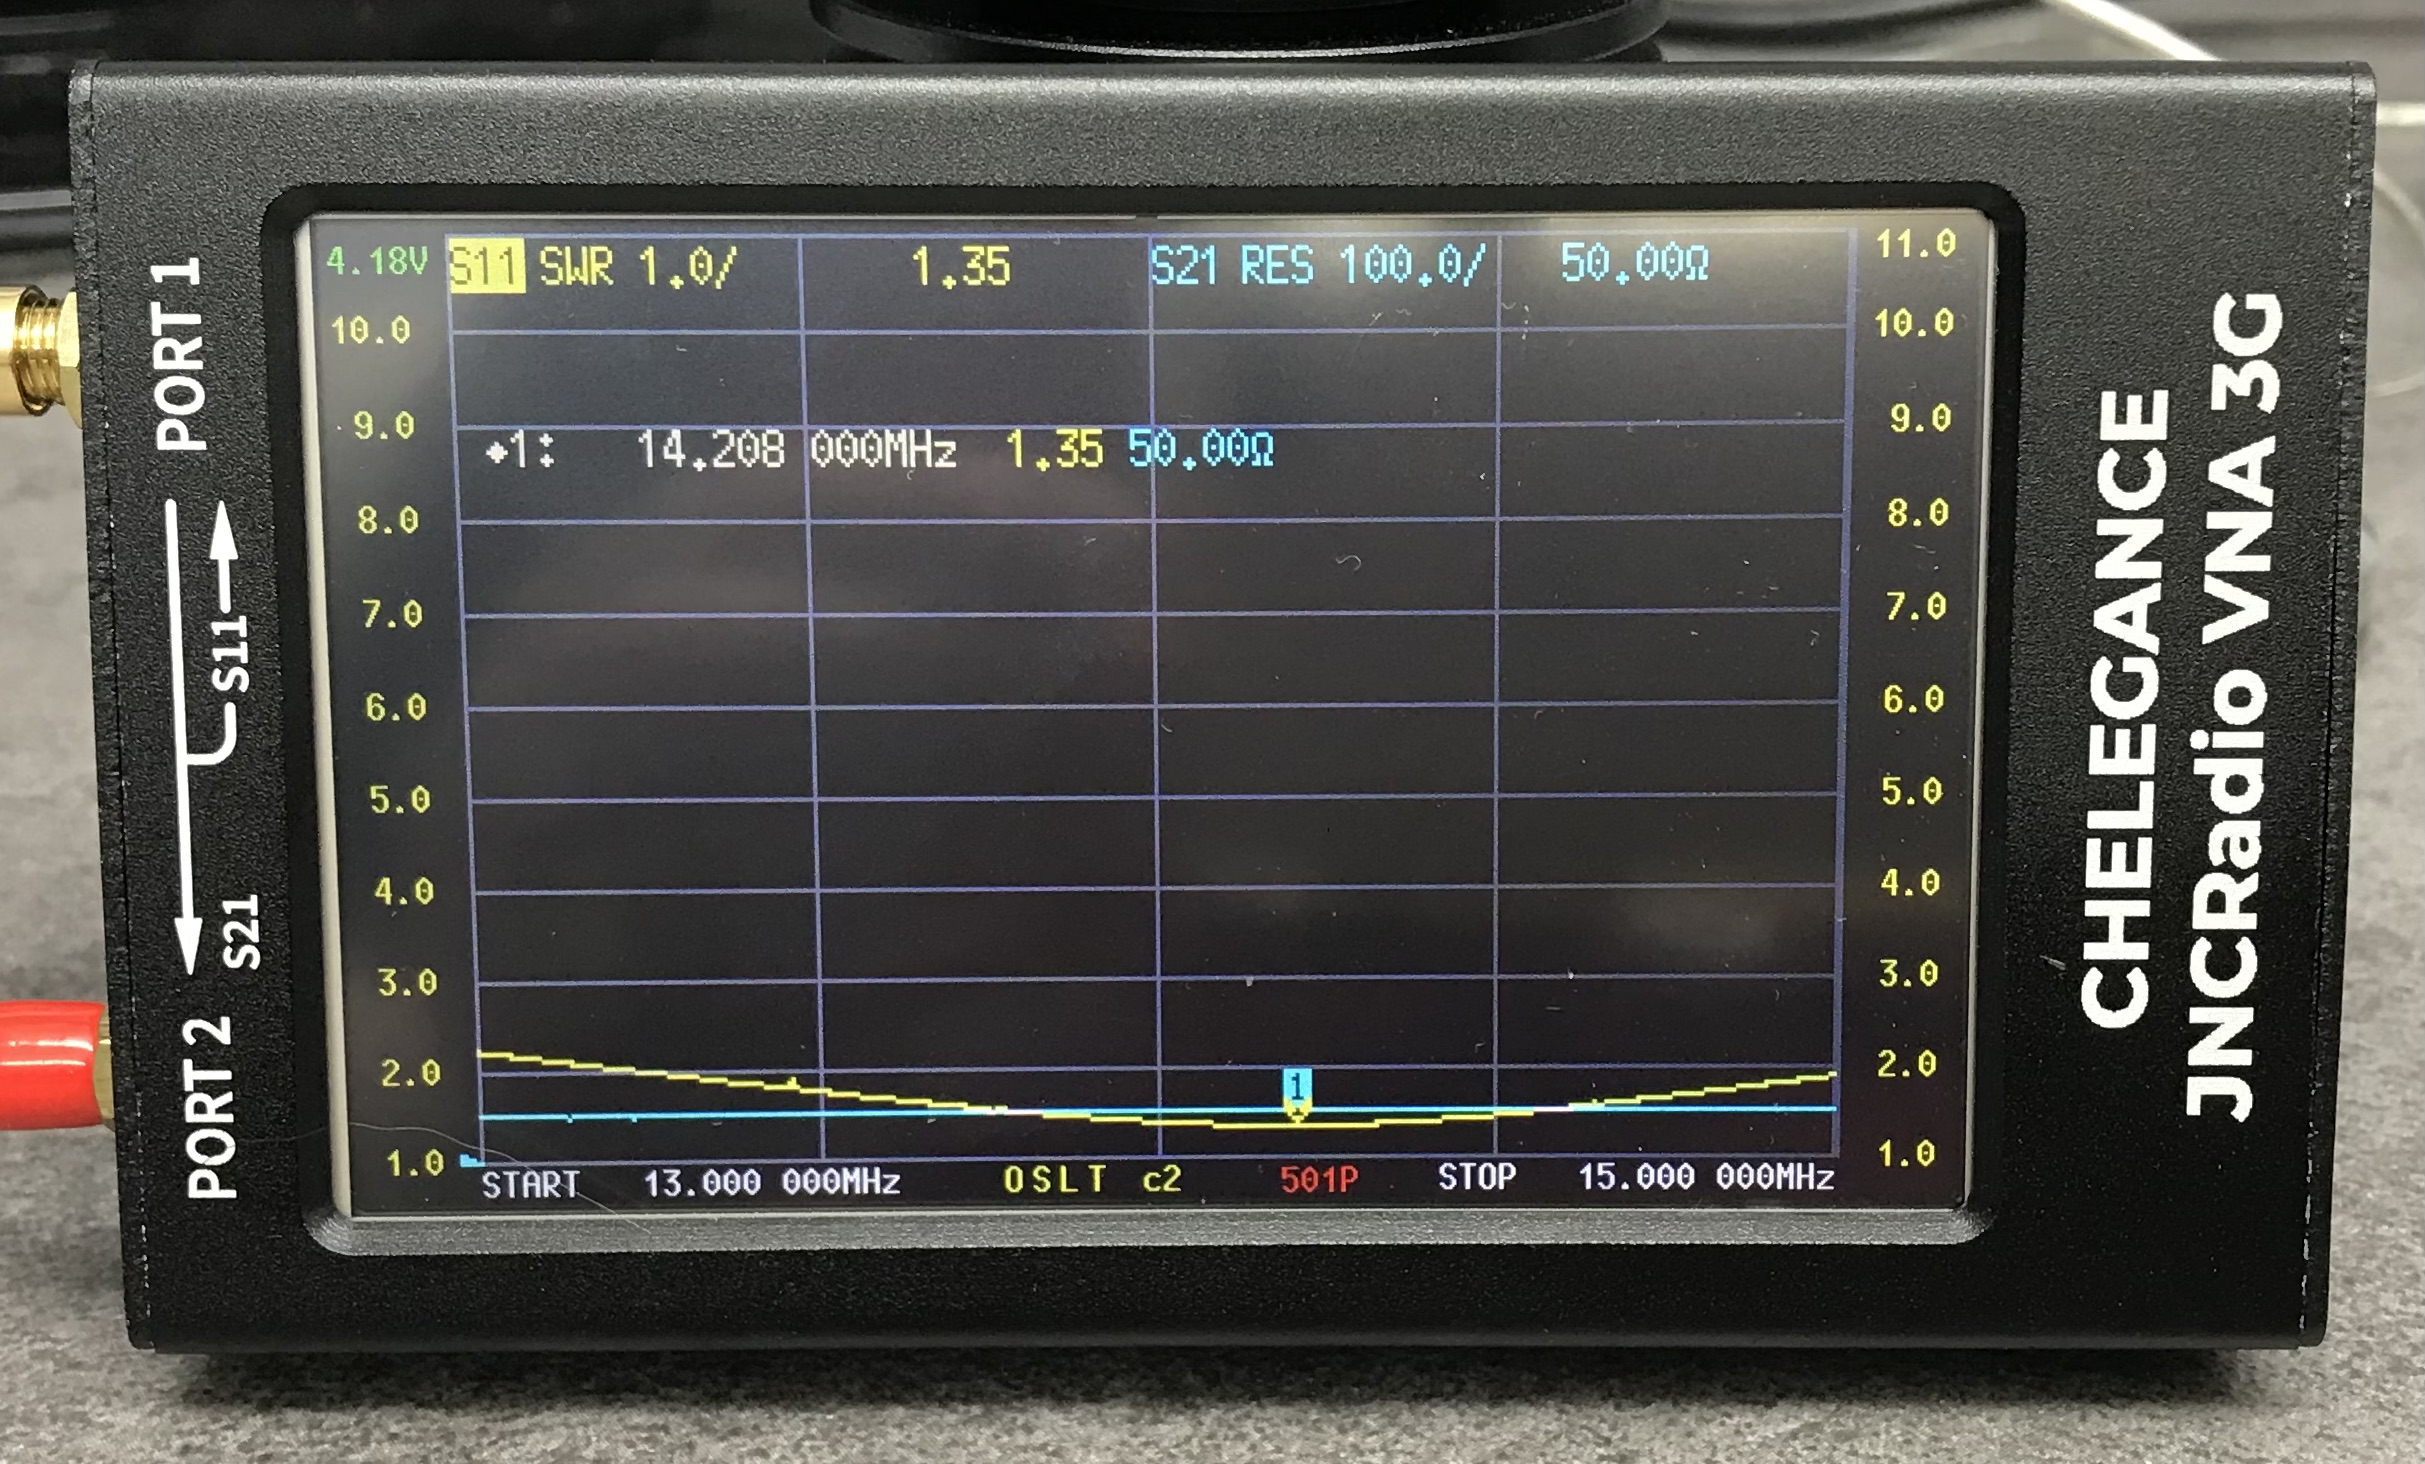
Hooking up the VNA I could see immediately that the point of resonance was at 13.650Mhz, well low of the 20m band and so I set about shortening the wire until the point of resonance moved up into the band.
JNCRadio VNA3G showing 20m Band EFHW Resonance
With a little folding back of wire I soon had the point of resonance nicely into the 20m band with a 1.35:1 SWR at 14.208Mhz. This provides a very useable SWR across the whole band but, I decided I’d prefer the point of resonance to be slightly lower as I tend to use the antenna mainly on the CW & FT4/8 part of the band with my Icom IC-705 QRP rig.
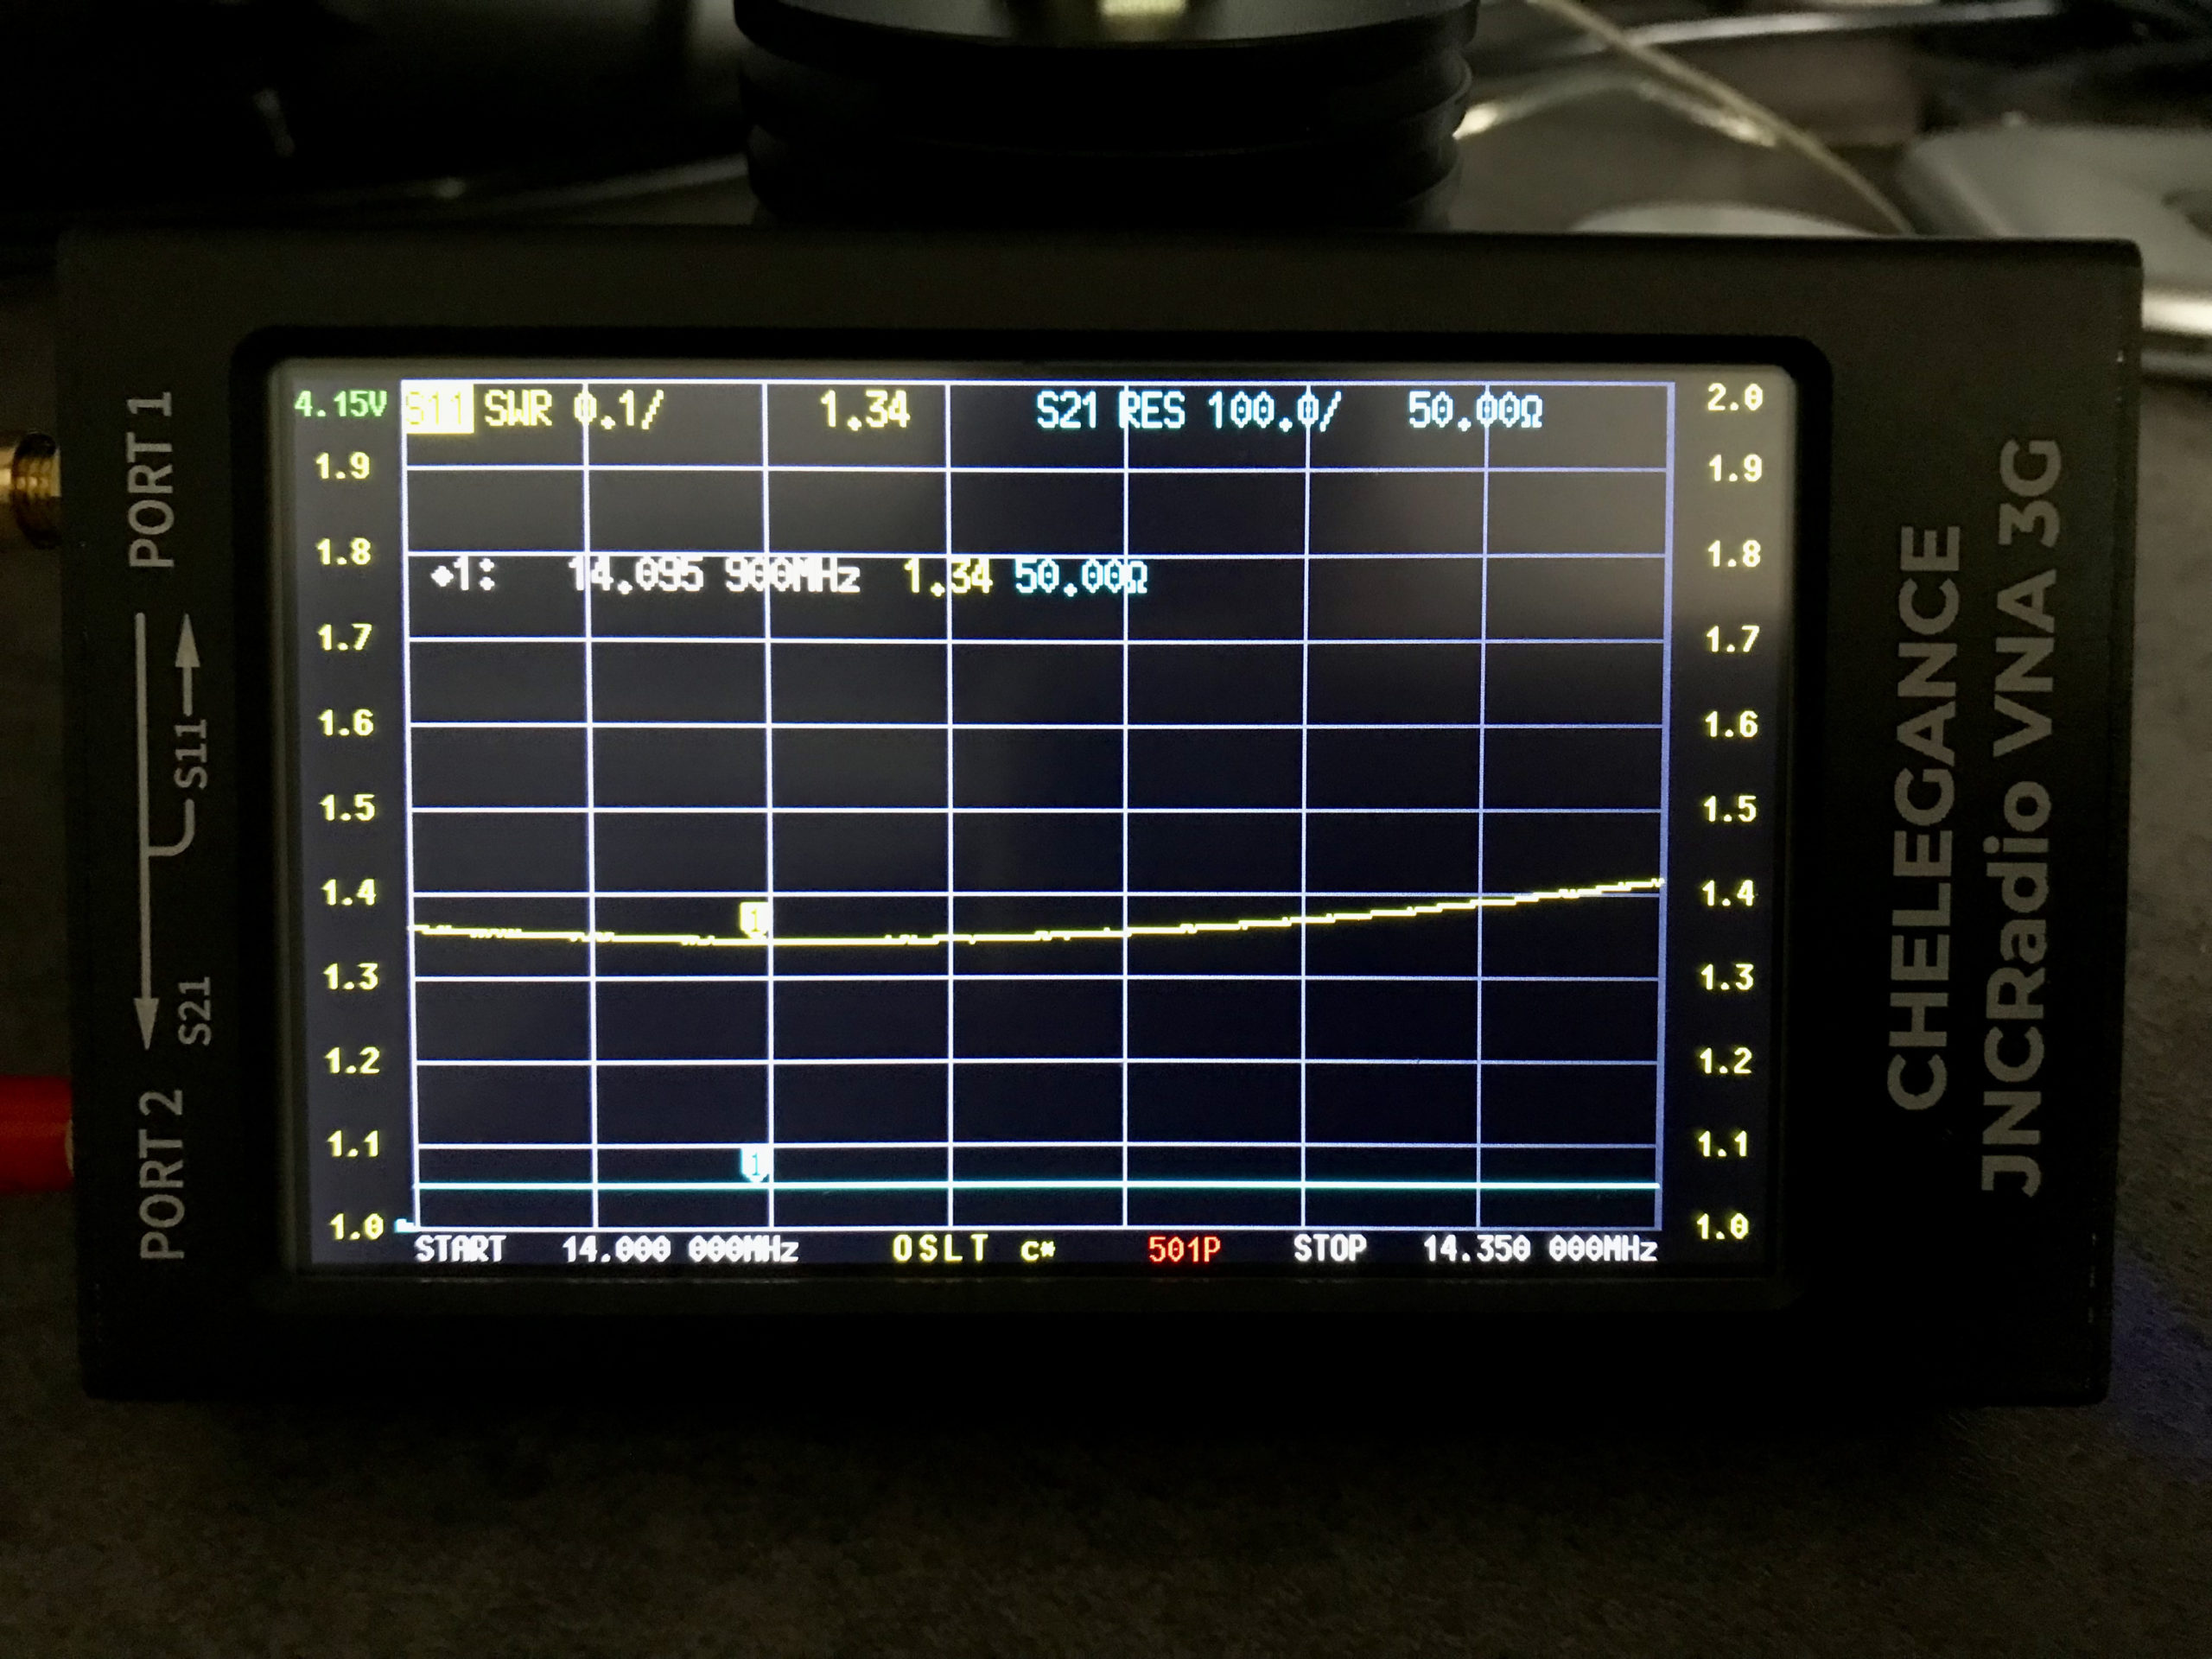
Popping out into the garden once more I lengthened the wire easily enough by reducing the fold back and brought the point of resonance down to 14.095Mhz.
JNCRadio VNA3G showing 20m Band EFHW Resonance 14Mhz to 14.35Mhz Sweep
The VNA automatically updated the display realtime to show the new point of resonance on the 4.3in colour screen. I also altered the granularity of the SWR reading on the Y axis to show a more detailed view of the curve and reduced the frequency range on the X axis so that it showed a 14Mhz to 14.35Mhz sweep. With an SWR of 1.34:1 at 14.095Mhz and a 50 Ohm impedance, the antenna is perfectly resonant where I want it.
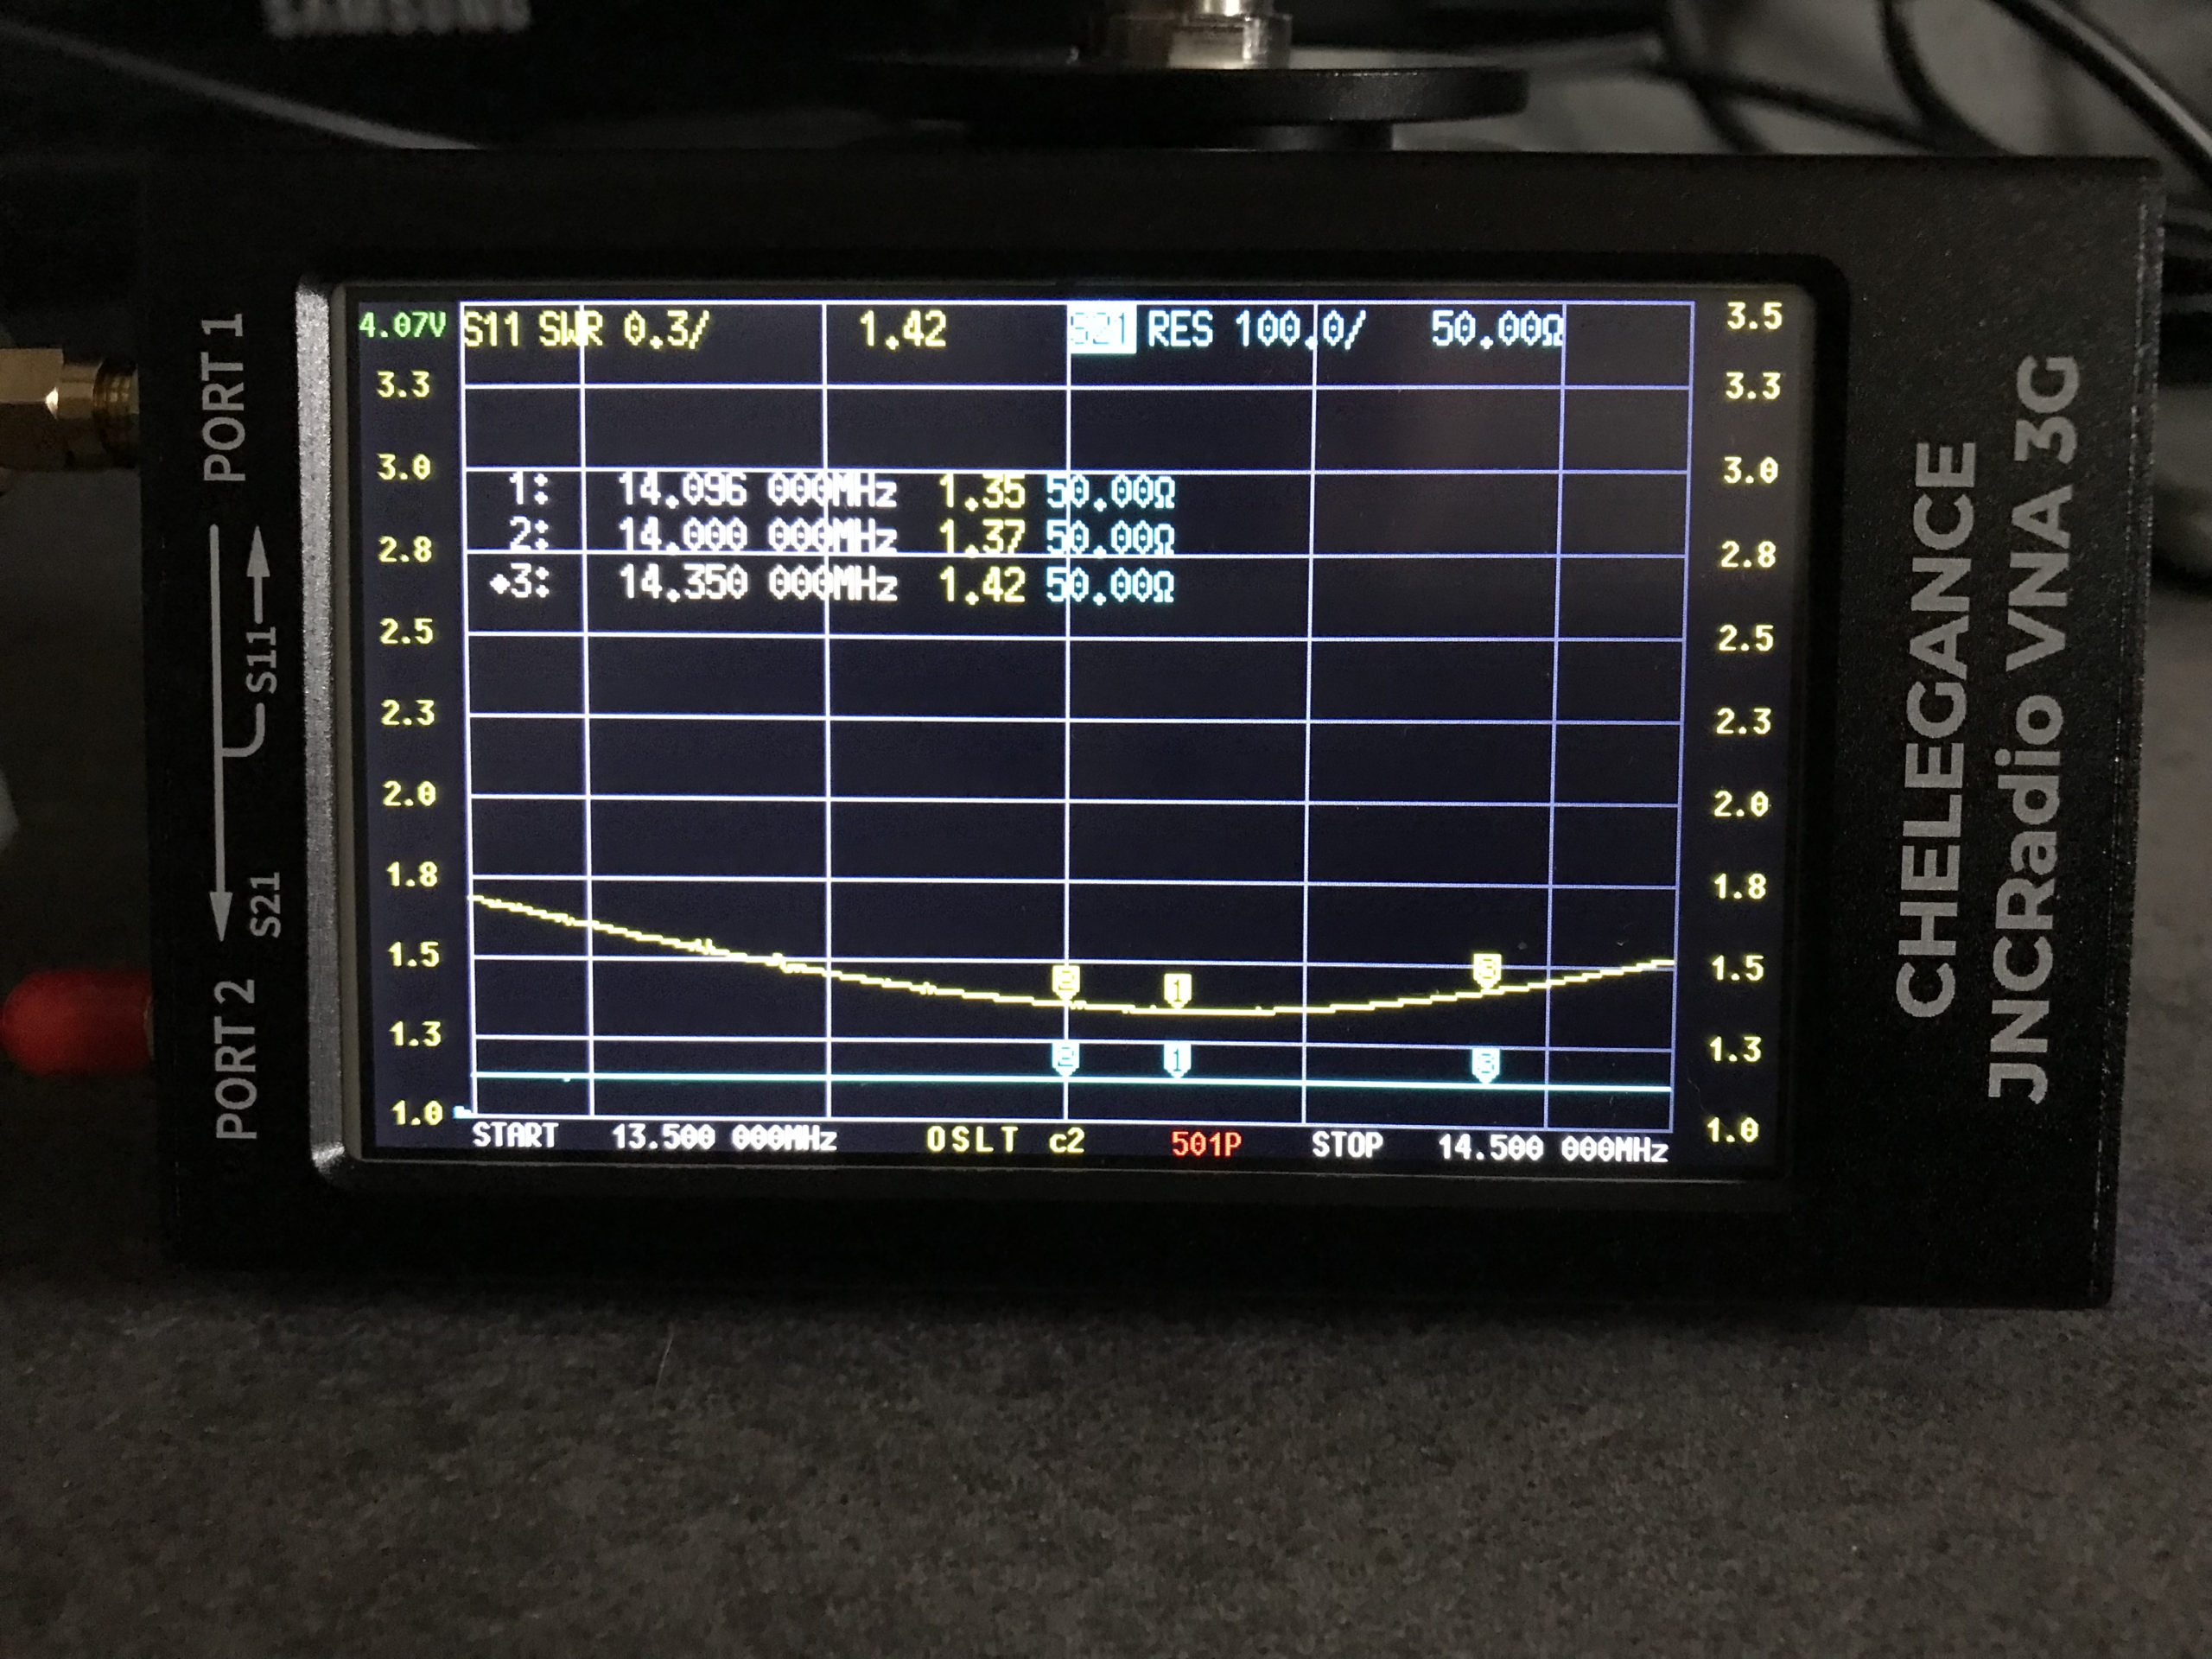
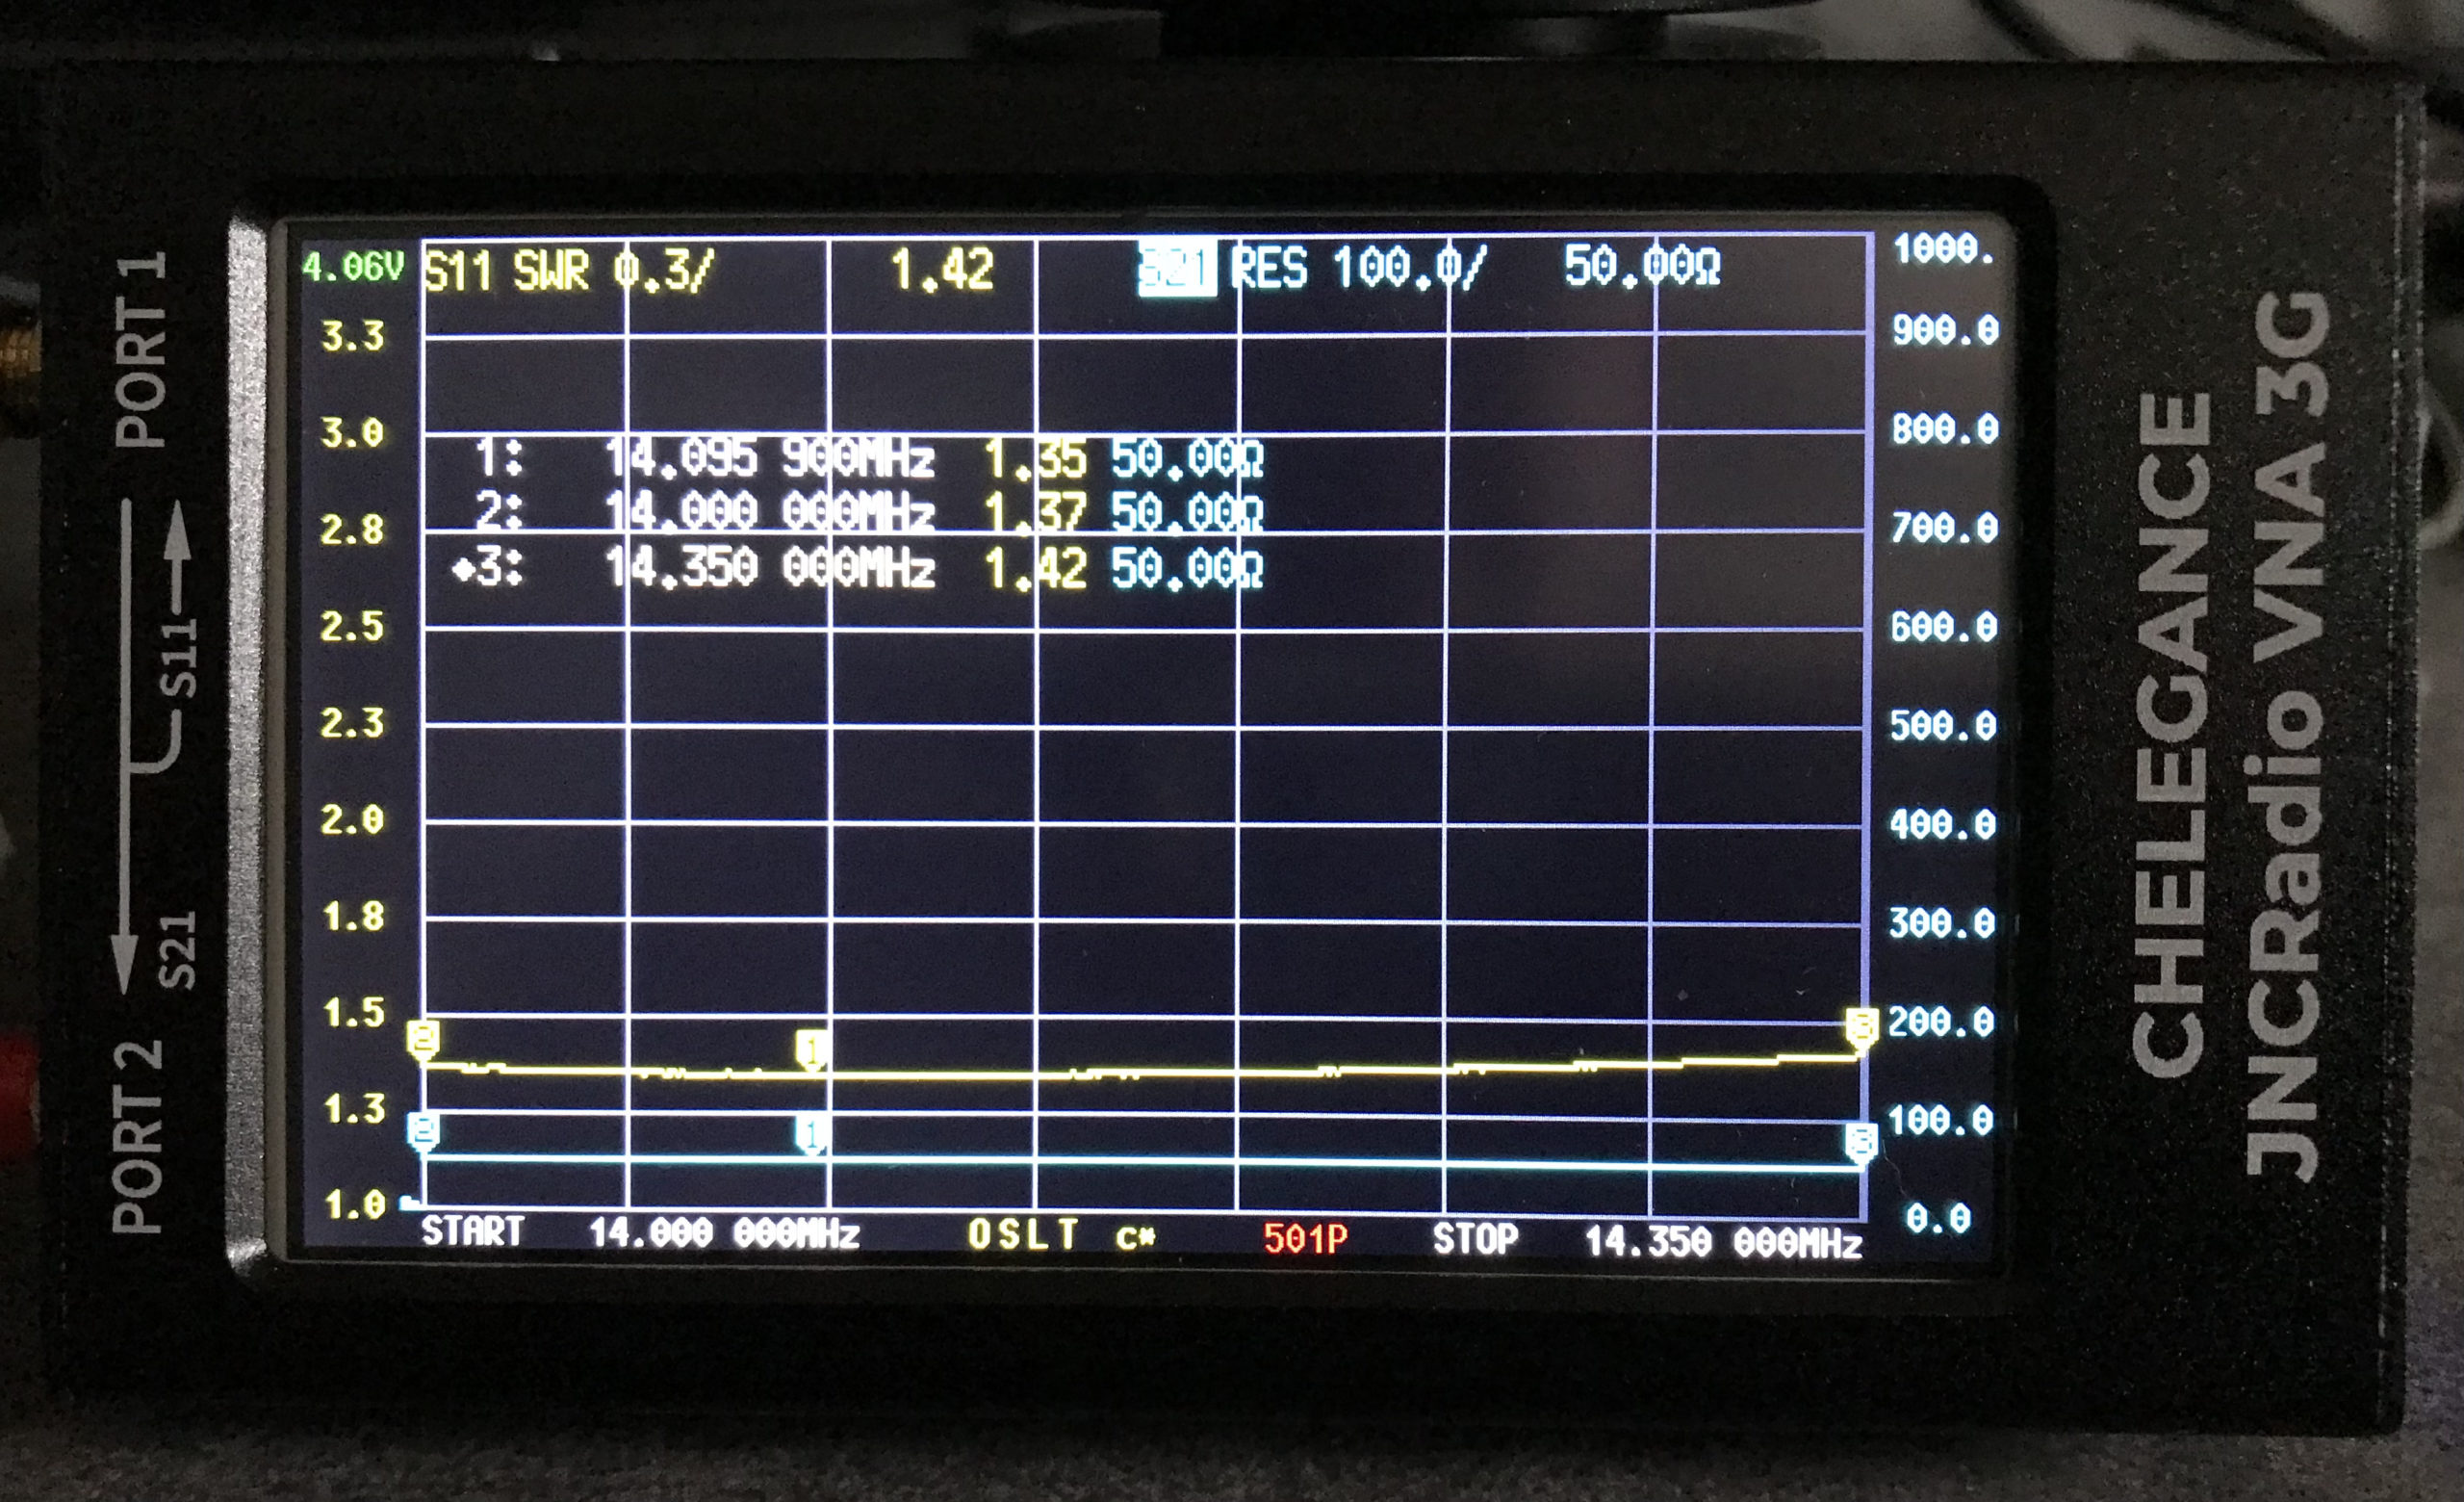
It’s interesting to note that the antenna is actually useable between 13.5Mhz and 14.5Mhz with a reasonable SWR across the entire frequency spread. Setting 3 markers on the SWR curve I could see at a glance the SWR reading at 14Mhz (Marker 2) , 14.350Mhz (Marker 3) and the minimum SWR reading at 14.095Mhz (Marker 1).
Since purchasing my new Begali Pearl morse key I’ve been wanting to install the 300hz CW filter into my Yaesu FTDX10. The radio comes standard from the factory with the 500z CW filter preinstalled however, being able to narrow the bandwidth down even further will help to reduce the ringing effect on noisy bands that often plaques CW Ops when trying to catch those very weak DX signals.
Since I had built up some free credit at ML&S by buying all my new radio equipment I decided to put it to good use and put it towards the cost of the optional 300hz filter for the radio.
In years past when I had a Yaesu FT1000MP I installed a full set of filters in it and it made quite a difference DXing on the 160/80/40m bands. Back then things like digital noise reduction (DNR) were in their infancy and so narrow filters were even more important than they are today.
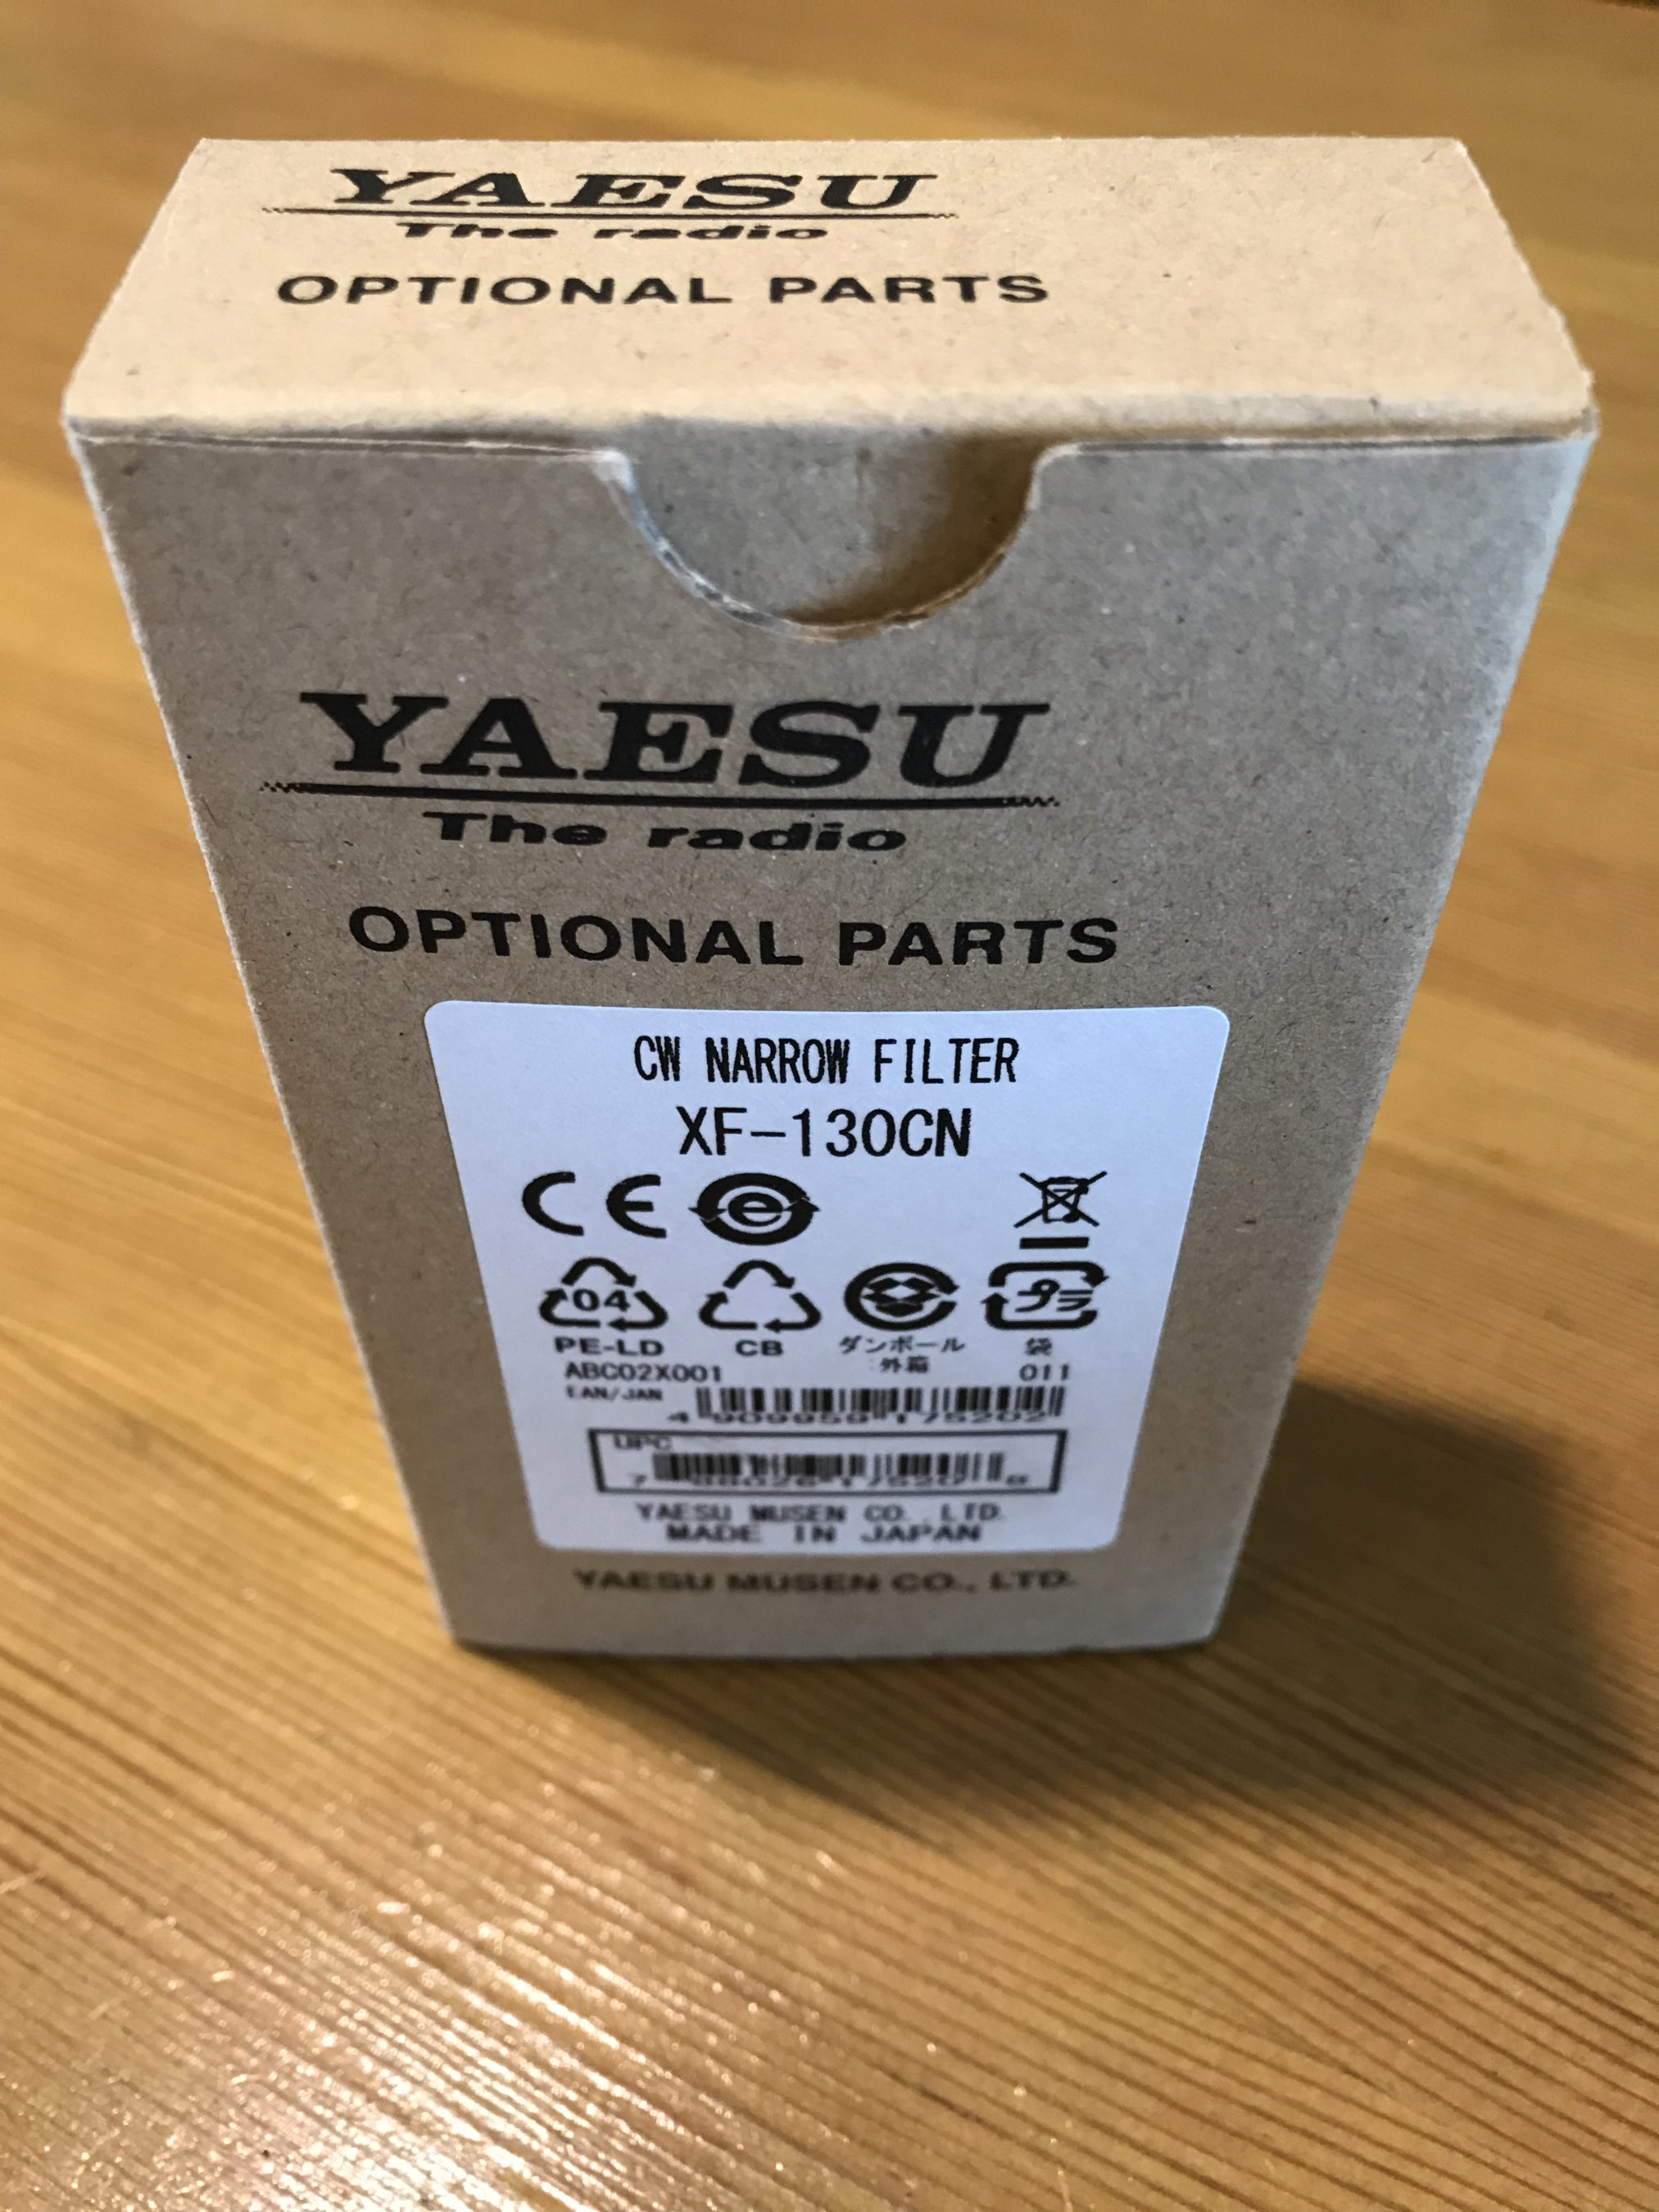
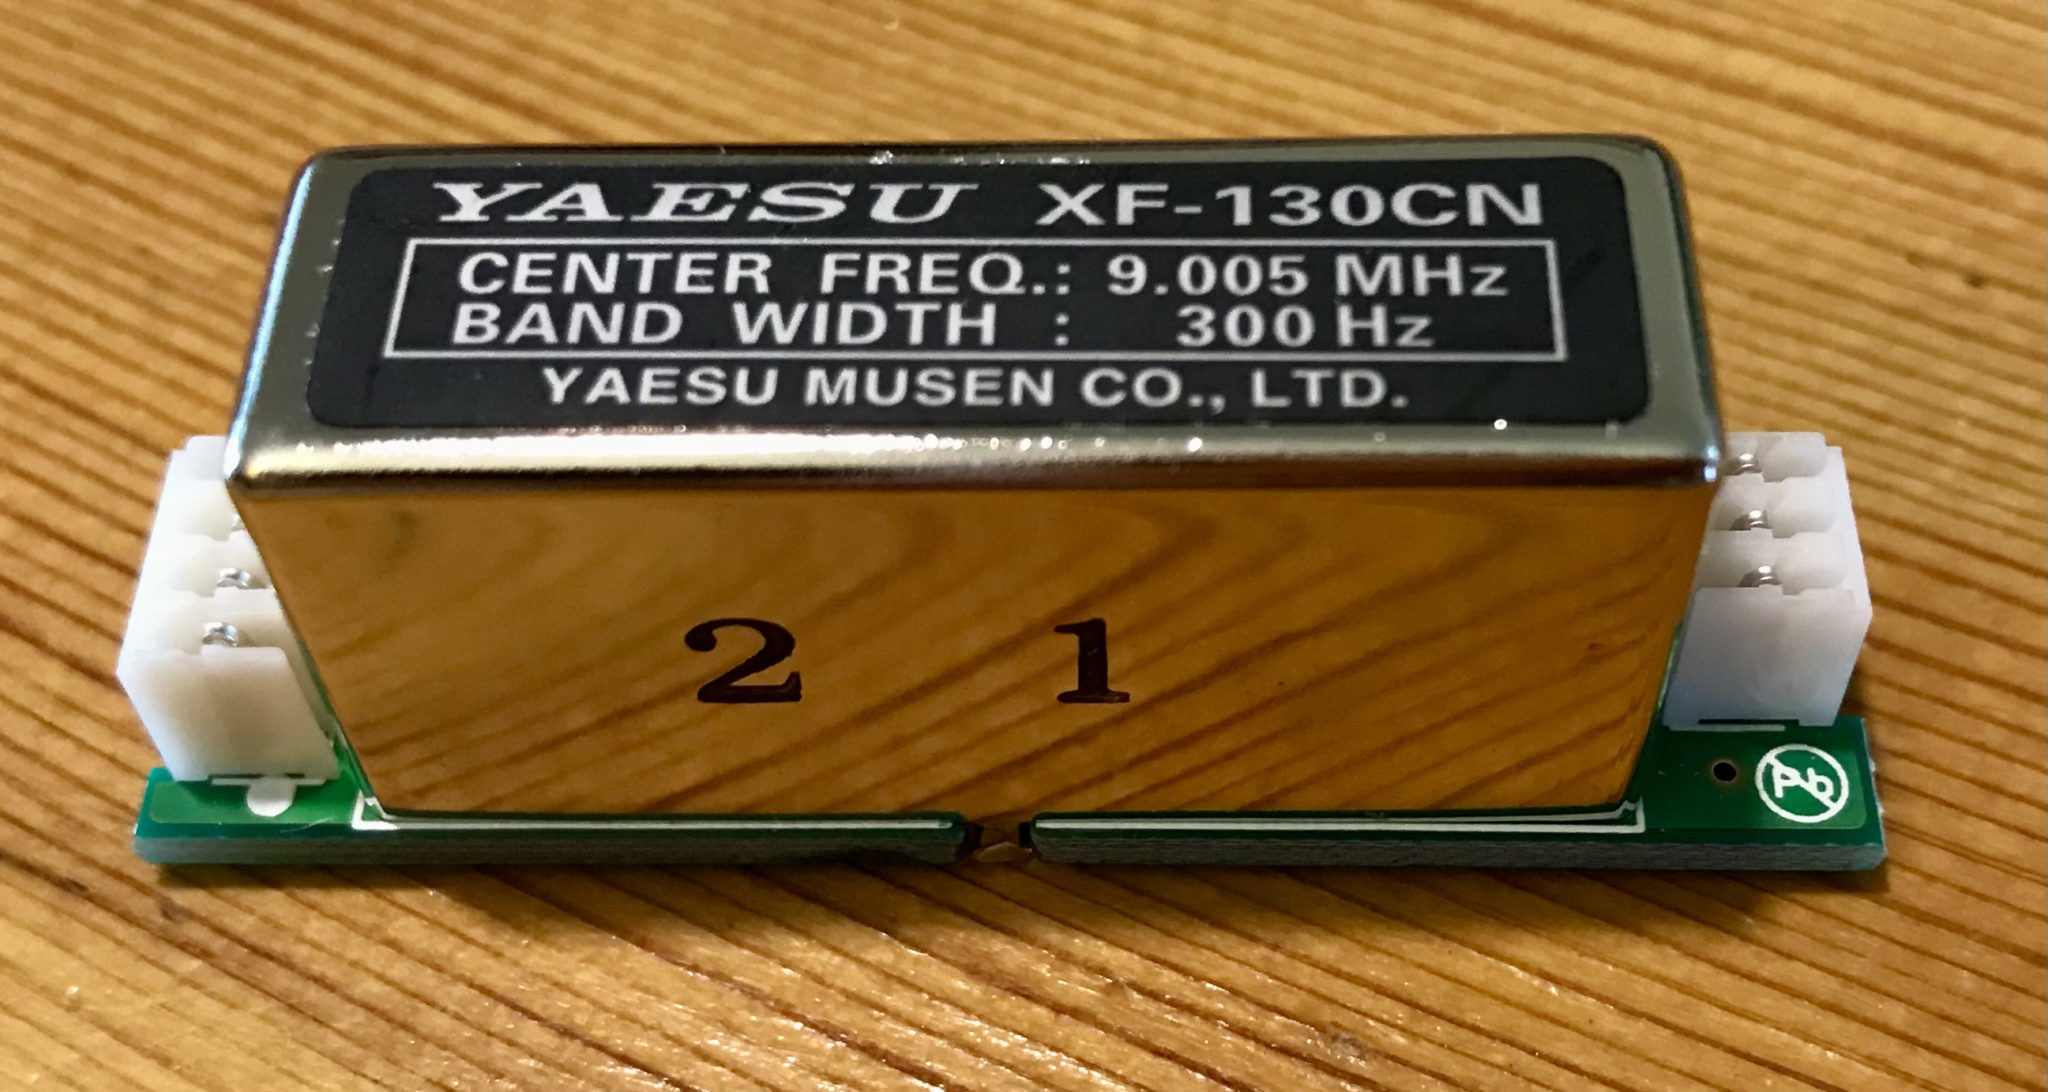
Yaesu XF-130CN 300hz CW Filter for the FTDX10
The FTDX10 300hz filter looked very similar to the ones I fitted in the FT1000MP and it doesn’t look like they’ve changed at all over the years.
Yaesu XF-130CN 300hz CW Filter
Removing the cover from the FTDX10 it’s immediately apparent where the filter goes. A neat little cutout in the RF shield draws your eye immediately to the spot.
Cutout in the RF shield for the optional 300hz filter
Fitting the filter is easy enough however, you do have to take care to move the little black wire to one side otherwise it gets caught under the filter and stops it from seating properly onto its connections. There’s not a lot of slack on the wire either so care is needed to not pull it too taught.
Note the black wire on the right hand site of the connections for the 300hz filter
I was surprised to see how small the standard 500hz filter is in comparison to the optional 300hz filter.
Optional 300hz filter next to the factory fitted 500hz filter
With the filter safely in position and seated perfectly I had the cover and 9 screws back on in no time at all and then got the radio powered up to check if the menu system had the option of a 300hz filter in CW mode.
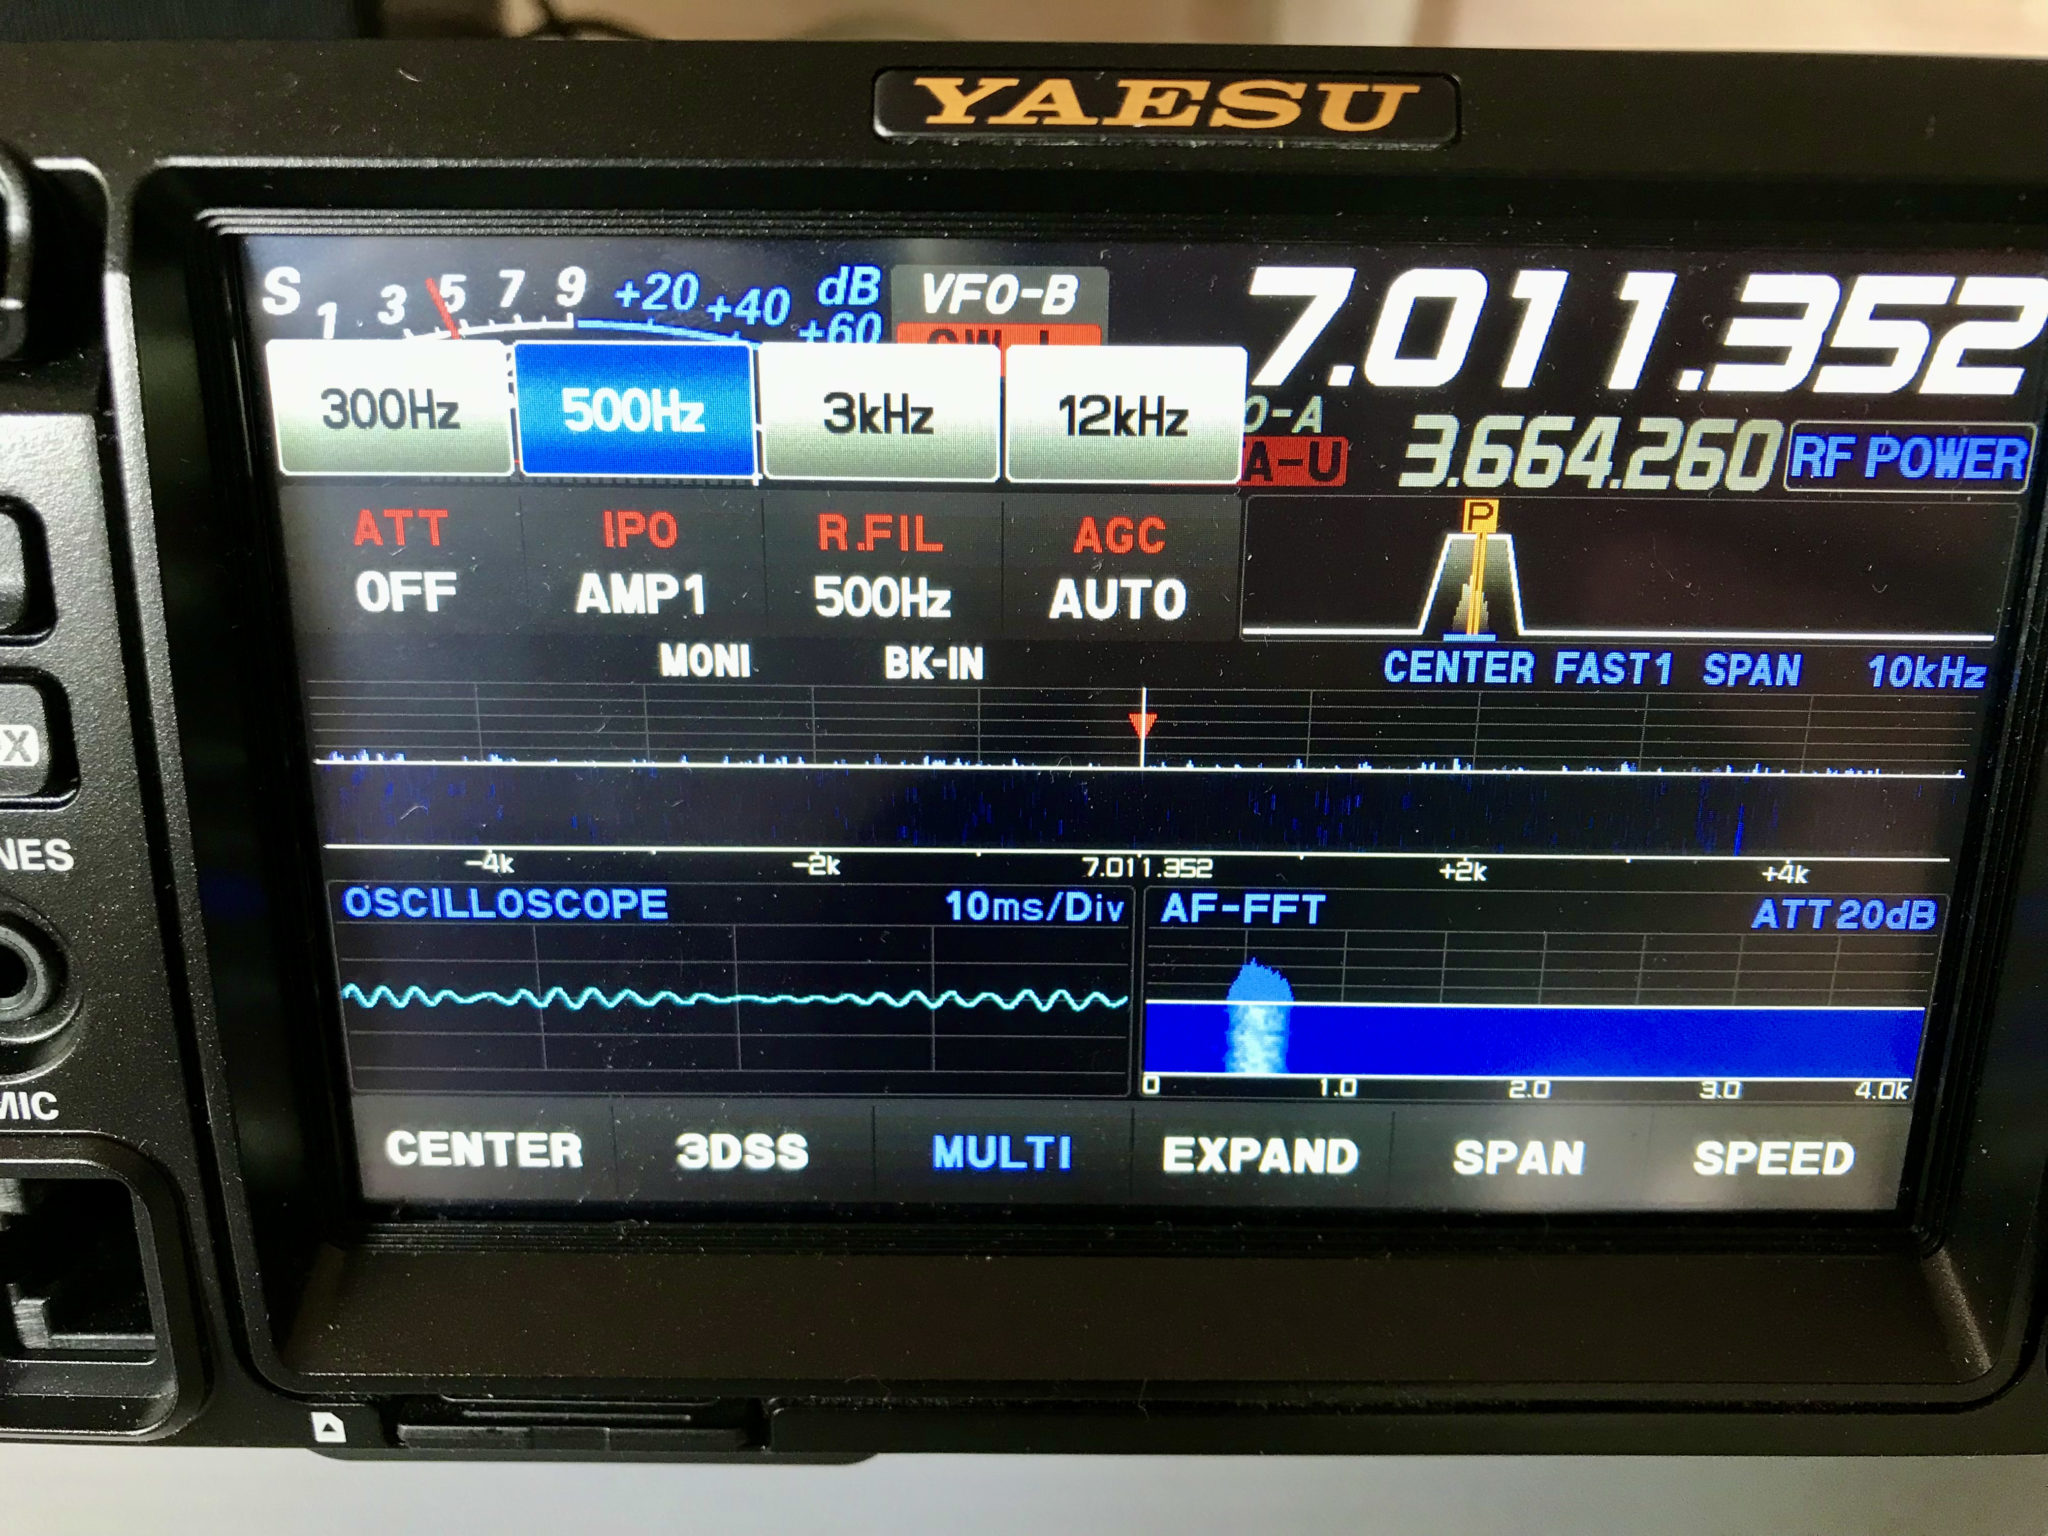
FTDX10 CW filter menu with 300hz option
Getting on air the filter makes quite a difference to the amount of background noise when listening to weak DX stations. Adding DNR and APF to the equation removes all background noise completely with the 300hz filter making it possible to hear the weakest of CW stations and complete silence in-between.
The bands aren’t in particularly good shape today however, I tuned around on the 20m band and found W7SW in Phoenix Arizona calling CQ. He wasn’t particularly strong but, it was a good opportunity to experience the difference between the filters without any DNR or APF enhancement.
Short video showing difference between 500hz and 300hz filters with W7SW calling CQ
Unfortunately W7SW disappeared before I could make another short video with the DNR and APF on to show the difference. I’ll revisit this again soon and get some video snippets up showing the difference the optional 300hz filter makes with DNR and APF.
After my disappointment with the Vine RST-TP1 twin paddle that I bought and subsequently returned to Martin Lynch and Sons due to the poor build quality and finish I continued my hunt for a morse key.
During my conversation with Tony, the sales manager at ML&S one thing he did say to me was that if I was really serious about morse code then there really was only one key to buy these days, a Begali from Italy.
Morse Code has always been my main mode ever since I passed my 12wpm morse test and obtained my M0AWS A class licence, it’s a mode I dearly love and get a huge amount of pleasure from. (It also helps to keep the little grey cells alive in retirement!)
So without delay I googled the Begali website and started looking at their offerings.
Begali do a fine range of twin paddle keys starting from €131.00 +VAT and shipping right up to almost €700+VAT and shipping, far more than I wanted to spend.
Having spent almost £180.00 inc VAT and shipping for the Vine RST-TP1 and being extremely disappointed with it I decided to spend a little more to ensure I bought something of quality that was going to last.
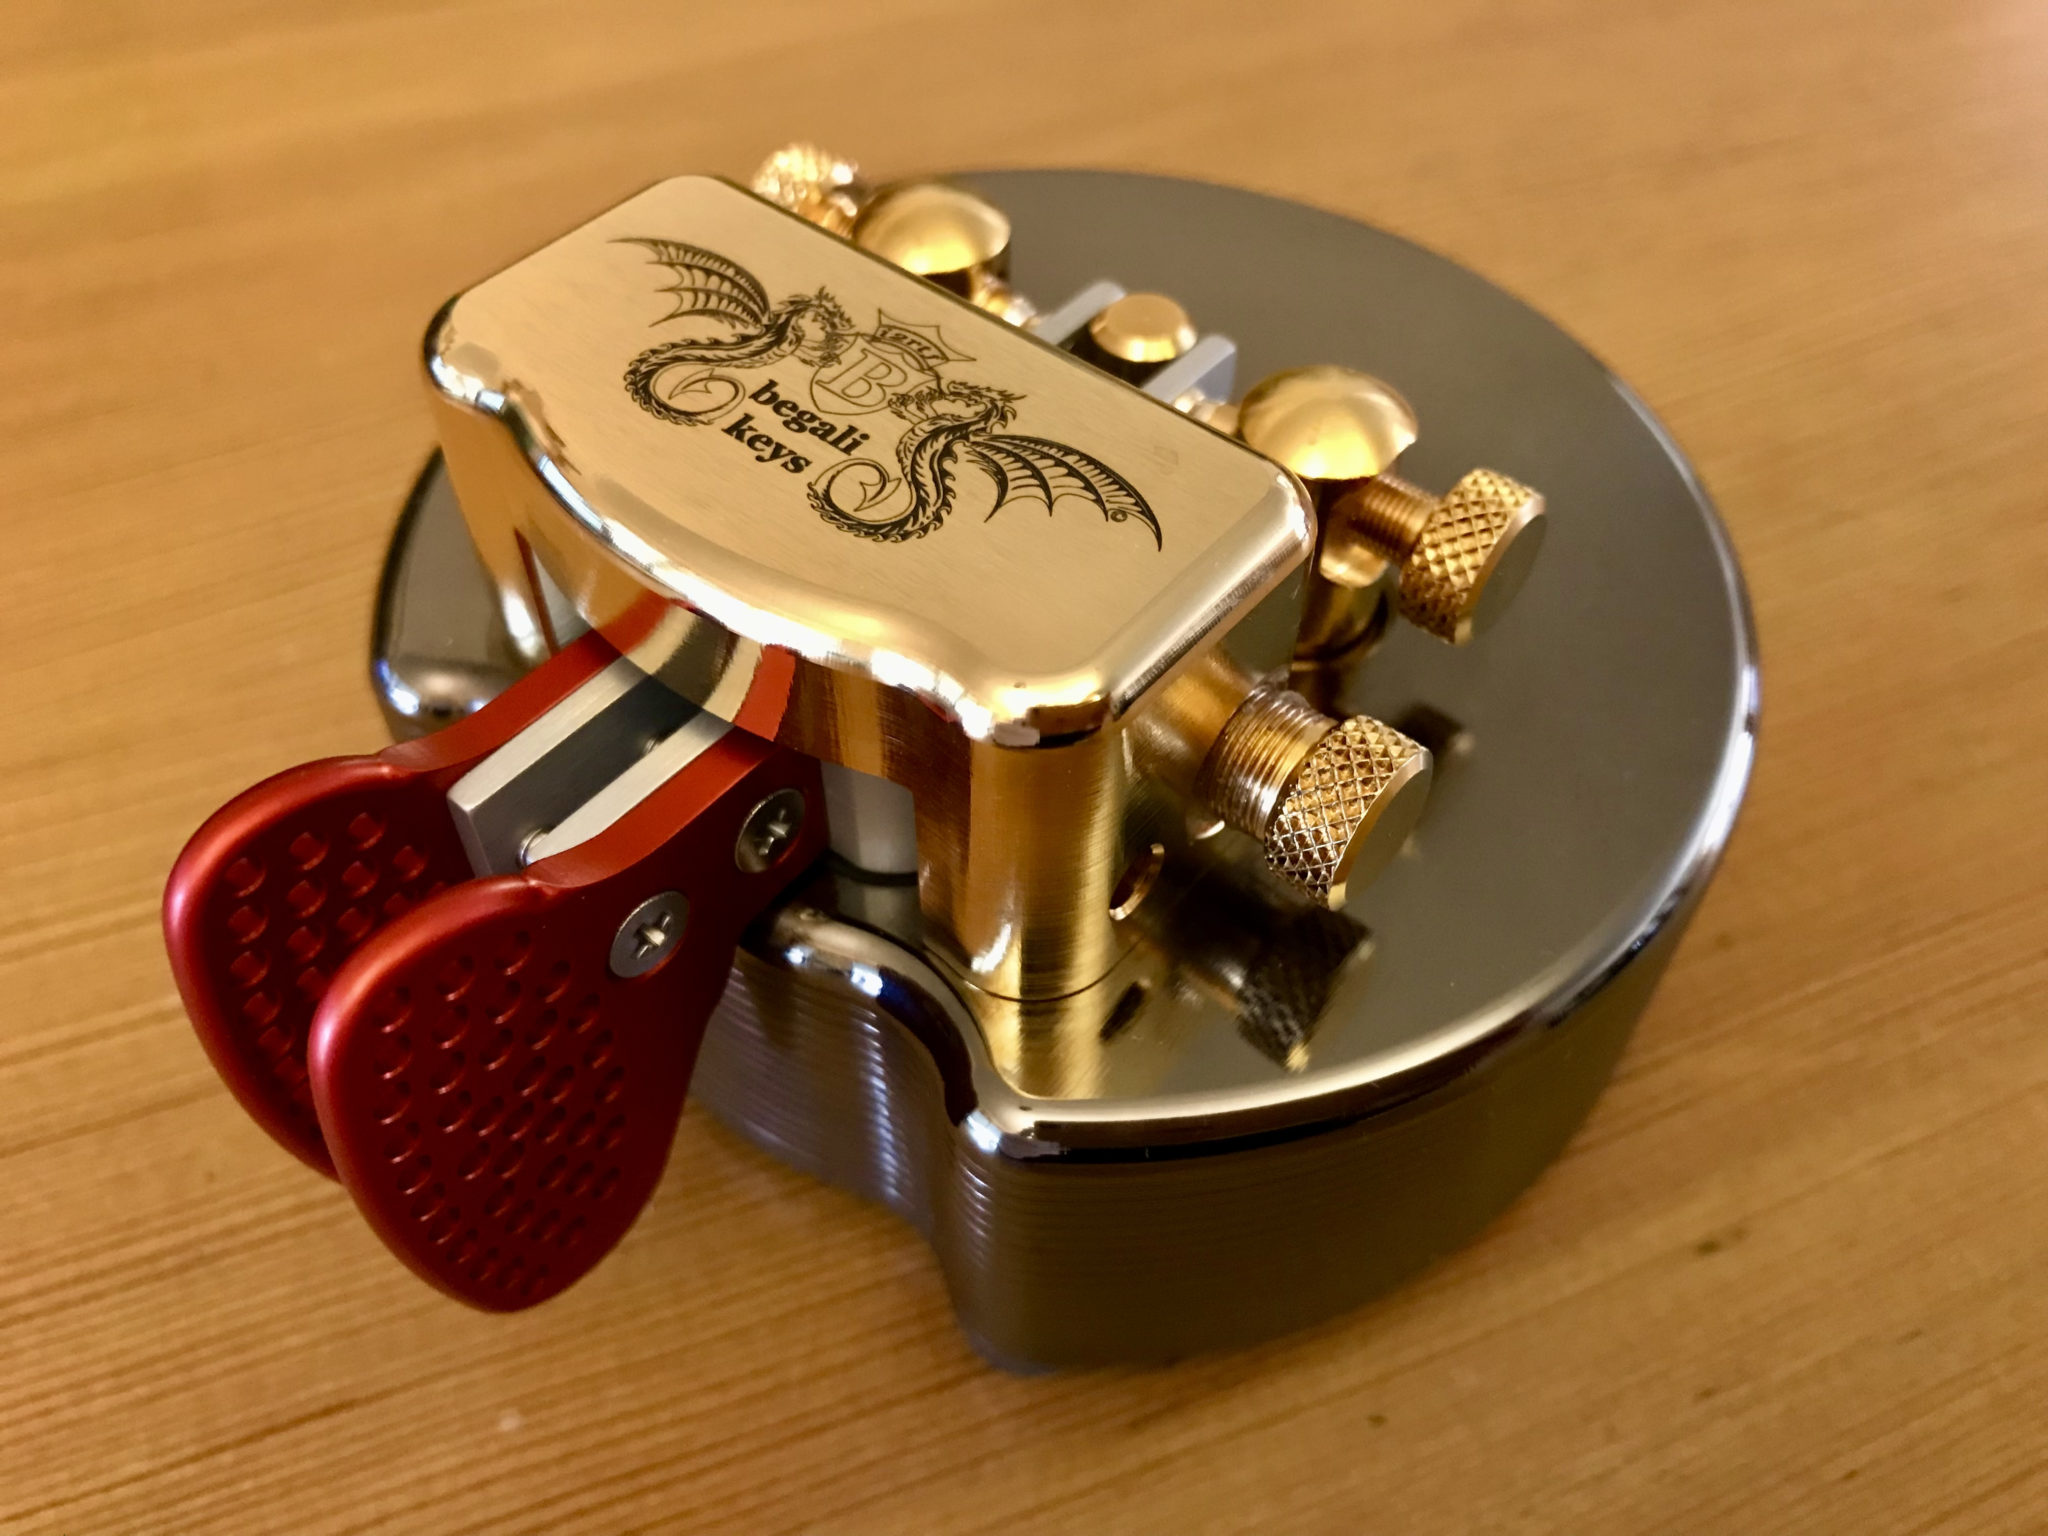
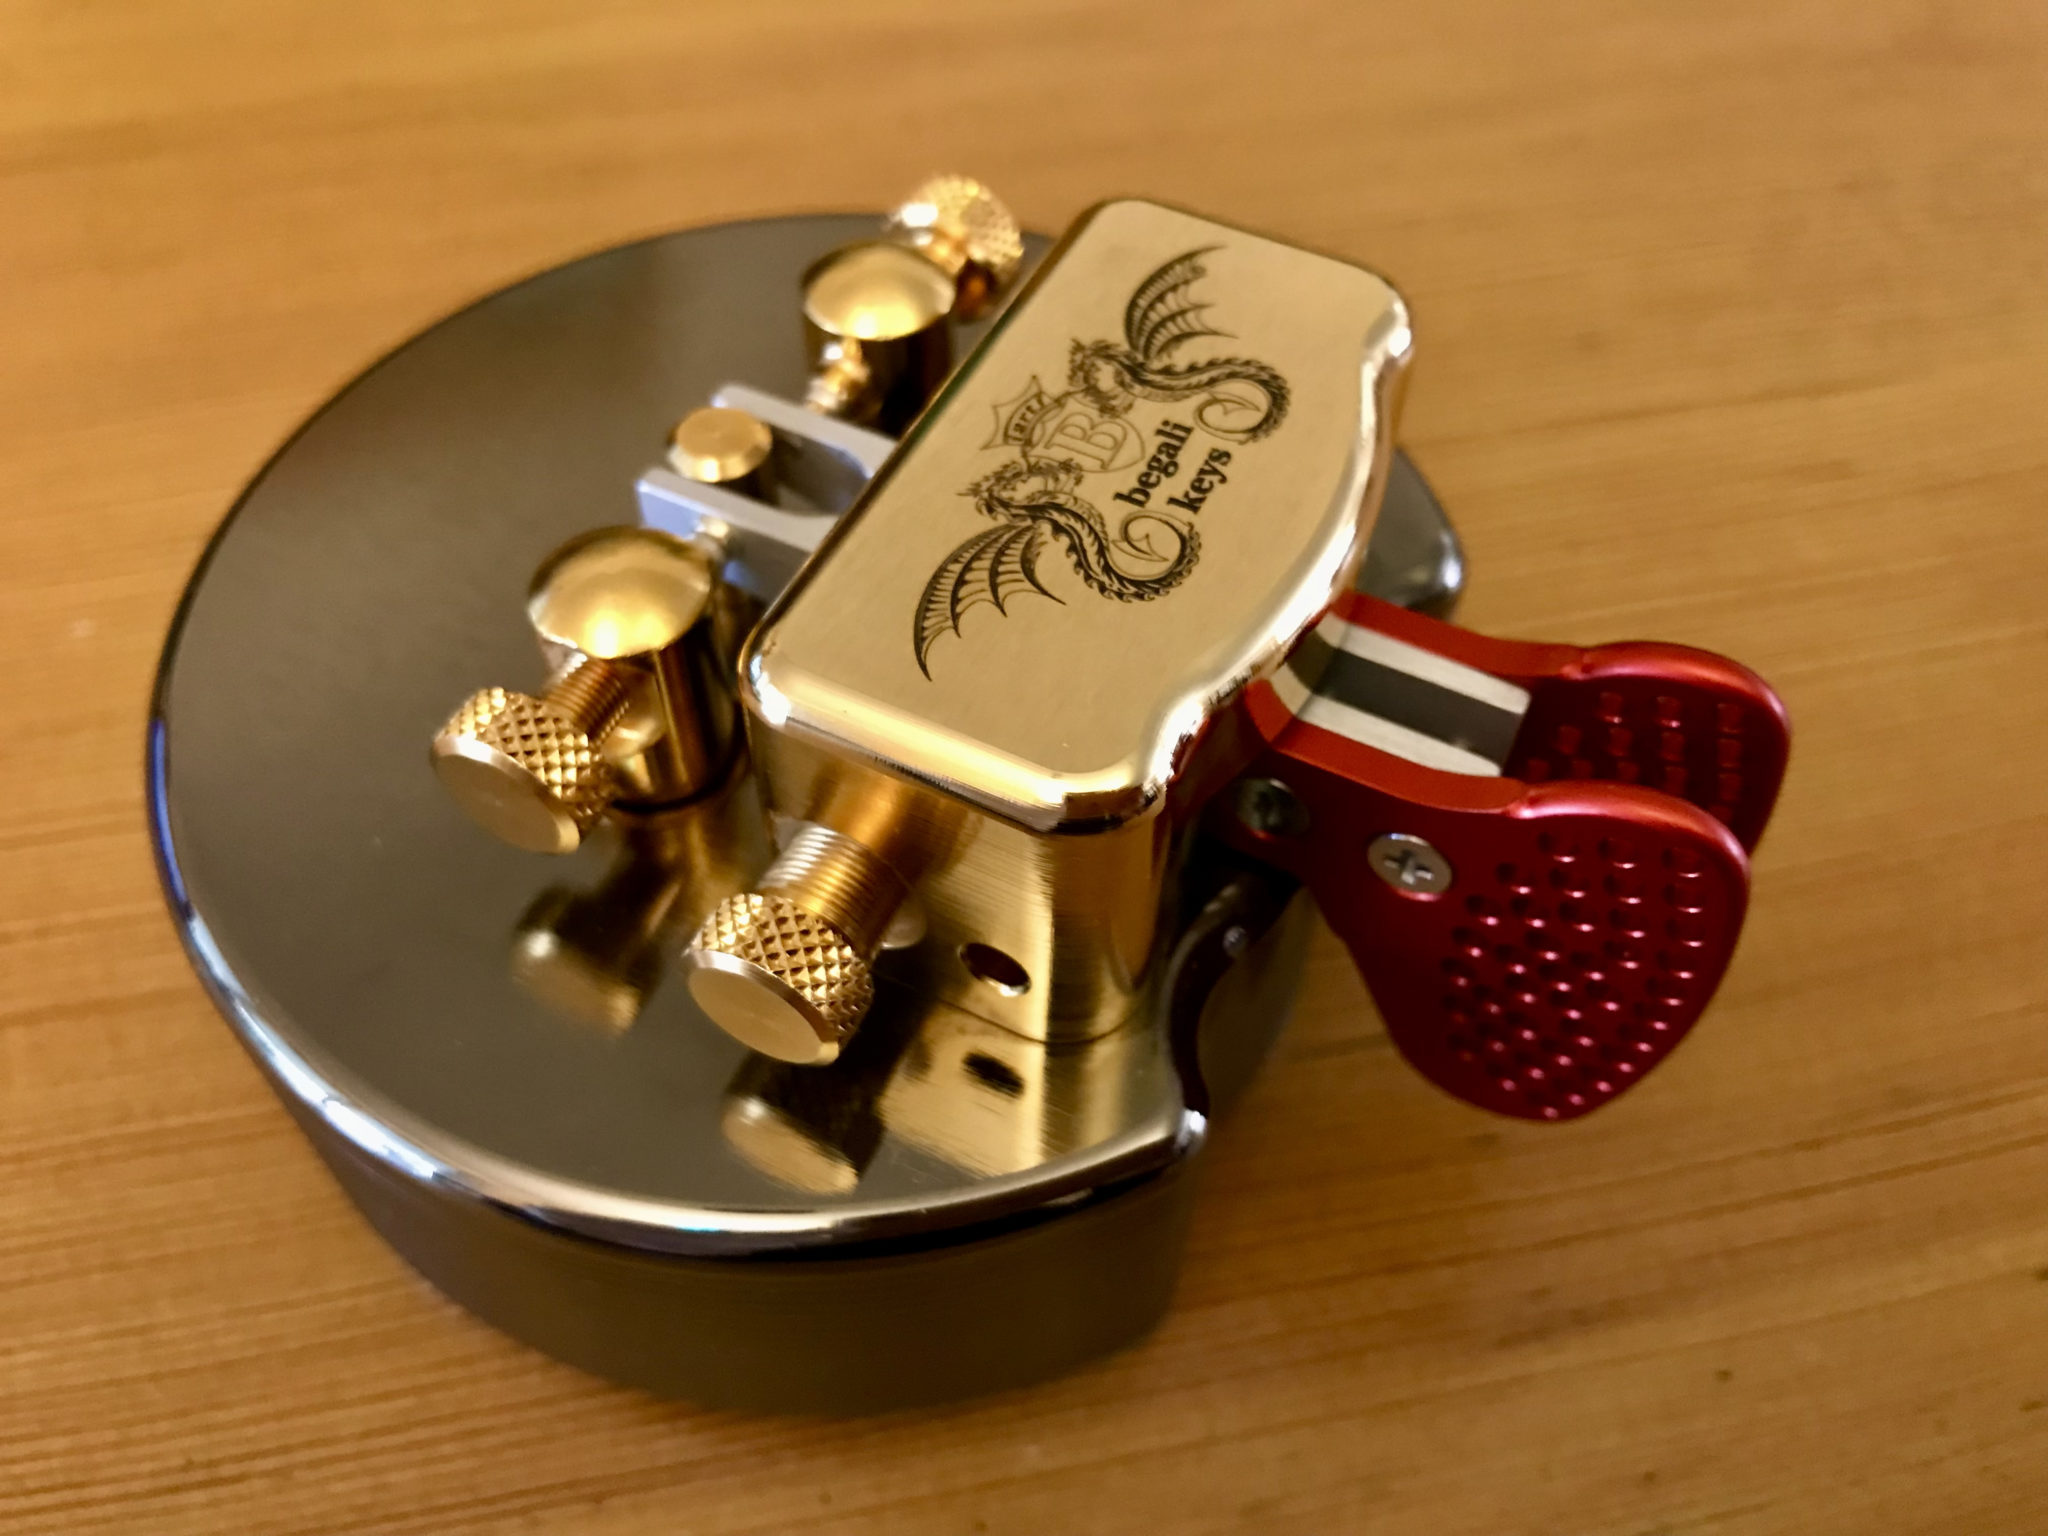
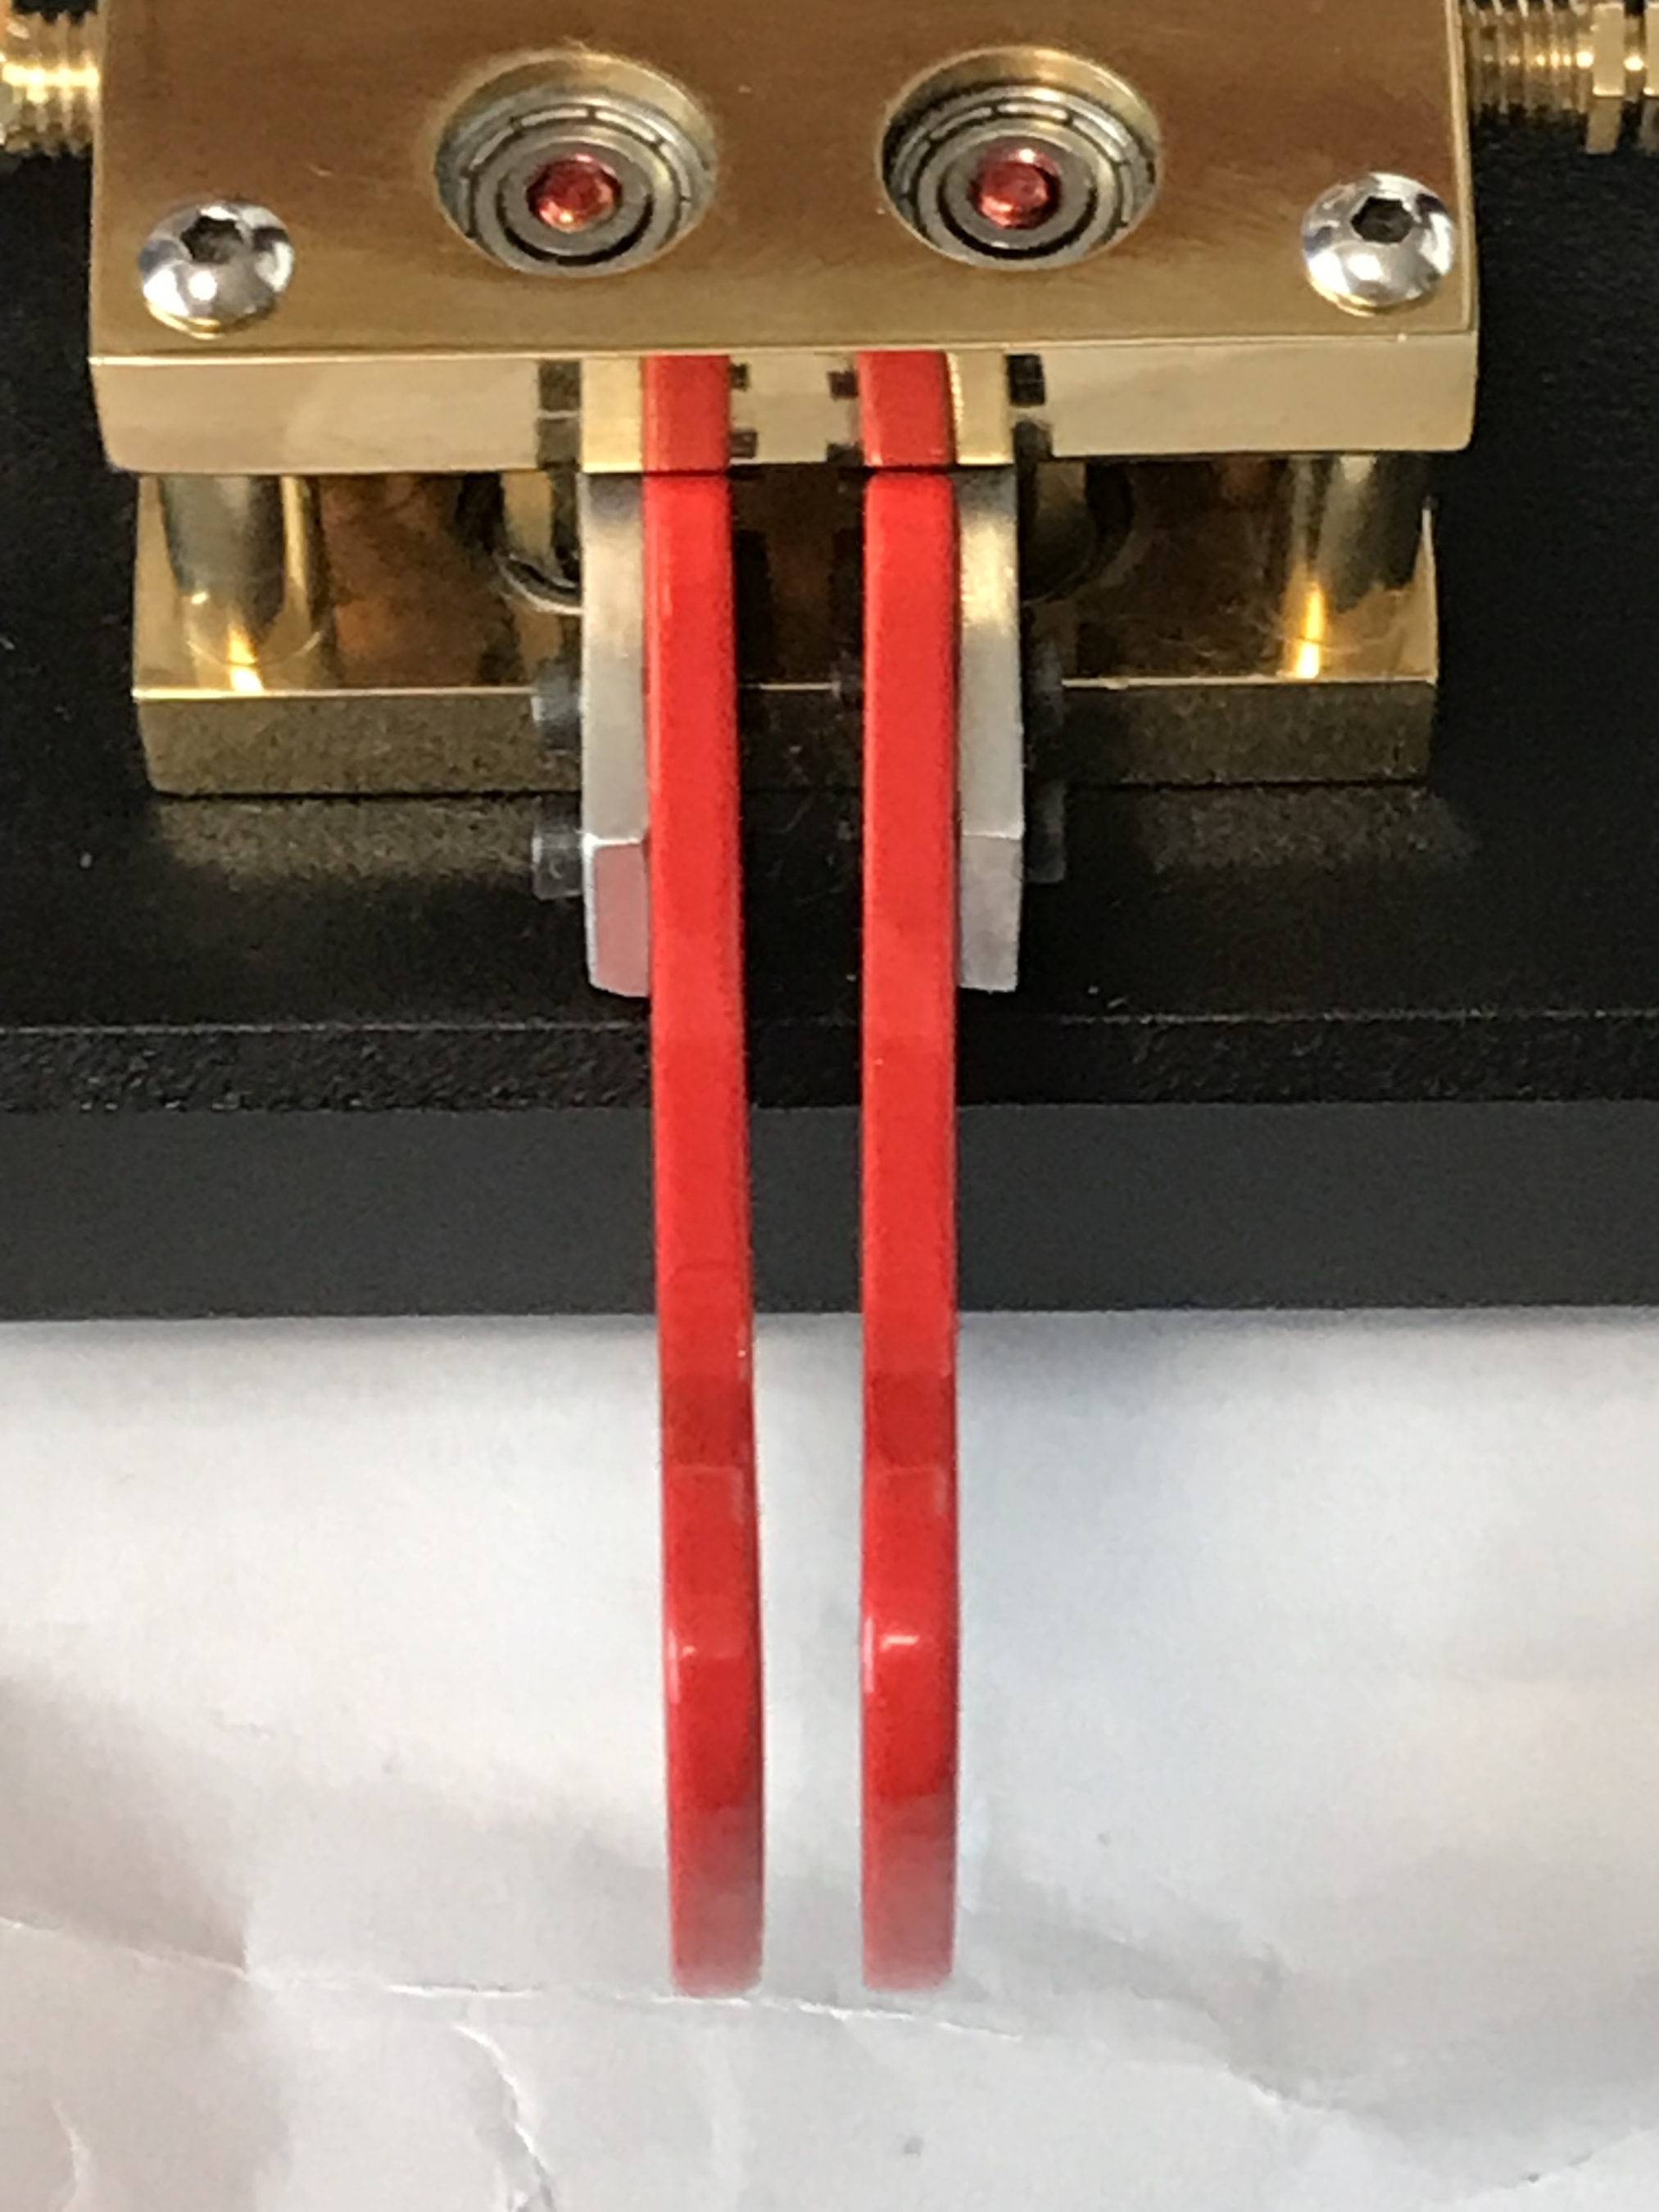
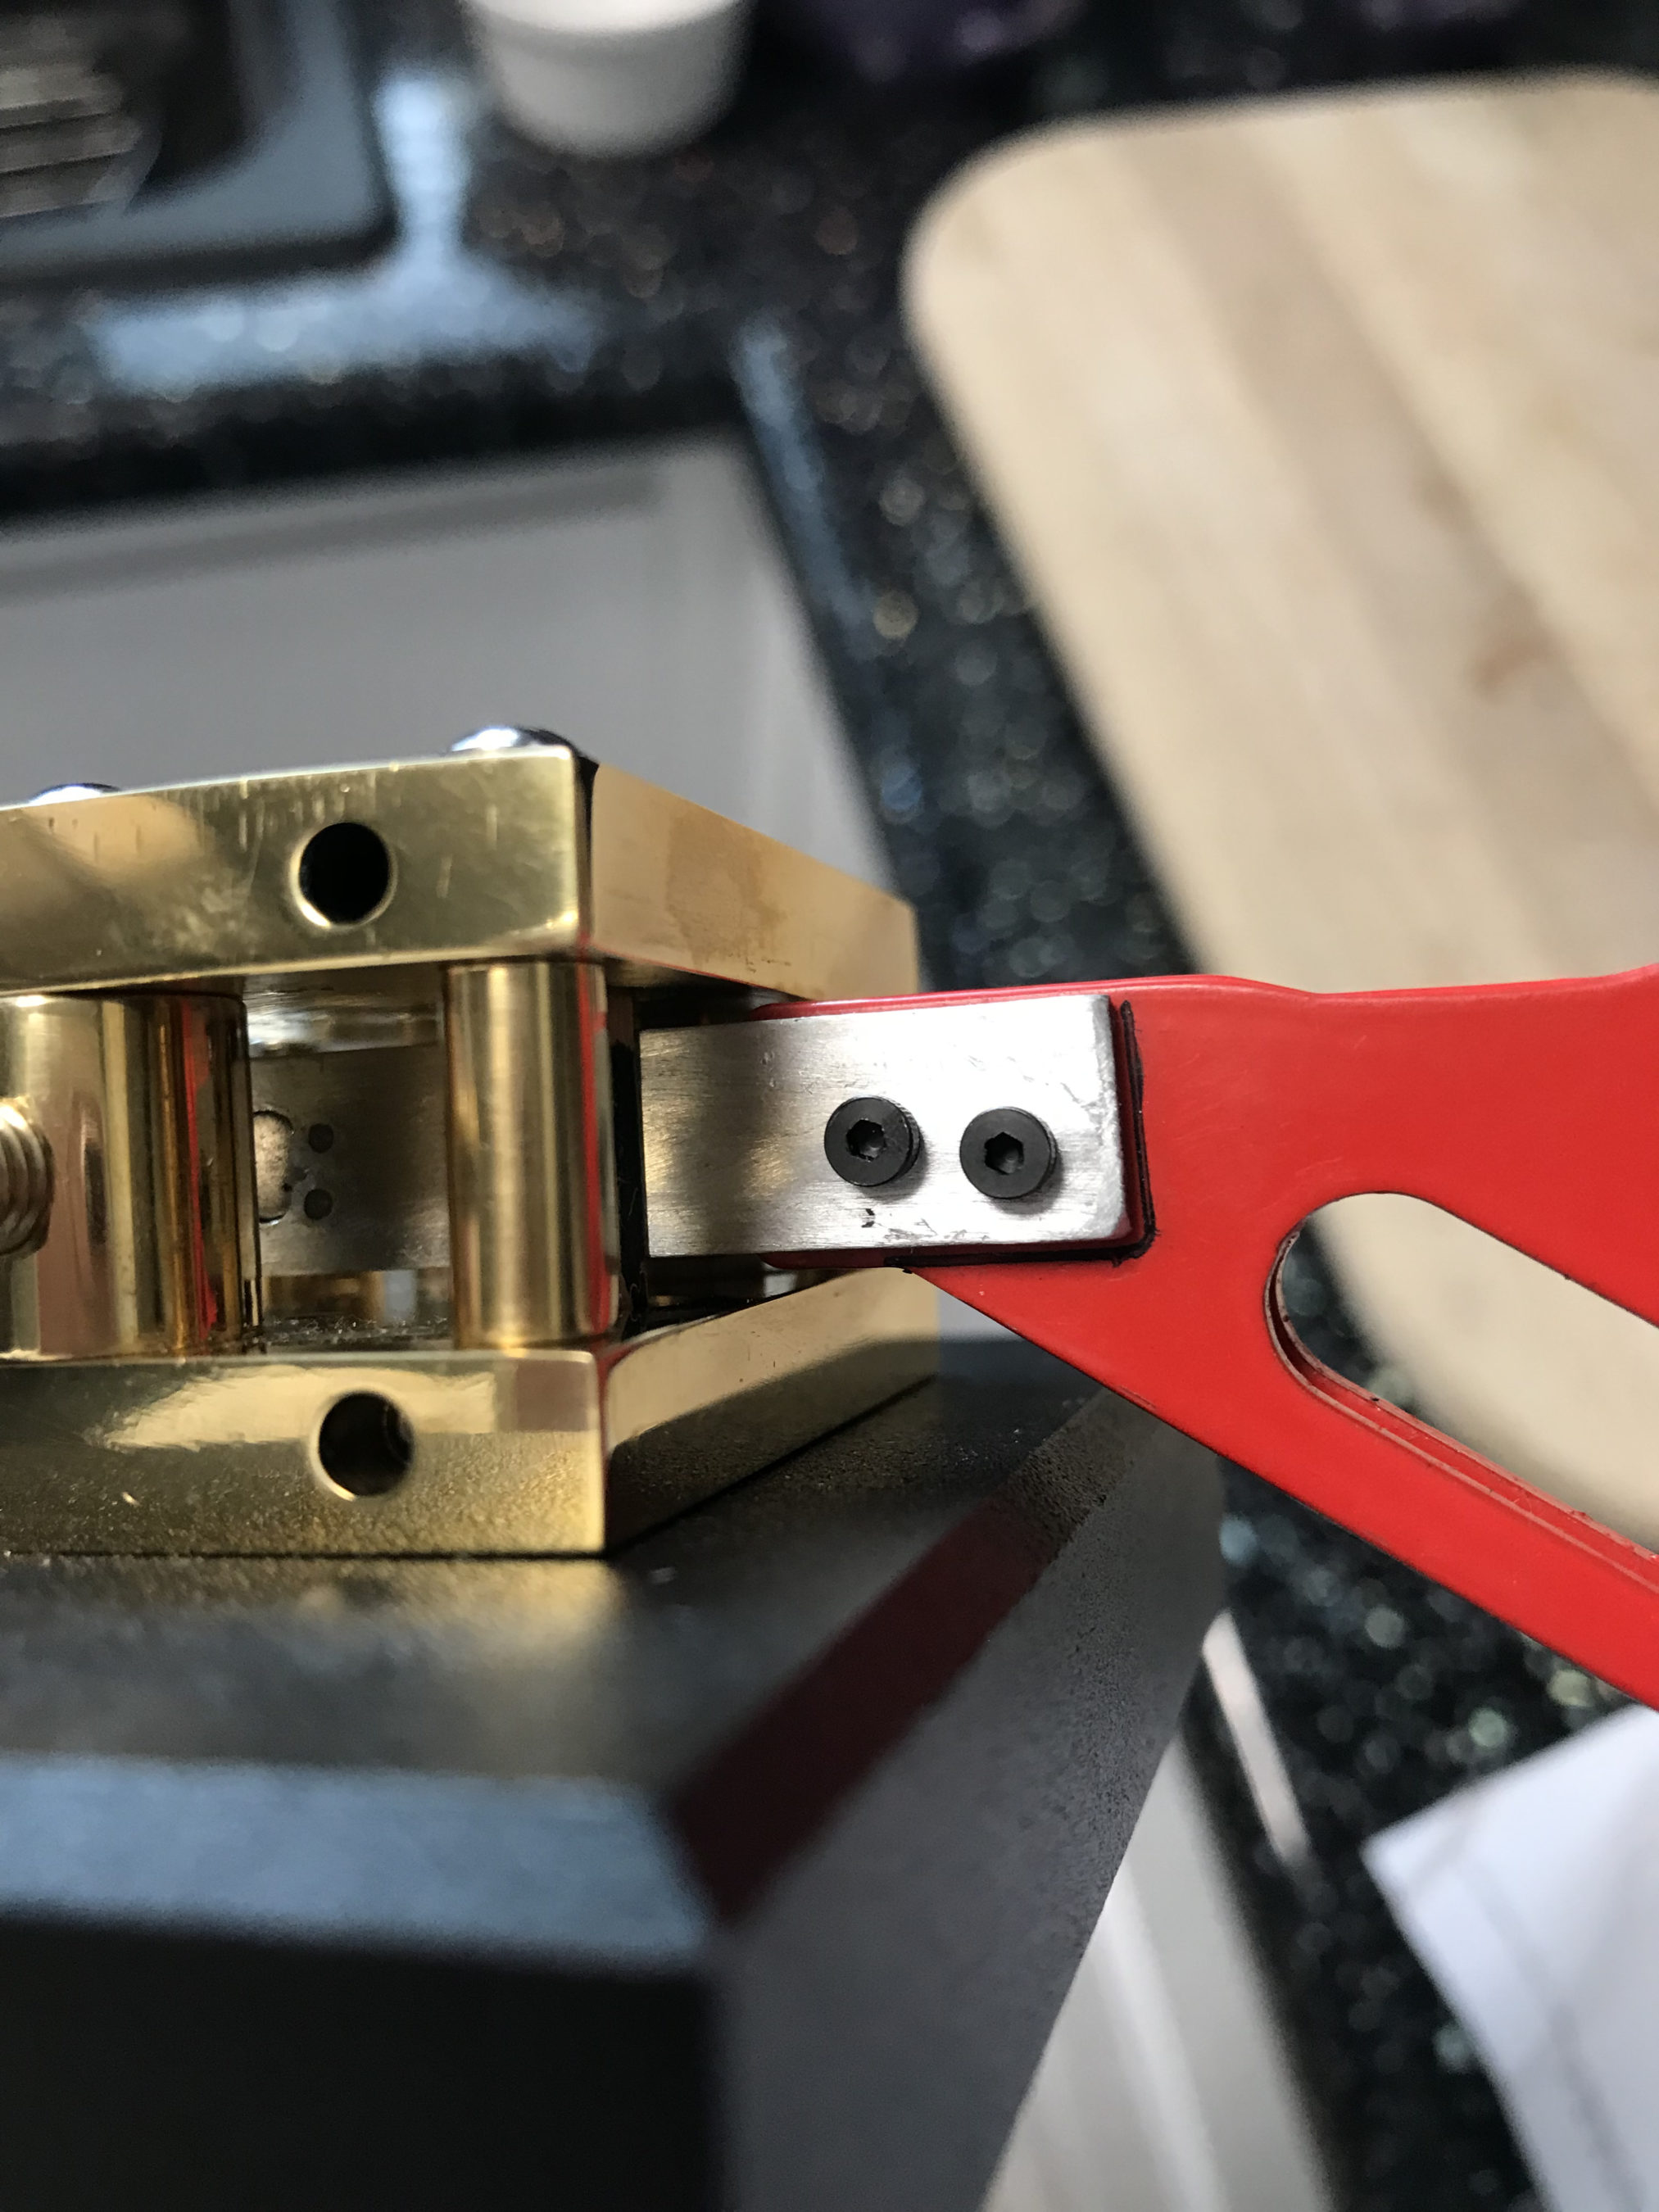
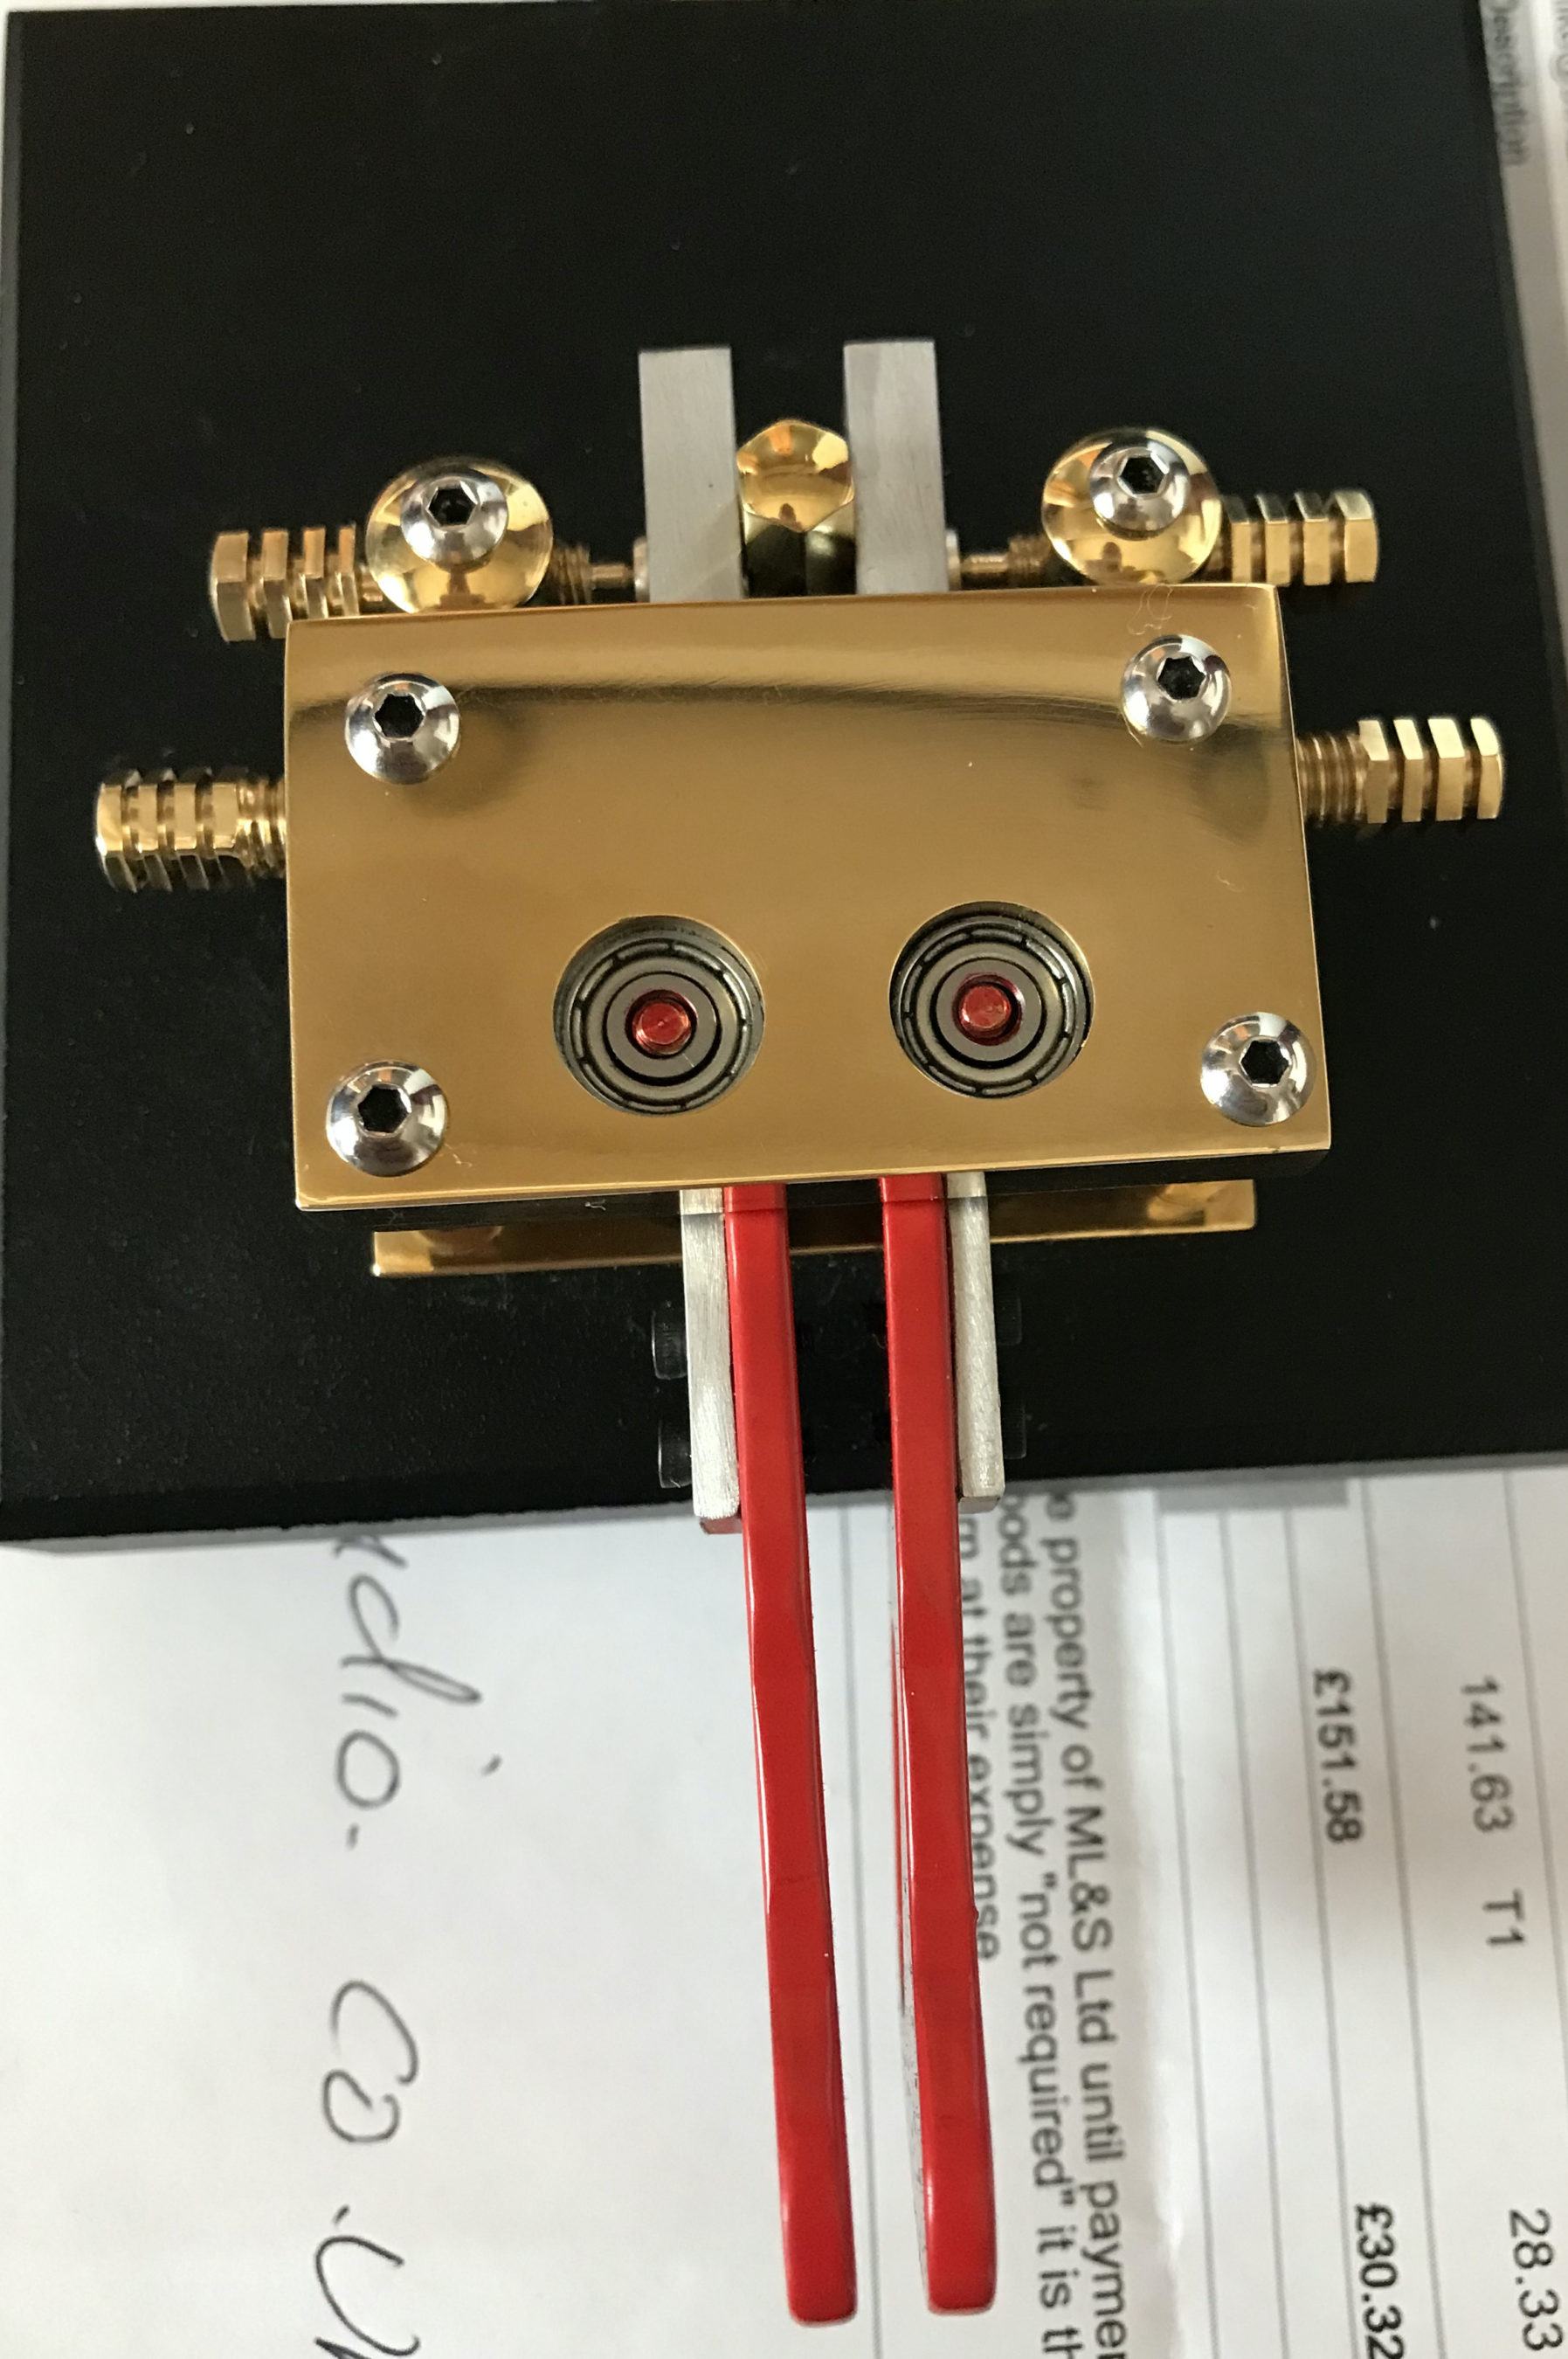
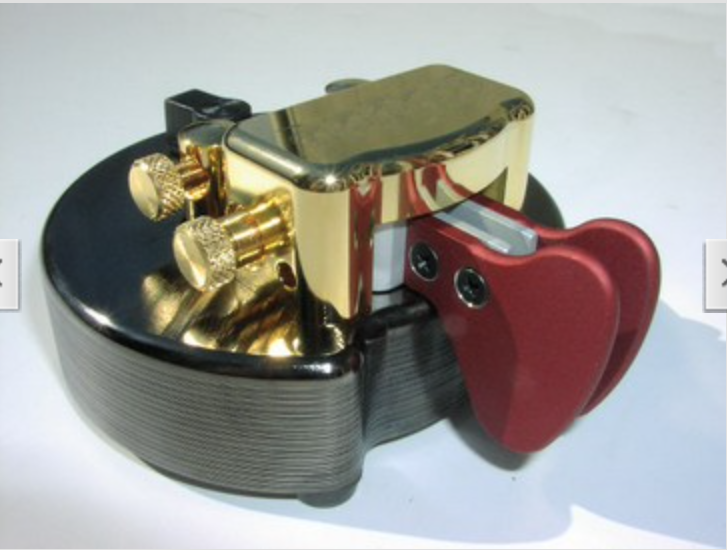
My Begali Pearl with Palladium base, gold top and red paddles, a thing of beauty
A couple of weeks after ordering the key arrived hassle free, a miracle considering the hassle Brexit has caused with import and export of goods between the U.K. and Europe.
Bruna at Begali assured me that they had a system in place that takes care of all the import taxes etc and that the delivery process would be smooth and trouble free, and indeed it was!
Upon opening the box I was taken by the sheer beauty of the key, beautifully finished, perfectly put together and well engineered. I knew this was going to be a pleasure to use before I’d even touched the paddles!
My Begali Pearl Twin Paddle Morse Key
Being left handed I’ve had to setup both my Yaesu FTDX10 and Icom IC-705 such that the dit and dah are reversed on the paddles but, once done I felt at home with the key very quickly.
Having been out of the hobby for some 15 years my morse is a little rusty so I set about doing a fair bit of listening before trying to work stations. To my surprise I was soon decoding stations at 20wpm in my head albeit with a little more thought than it used to take but, accurate enough to have a go at working a few stations.
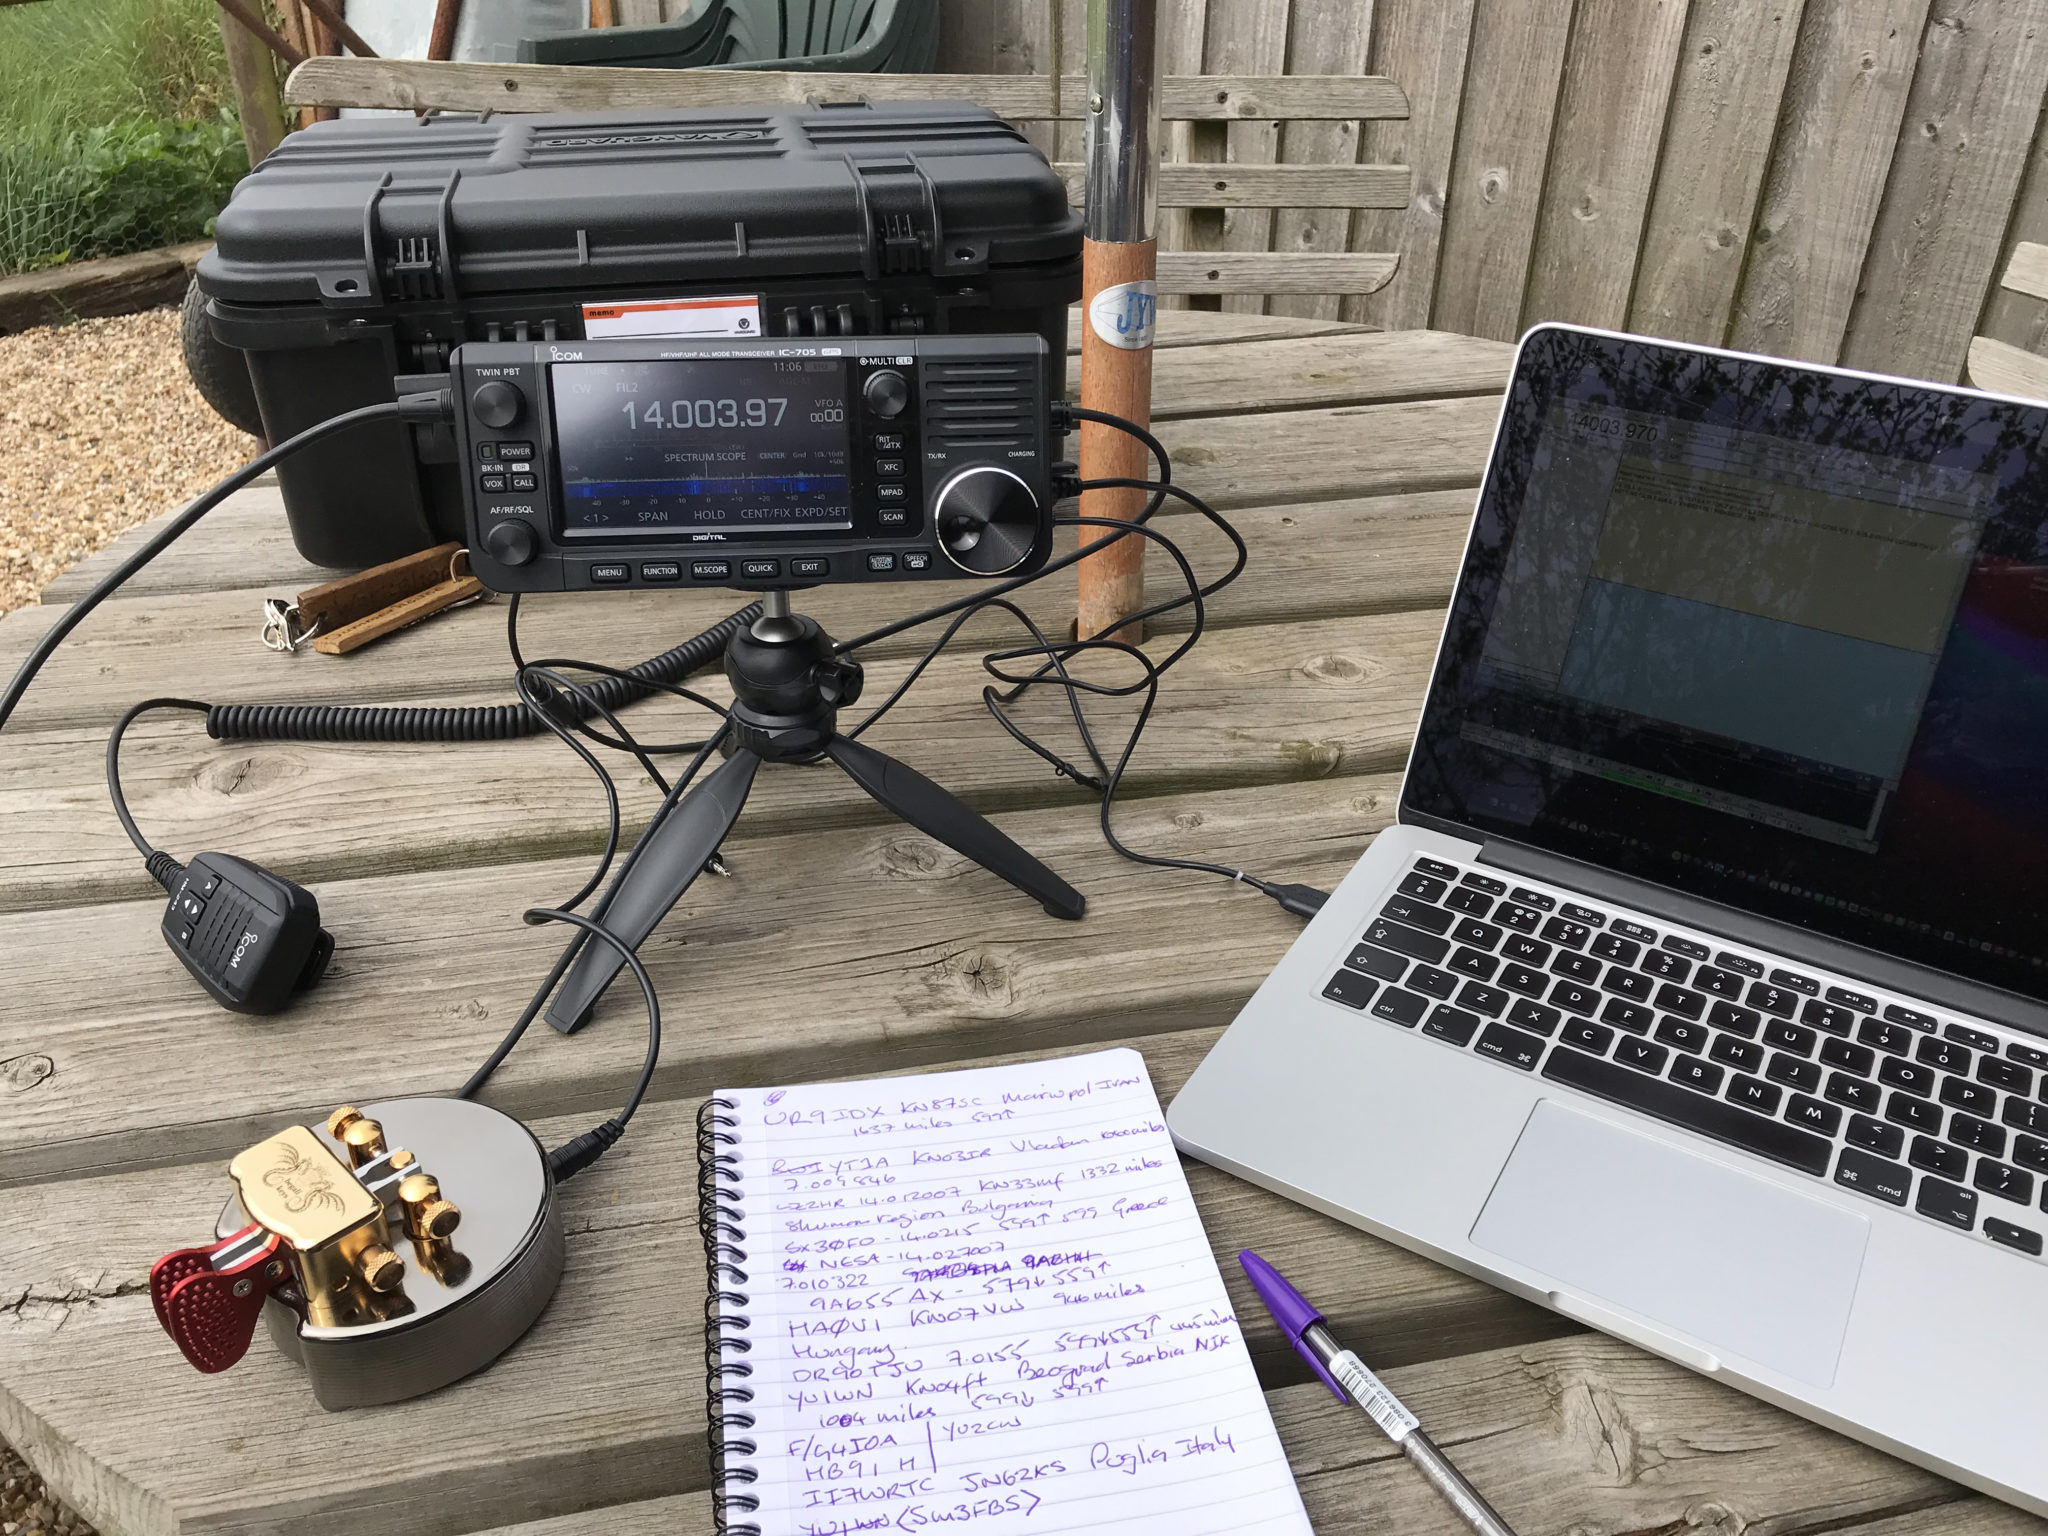
Working CW stations on 20m with the Begali Pearl Twin Paddle and Icom IC-705
Using the key is pure delight, it’s light to the touch, responsive, infinitely adjustable, comfortable and a joy to use. I knew right away that I had made the right decision.
At 1.7kg it’s a heavy key which ensures it doesn’t move around the desk no matter how hard you lean on it. I find the key really relaxing to use as it only needs a gentle touch to bring the contacts together. Adjustment is super accurate thanks to the very fine threaded adjuster screws that have been beautifully machined.
It’s clear from the moment you get a Begali Pearl out of the box that it has been made with care and pride, something that is a rarity today.
Laser engraving on the Begali Pearl Twin Paddle Morse Key
I’ve decided that this key is going to be my main station key and will spend most of it’s life connected to my Yaesu FTDX10 radio, that means I need another key to go into my portable case with my IC-705. I’ve already made the decision what it’s going to be, of course it’ll be another Begali, the Simplex Basic Twin Paddle.
My wife and I always do our best to support British companies by buying local and U.K. products and produce whenever we can.
Before making the purchase I’d read mixed reviews on the the Vine series of keys but, decided to try and support British manufacturing by buying British, sadly I too was disappointed.
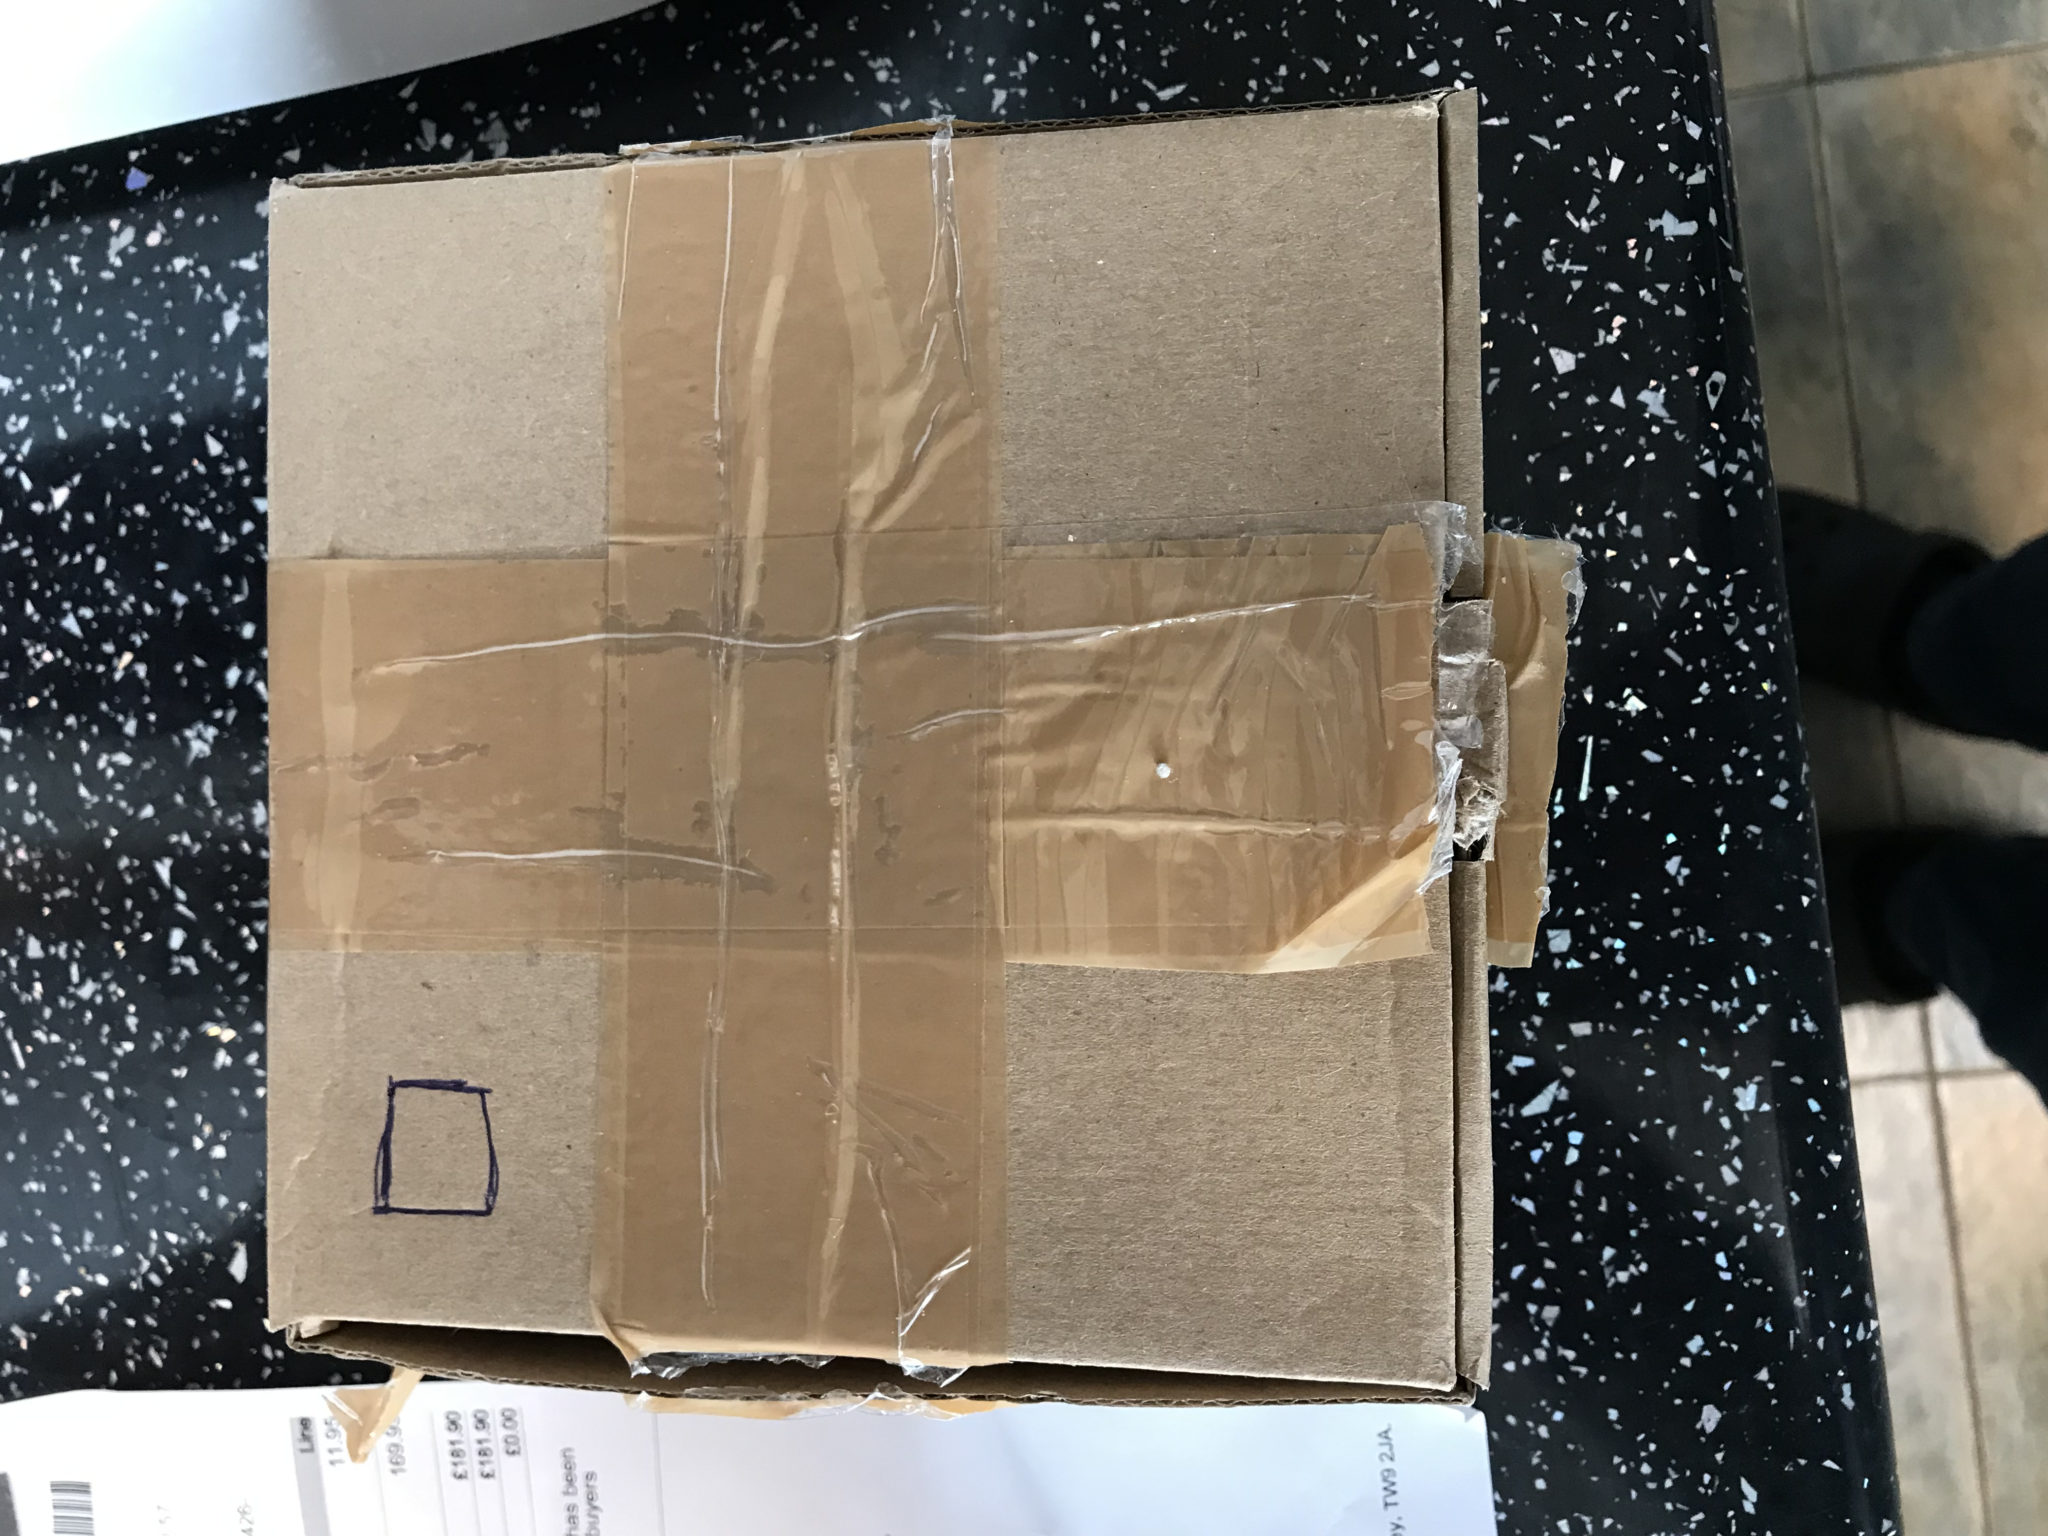
Vine RST-TP1 packaging
When the package arrived it was clear that it had been opened before and then resealed, perhaps already been returned by a customer before being resealed and shipped out to me?
The box had also been drawn on with biro, no big deal except for the fact that this wasn’t the only thing that had been drawn on.
Upon getting the key out of the box the first thing that struck me was the quality of the finish on the product, it was the poorest I’ve ever seen on a key.
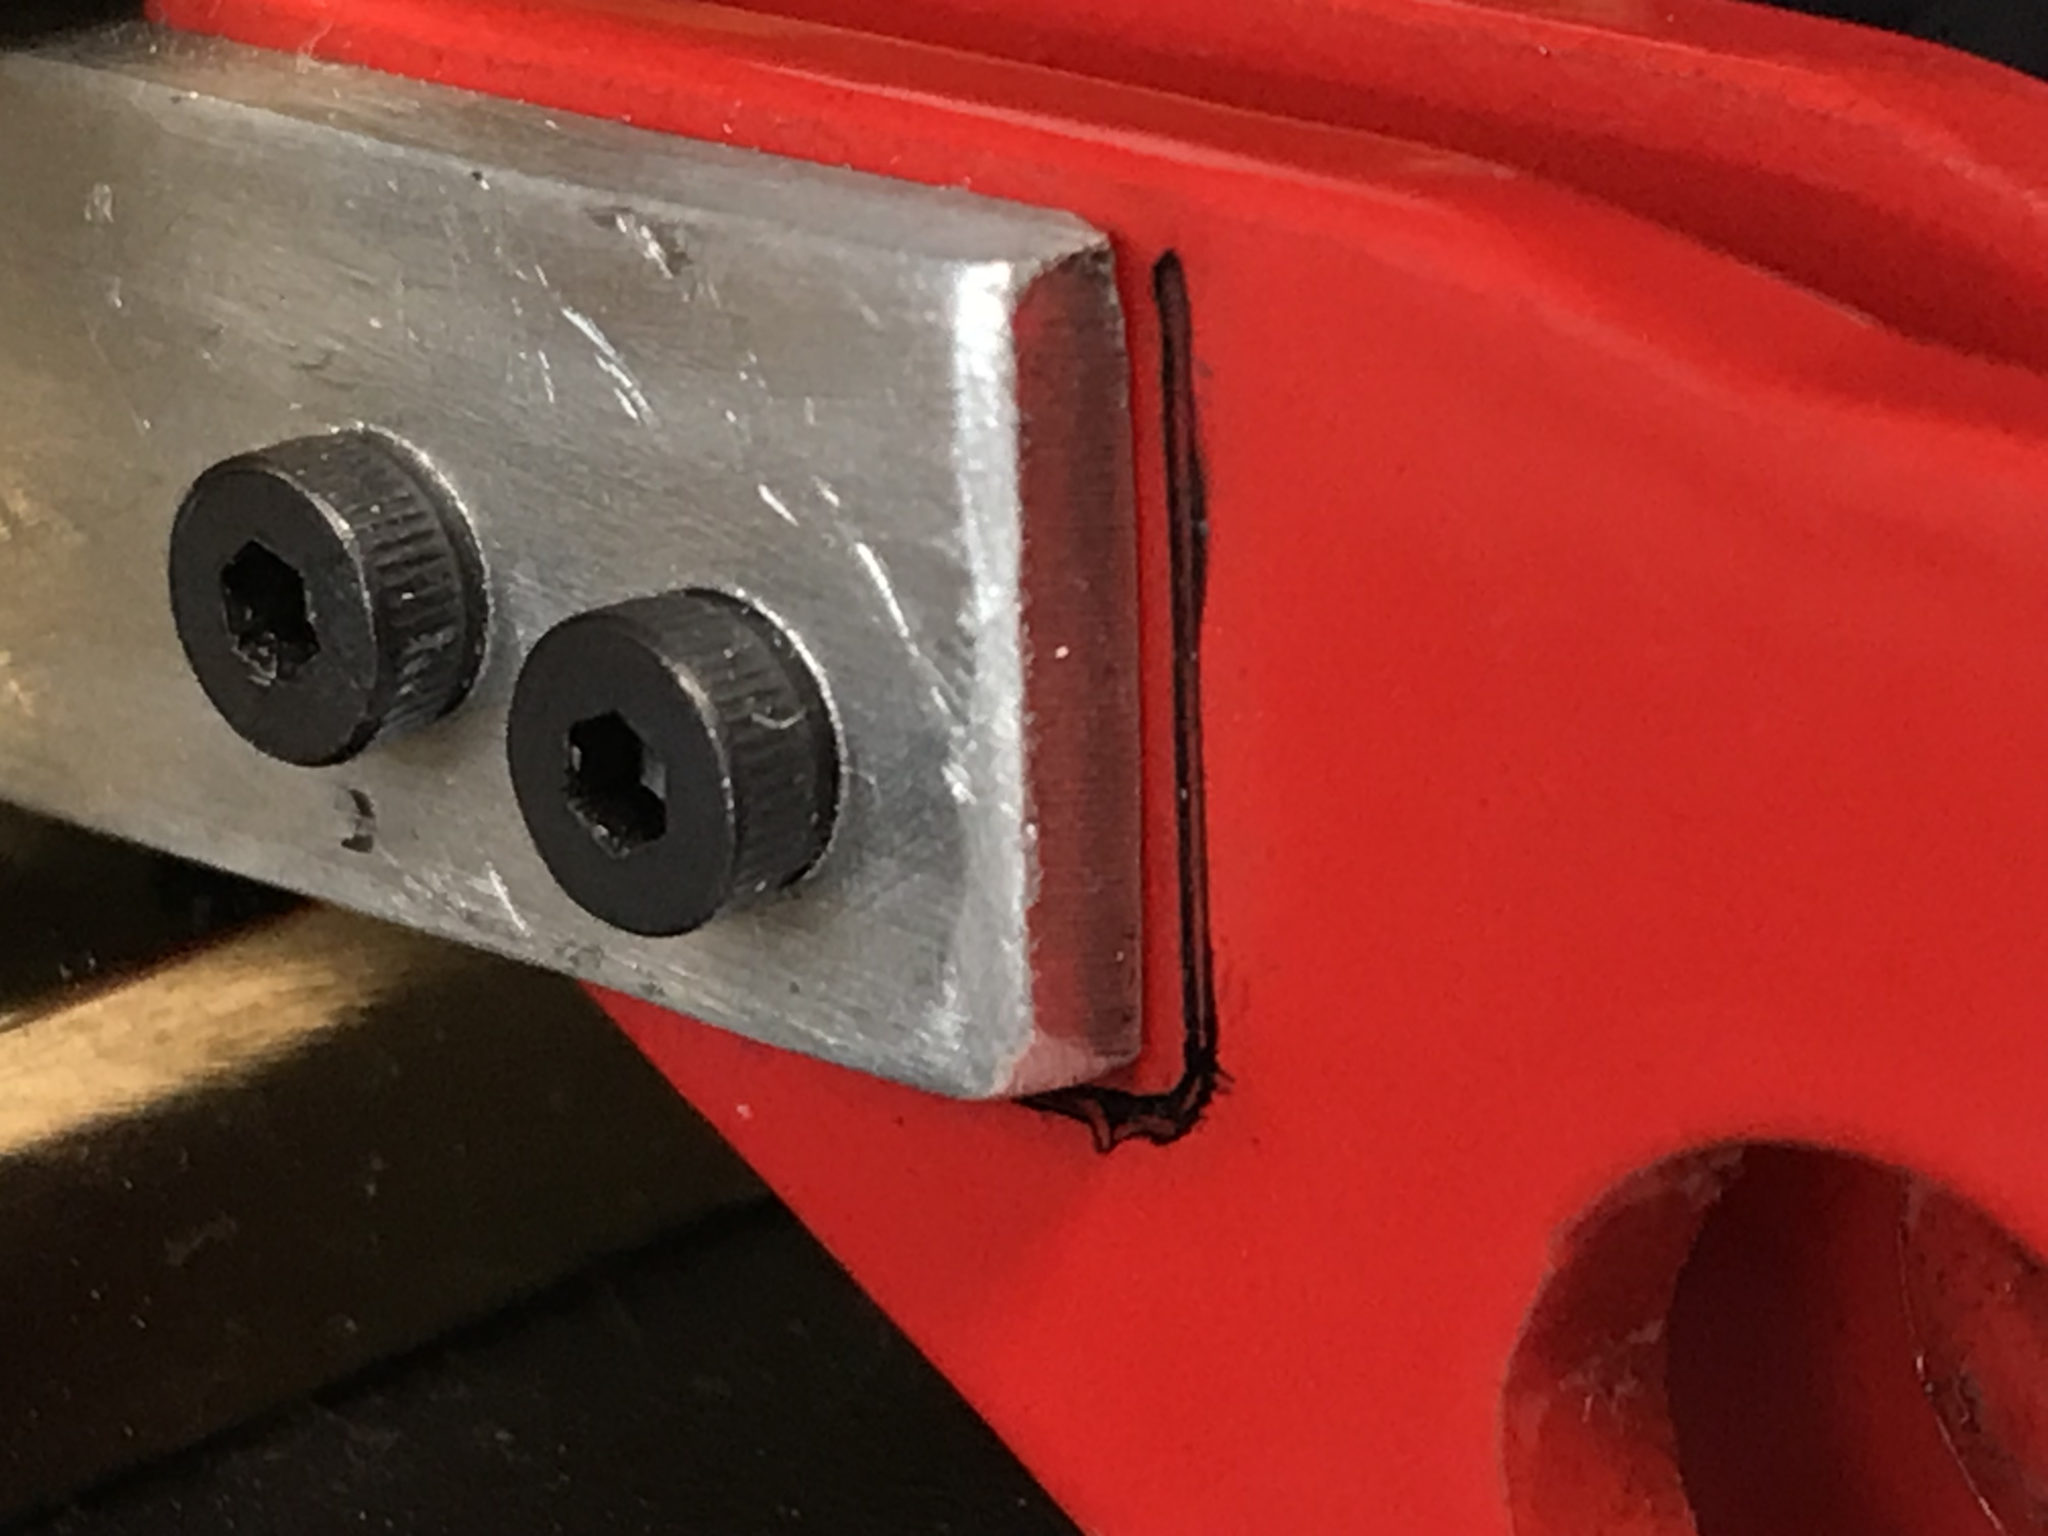
Poor quality finishing on the Vine RST-TP1 Twin Paddle Key
Some of the metal surfaces had clearly been finished with a hand file, the finish was appalling. I’d be embarrassed if I had made something with finishes this bad yet alone selling a product commercially with such poor quality finishing.
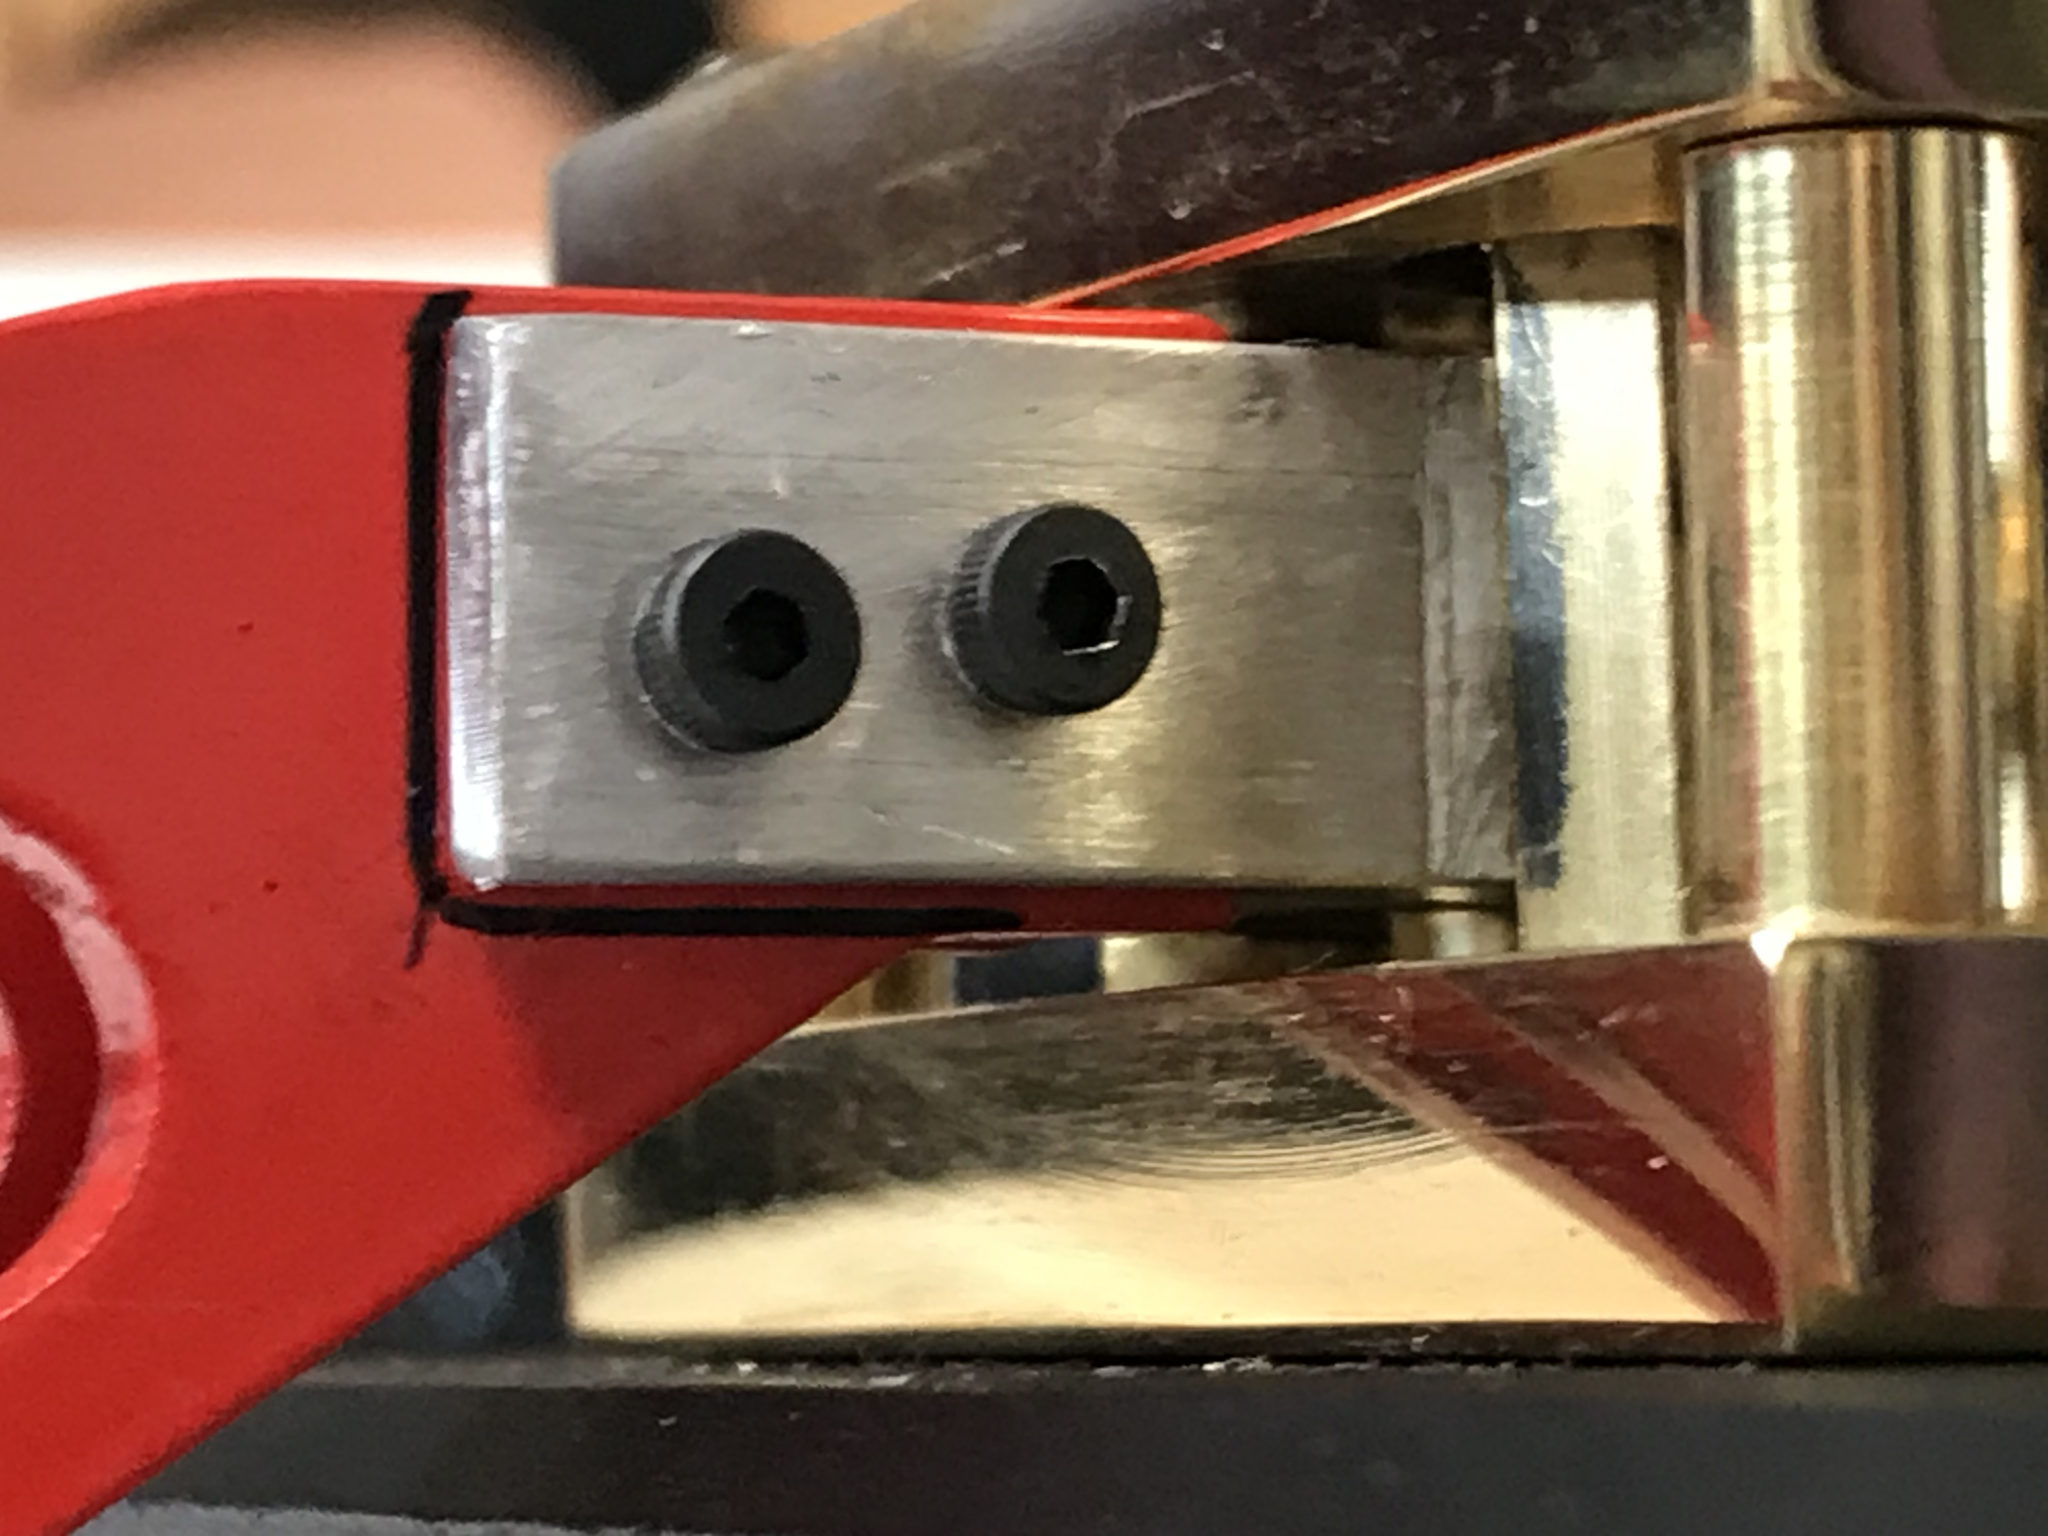
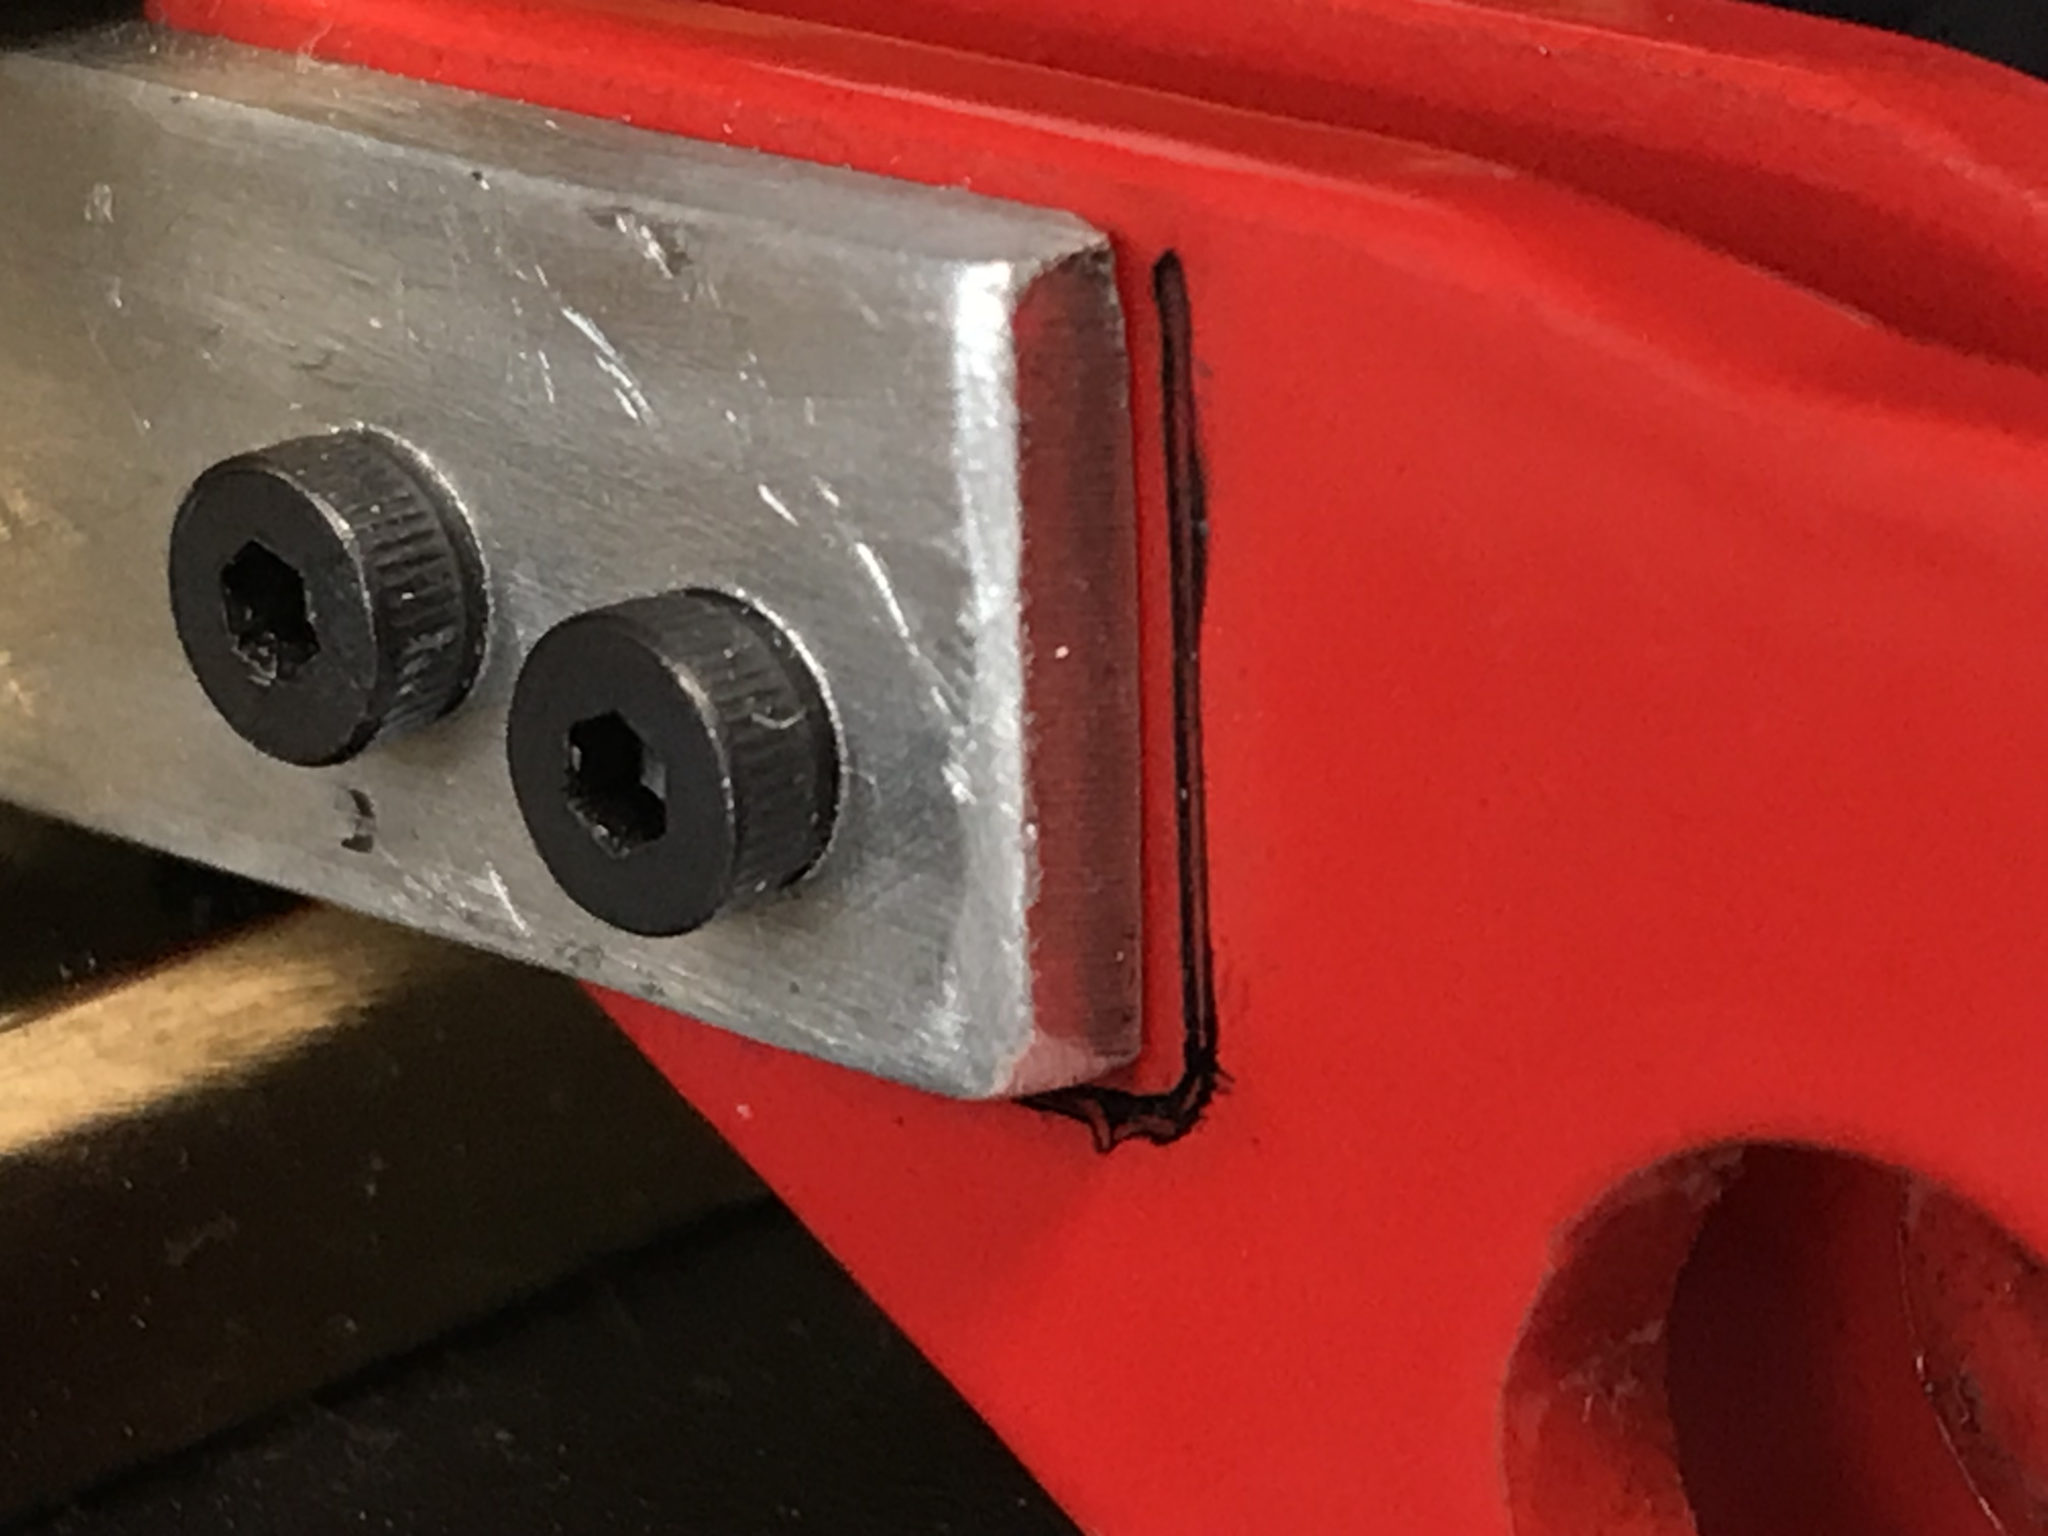
The other thing I couldn’t believe was that a pen had been used to mark where on the paddle the arm should be attached. It’s one thing marking things up during production for alignment but, another when you ship the product out with permanent pen ink on the paddles. It looked like it had been put together by a 5 year old!
Poor quality finishing and pen marks on Vine RST-TP1 Twin Paddle key
I know that at £170.00 it’s not an expensive key and one shouldn’t expect high quality but, these are very simple production issues that could be resolved easily and produce a much better quality product overall.
Bent left paddle on Vine RST-TP1 Twin Paddle Key
Another issue with the key was that the left paddle wasn’t straight, no a big deal but, again attention to detail during production could resolve all these issues.
Another major issue with the key was the fact that the two gap adjusters were wound all the way in and had no more adjustment available but, the gap between the contacts was big enough to drive a bus through!
Any seasoned CW op wouldn’t be happy with the size of the gaps on this key and with the fact that there was no adjustment left it rendered the key useless.
Another issue with the key was the plug, it was the cheapest quality plug I have ever seen, it wasn’t even straight!
Bent 6.2mm plug on the Vine RST-TP1 Twin Paddle key
I called ML&S and spoke to Tony the sales manager about the issues with the key. He fully understood and even admitted that they’d had a lot of issues with quality from Vine and that most of the Vine keys they’d sold had come back because of defects and poor quality build.
He even said that he was now considering dropping Vine keys from their store as they are so poor but, I see they are still for sale on their website.
What is incredibly sad is that in the 21st century British companies are shipping such poor quality products when there is technology easily available that can produce a high quality finish without a high cost. I really don’t understand how a company can ship such poorly built products to a discerning market place and think it’s acceptable.
Vine RST-TP1 Twin Paddle key defects
Needless to say ML&S arranged collection of the key and issued a full refund, excellent service as always.
So after being let down by British manufacturing I’m back to looking for a morse key to get back on air.
My IC-705 and AH-705 arrived today from ML&S, I wasted no time getting it hooked up to an antenna and started working my way through the manual getting to know the menu system.
After a few hours tinkering I piped up on 20m SSB and worked a couple of stations with ease using 10w. No problems getting through and to my surprise got a 5/9 report from both stations.
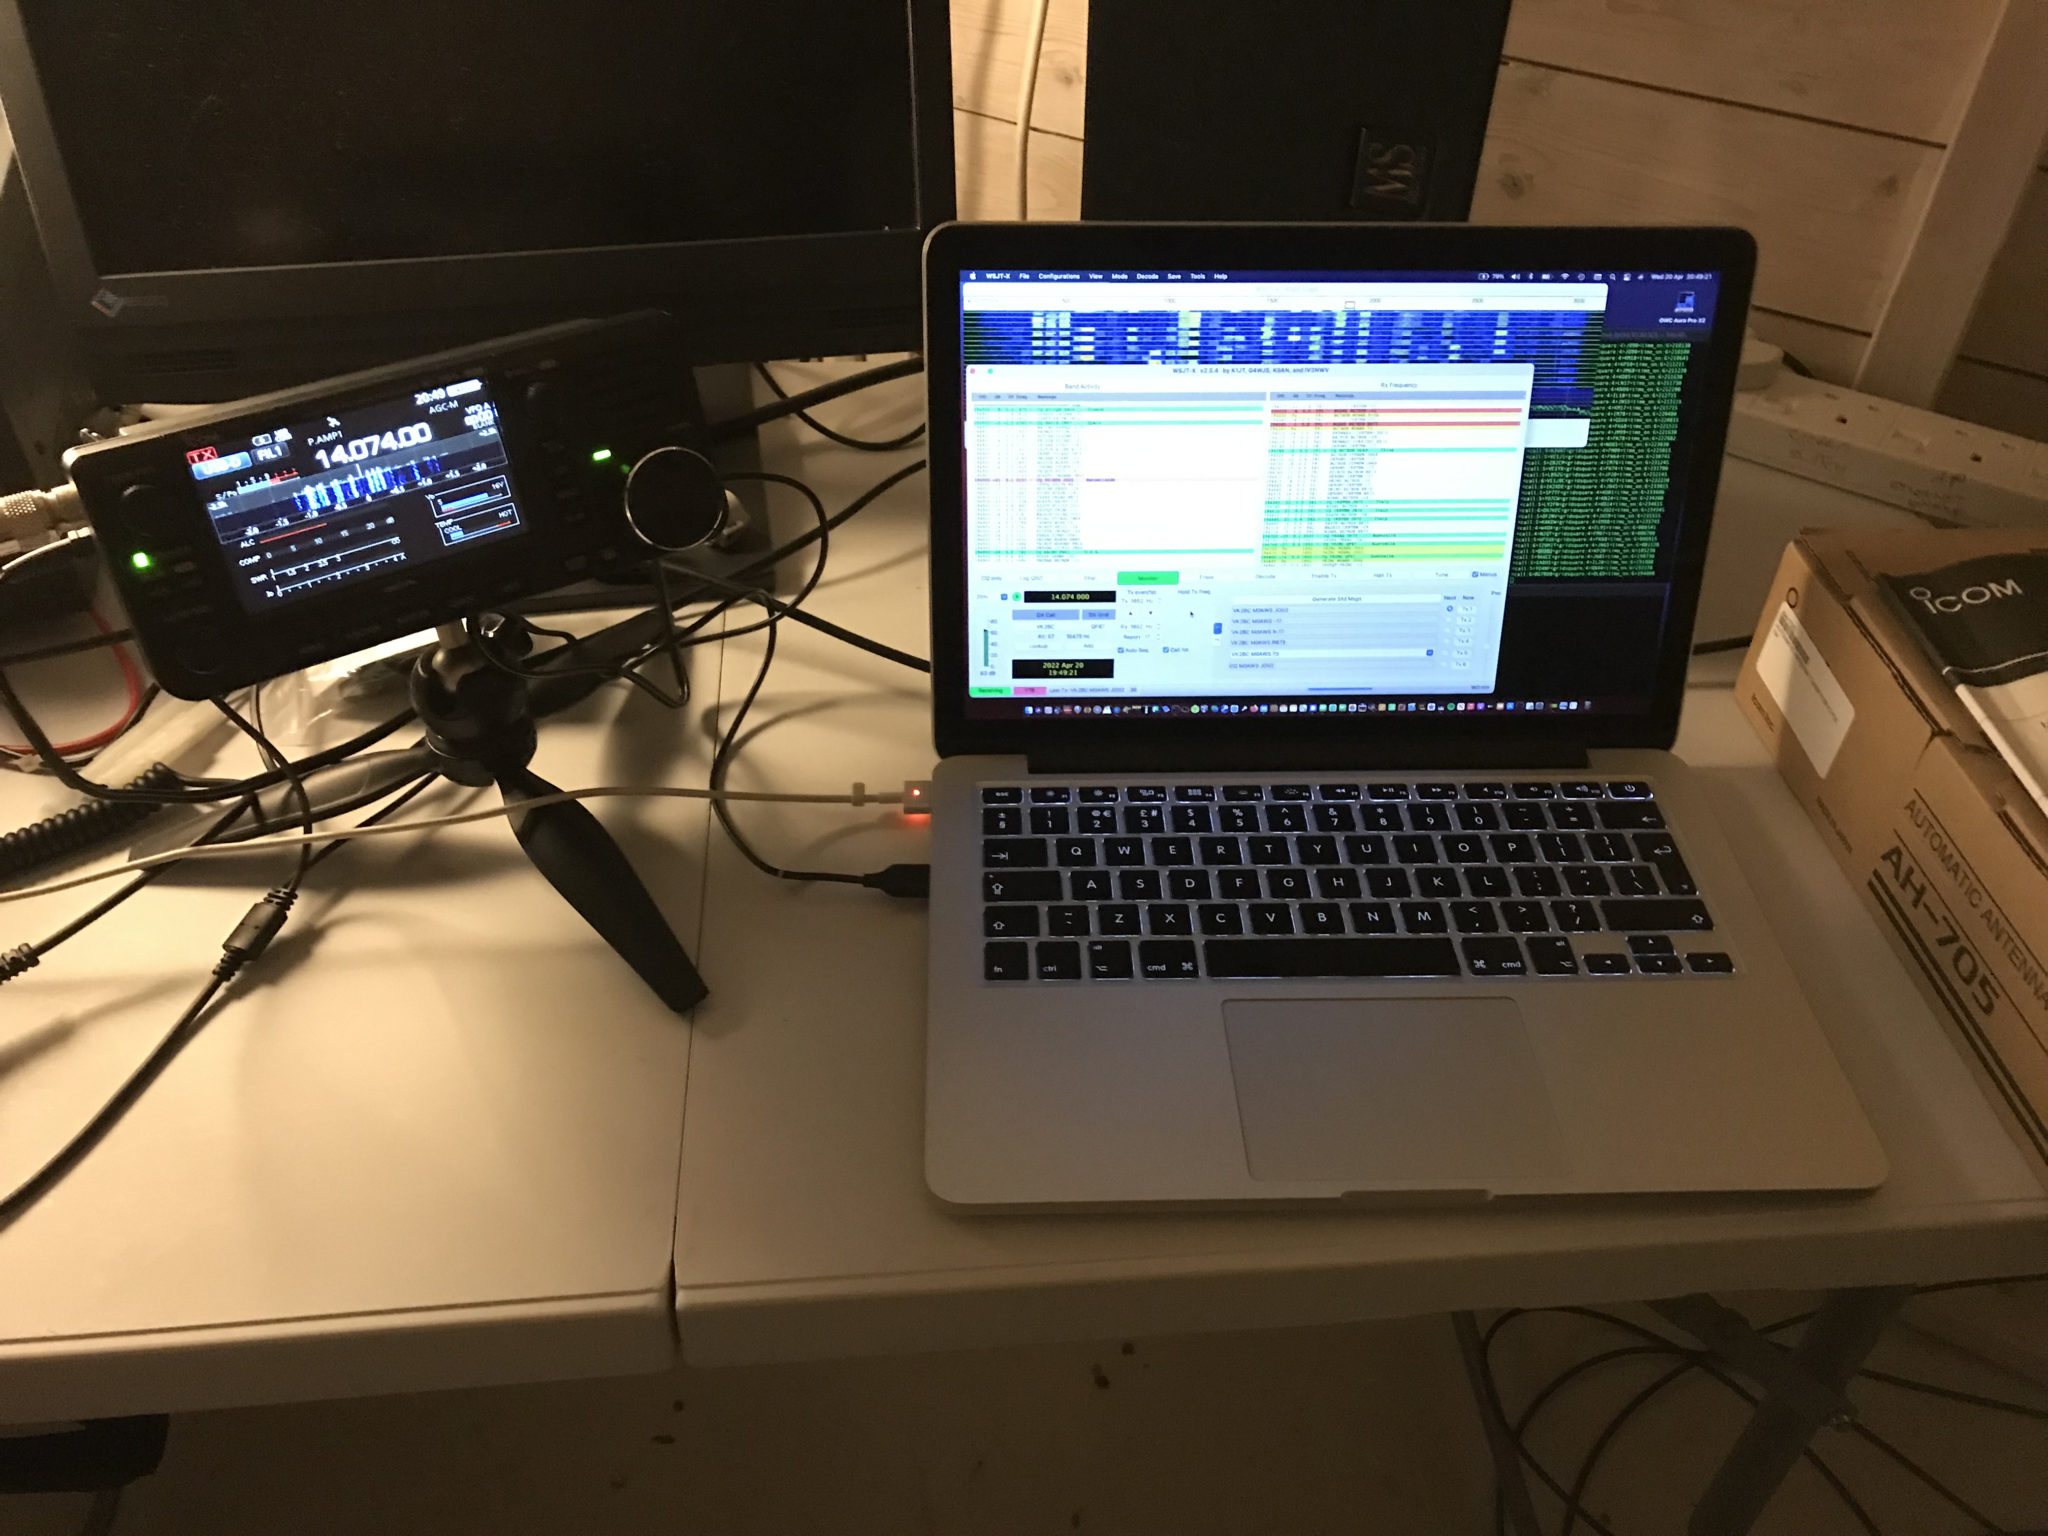
Later in the evening I decided to give it a go on 20m FT8 using just 5w O/P using the battery on the back of the radio that was now fully charged. It’s interesting to note that I didn’t need any drivers on my MacBook Pro to use the CAT and Audio via USB on the IC-705. It was simply plug and go. Much easier than it was with the FTDX10.
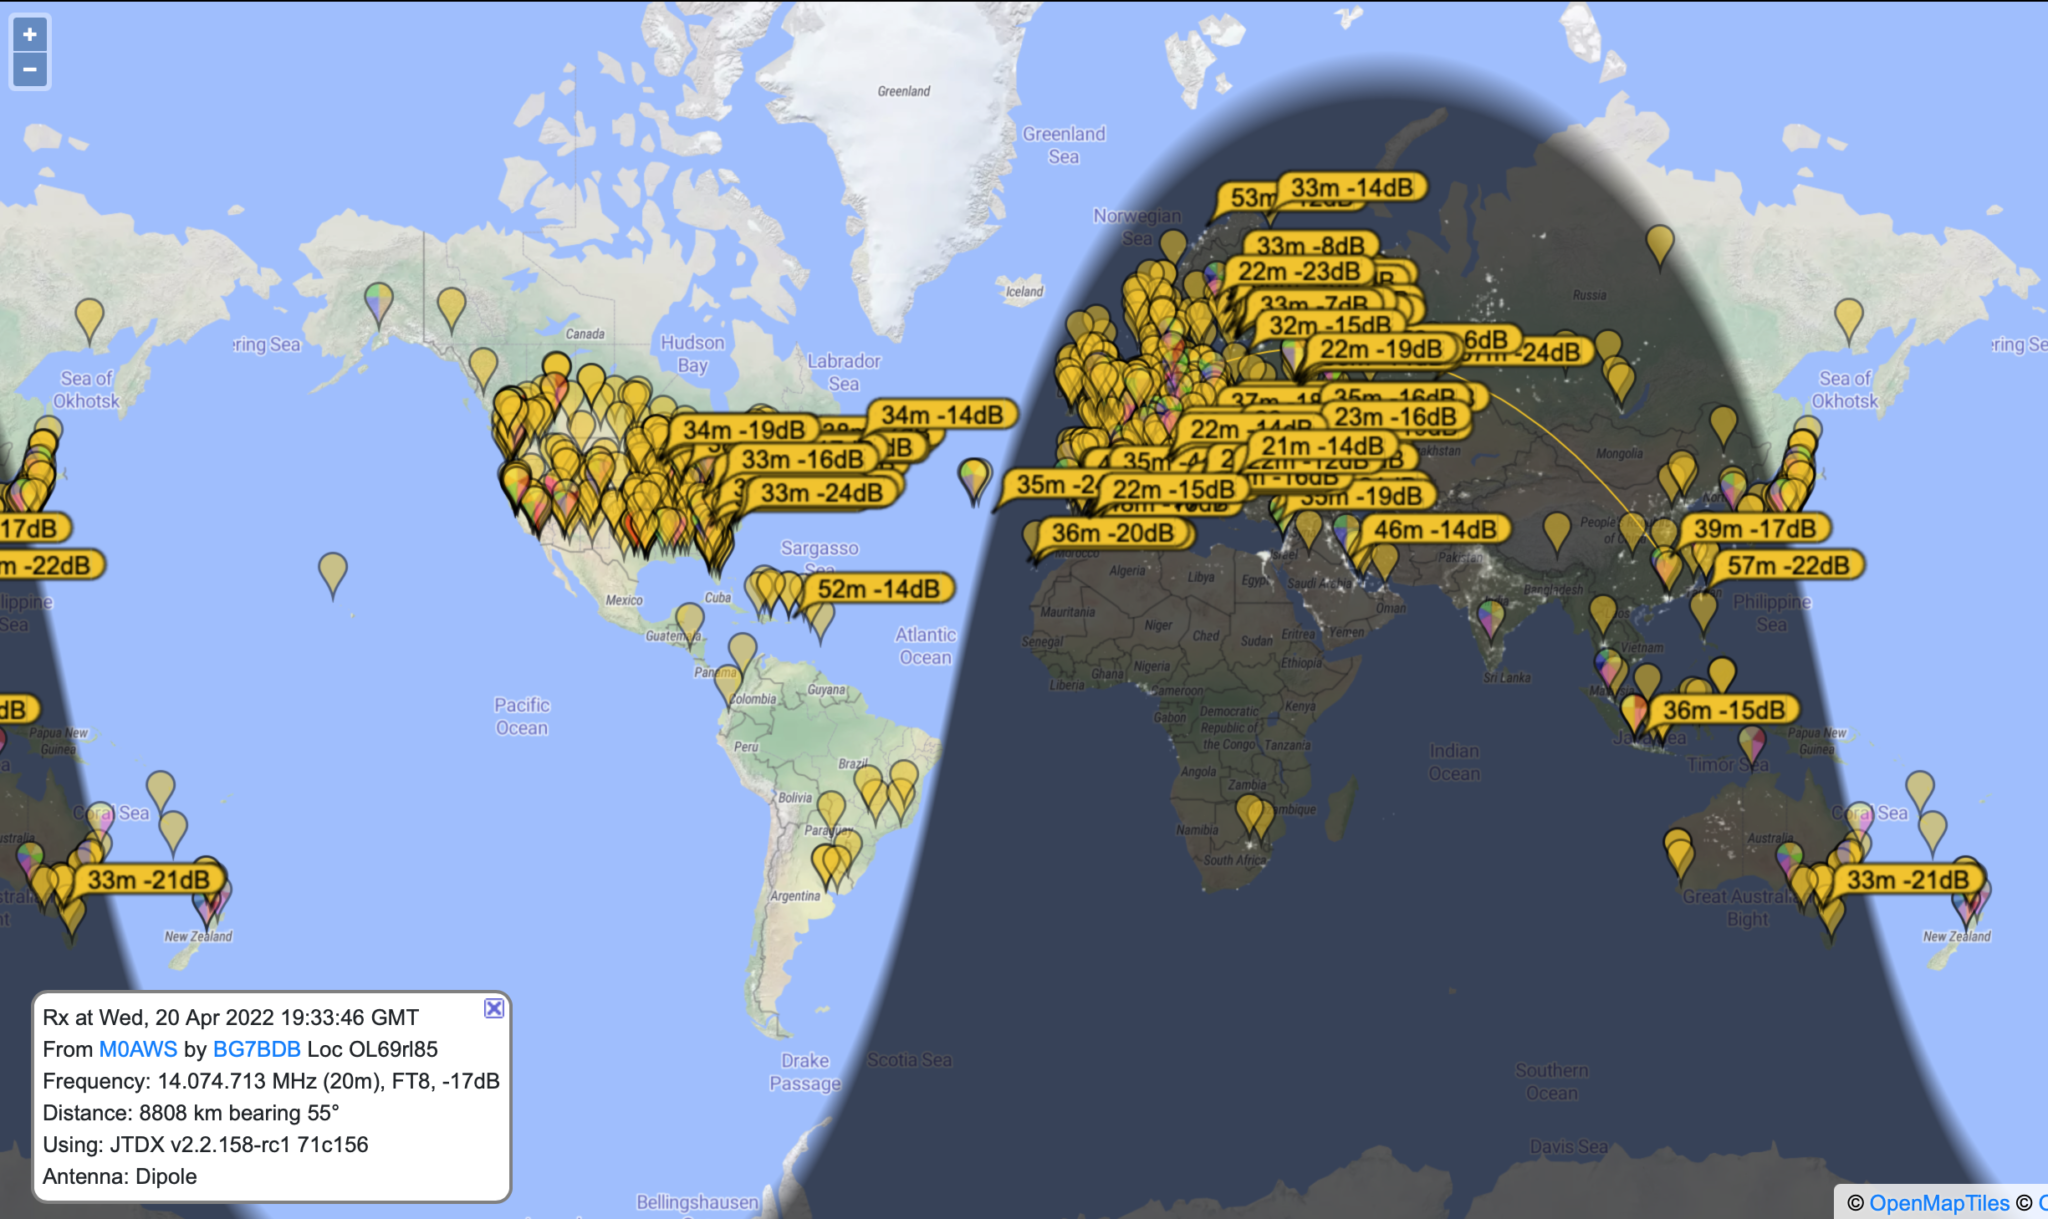
There was a fair amount of DX about on 20m including a few stations from Australia and Japan. I never managed to get a response back from either but, PSKReporter was showing that I was heard!
PSKReporter showing M0AWS being heard by BG7BDB
I also noticed that a station in China was hearing me too. BG7BDB in LinXiang City reported hearing me at -17dB. I quickly hunted around the waterfall and found him and gave a call.
To my amazement he came straight back to me and we exchanged SNR reports, 73 and he was in the log.
WSJT-X FT8 contact with BG7BDB
Looking at my WSJT-X log the distance to BG7BDB is 5467 Miles, at 5w O/P that equates to 0.91mW/Mile!
FT8 really is an impressive mode, it allows QRP stations to work the DX that just wouldn’t be possible on SSB. I have to say I’m really impressed with the Icom IC-705. The receiver and filtering isn’t as good as my Yaesu FTDX10 but, it’s an impressive little package. Portable operations with this radio is going to be a lot of fun!
Since purchasing the Yaesu FTDX10 and getting some wire into the air I’ve been working DX all over the world with ease. So far I’ve not exceeded 25w total output and yet I’ve worked as far as Australia, South America and West Coast USA and Canada. I’m often found to be using far less than 25w, even 5w on the 60m band is a huge amount of fun!
The FTDX10 has an incredible receiver, the best I have ever owned, for the money it really is an amazing bit of kit. The only thing about it that doesn’t work for me is the size when trying to go portable. It’s just a tad too big and requires a huge battery to power it. I love everything else about the FTDX10 apart from this one thing.
So, with the FTDX10 now being the prime shack radio I decided to look into a solution for portable operations. There are many options available today from the cheap Chinese made radios to the old reliable FT817/818 (which I used to own and had a lot of fun with) through to a multitude of newer, more modern full functionality radios. We are truly spoilt for choice these days!
One radio I have read a lot about is the Icom IC-705, it’s an incredibly feature packed little radio with a max output of 10w that covers 160m all the way up to 70cms. With its large super clear colour touch screen and easy swap battery solution it ticks all the boxes.
Icom IC-705 Portable HF/VHF/UHF Transceiver
One thing many people complain about is the fact that the IC-705 doesn’t have a built in ATU. This has never bothered me as I am a firm believer that the ATU should be at the antenna and not in the radio at the end of a long coax run. Running various antenna models on my EzNEC software has shown that keeping the ATU at the antenna is by far the best solution.
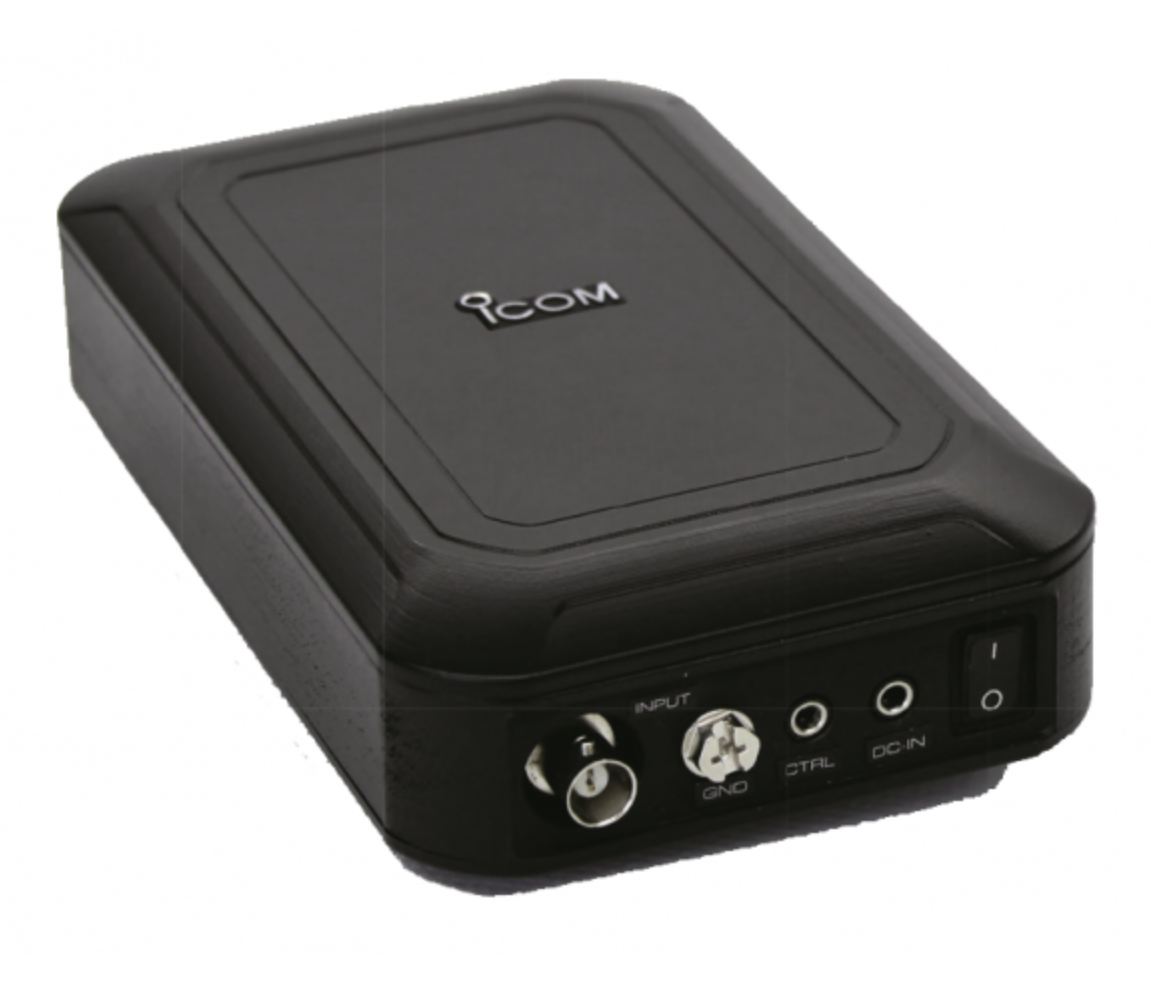
Of course Icom have this covered with their AH-705 remote auto ATU that’s specifically designed to compliment the IC-705. Powered by just two AA batteries and utilising latching relays the unit is both very quick to tune and uses next to no power at all, ideal for those Parks on the Air (POTA) or in my case, Beaches on the Air (BOTA) activations.
Being a quality Icom product the AH-705 isn’t cheap, at £299.99 it’s actually one of the most expensive auto ATUs available for the IC-705.
Icom AH-705 Remote Auto ATU
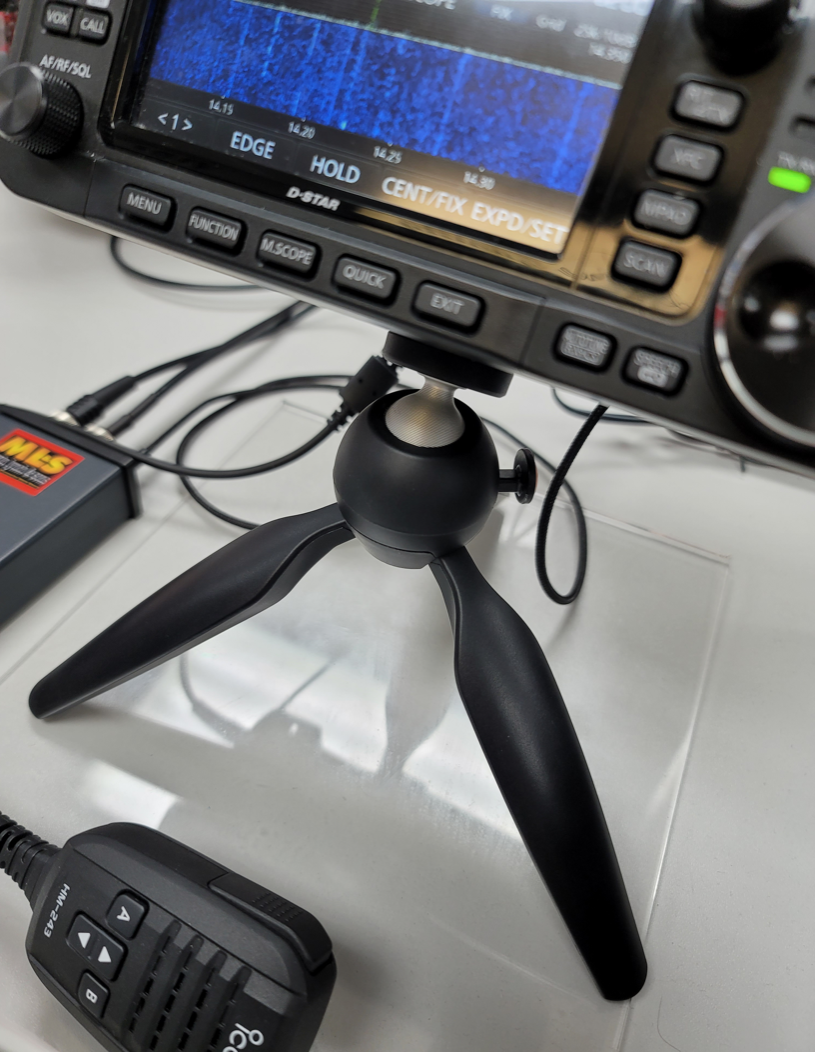
The other thing I wanted was some kind of stand for the IC-705 that would allow me to angle the radio such that the display and controls are always easily useable. On the ML&S site I found a nifty little tripod that will do the job nicely and so, that had to be included in the bundle.
Icom IC-705 Tripod stand
Fortunately for me the AH-705 was on special offer over the Easter Bank Holiday with 40% off making it the same price as the cheaper MAT tuner from china.
So I have now ordered an IC-705, matching AH-705 and the tripod all for the bundle price of £1504.87 including VAT, I even got free shipping thrown in too!
So that leaves just one more thing that I need to complete my radio solution, a morse key!
Having sold my Schurr Profi II Twin Paddle key (Been kicking myself ever since!!) a few years ago when I decided to take a break from radio I’m now in the position of not owning a morse key.
I did order a Vine Antenna RST-TP1 key from ML&S but, that had to go back (There’ll be an article about it coming very soon!) and so, I decided to spend a bit more and get a much better quality key.
Talking to many people online and Tony at ML&S it’s apparent that the Begali Morse keys are some of the best available these days. Looking on the Begali website they certainly have a great selection of high quality keys available, some for much more than I want to spend.
Begali Pearl Twin Paddle Morse Key
So after much consideration I decided to purchase a Begali Pearl Twin Paddle Morse key in Palladium and Gold with red paddles. It’s a super looking key and gets great write ups. It’s also their biggest seller, that says a lot.
More soon …
We use cookies to ensure that we give you the best experience on our website. If you continue to use this site we will assume that you are happy with it.