All night DX fest!

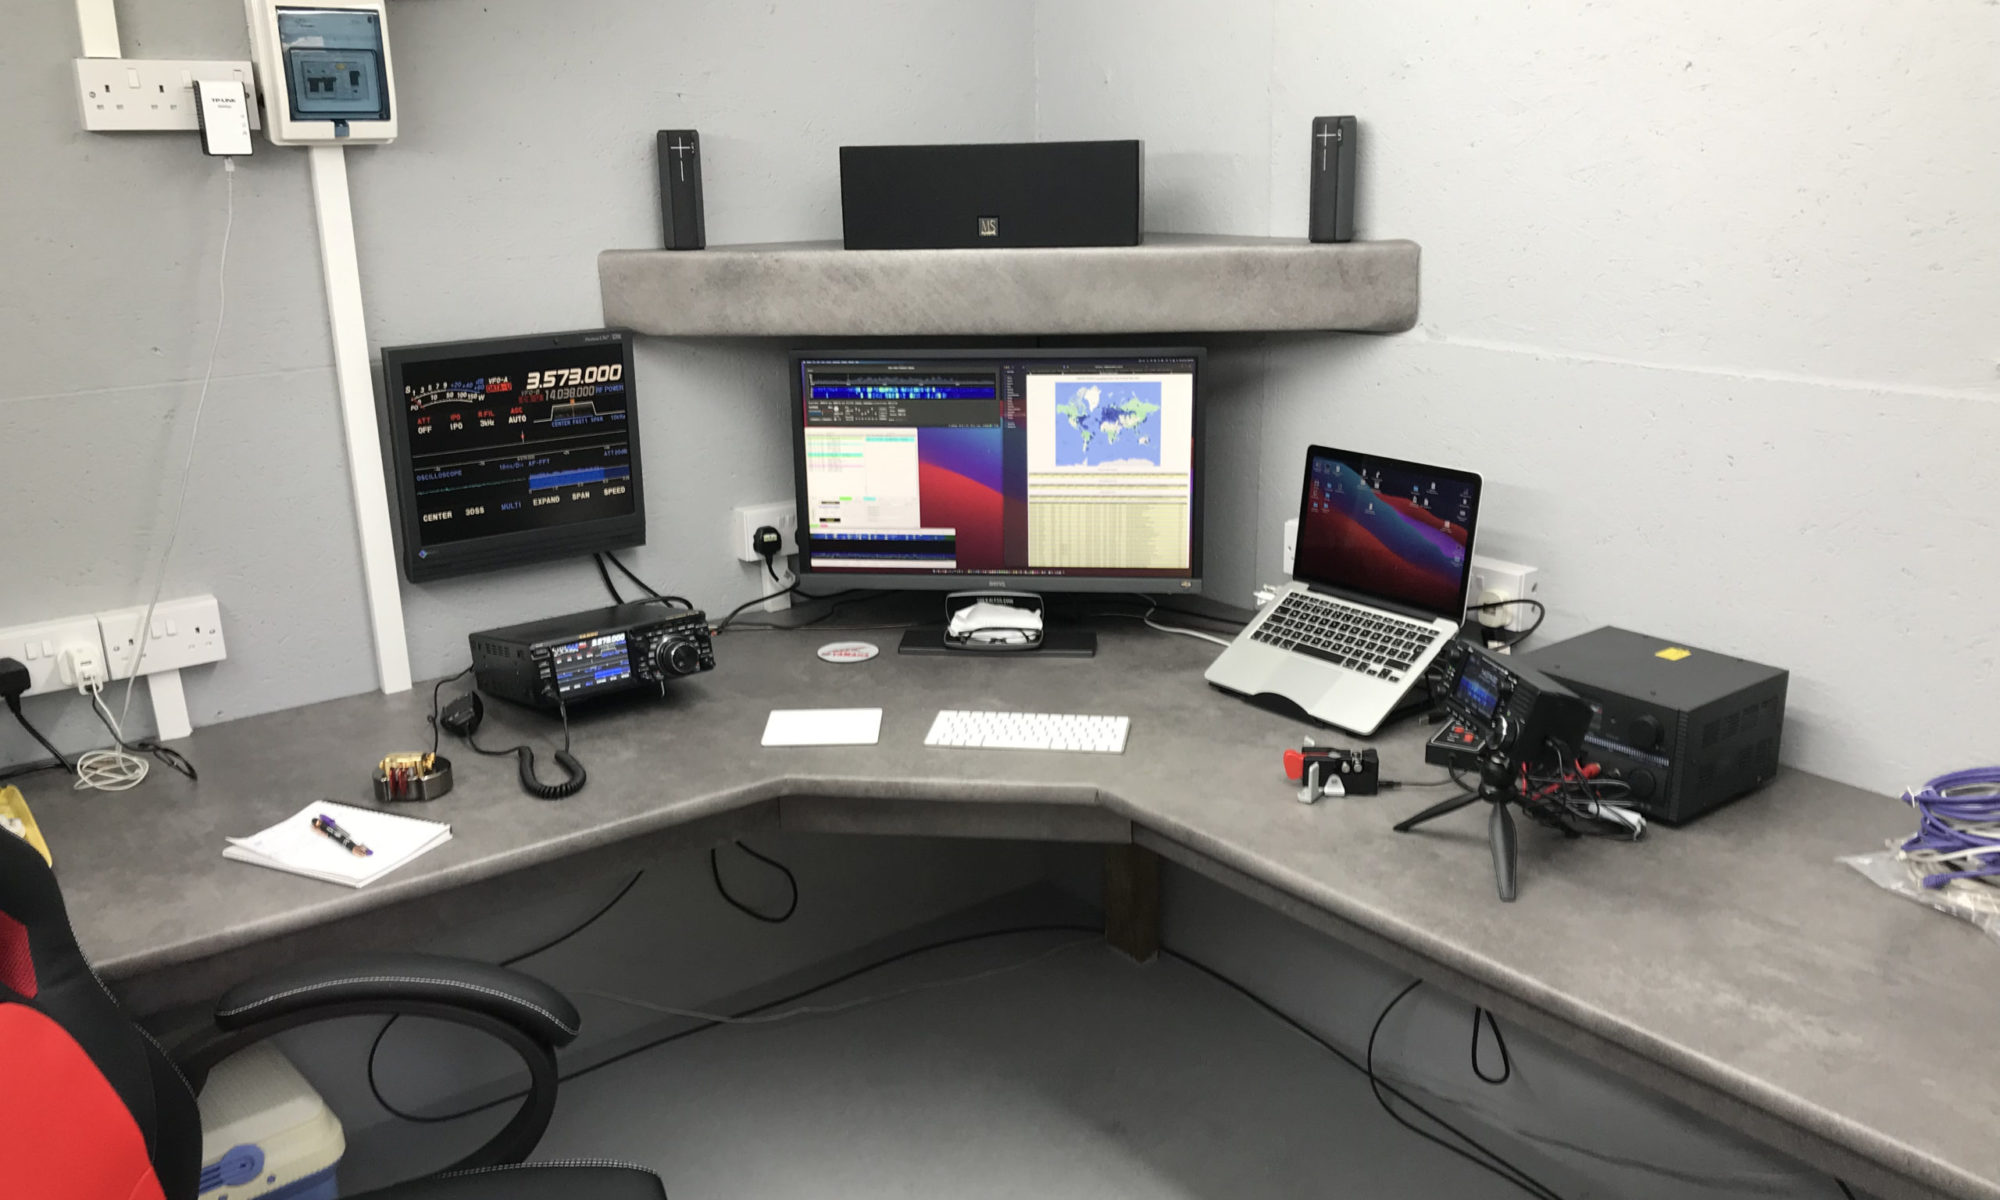
Having just completed building my new radio shack I thought what better way to break it in than to do an all night radio session chasing the DX.

All nighters aren’t anything new for me, I did many an all night session low band DXing when we lived in France (F5VKM). Back then I had a massive cellar, part of which was a very well fitted out radio shack. With some very large antennas in our field out back I was truly spoilt with some great times on the 160m band in the dark winter months.

Now back in the UK and only just getting back into the hobby after a long break things are somewhat different. I now only have a typical small UK garden and only vertical antennas. Better than no antennas though!

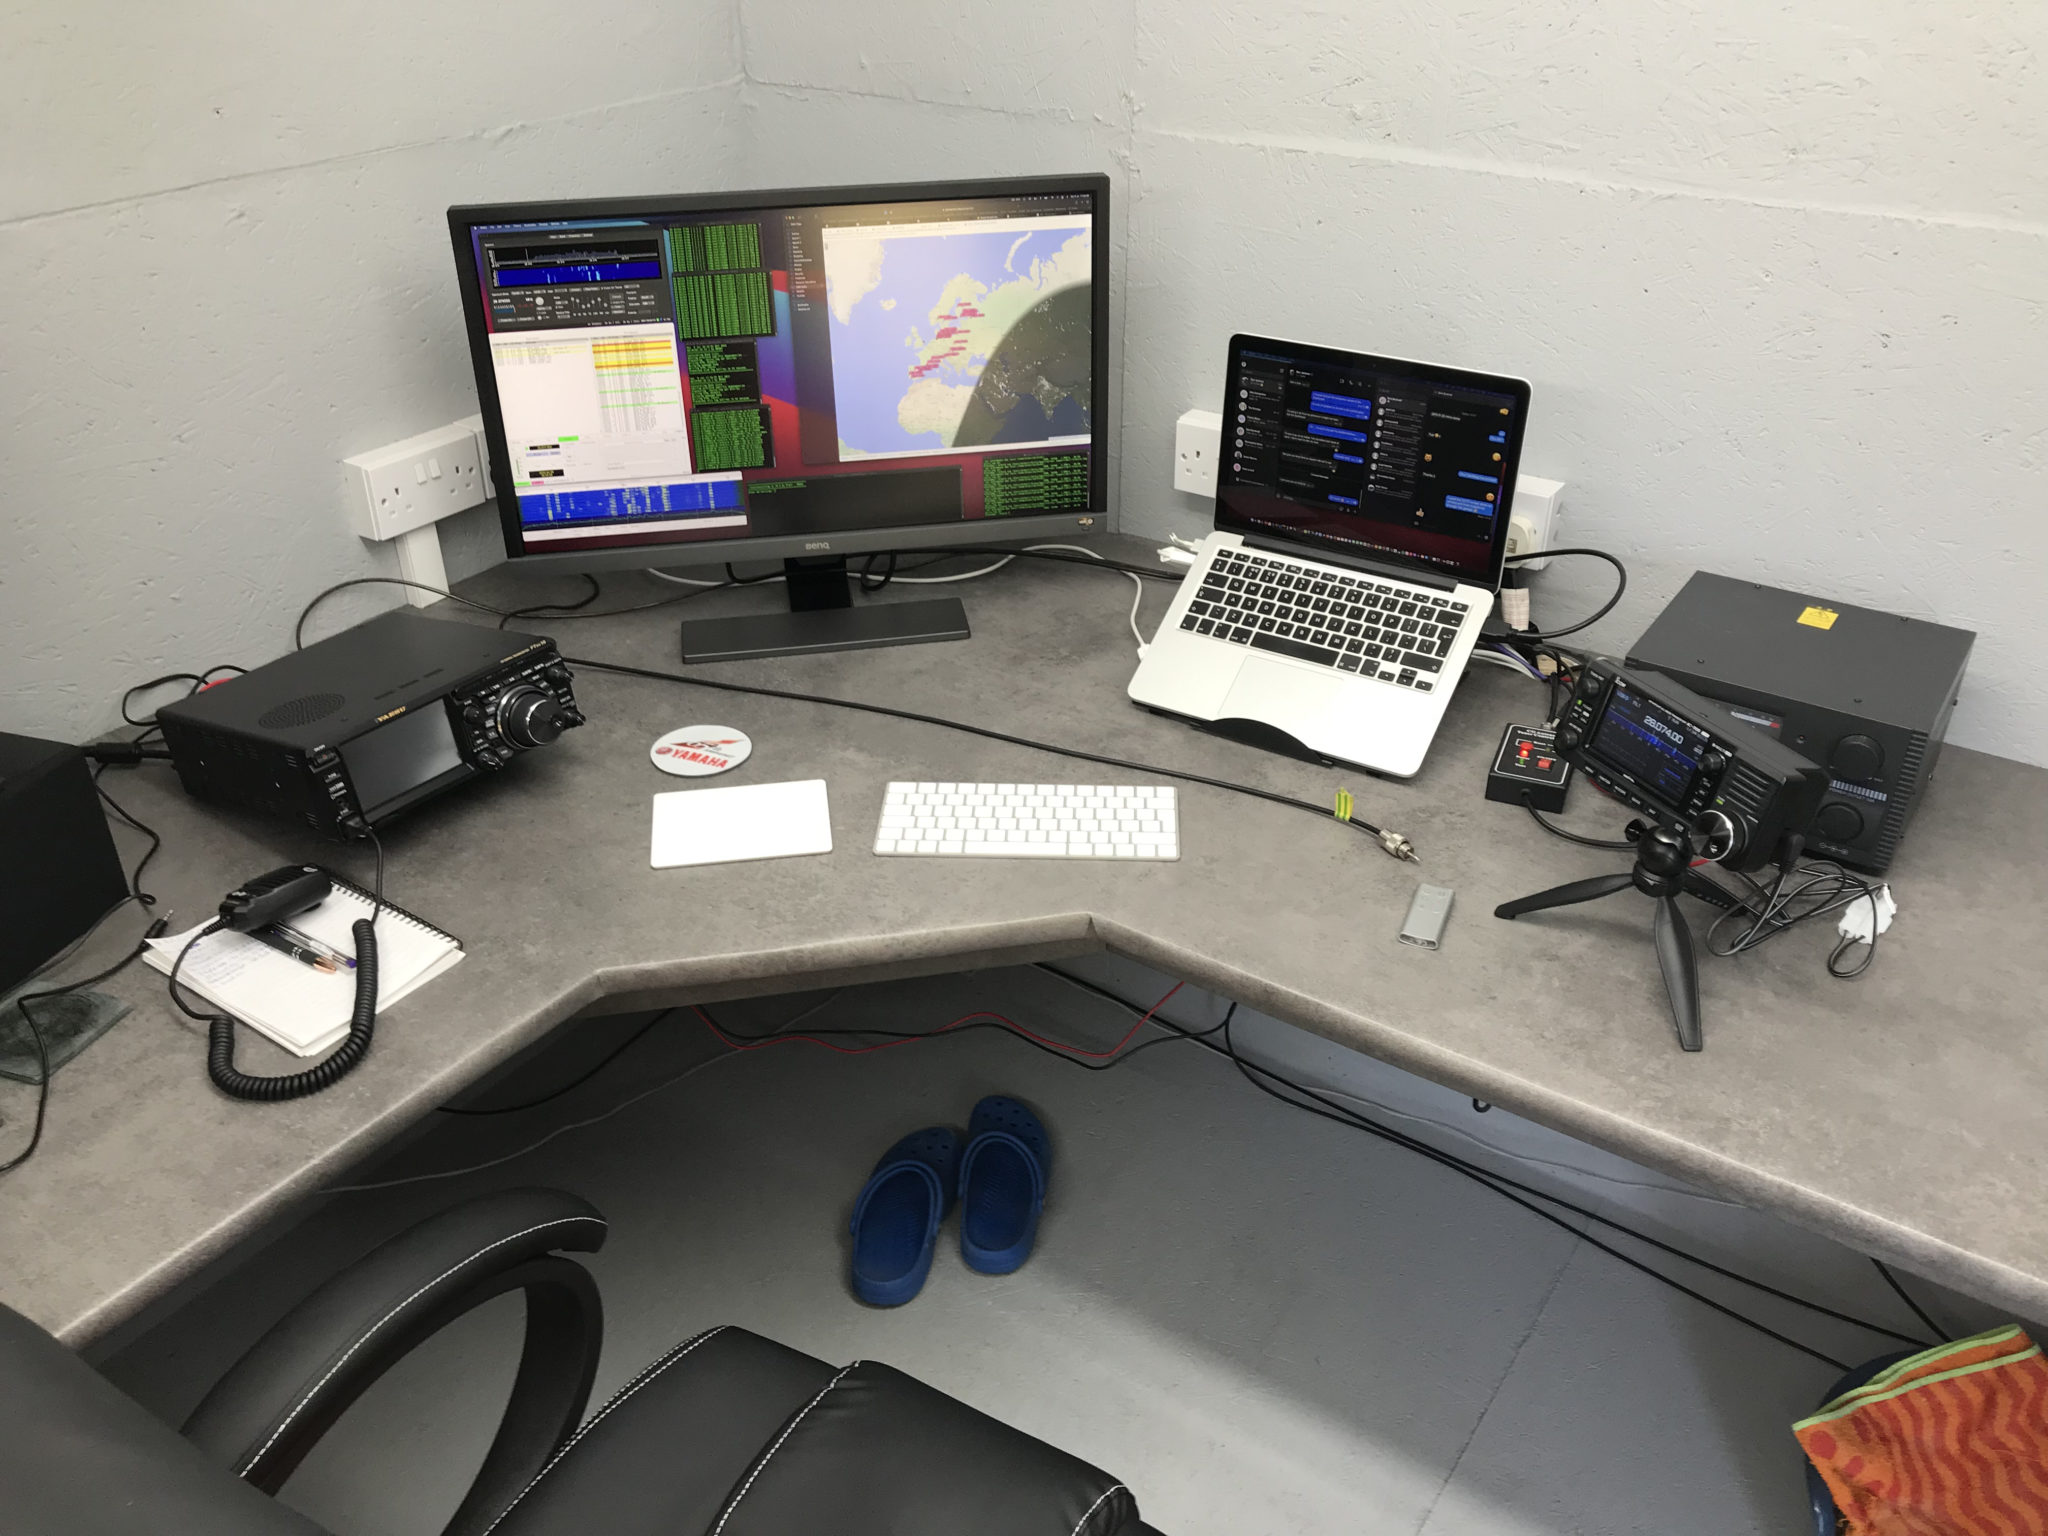
The new radio shack is small compared to my super spacious setup in France but, it’s perfectly formed with all facilities.

For my over night radio session I decided to use my trusty Yaesu FTDX10, it has the best receiver I’ve ever used and is built to withstand the long haul operation.

Antenna wise I decided to use my 30m band EFHW vertical that can be tuned on most bands from 80m and upwards. I use a CG3000 remote auto tuner to match this antenna to the 50 ohm coax feed and it does a great job.

Being comfortably setup in the shack I tuned up on the 30m band and had a listen to see what shape the band was in.
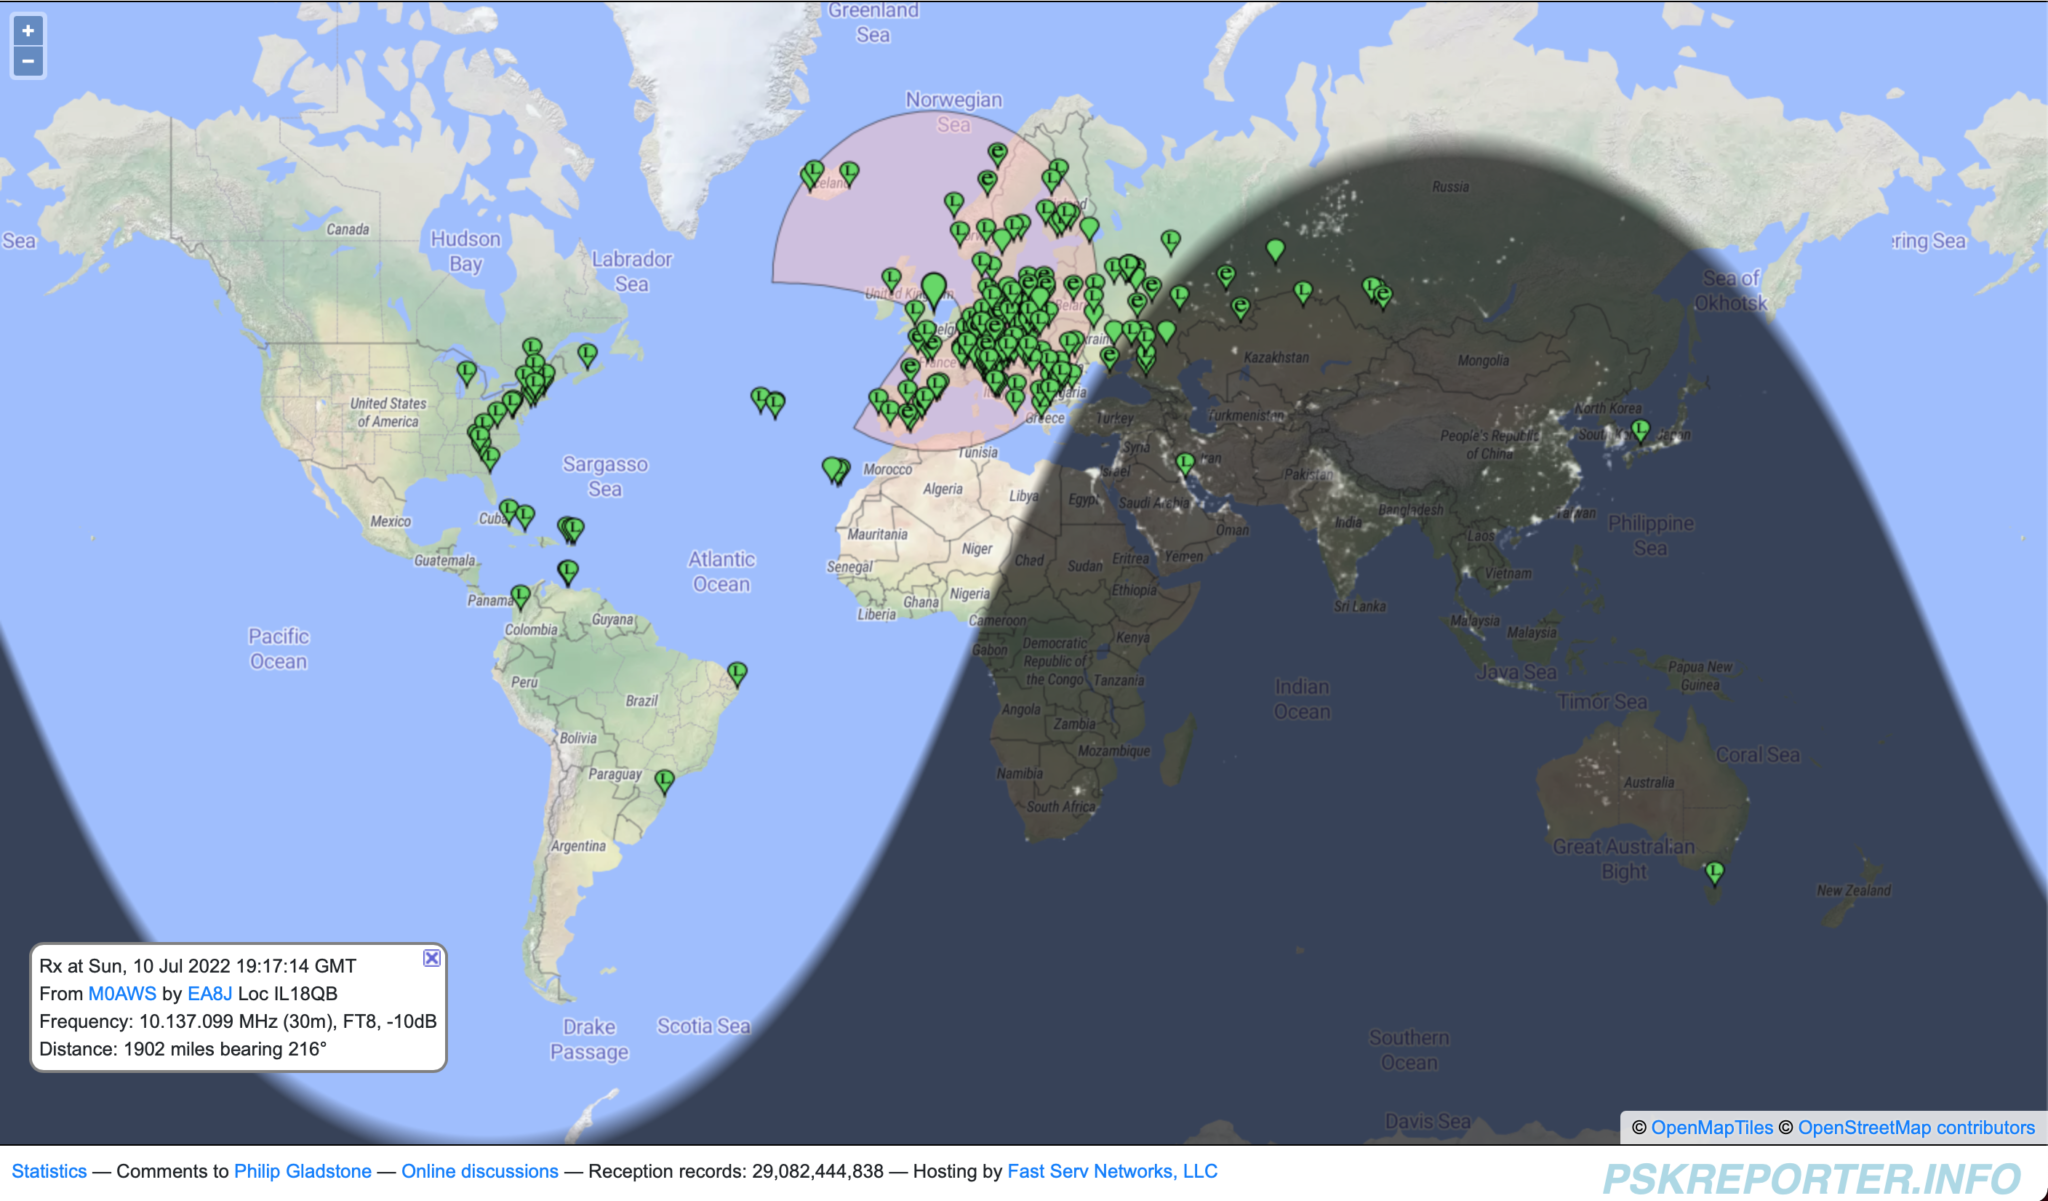
Stations heard on 30m 10/11-07-22

Using FT8 I worked a bunch of European, Russian/Asiatic Russian stations with ease, the band was in fairly good shape albeit localised around Europe and Russia. Wanting to work stations a little further afield I decided to move up on to the higher bands. 12m is a band I really like but, always seem to miss when it’s open.

Tuning up on the 12m band using the same vertical that I was just using on the 30m band the FT8 section was packed with signals. At last, I’ve tuned up on the band when it’s open!

I suddenly noticed Bobby, VP8ADR down in the Falkland Islands in the WSJTX waterfall and gave him a call. He had a fair few people calling him and so I joined the list. In no time at all Bobby answered my call and we exchange SNR reports of -8dB both ways. This was surprising as later on one of the FT8 Facebook groups Bobby stated he was using 200w into a Hexbeam during our QSO, I was only using a measly 18w into my Vertical, I would had expected a much lower SNR report. Clearly Bobby’s setup was doing all the work!

Right after the QSO with Bobby I immediately went on to work PY7ZC, LU8YD, PY2ATI, LW6EQC, PY2EBD and PY2THO all in quick succession. With the Falklands, Brazil and Argentina in the log so soon it was looking like it was going to be a fun packed night.

Next up on the waterfall was 9Y4DG in Trinidad and Tobago and 8P6ET in Barbados, two really nice locations to get into the log and new ones on 12m for me.

Having worked all the DX I could hear on 12m and not wanting to just spend hours working endless European stations I tuned down onto the 17m band using the same vertical antenna. This antenna really does work well on bands it’s not designed for.

First 3 stations in the log on 17m were all from Japan, JR3NZC, JQ6RUP and JA5BDZ. With all 3 stations being well on the way to 6000 miles away this was a good start. The propagation strangely swung to the west and I got YV5DRN from Venezuela in the log.

Not seeing any other stations that I wanted to work I retuned back onto 30m again and found it was open to South America and the Caribbean.

In no time at all I had YV4CLF in Venezuela, HK2AQ in Colombia, NP4TX and NP3XF in Puerto Rico and PY7ZC in Brazil all in the log.

Being in complete darkness I decided to tune down on to the 60m band, one of my favourites, to see if there was much going on. Sure enough there were a few stations active on the limited space available.

First station worked was a new one for me FP/KV1J on St. Pierre and Miquelon Island just off the coast of New Foundland. I have to admit I had no idea where this little island was and confess to having to look it up on google maps.

I then went on to work a few East Coast USA stations all with good SNR reports for this time of year.
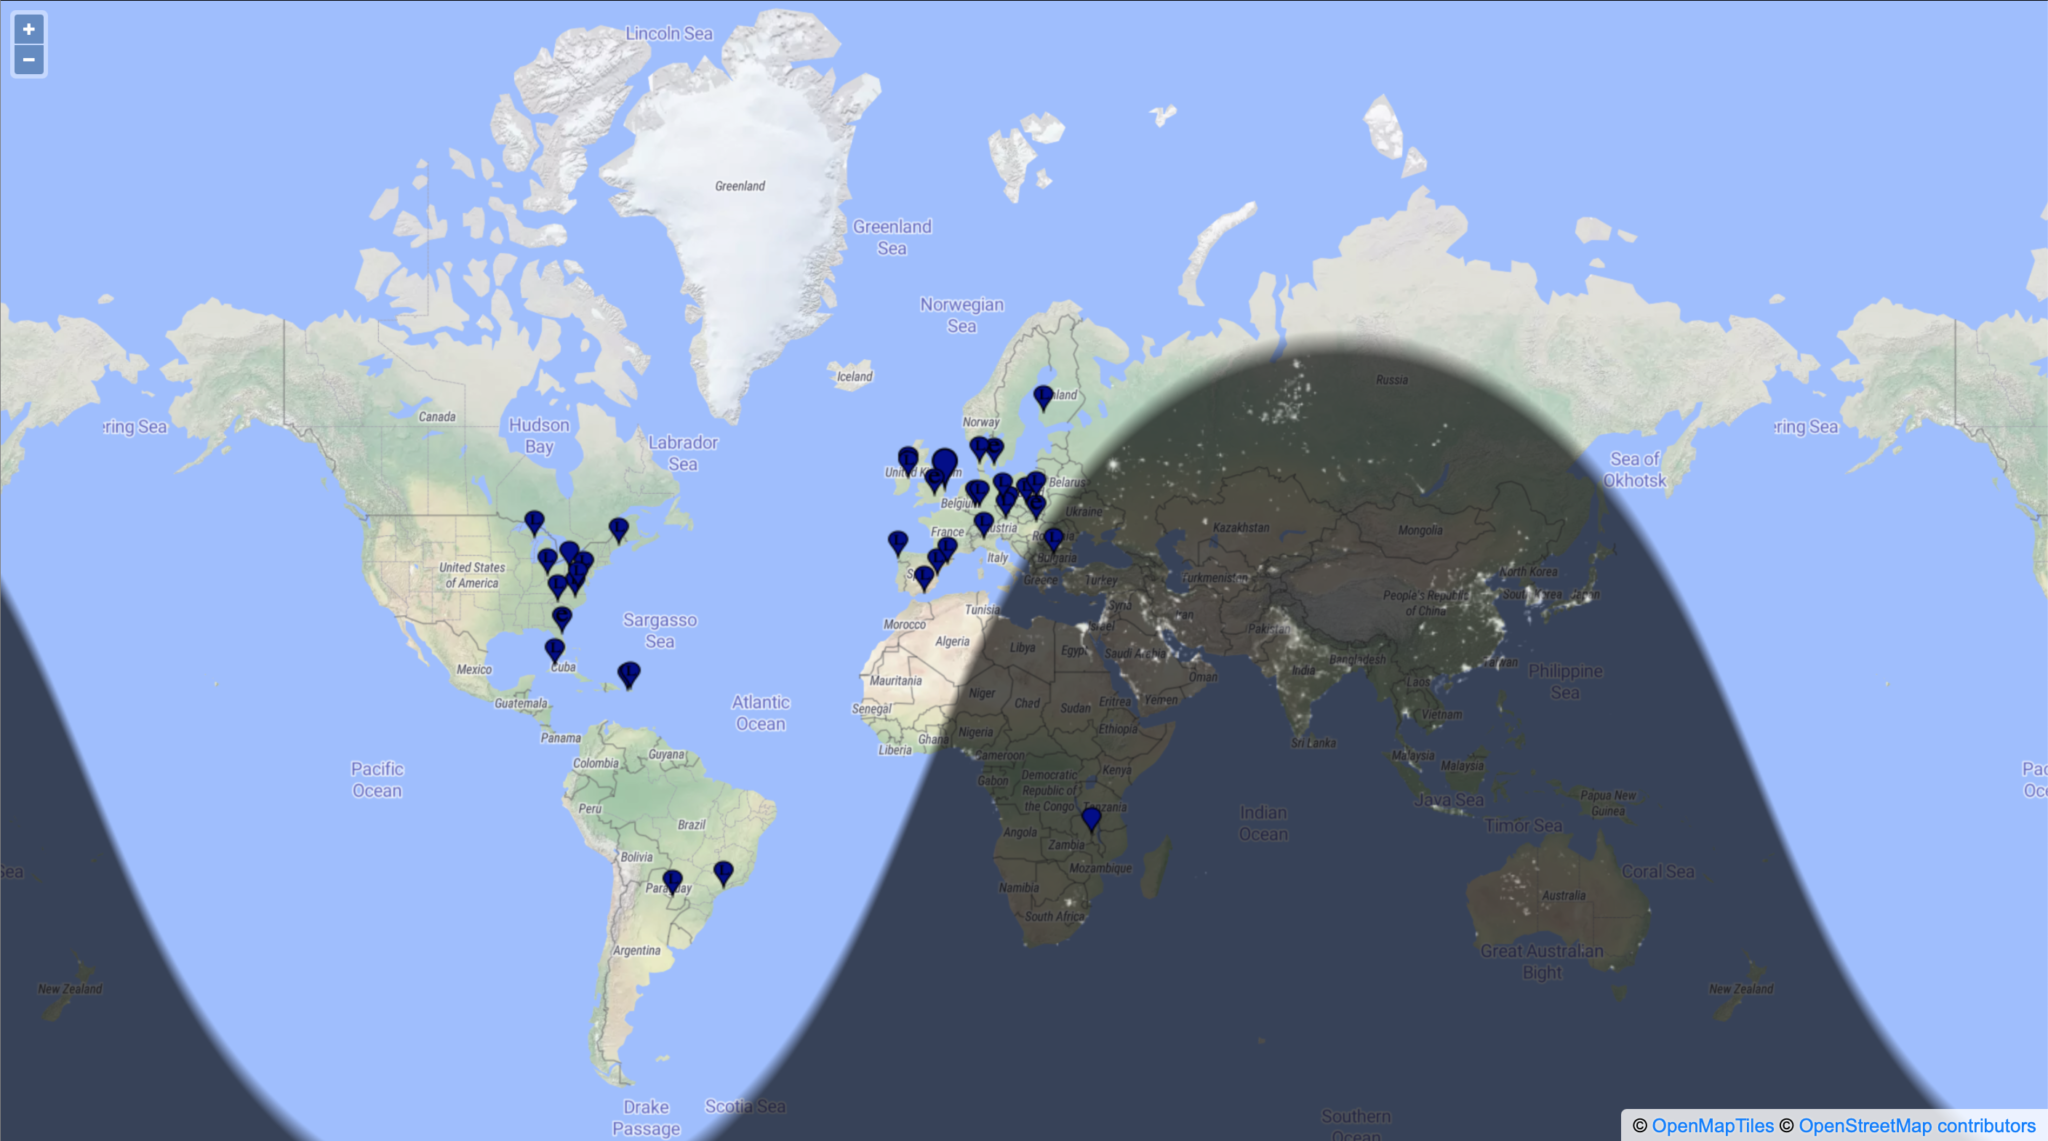
Stations heard on the 60m band 11-07-22

Having worked all the notable DX on 60m I tuned back onto the 17m which was now wide open to the world.

I stayed on this band for the rest of the night well into the morning grey line and beyond working some great DX including some new ones for me.

I worked many East Coast USA stations but, stations of note were 6Y5HN in Jamaica and AK6R, K6EU and K6EI in California on the West Coast USA. It’s rare for me to get into the West Coast USA for some reason.

UA0SDX in Irkutsk Siberia was also a nice one to get in the log. This is a town I was going to be riding my motorcycle through on my Mongolian trip before COVID19 and the war in Ukraine broke out and stopped the trip from happening.

It was good to get an Ozzy call in the log too, VK6EI on the West Coast of Australia came in at a strong -15dB SNR giving me a surprising -14dB SNR report, incredible considering I was using just 22w into my vertical antenna.

Well after sunrise the DX was still pouring in and I worked KL7TC in Fairbanks Alaska, a new one for me that made me very happy as I’d been trying to get into Alaska for some time but, never seemed to time it right. Today was my day!

Another station I was really pleased to get into the log was V31MA. I’ve tried to get a QSO with this station many times but, have never succeeded until today. I called for about 20mins and eventually got a reply putting a huge smile on my face. -16dB SNR sent and -19dB SNR received, I was happy that I finally have Belize in the log.

The last station worked was RA0FF way over on the far East Coast of Russia, the complete opposite direction to Belize. Located in Yu-Sakhalinsk right on the Russian coast opposite Japan and at 5270 miles, this is my longest distance Russian station worked so far and one I was very happy to have in the log. I always get good take off towards Russia whether it be directly east or over the North Pole to the far eastern parts of the Siberian wilderness.

I had a great night chasing the DX on the HF bands and being retired didn’t have to worry about going to work after such a long night. I highly recommend that you try an all nighter at least once in your HAM radio career, you get the opportunity to work stations that you’d normally not hear during the day time hours.

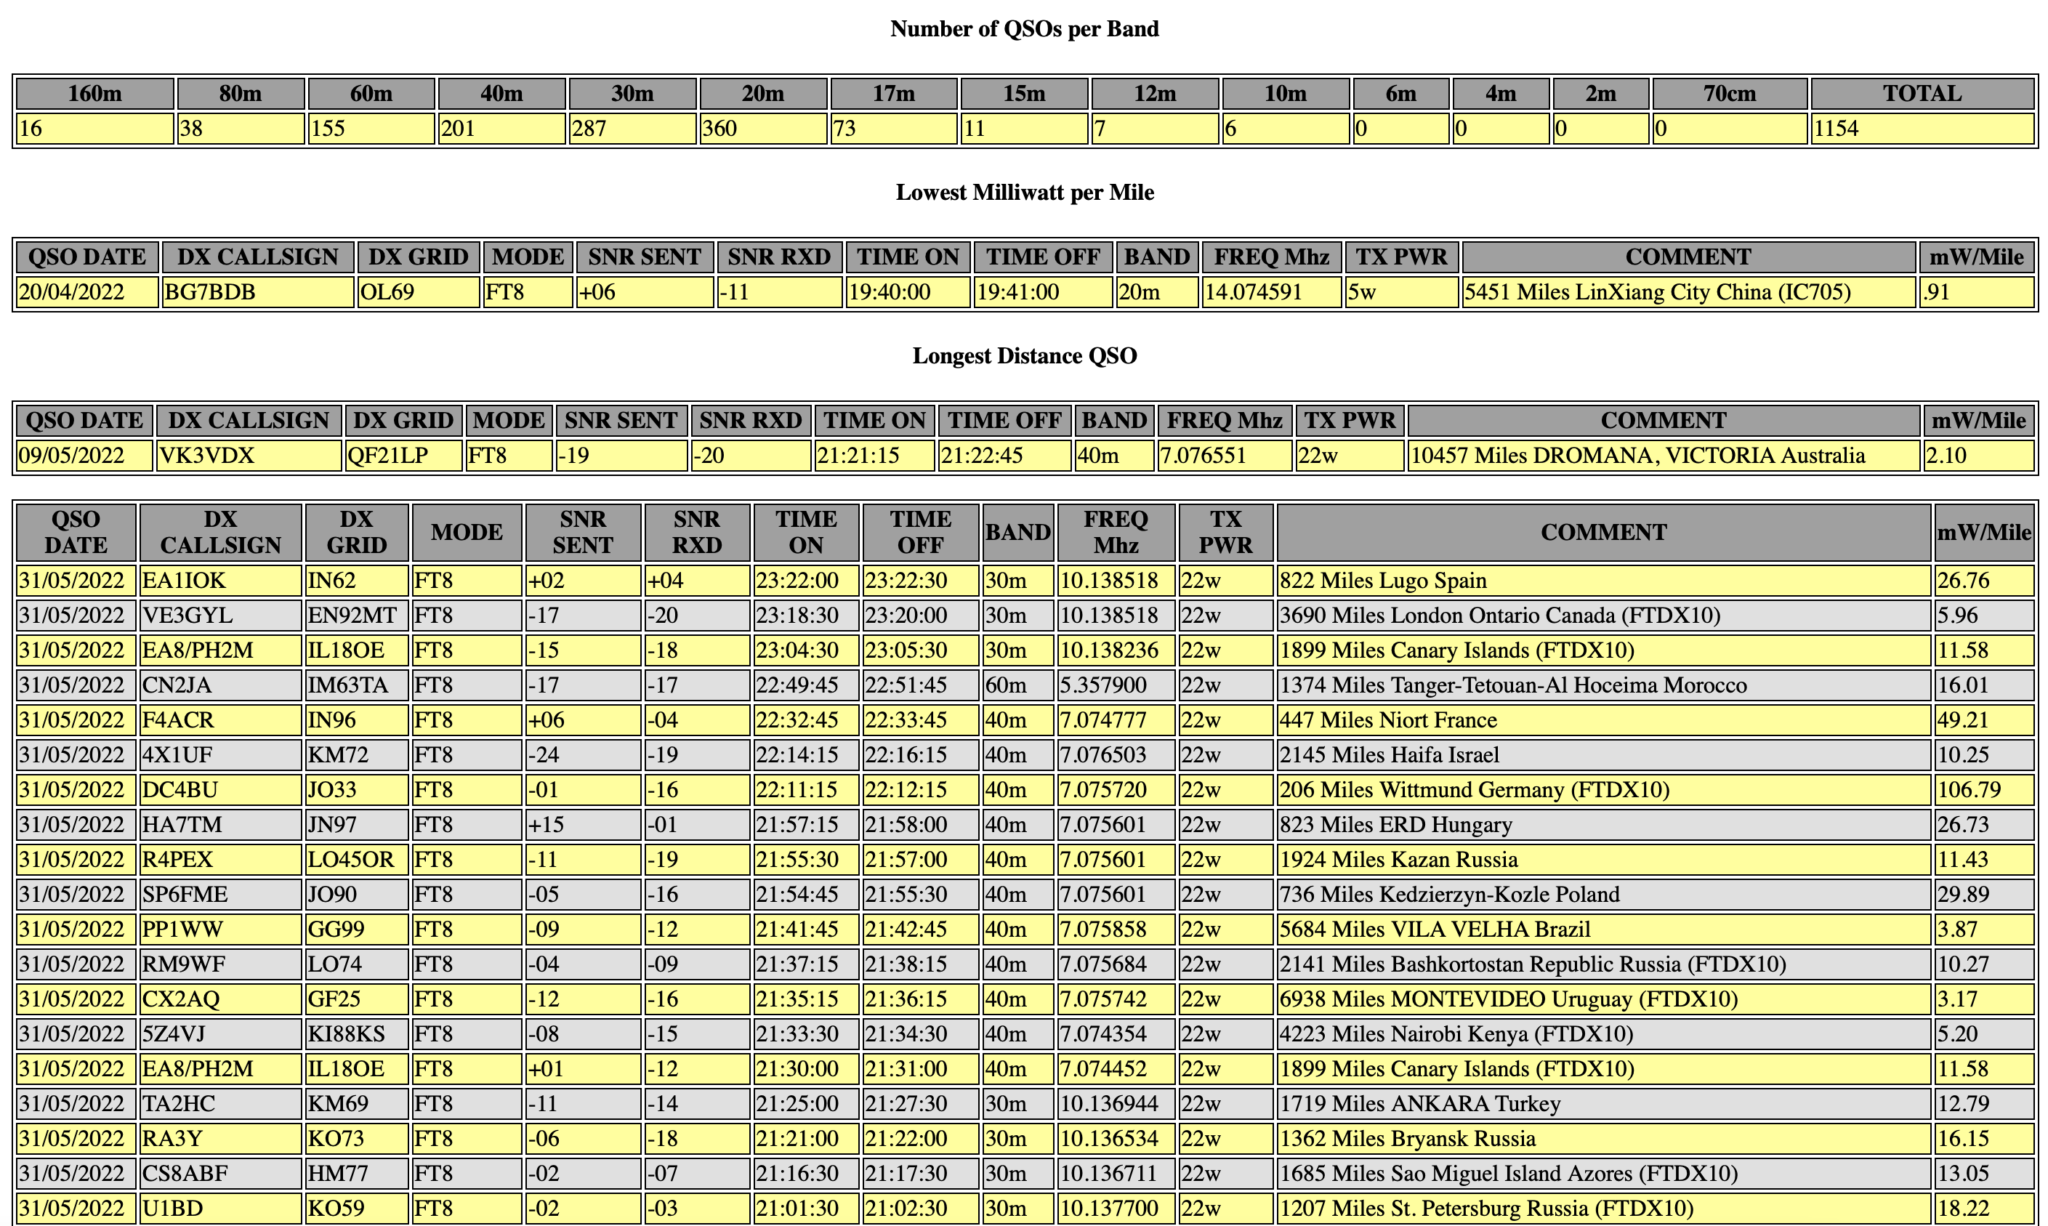
You can see the full list of stations worked on the over nighter on my WSJTX Log page.

More soon …
How low can you go?

Now that I’ve got my new radio shack up and running I decided to give my Icom IC-705 QRP rig an outing and see if I could work a distance of 2000 miles with 1w output.

This is something I’ve been wanting to do for a while but, only being able to sit at the picnic table in the garden or in the summer wasn’t particularly conducive to a long stint on the radio.

Icom IC-705 wirelessly connected to my MacBook Pro

For this challenge I decided to use FT4 or FT8, whichever was active on the bands. This is a great mode for QRP operations and can get a tiny signal through when other more traditional modes fail.

I used both my EFHW vertical for 20m/10m and my EFHW vertical for 30m that can also be tuned on most of the other HF bands too. This gave me most of the HF bands for the challenge.

Initially I worked a lot of stations in the 600-700 mile range, conditions weren’t brilliant and there was a lot of deep QSB.

My first notable distance QSO was with YO4DG near Mangalia Romania at 1383 miles, this equates to 0.72mW/Mile, my lowest mW/Mile achievement up until this point.

Not long afterwards I saw SV8DCY on the WSJTX waterfall, I wasn’t sure if he’d hear me or not but, I gave a call. To my surprise he came back and became the longest distance QSO for a short time. At 1485 Miles to Kalloni Lesvos Island, Greece this equates to a new low of 0.67mW/Mile.

I then went on to work a bunch of stations in the 1000 miles or less range for a while as conditions on the bands were up and down. It’s amazing how many times I got an answer from a station only for them to disappear completely before the QSO was completed.

The next contact of note was with CU3HN in the Azores, 1713 Miles at 0.58mW/Mile, a new lowest mW/Mile record set. it’s amazing how far you can get a signal with such a tiny amount of power.

RV6F in the Stavropol region of Russia was the next big mile marker, 1932 miles at 0.51mW/Mile. It took a number of attempts to get the QSO to complete as we kept losing each other due to the deep QSB that was between us on the 20m band but, with a little patience and persaverance we eventually got the QSO to complete and it was in the log.

At this point I decided to switch over to the 10m band to see if it had opened up to more than just Europe. When I checked earlier there were only European stations being heard, most being well under 1000 miles. Sure enough the band had indeed opened up and I was hearing stations out to the east that were in excess of 2000 miles.

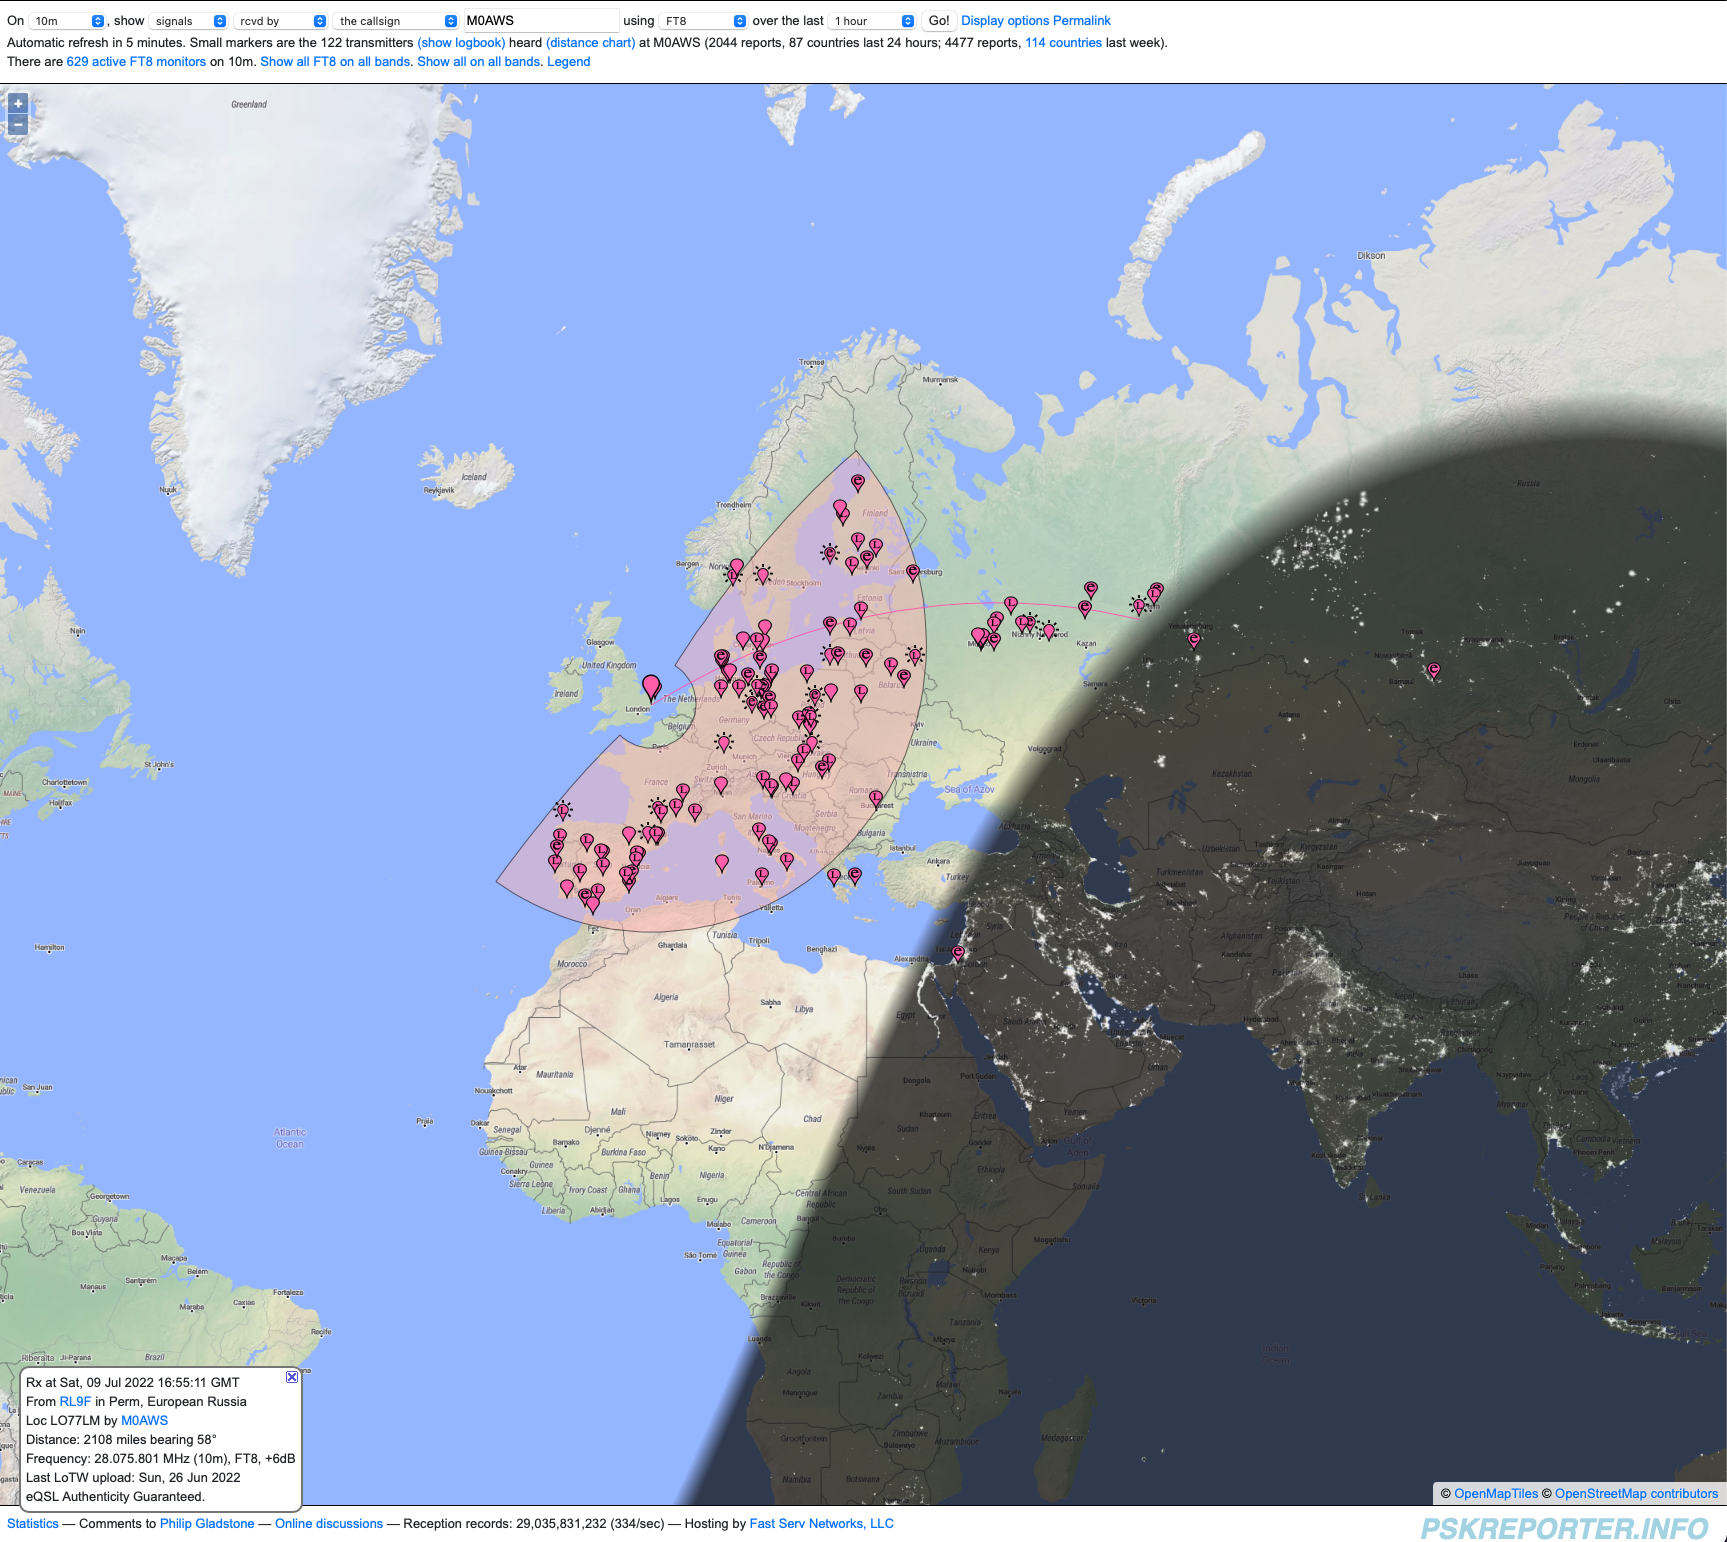
PSKReporter map showing signals heard on the 10m band

After tuning up and listening for a bit my first call was to RL9F in Perm Russia. This was the one that I’d been looking for, 2084 miles at 0.47mW/Mile this was the one that could complete the challenge.

After a few failed attempts due to deep QSB we eventually got a complete QSO in the log finishing the challenge.

2000 miles using 1w is a lot of fun, frustrating at times when you’re being heard by stations on the east coast USA but, none are answering your reply to their CQ calls.

PSKReporter has proven invaluable, being able to see who can hear you makes a big difference when trying to eek out the last mile when using next to no power.

In total 31 stations were worked over a 9 hour period, not huge numbers but, for many an M0AWS call sign isn’t exotic enough to answer and so many of my calls to stations were ignored. Sad really.

You can view all the log entries for the 2000 Mile 1 Watt challenge on my WSJTX Log.

So, what next? Well I guess it has to be 3000 miles or more using just 1w from my trusty Icom IC-705.

More soon …

New radio shack almost complete

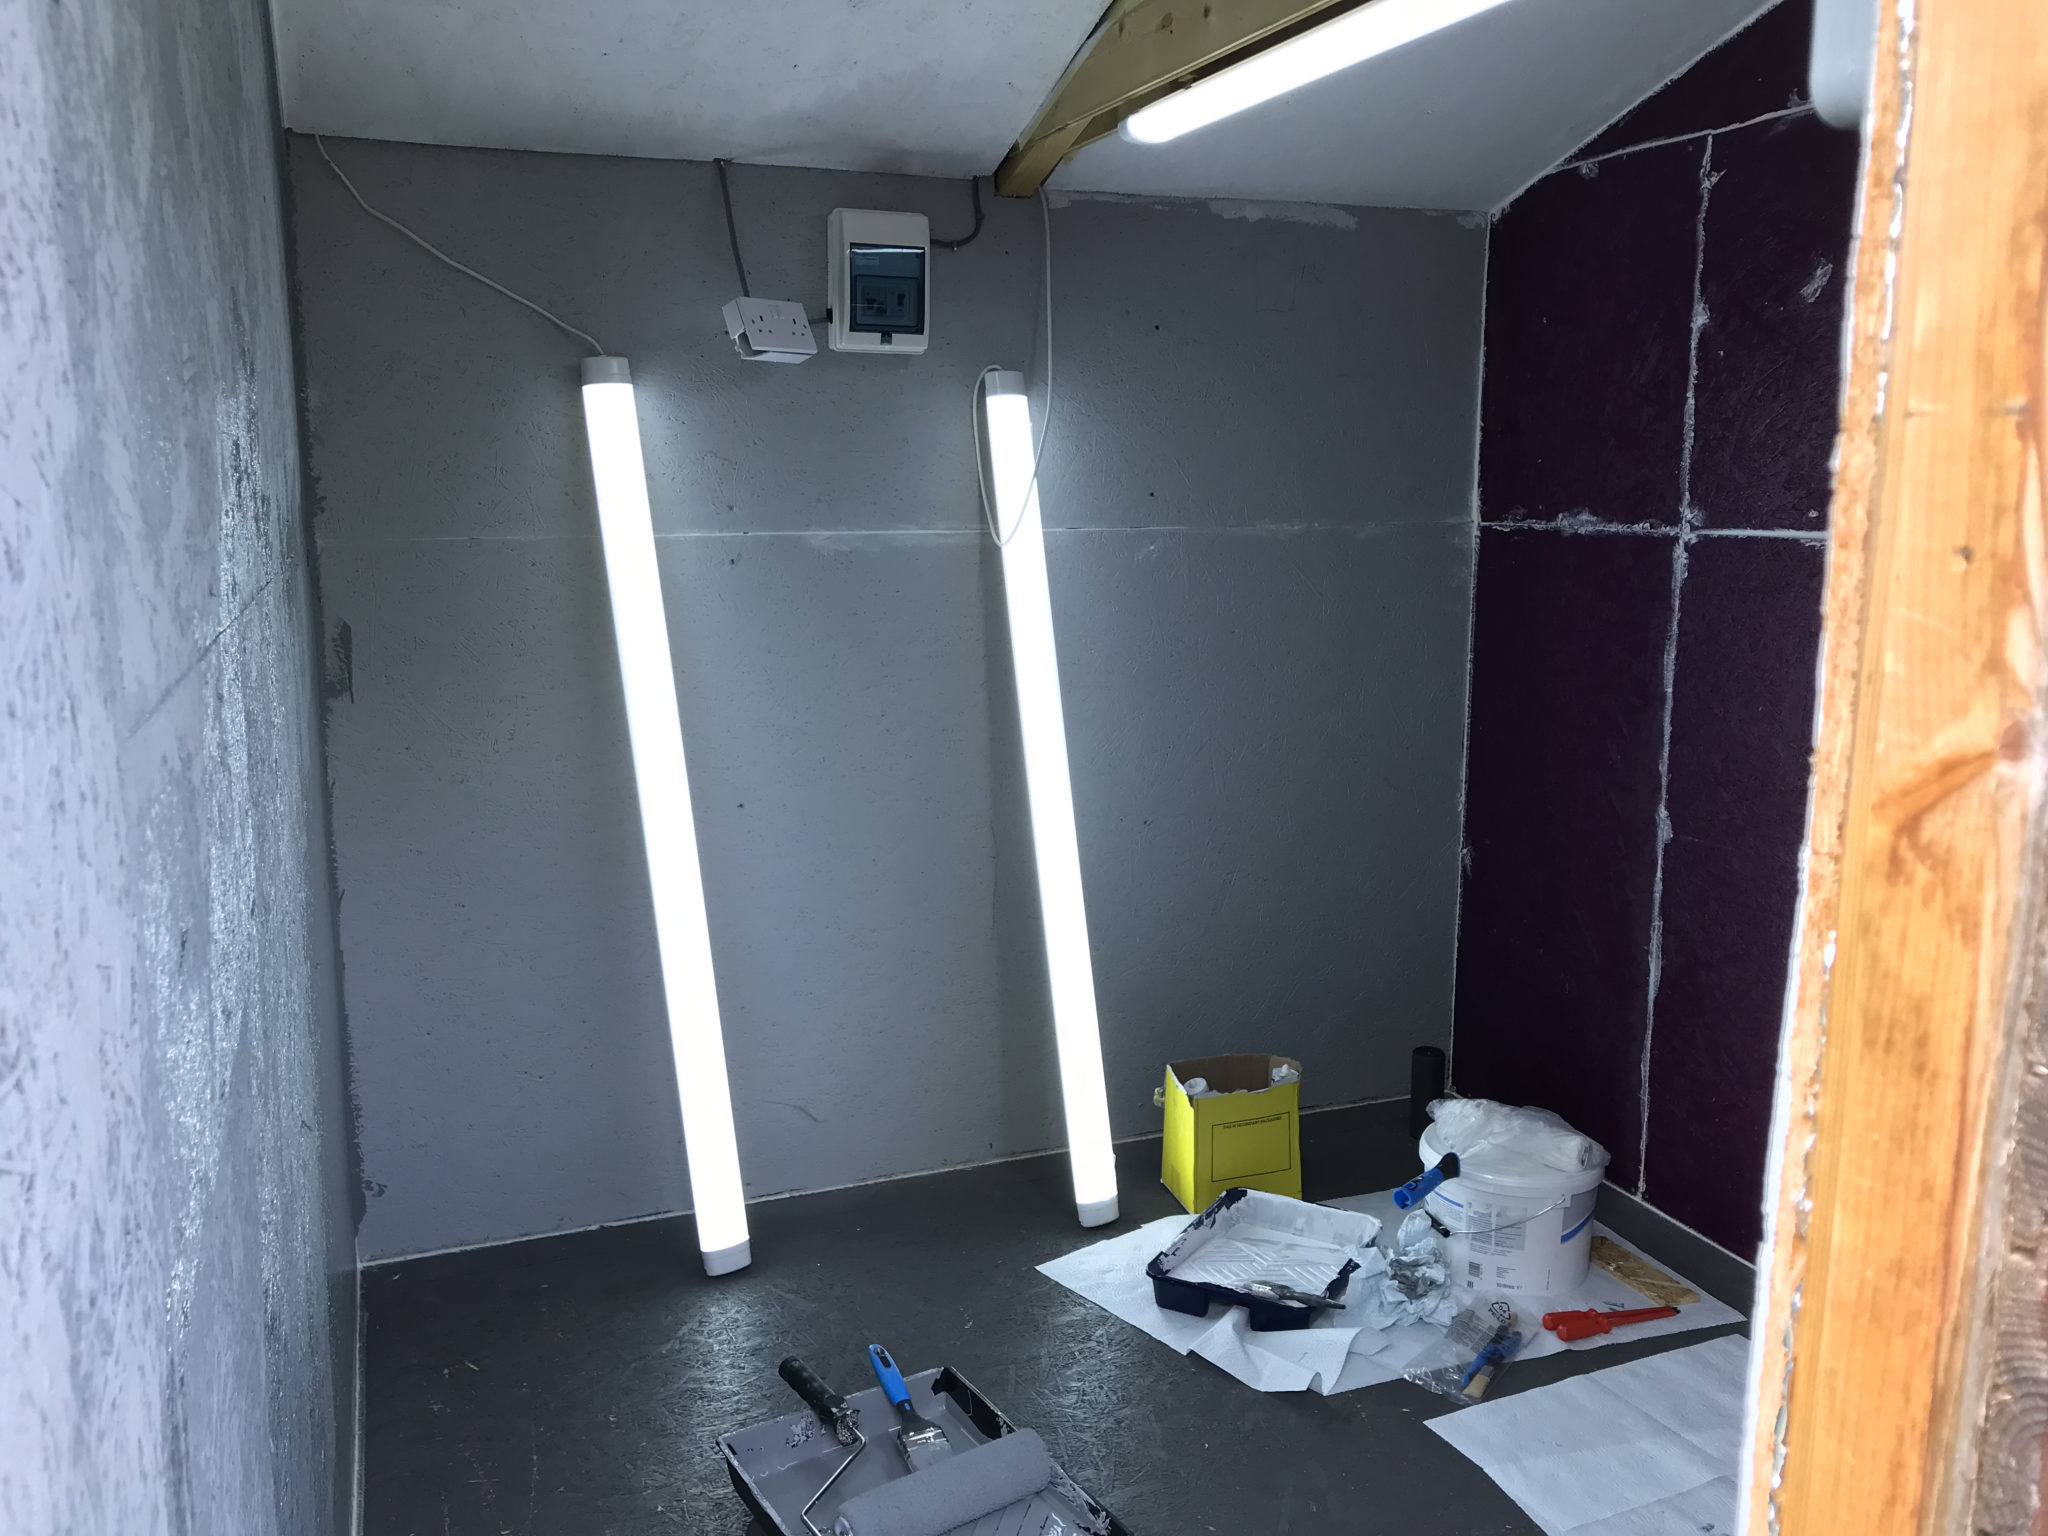
Over the last couple of weeks my wife and I have been busy converting part of my old motorcycle workshop into my new radio shack.

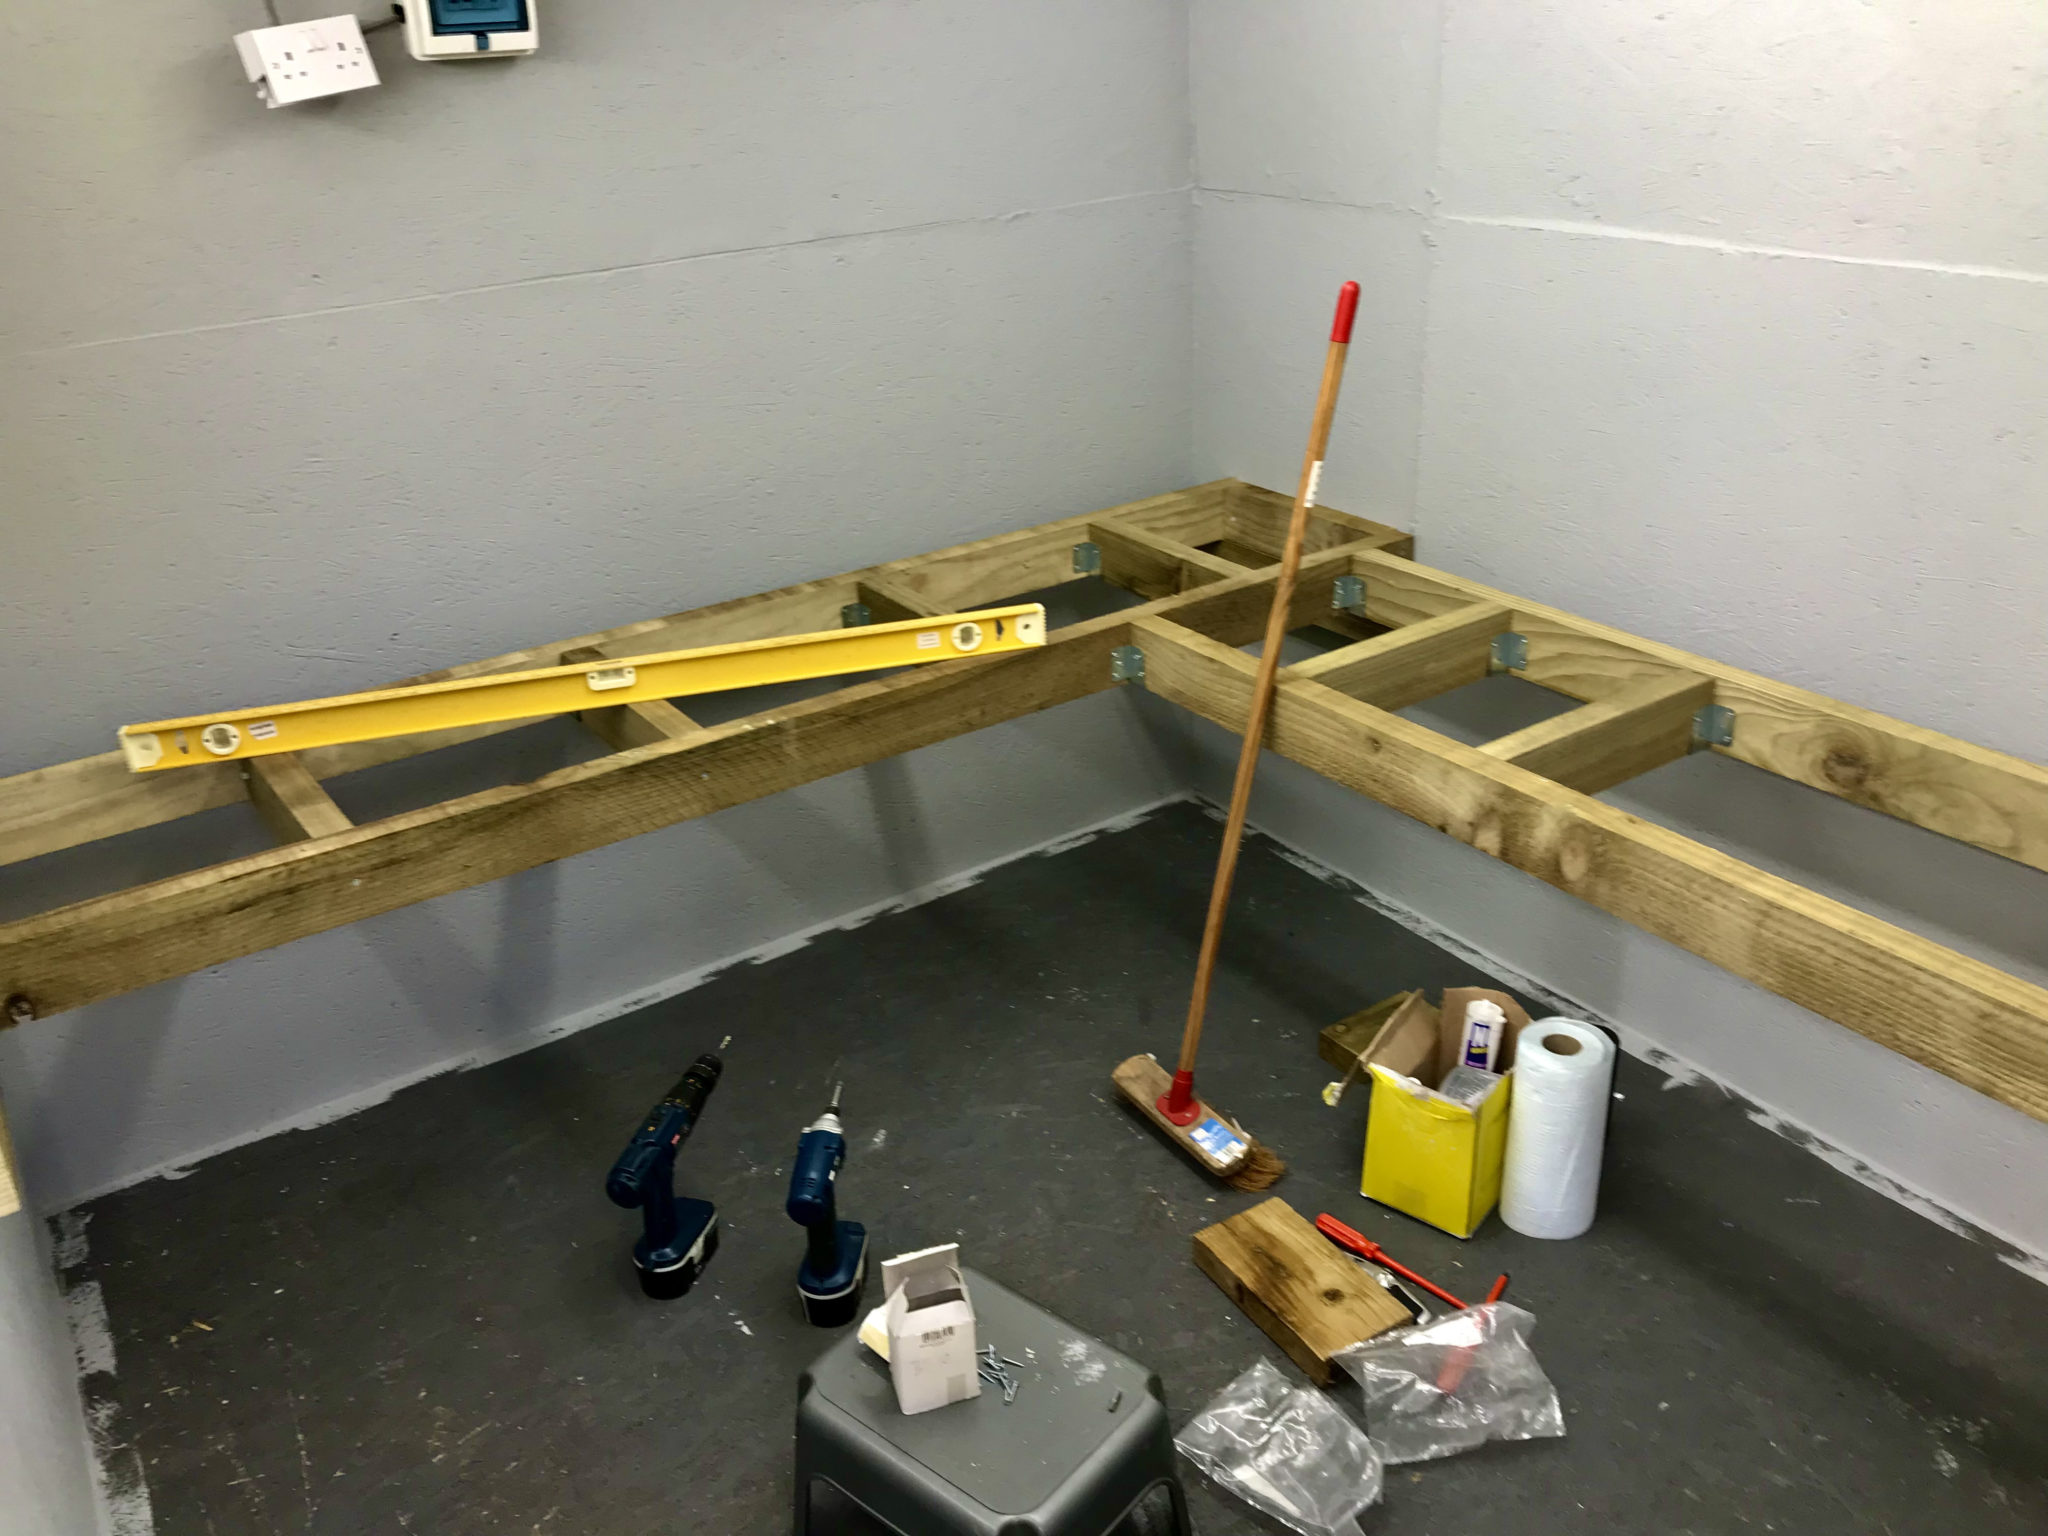
To save money we’ve custom built the desk ourselves using timber from a local supplier. I’ve done all the 240v power and lighting installation with a dedicated feed from the main distribution panel in the house.

Custom building the desk gives us a huge advantage in that it allows us to maximise usage of the available space. Using 10mm sterling board covered with 10mm plywood makes the desk solid enough to sit on whilst fitting all the power sockets.

Bennie overseeing the project

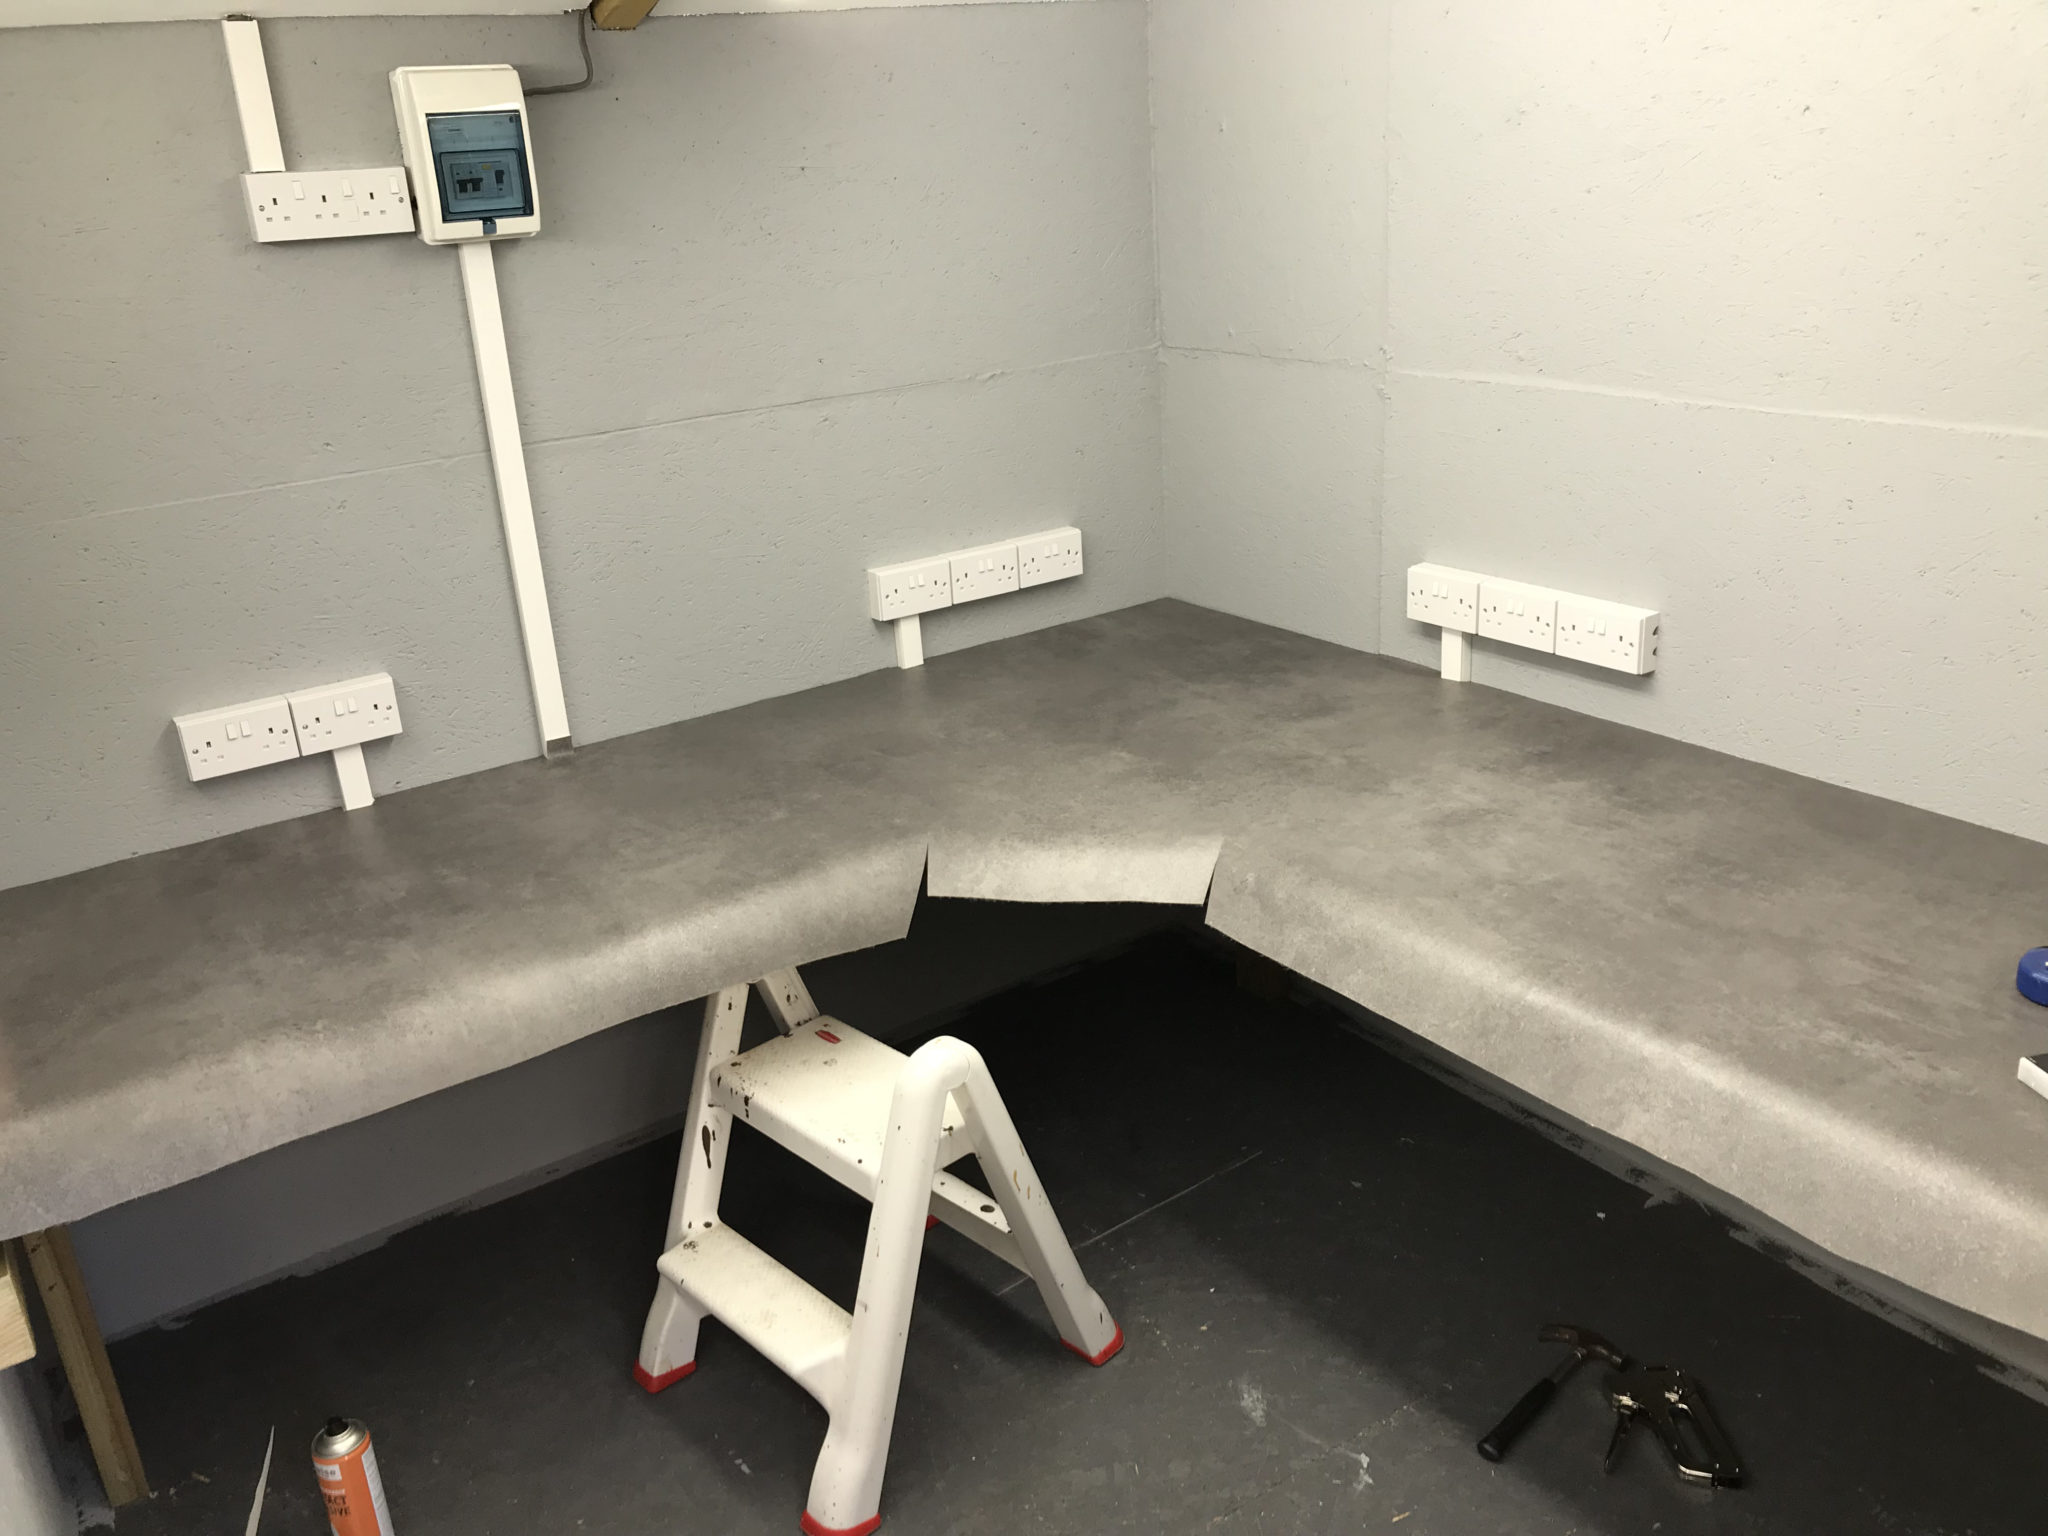
We used a good quality padded vinyl flooring for the desk covering as it allowed us to cover the desk area in one continuous piece. It was challenging to get all the cuts in the right place and get it glued down without it moving but, with a little care and patience we got it done. We’re both really pleased with the results!

I’ve just got to install some cable management and shelving to complete the project but, overall I’m really pleased with the new radio shack. I’m looking forward to the winter low band DXing season!

The new M0AWS Radio Shack

More soon …

How to make a webpage from your WSJT-X log file

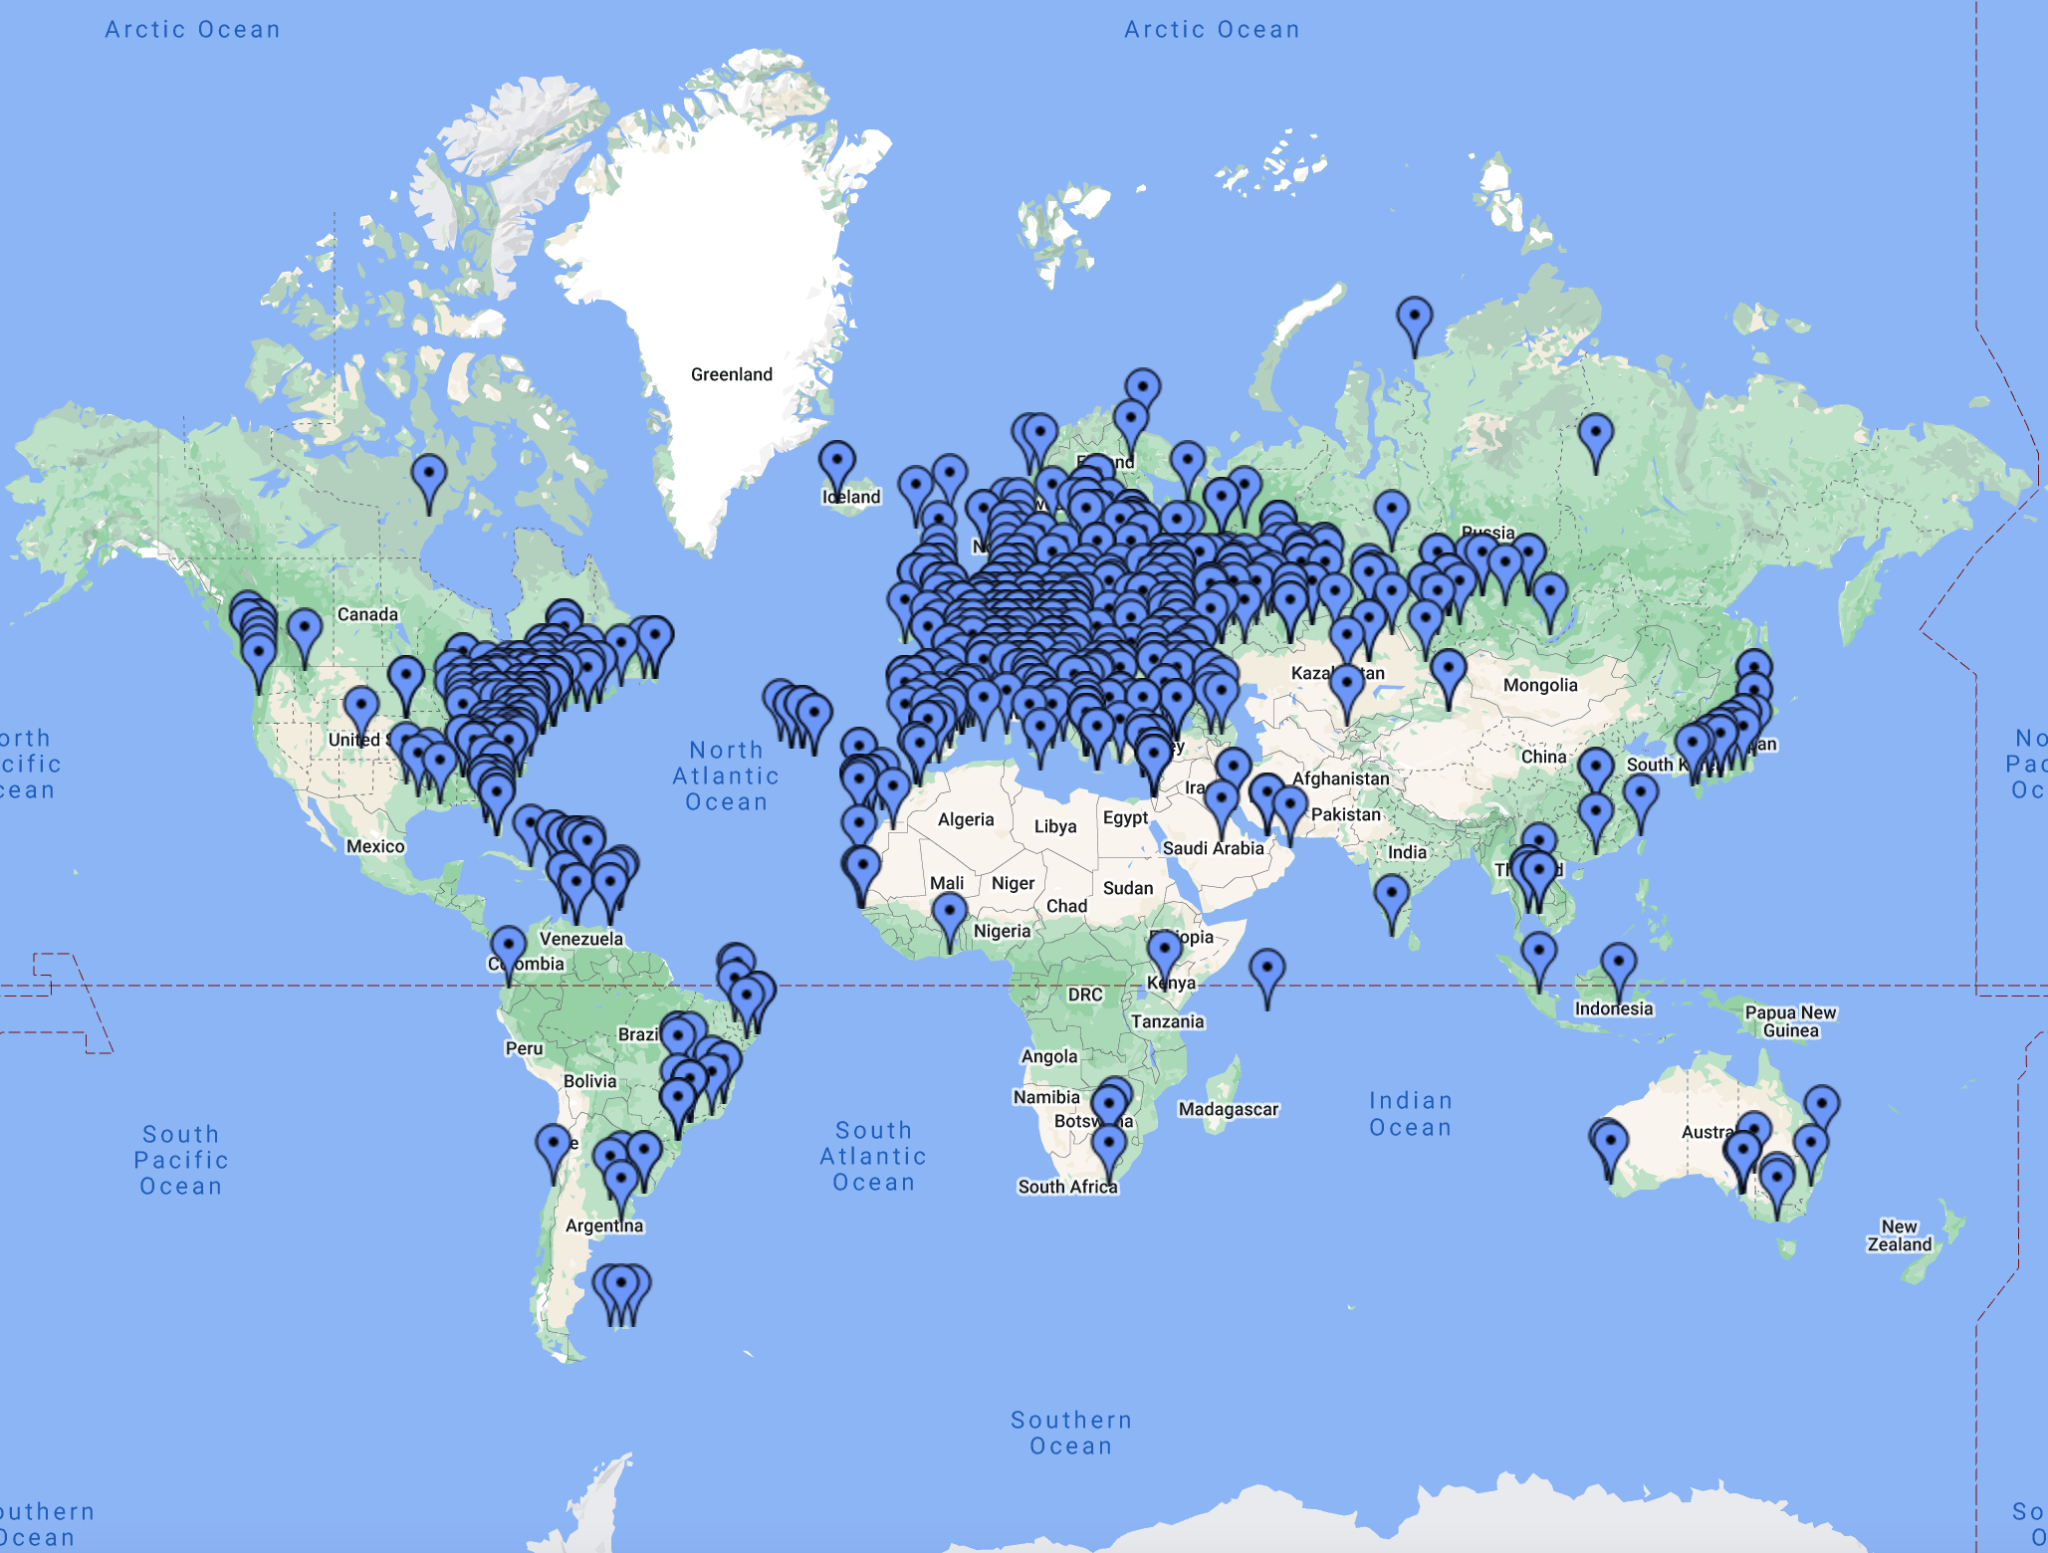
Map showing all M0AWS FT4/8 contacts

I’ve had a few messages of late asking how I generate my WSJT-X log web pages for my website. The answer is pretty simple, I use a little BASH script that I started writing some time back and have gradually improved over the last few months.

If you have a PC running Linux or a RaspberryPi running any of the normal Debian/Ubuntu/Redhat/Fedora based Linux distro’s that are available today then, this script should work just fine.

I originally wrote this program using Python but, a friend of mine bet me that I couldn’t write it in BASH and so, I took up the challenge and this is the result. It’s pretty simple and uses all the normal UNIX command line goodies like grep, sed and awk.

The script also uses WWL to calculate the distance between two Maidenhead locator grid squares and so it’s important to have it installed before running the script. (The script checks for it at runtime and will exit if it is not installed!). You can install WWL using your package manager on your Linux distro or from the command line directly. Details are in the READ-ME.txt file.

Screen grab from my M0AWS WSJT-X Log web page

It’s important that you READ the READ-ME.txt included in the zip file before trying to run any of the scripts included as it details the variables that you need to enter values for to make the script run on your PC/Server. (Example entries are in place as supplied).

The variables are mainly just paths to files on your system and whether you want distances calculated in miles or kilometres. Other than that there’s nothing else required for it to run.

I’ve also included details on how to run the script automatically from a crontab so that your webpage can be updated automatically every few minutes/hours etc.

The script also includes code to add a PNG map file into the generated webpage so that there is a graphical representation of all your QSOs. The map isn’t generated by the script (something I need to add in the coming few months) so you’ll need to generate it yourself and then add it to the website either via the crontab script included in the zip file or manually.

I use the QSOMap website to generate my map image files and then have them uploaded to my web server via the crontab script.

The script processes 100 entries per second on my web server (Headless virtual machine running Ubuntu Server 64bit Edition) and so should be pretty fast on most PCs. It will run somewhat slower on a RaspberryPi so be patient!

You can download the script and associated information using the button below.


If you do use my script please send me a link to your website so that I can take a look at your log file.

More soon …
MQ0AWS will be on air 01/06/22 – 30/06/22

To celebrate Her Majesty the Queen Platinum Jubilee, marking 70 years of service to the people of the United Kingdom, the Realms and the Commonwealth, U.K. Radio Amateur (HAM) operators can apply for a Notice of Variation (NOV) to use the Q Regional Secondary Locator.

The RSGB will also be operating a bunch of GB70 special event stations, full details on the GB70 website.

I have my NOV and will be on air using MQ0AWS for the whole of June 2022.

This callsign will operate for one month only and so will be a rare one for you to get in your log.

I will be operating on all HF bands 160-10m CW & FT4/8 and maybe some SSB depending on conditions.

All MQ0AWS logs will be uploaded to my website almost realtime and will be uploaded to EQSL at the end of June 2022.

If you hear me calling CQ please give me a call.

More soon …
Getting FLRig and FLDigi working wirelessly to the IC-705

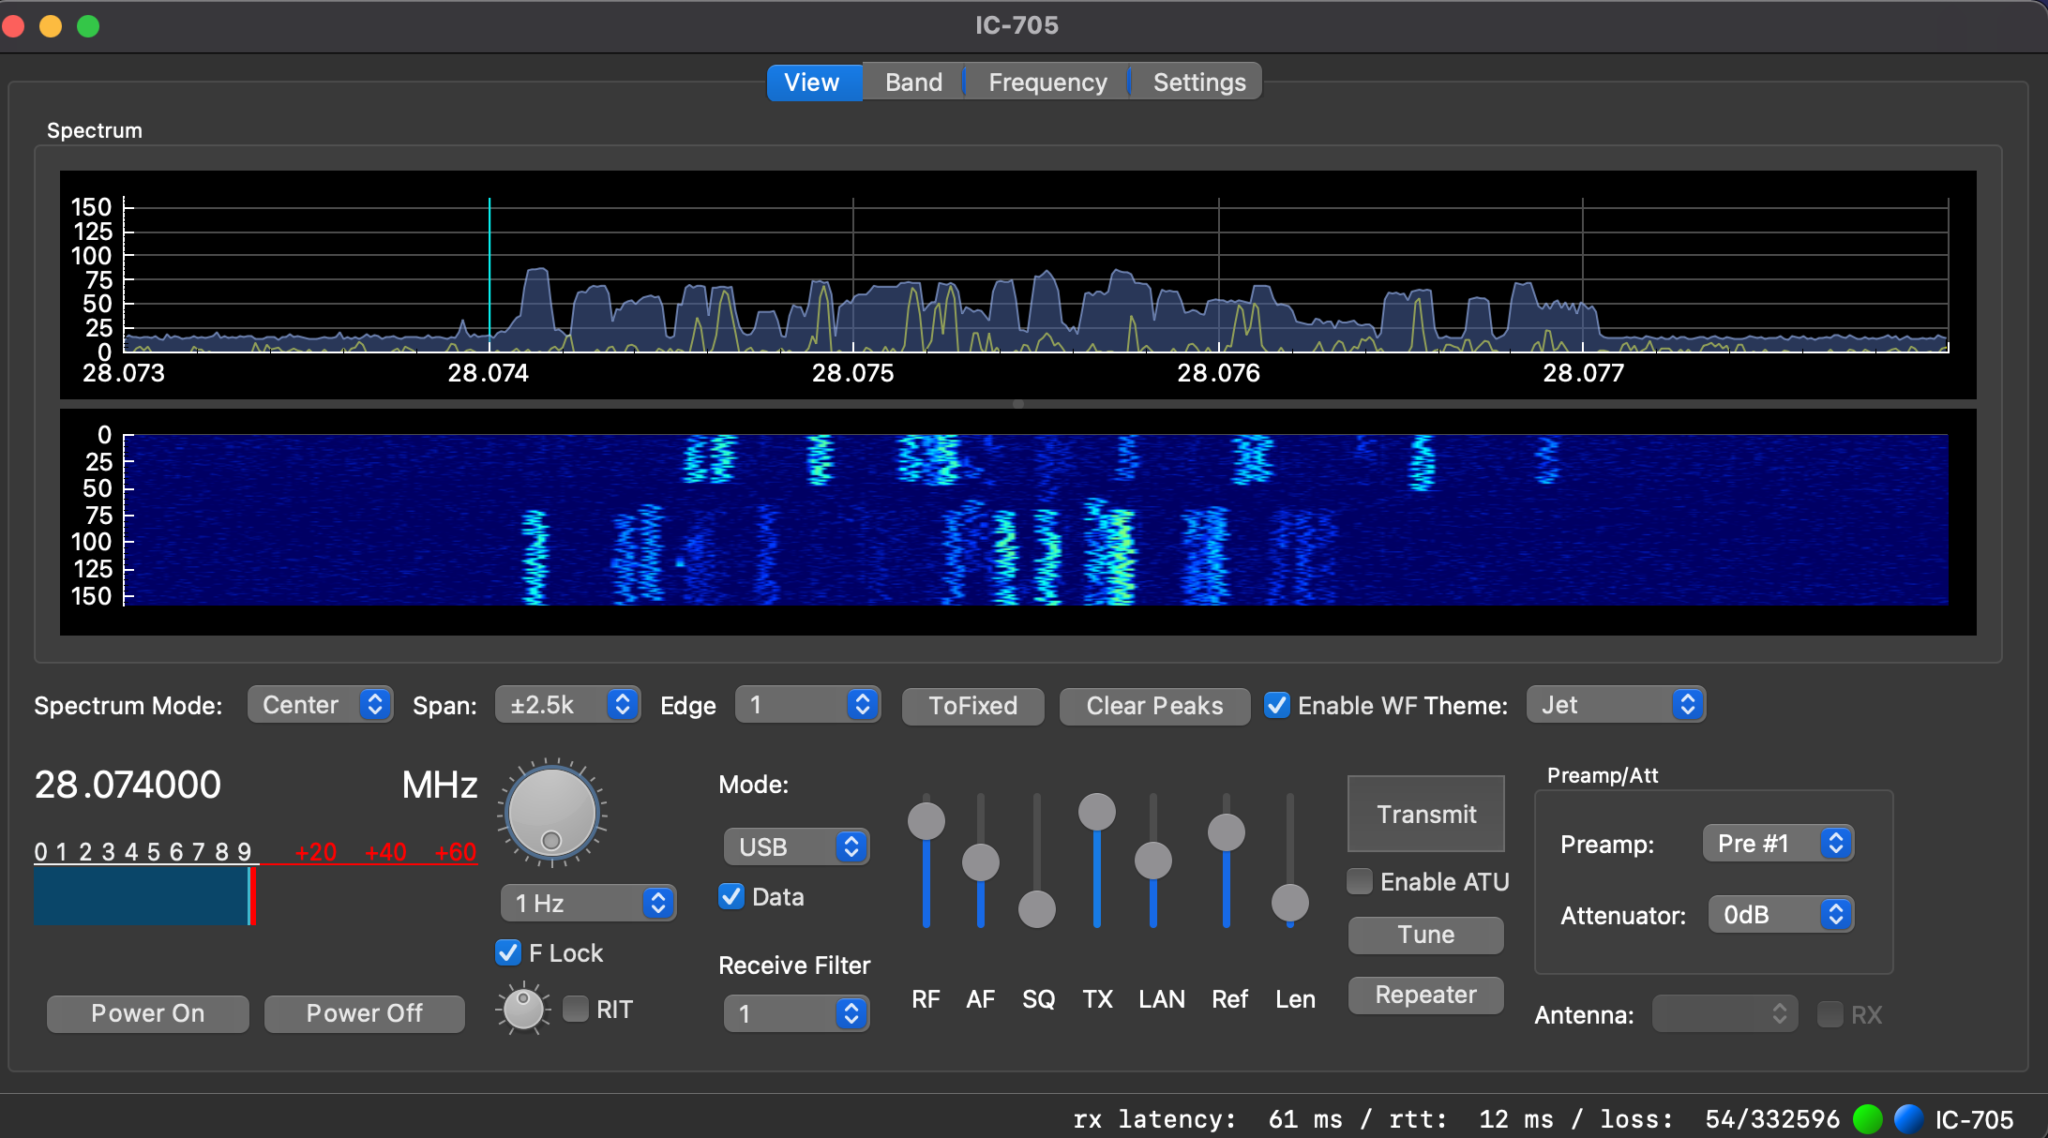
Screenshot showing WFView, FLRig and FLDigi all working wirelessly with my IC-705

In my “IC-705 Going Wireless with Apple Mac Computers” article I came across an issue whereby I couldn’t enter the correct path into FLRig to get the application to talk to WFView for CAT control of the IC-705 radio. I’m glad to say that I have now resolved this issue and detail it below.

Upon further inspection it appears that WFView uses a different /dev/ttys00x port each time it is started. It seems to round robin on ports 001 to 006. It’s quite clever in that it doesn’t actually directly use the port, each time the WFView app is started it creates a softlink to the next port after the one it last used.

The softlink is created with the same name each time the app is started but, it just points to the next /dev/ttys00x port available.

In my WFView setup I selected the first virtual serial port in the drop down list and so this soft link (AKA Symbolic link) gets created each time the WFView app is started.

/Users/username/Library/Containers/org.wfview.wfview/Data/Downloads/rig-pty1

Above soft link used by WFView (Replace “username” with your username)

The problem with FLRig is that it won’t allow you to type in this path to the serial port field, it only has a drop down list that doesn’t include this path.

The way around this is to edit the settings file IC-705.prefs in the .flrig folder in your home directory and manually enter the path to the correct field.

In the file there is an entry that starts with xcvr_serial_port: you just need to add the long path from WFView after the colon on the same line as shown below.

xcvr_serial_port:/Users/username/Library/Containers/org.wfview.wfview/Data/Downloads/rig-pty1

NOTE: Change username to your username as shown in the virtual serial port field in the WFView settings tab.

Once you’ve edited the file, save and close it and then start WFView and let it connect to the IC705 and then start FLRig. You’ll find it now connects to WFView directly and gains CAT control of the radio without issue.

You shouldn’t need to ever edit the IC-705.prefs file again as the settings are stored permanently. It should just work each time you start the FLRig app.

To get the frequency display on FLDigi just go into settings and switch on the FLRig CAT control, it will get all the data from FLRig and present it as shown in the screenshot above.

More soon …
IC-705 – Going wireless with Apple Mac computers

Since getting my Icom IC-705 I’ve had problems with computer noise causing interference when connected via USB. I solved the problem mostly by winding both the USB and coax cables around 240-31 ferrite toroids. This resolved the problem nicely on all HF bands except 10m. With further investigation I realised that the 240-31 ferrite toroid doesn’t provide much choking resistance at 28mhz and so a 240-43 would be better for the higher bands. This would mean I’d need a longer USB cable and coax to the AH-705 so that there was enough cable to wind around two ferrite toroids to cover all the HF bands.

Whilst this will almost certainly provide a complete solution to the problem there is of course another way around this issue. The IC-705 is a rare beast in that it has wifi capability built in. The wifi on the IC-705 is capable of operating in one of two different modes, Access Point (AP) and Station, a host on an existing wifi network.

Since I connected my IC-705 to my in-shack wifi I am using the radio in station mode for connectivity via wifi. By connecting it this way my MacBook Pro will also have access to the internet at the same time as connecting to the radio giving me the best of both worlds.

You can of course put the radio into AP mode and connect your computer directly to it via wifi however, you won’t have any internet access from the computer as it will be connected directly to the radio. This is how it will be used when in the field for portable operations unless you have a portable 3/4/5g wifi router.

Getting the radio connected to my shack wifi was easy, just go into the IC-705 menus, switch the WLAN on, pick the SSID of my wifi router and enter the password, the radio connects immediately. You will also need to switch on the network control option and also set up a user and password that is used when connecting to the radio from your computer. Refer to the IC-705 manual on how to do this if you haven’t done it already.

To be able to use the radio wirelessly from any Apple Mac computer you will need 2 applications, WFview and Blackhole. Both of these applications are Opensource Software, I’m a huge fan of Opensource Software and have over the years been involved in a number of opensource projects.

I’m fully aware that there is an application called SDR Control available on the Apple App Store for around £90.00 that can be used instead to connect to the IC-705 wirelessly however, I prefer to use Opensource software where possible.

Before proceeding with the instructions below make sure you have an up to date backup of your system. This installation and configuration shouldn’t cause any issues at all, it worked fine on my MacBook Pro but, it’s always best to backup before you install more complex software like this.

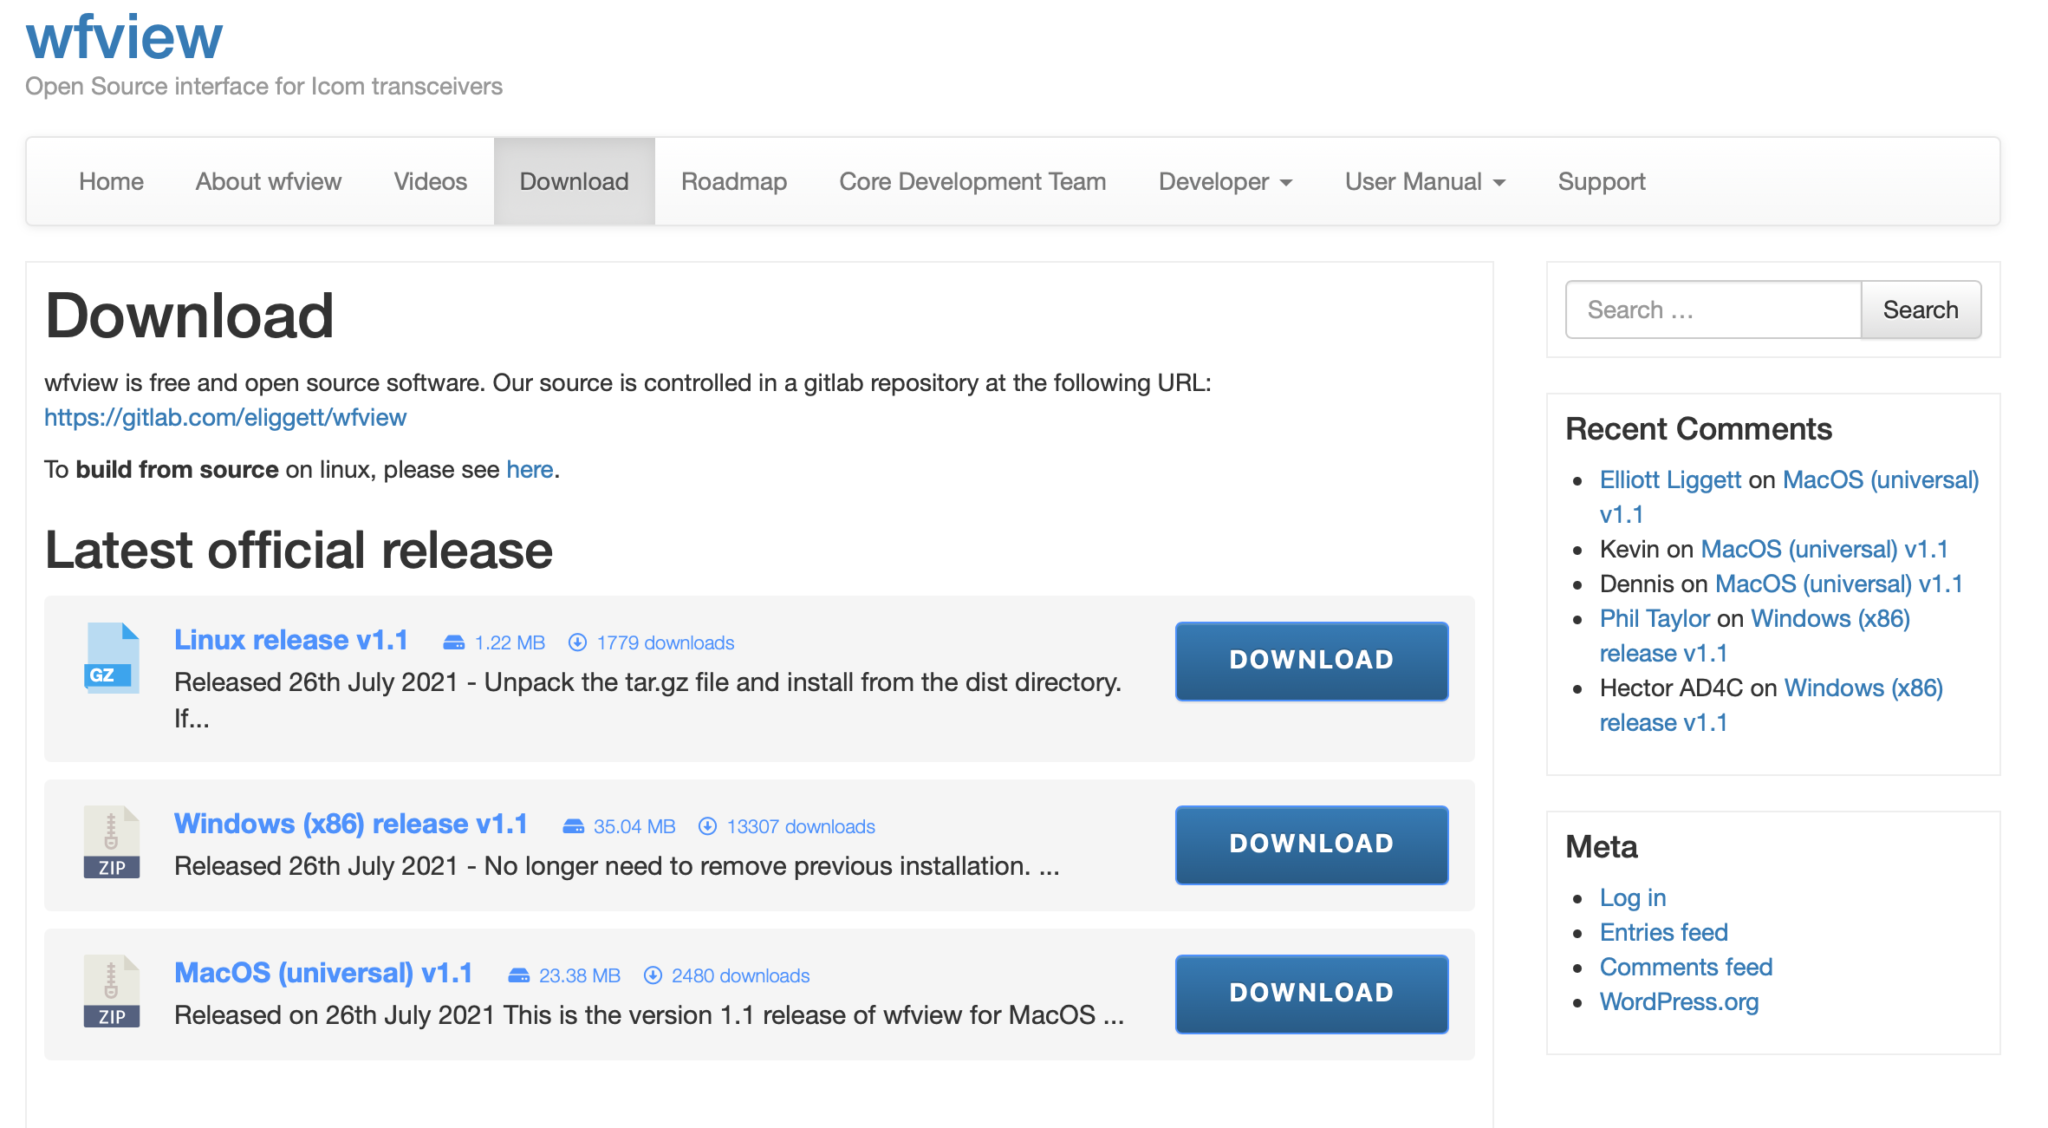
First you need to download WFView from the Download page, make sure to download the MacOS Universal package which was v1.1 at the time writing this article. Do **not** install WFView yet, the sequence of installation is important!

WFView Download page showing the MacOS (Universal) Package v1.1

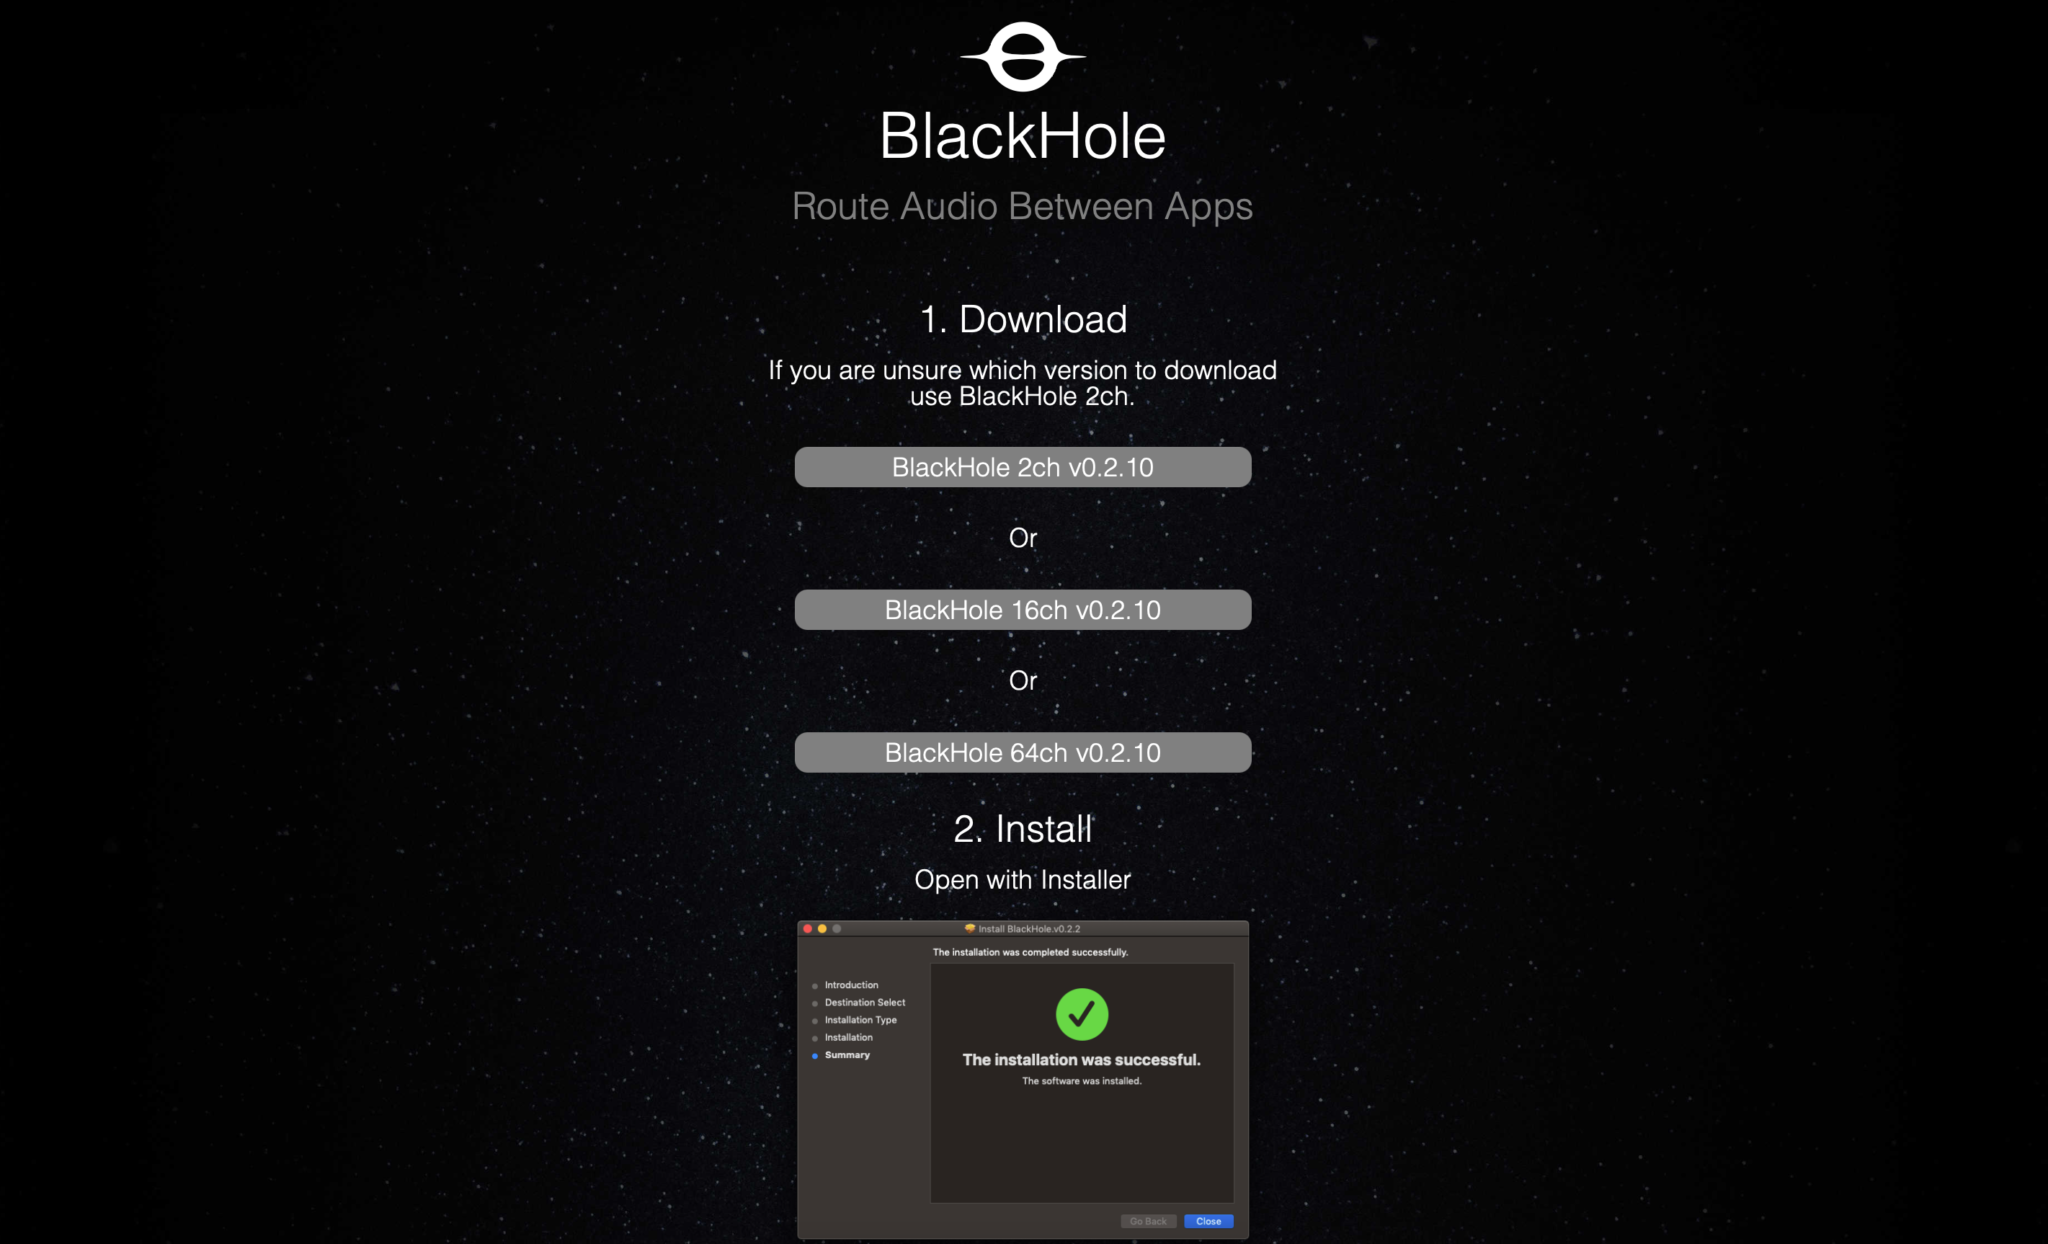
Next download the Blackhole Virtual Audio Cable application from the download page. You will need to enter an email address and your name to be able to download the application. It’s not clear how much email/spam will be sent to you but, you will need to get at least one email to obtain the download link with the authorisation code in it.

Once you’ve entered the information and submitted it you will get an email with a URL enclosed, click the URL and goto the download page. On the page there are 3 options available for download, select the “Blackhole 2 Ch” option only. At the time of writing this v0.2.10 was the current version available.

Blackhole Download page showing the 3 options available

Once downloaded you need to install the Blackhole application first as it will create the necessary virtual audio cable for WFView to use to provide sound to WSJT-X and other digital mode applications. Installation is simple and follows the normal MacOS installation process. Double click the installation package and follow the prompts accordingly.

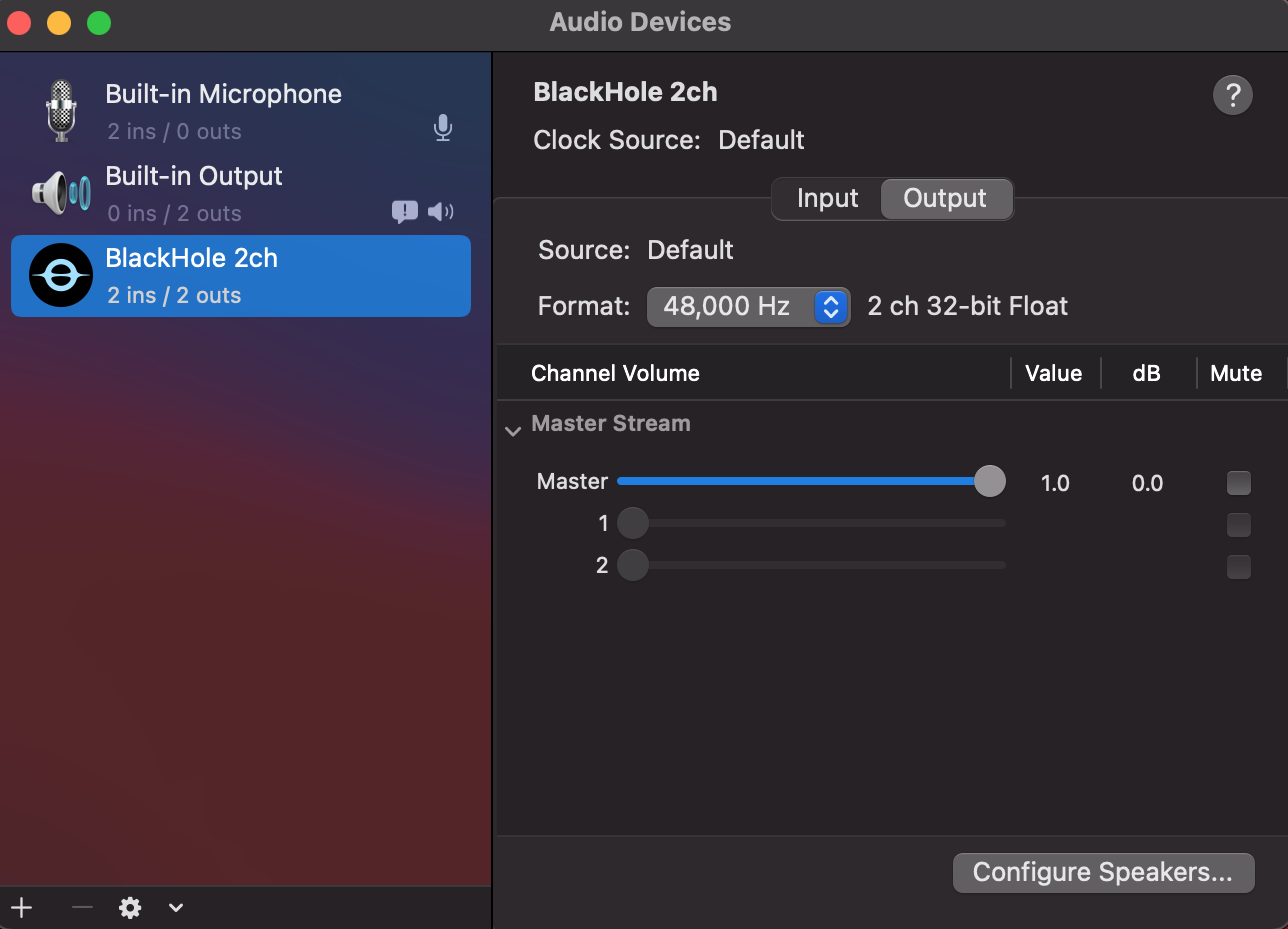
Once installed reboot your Apple computer to make sure it starts up OK with the new kernel module installed. When your system comes back up, login and open the “Audio Midi Setup” application. (The Midi app is in Applications >> Utilities)

Once the application opens you should see that you have a new audio device called “Blackhole 2ch”. On both the Input and Output tabs set the format to 48,000Hz. This setting will get the best results when using applications like WSJT-X for FT4/8 digital modes.

Apple Audio Midi Setup showing 48,000Hz selected

Leave everything else as default setting in the Audio Midi App, nothing else needs changing. Leave the Master volume at the default max as levels are controlled from the other apps.

Once you’ve set the 48,000Hz on the two tabs quit the audio midi app as it’s no longer required.

Next you need to copy the WFView app that you downloaded into the Applications folder on your Mac. Once in the applications folder you can create a shortcut to it on the dock by dragging and dropping the app icon onto your dock bar.

Next goto your IC-705 and go into the WLAN settings and make a note of the IP Address assigned to the radio from your wifi router. You will need this IP Address later.

At this point you are half way to having wireless control of your IC-705.

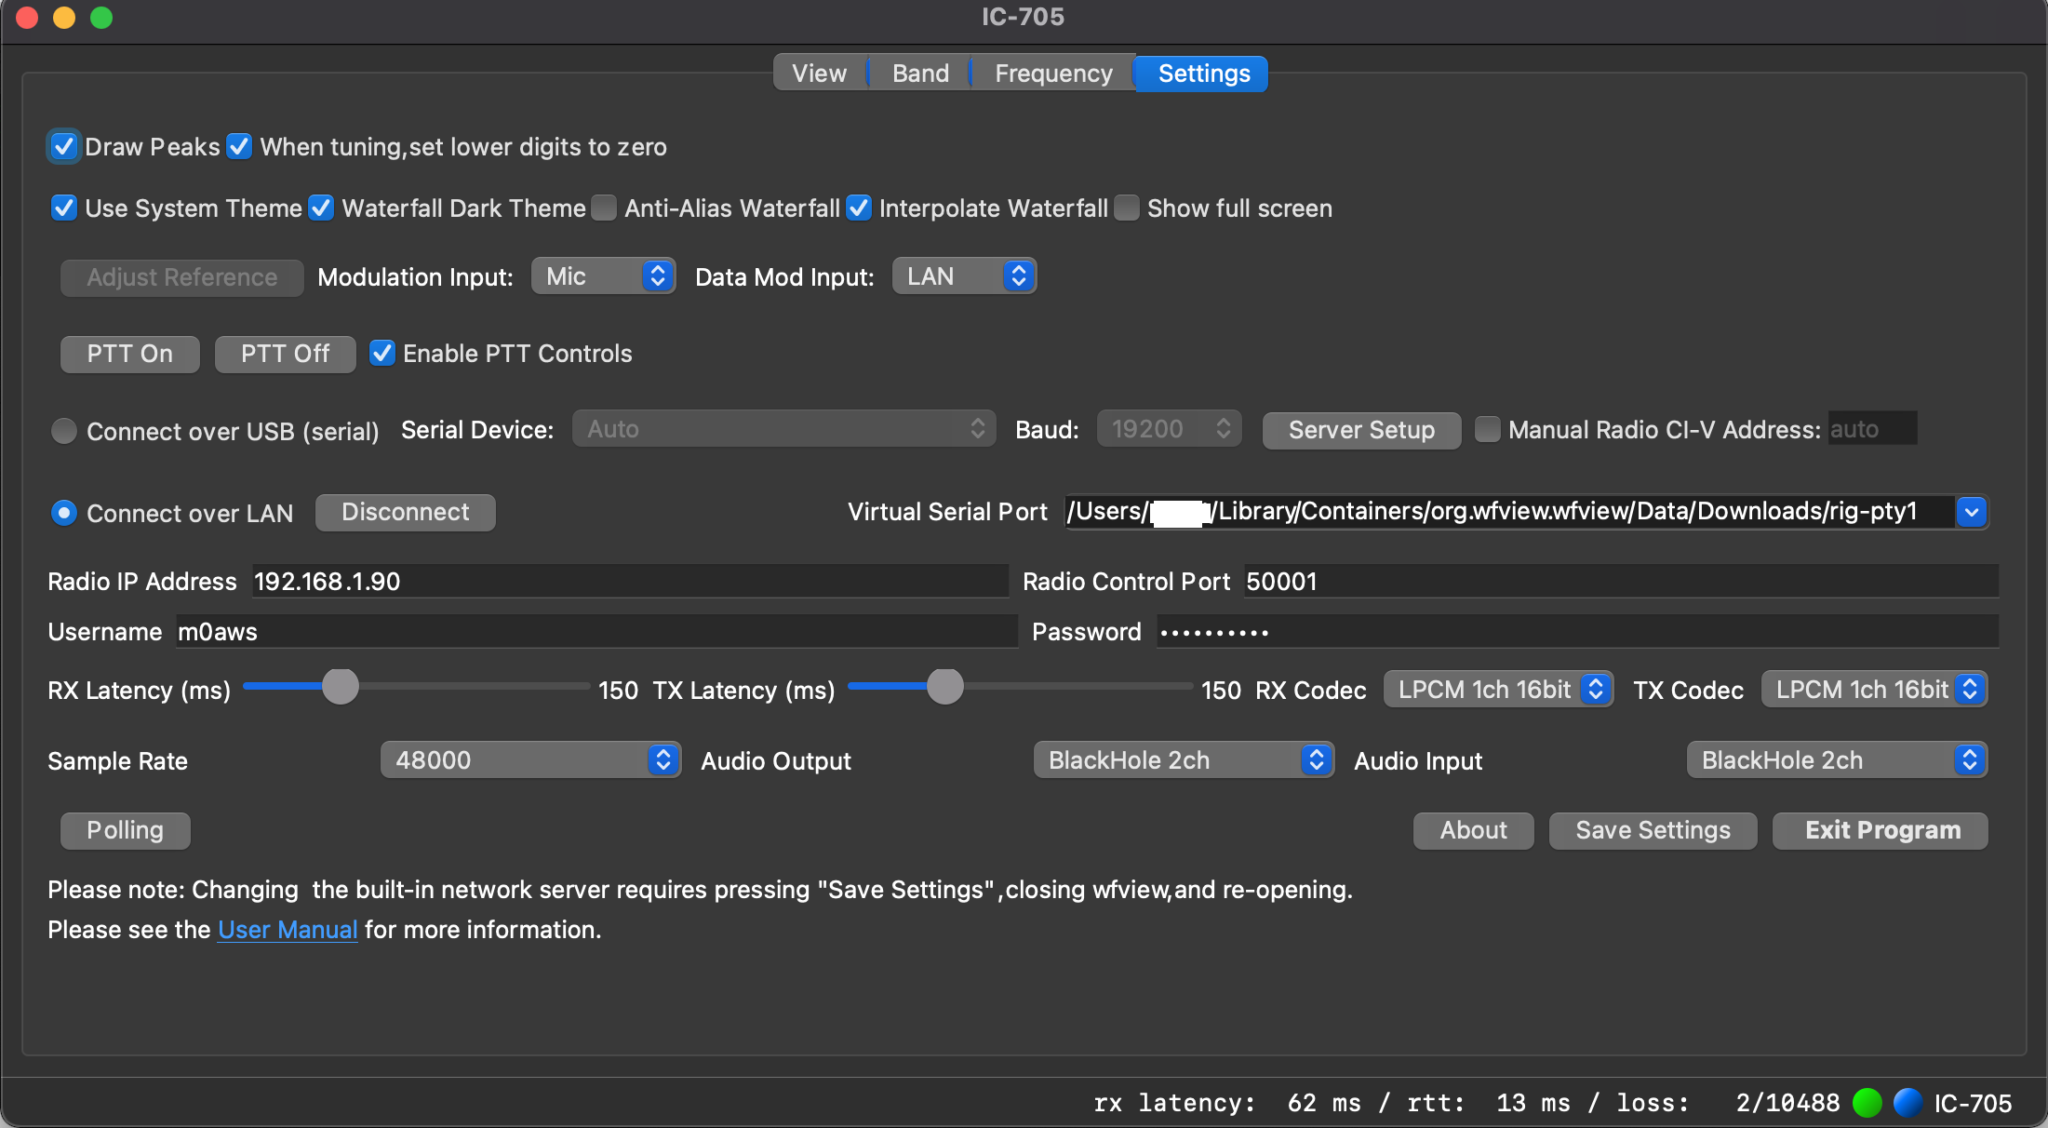
Start the WFView application and goto the settings tab.

The following settings need to be made:

1: Set Data Mod Input to LAN

2: Click the Connect Over LAN radio button.

3:Enter the IP Address from your IC-705 into the Radio IP Address field.

4: Make sure Radio Control Port is set to 50001

5: Enter the Username you configured on your IC-705 into the Username field

6: Enter the Password you configured on your IC-705 into the Password Field

7: Set Sample Rate to 48000

8: Set Audio Output and Input fields to BlackHole 2ch

9: Select the first option available in the Virtual Serial Port field. This should be as shown below:

/Users/username/Library/Containers/org.wfview.wfview/Data/Downloads/rig-pty1

Note: Replace username with your login username.

Leave all other settings as default and click Save Settings and then Exit Program.

You must exit the application in order to restart it with all the new settings.

WFView Settings tab showing all the necessary settings whilst connected to the radio

Start the WFView application again and goto the Settings tab. Click on the Connect Button.

Once it has connected to the radio you will see the RX Latency details etc on the bottom right of the window. Click on the View tab and you should now have an active waterfall.

At this point you have full control of your IC-705 wirelessly. Have a play with the application and get familiar with it.

Fully operational WFView connected to my IC-705 receiving FT8 on 10m

Once I had WFView operational I set about getting WSJT-X connected to the radio wirelessly. This is actually really simple to do and just needs a couple of changes to the settings to make it work.

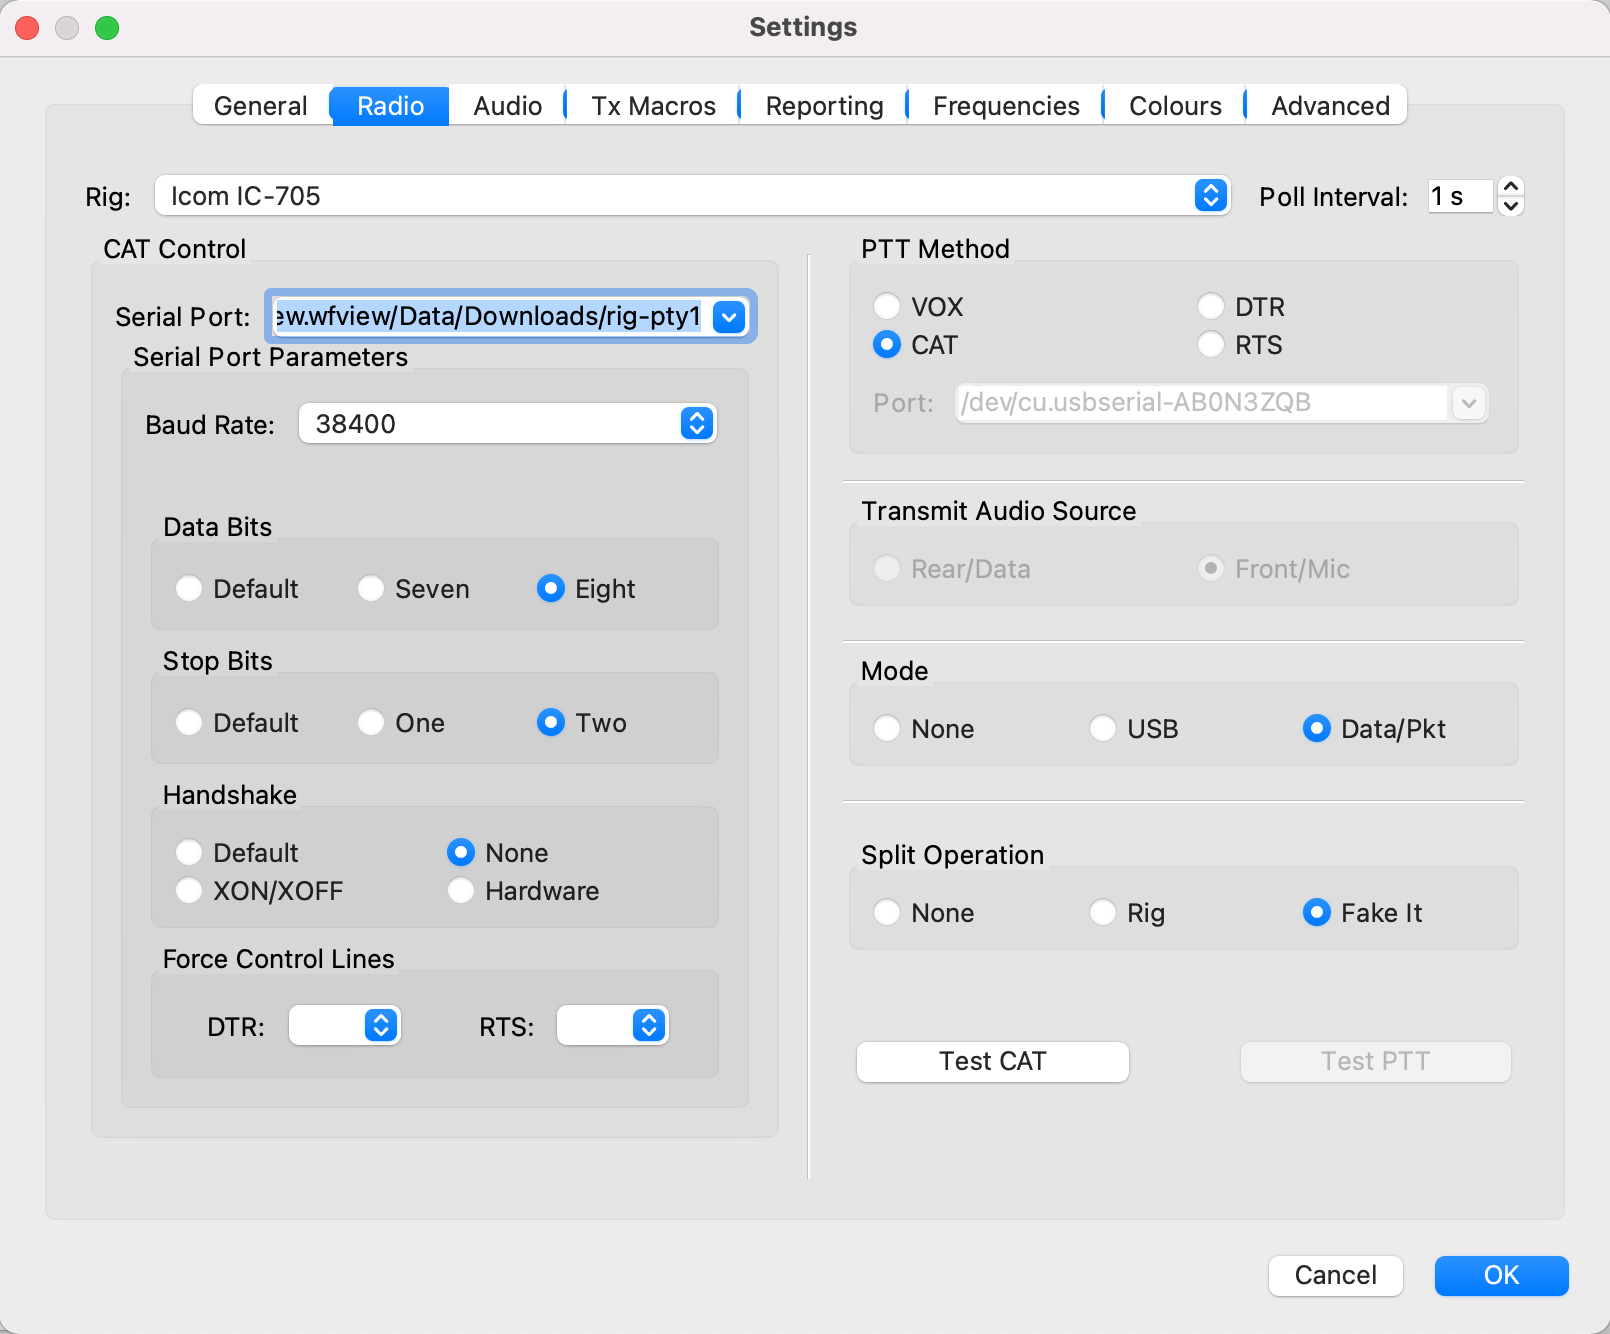
Start up the WSJT-X application and goto the Radio Settings tab. On this page you need to set the radio to IC-705, serial port to that shown below (Also shown in point 9 in the WFView section above) and Baud Rate to 38400.

/Users/username/Library/Containers/org.wfview.wfview/Data/Downloads/rig-pty1

Note: Replace username with your login username.

WSJT-X Settings showing Serial Port and Baud Rate

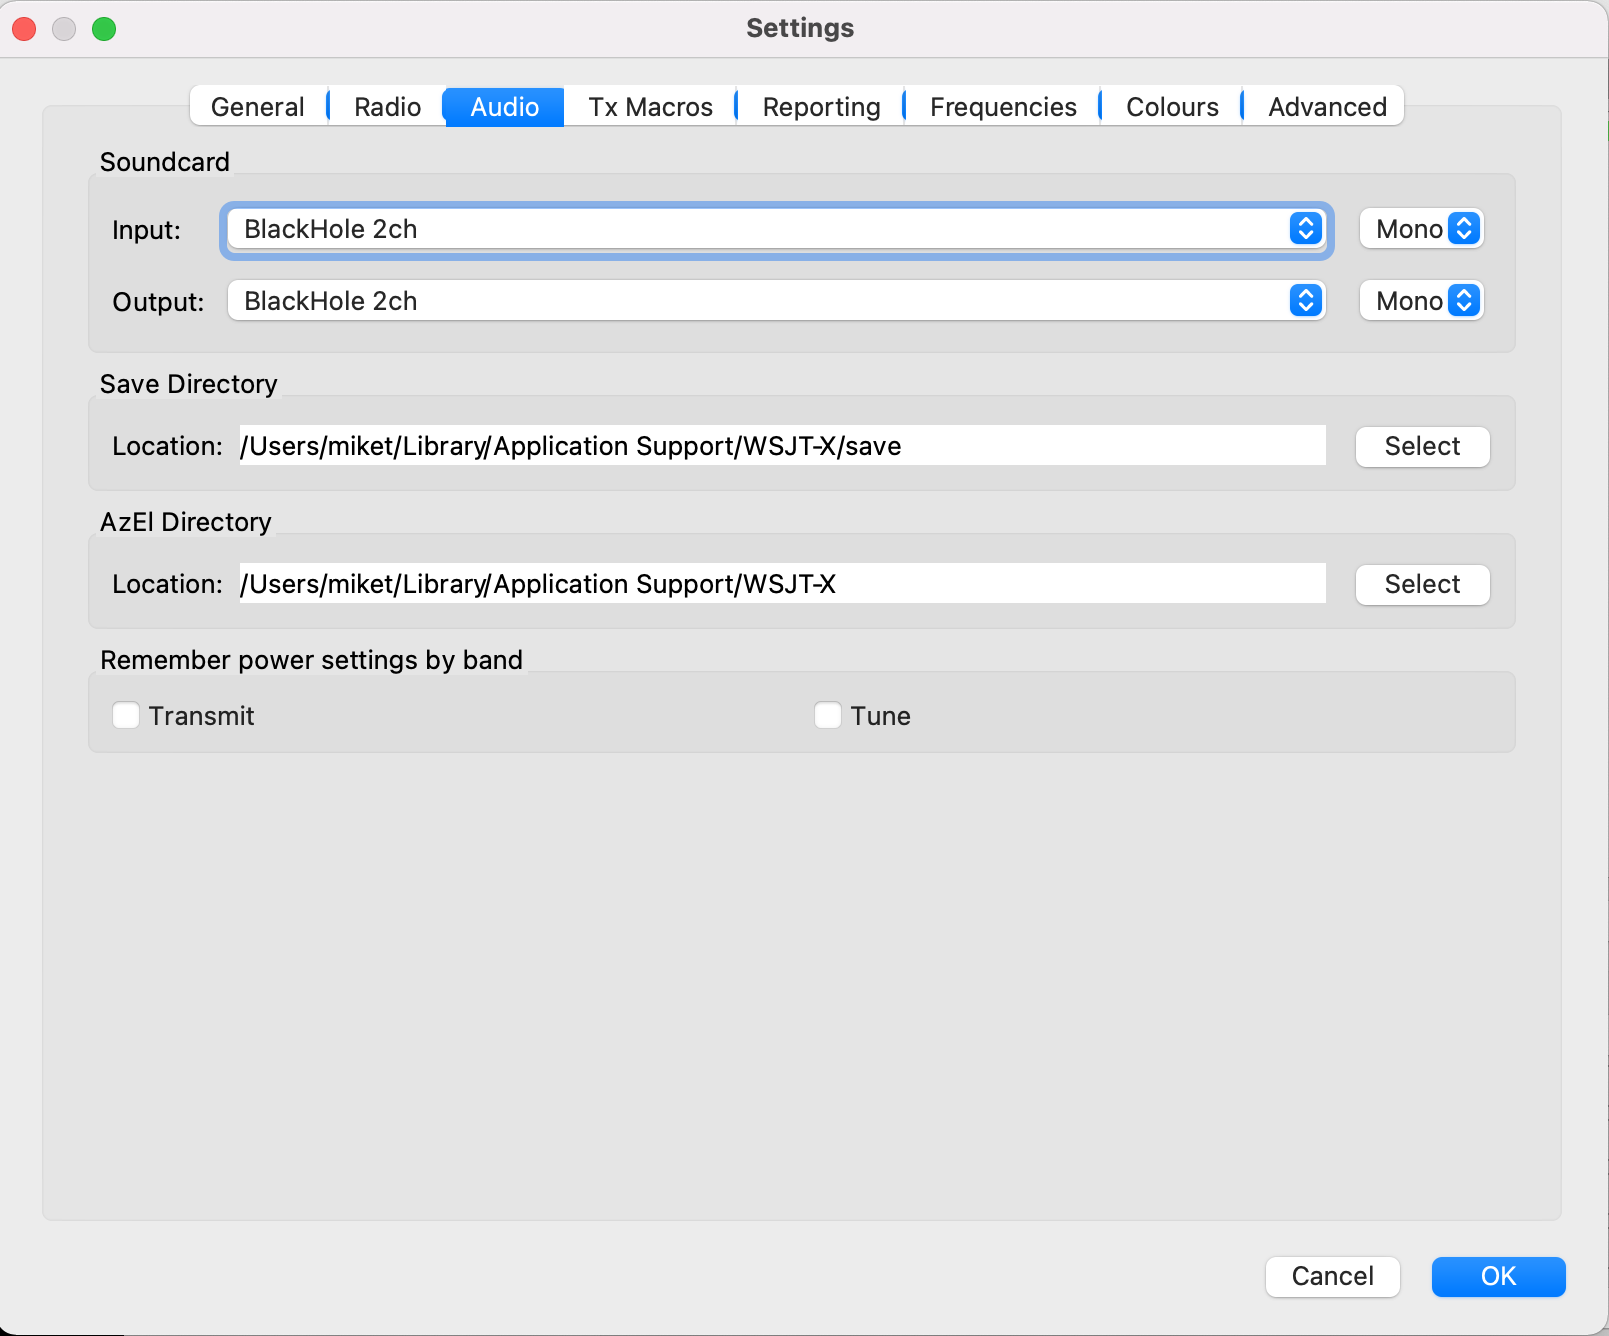
Next select the WSJT-X Audio Settings tab and set the soundcard Input/Output fields to Blackhole 2ch. Set both Input and Output to Mono as shown below.

WSJT-X Audio settings

Click OK and return to the WSJT-X main screen. You should now be fully operational for WSJT-X digital modes.

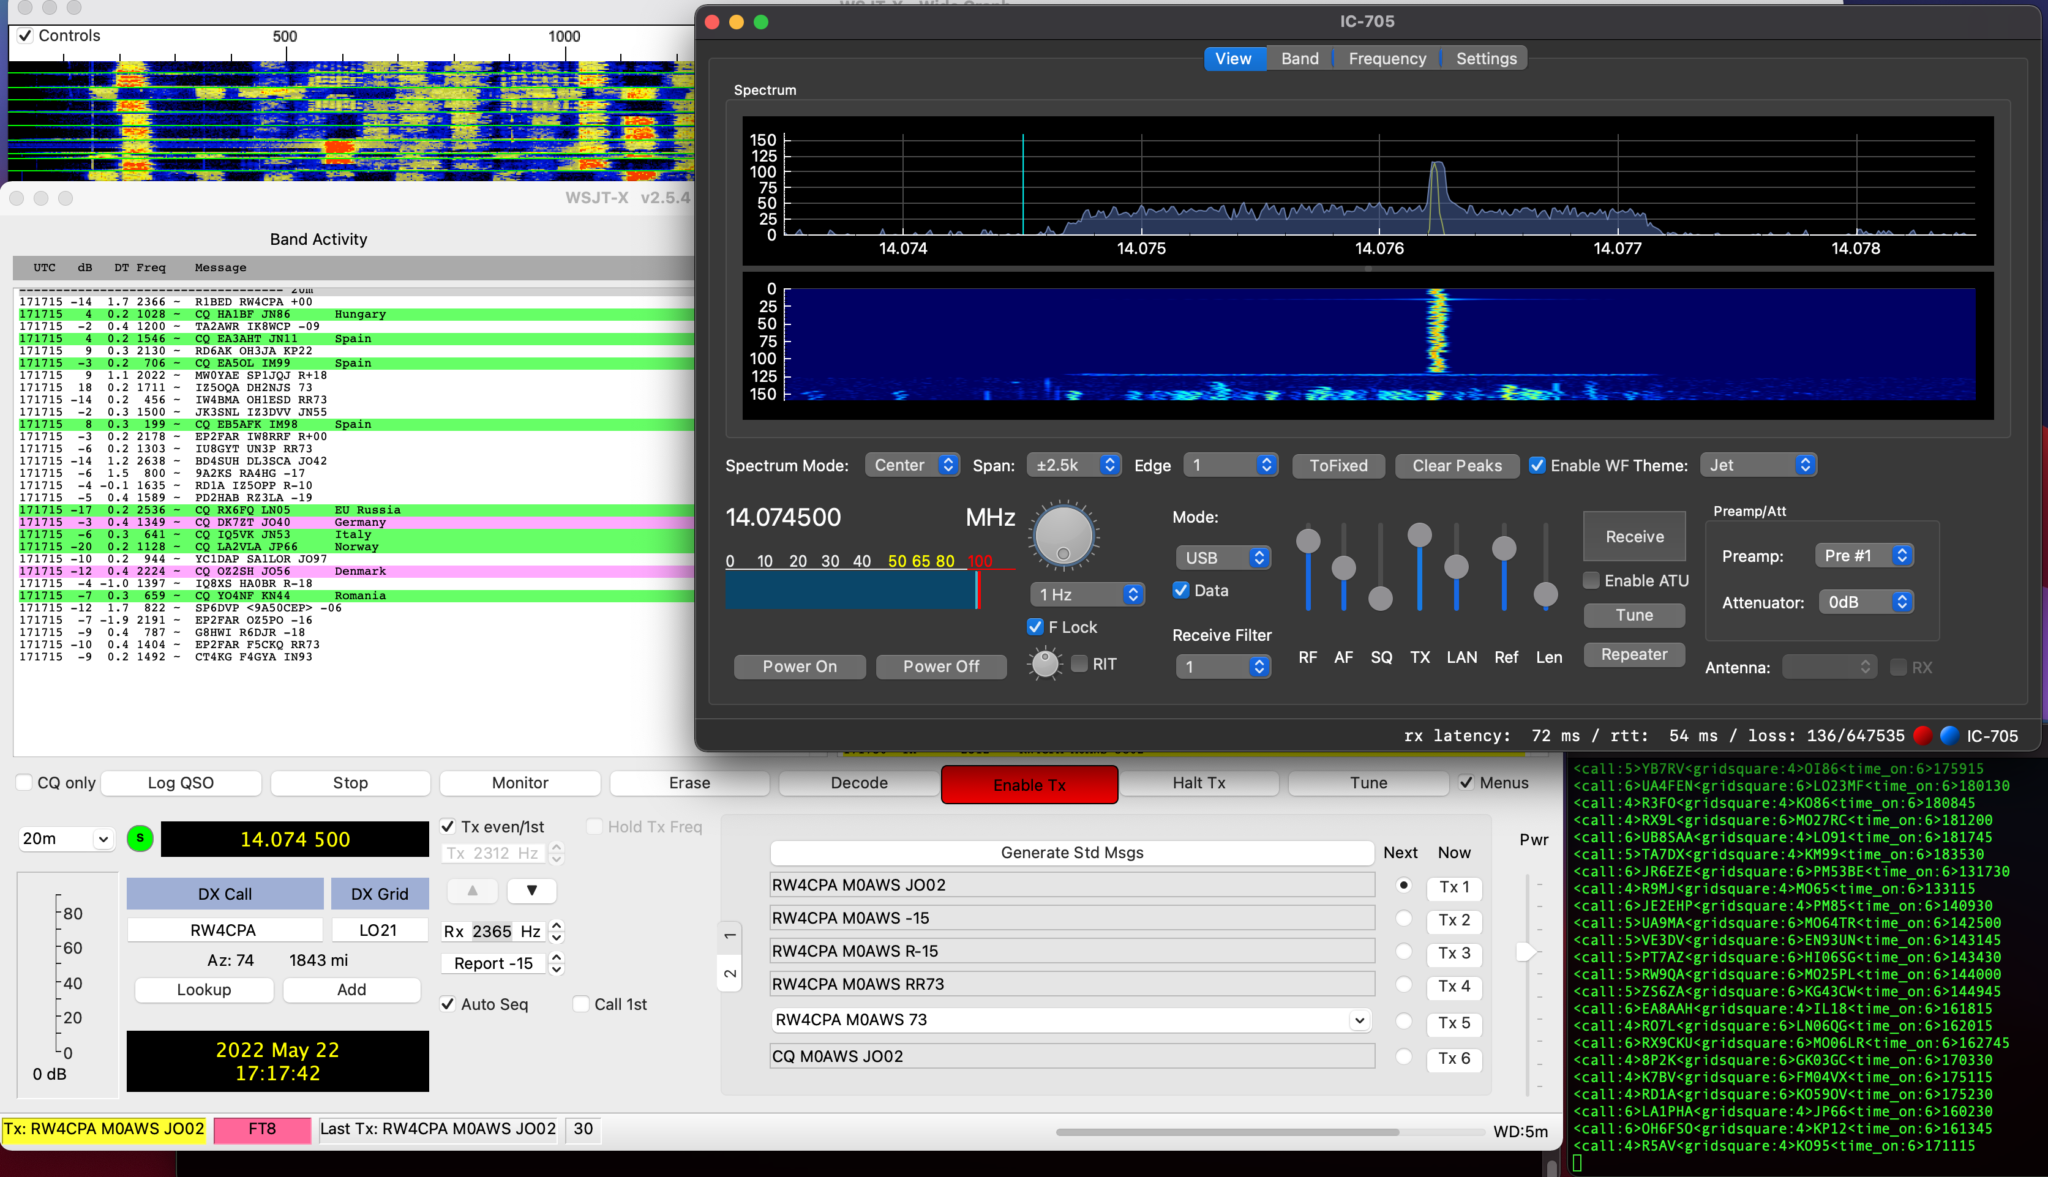
WSJT-X transmitting through WFView to the IC-705

Once I’d made a few contacts with WSJT-X in FT8 mode I went on to try and get FLDigi working with WFView as well.

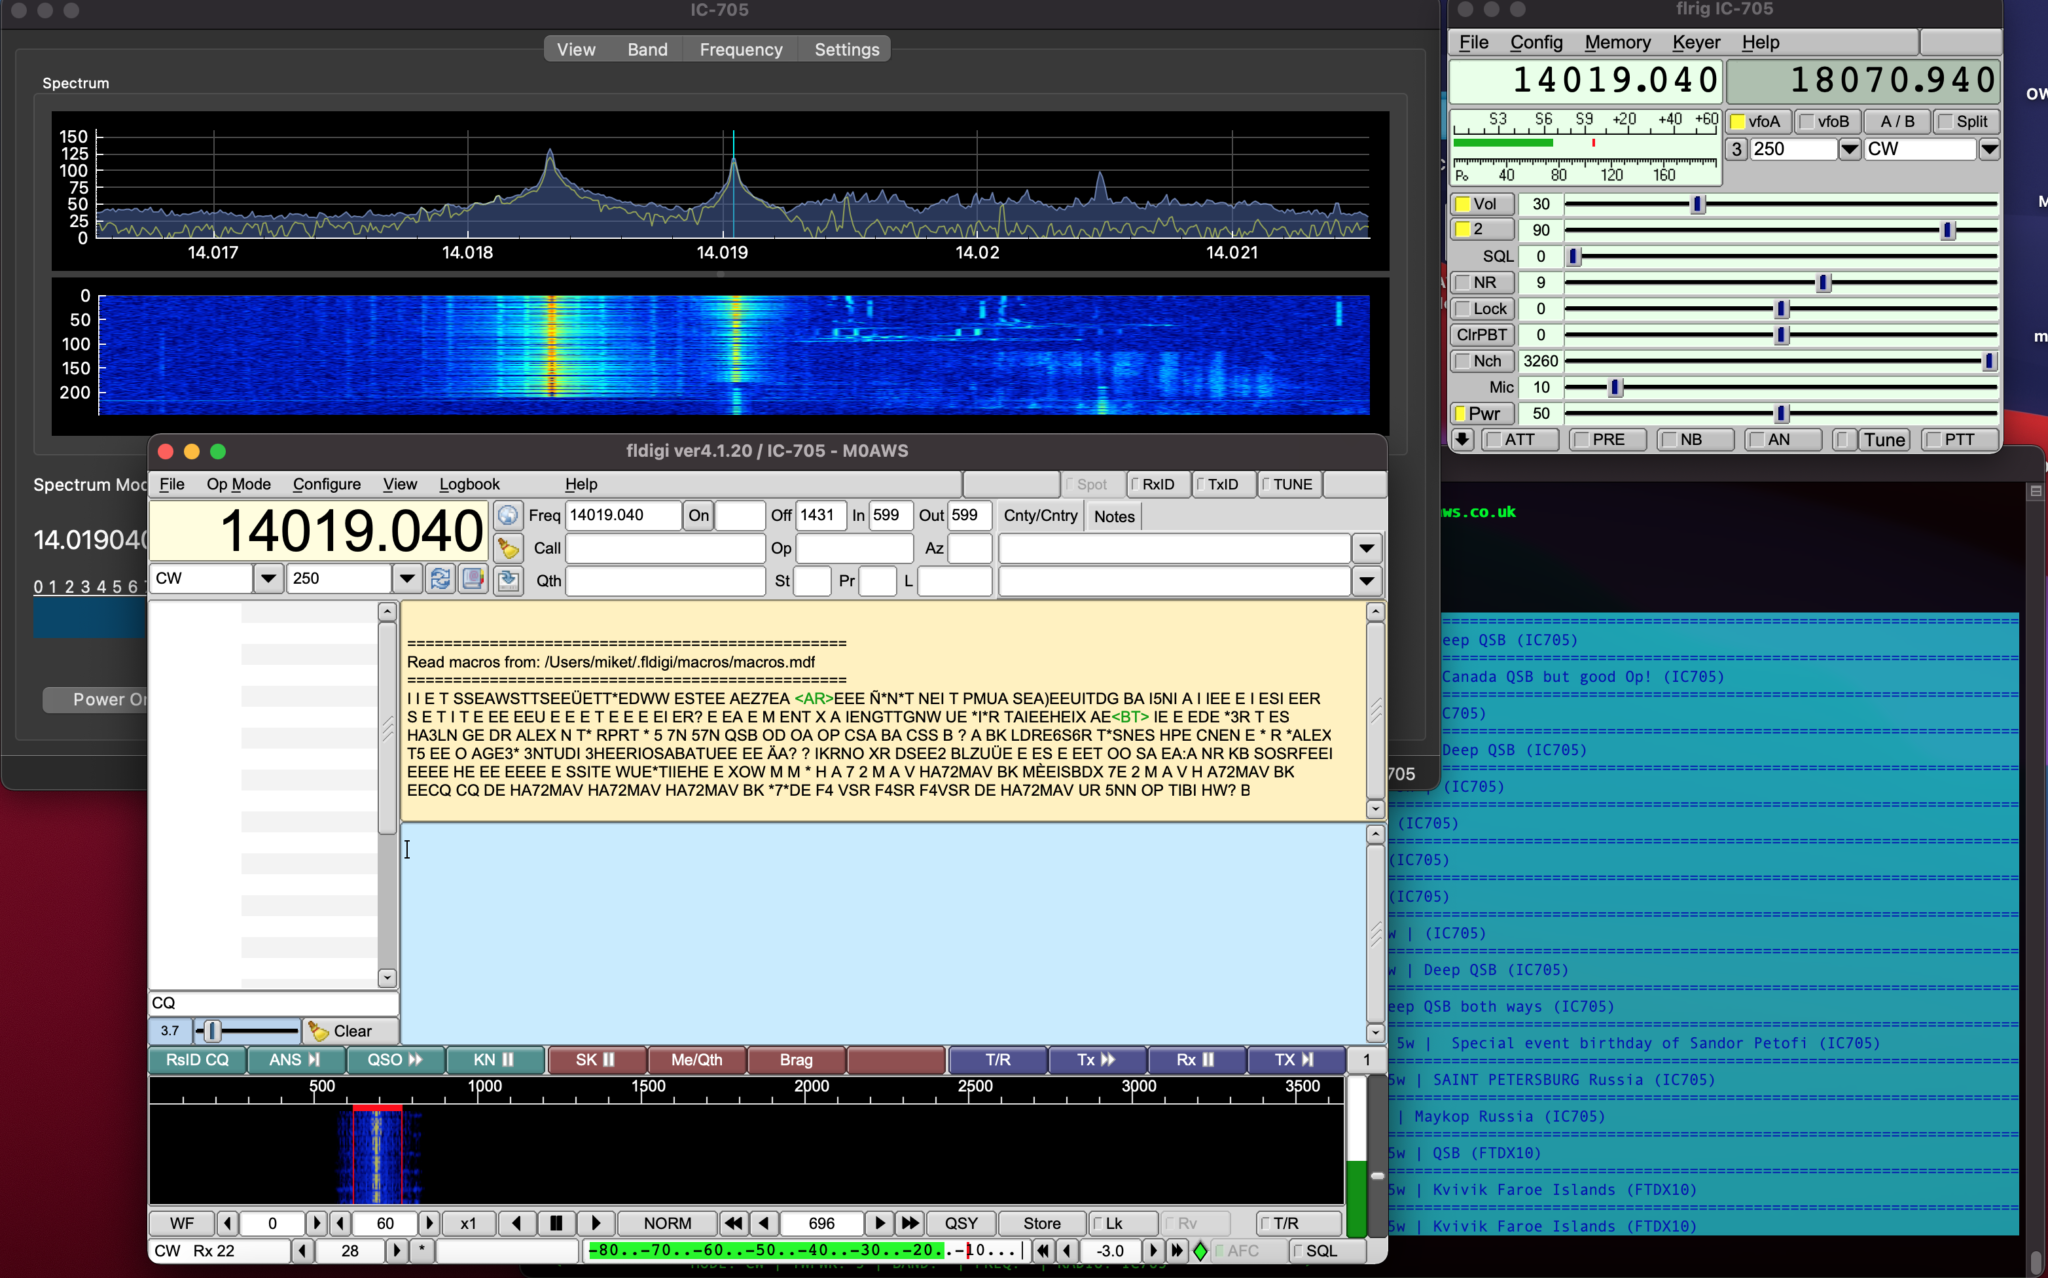
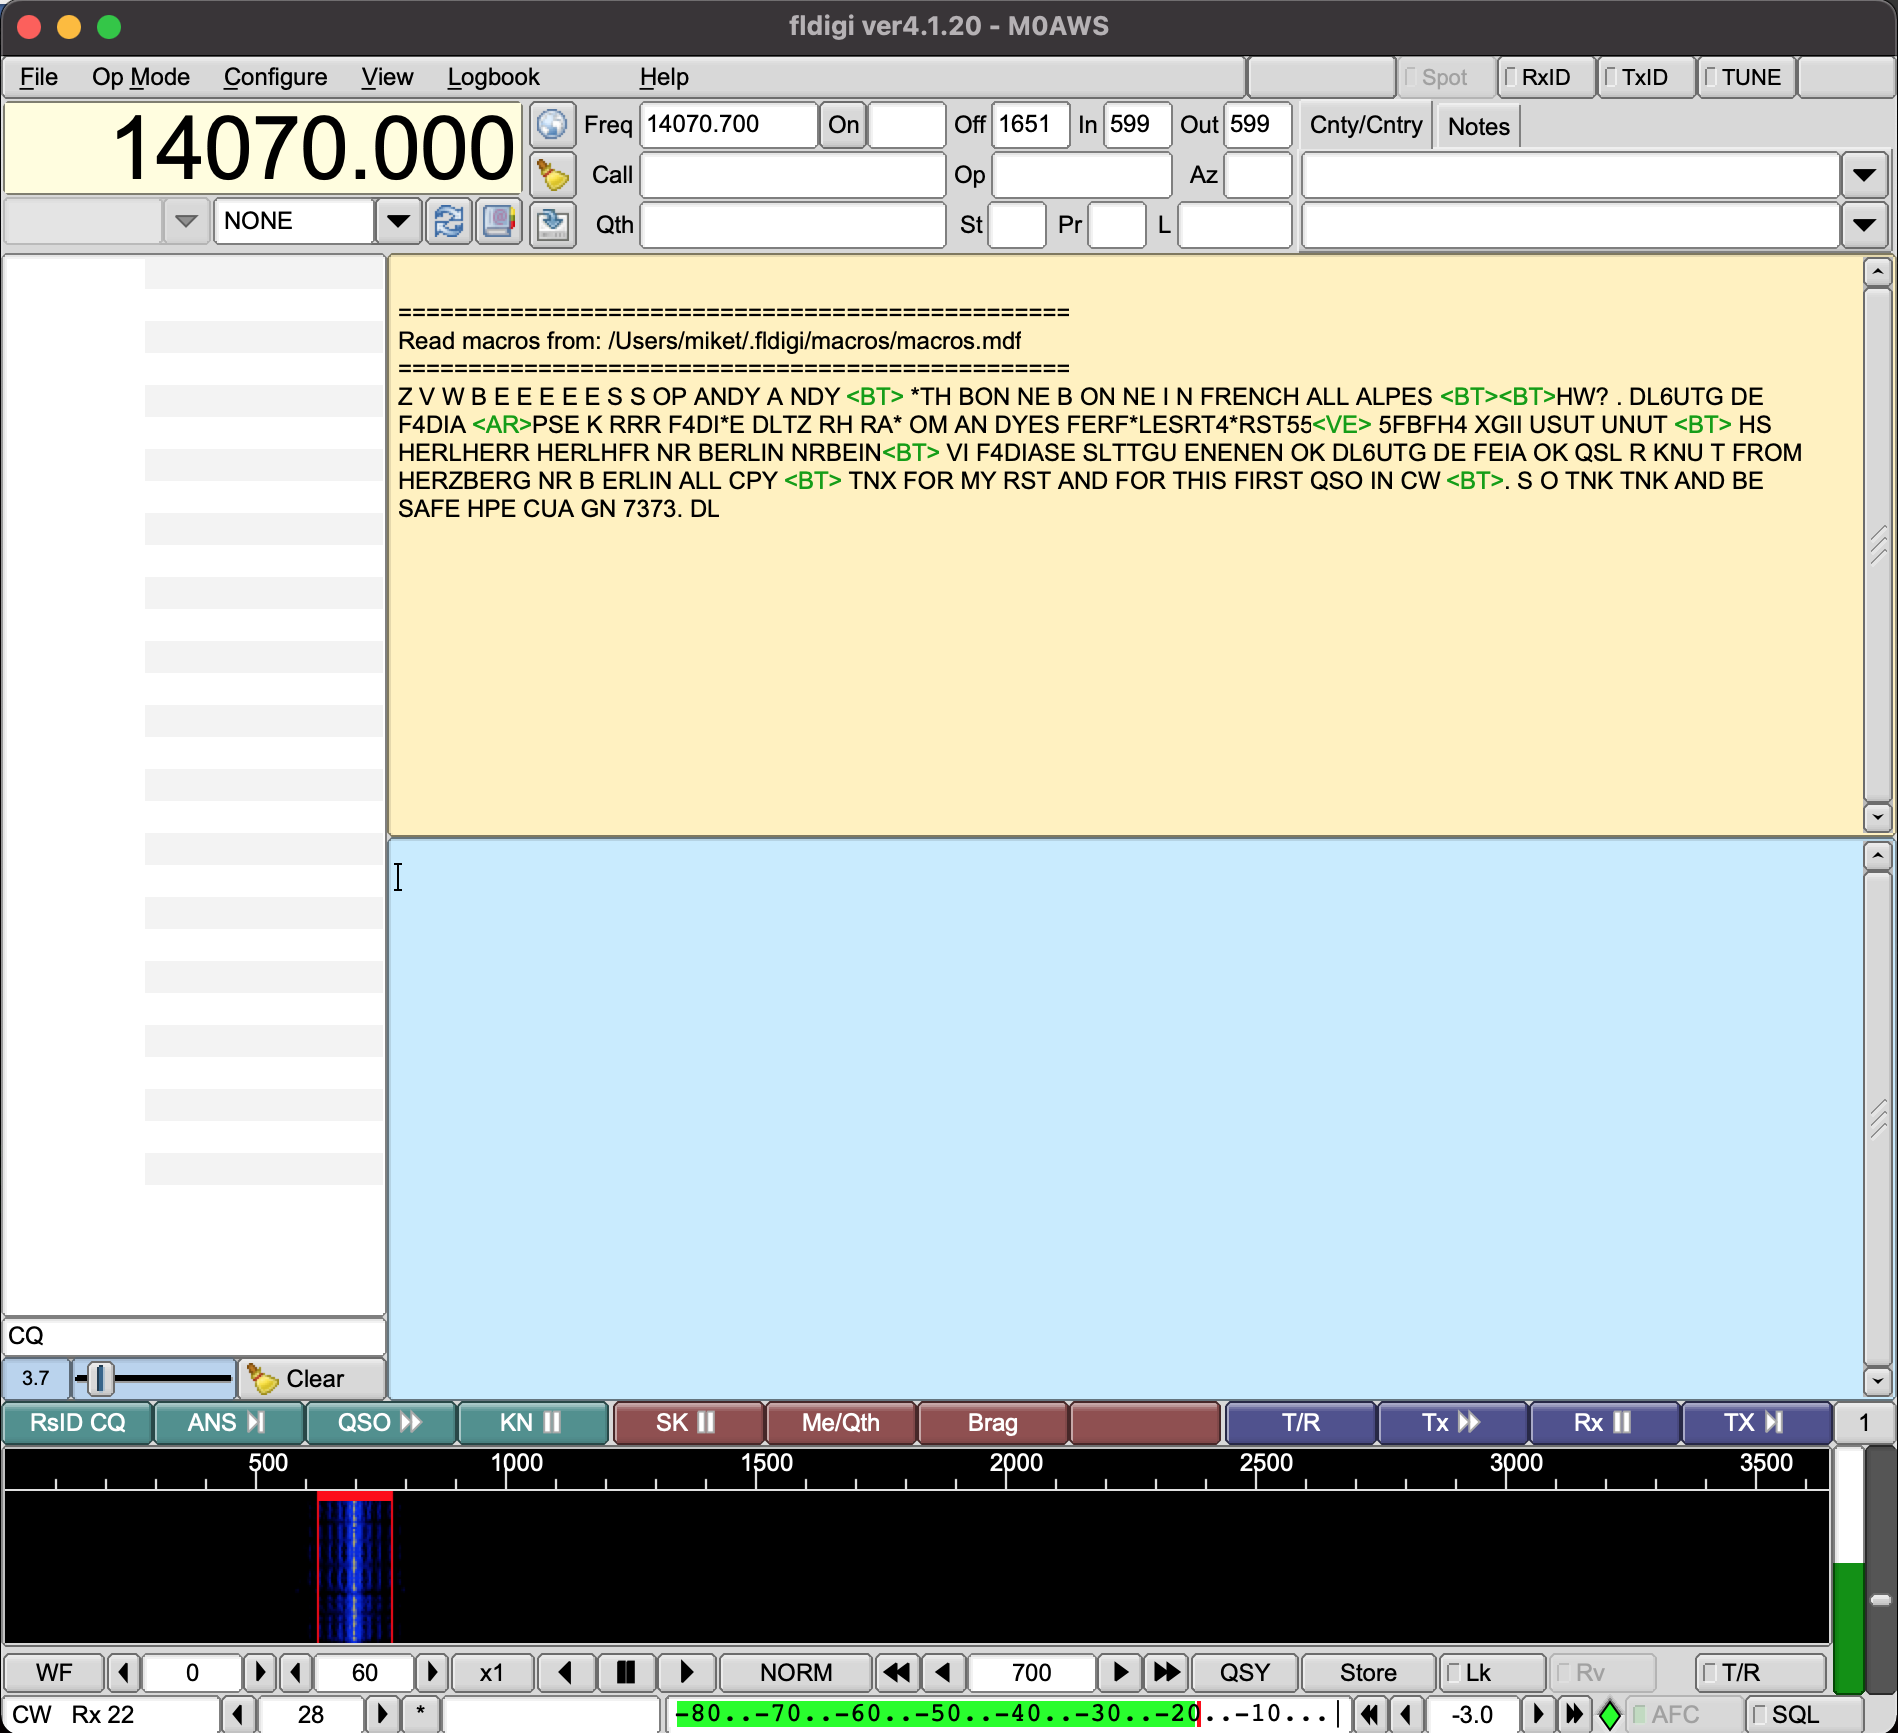
Unfortunately at the moment I cannot get CAT control working in either FLDigi or FLRig, neither will accept the /dev/ttys000 as the serial device however, I was able to get the audio working into FLDigi and even decoded some morse with it. I need to do little more work to fathom out why the CAT control doesn’t work in these two applications. I’m sure there is a way to resolve this but, I just need to put in a little more time to find the solution.

FLDigi decoding Morse code via WFView

UPDATE: There was some concern in one of the IC-705 Facebook groups that Blackhole wouldn’t work after a MacOS update. I’ve just upgraded my Macbook Pro to MacOS 11.6.6 and BlackHole is still fully functional afterwards. The MacOS update has no effect on the BlackHole service whatsoever. So you can rest easy!

More soon …
Resolving the IC-705 USB interference problem

Since getting my Icom IC-705 I’ve had a constant issue with interference on the HF bands from the USB connection on the radio when the AH-705 remote auto ATU is connected.

If I use the radio without the AH-705 inline there is no issue at all but, as soon as the AH-705 is connected to the radio there is some 9 S points of computer data noise across all the HF bands rendering them unusable.

Reading online this appears to be a common issue and so I set about trying to find a resolution.

The noise is most likely being induced onto the outer braid of the screen on the cables and so I decided to look into making a common mode choke.

Visiting the HAM Goodies website I ordered a couple of FT240-31 Ferrite Toroids as I’d read this particular mix is ideal for making common mode chokes.

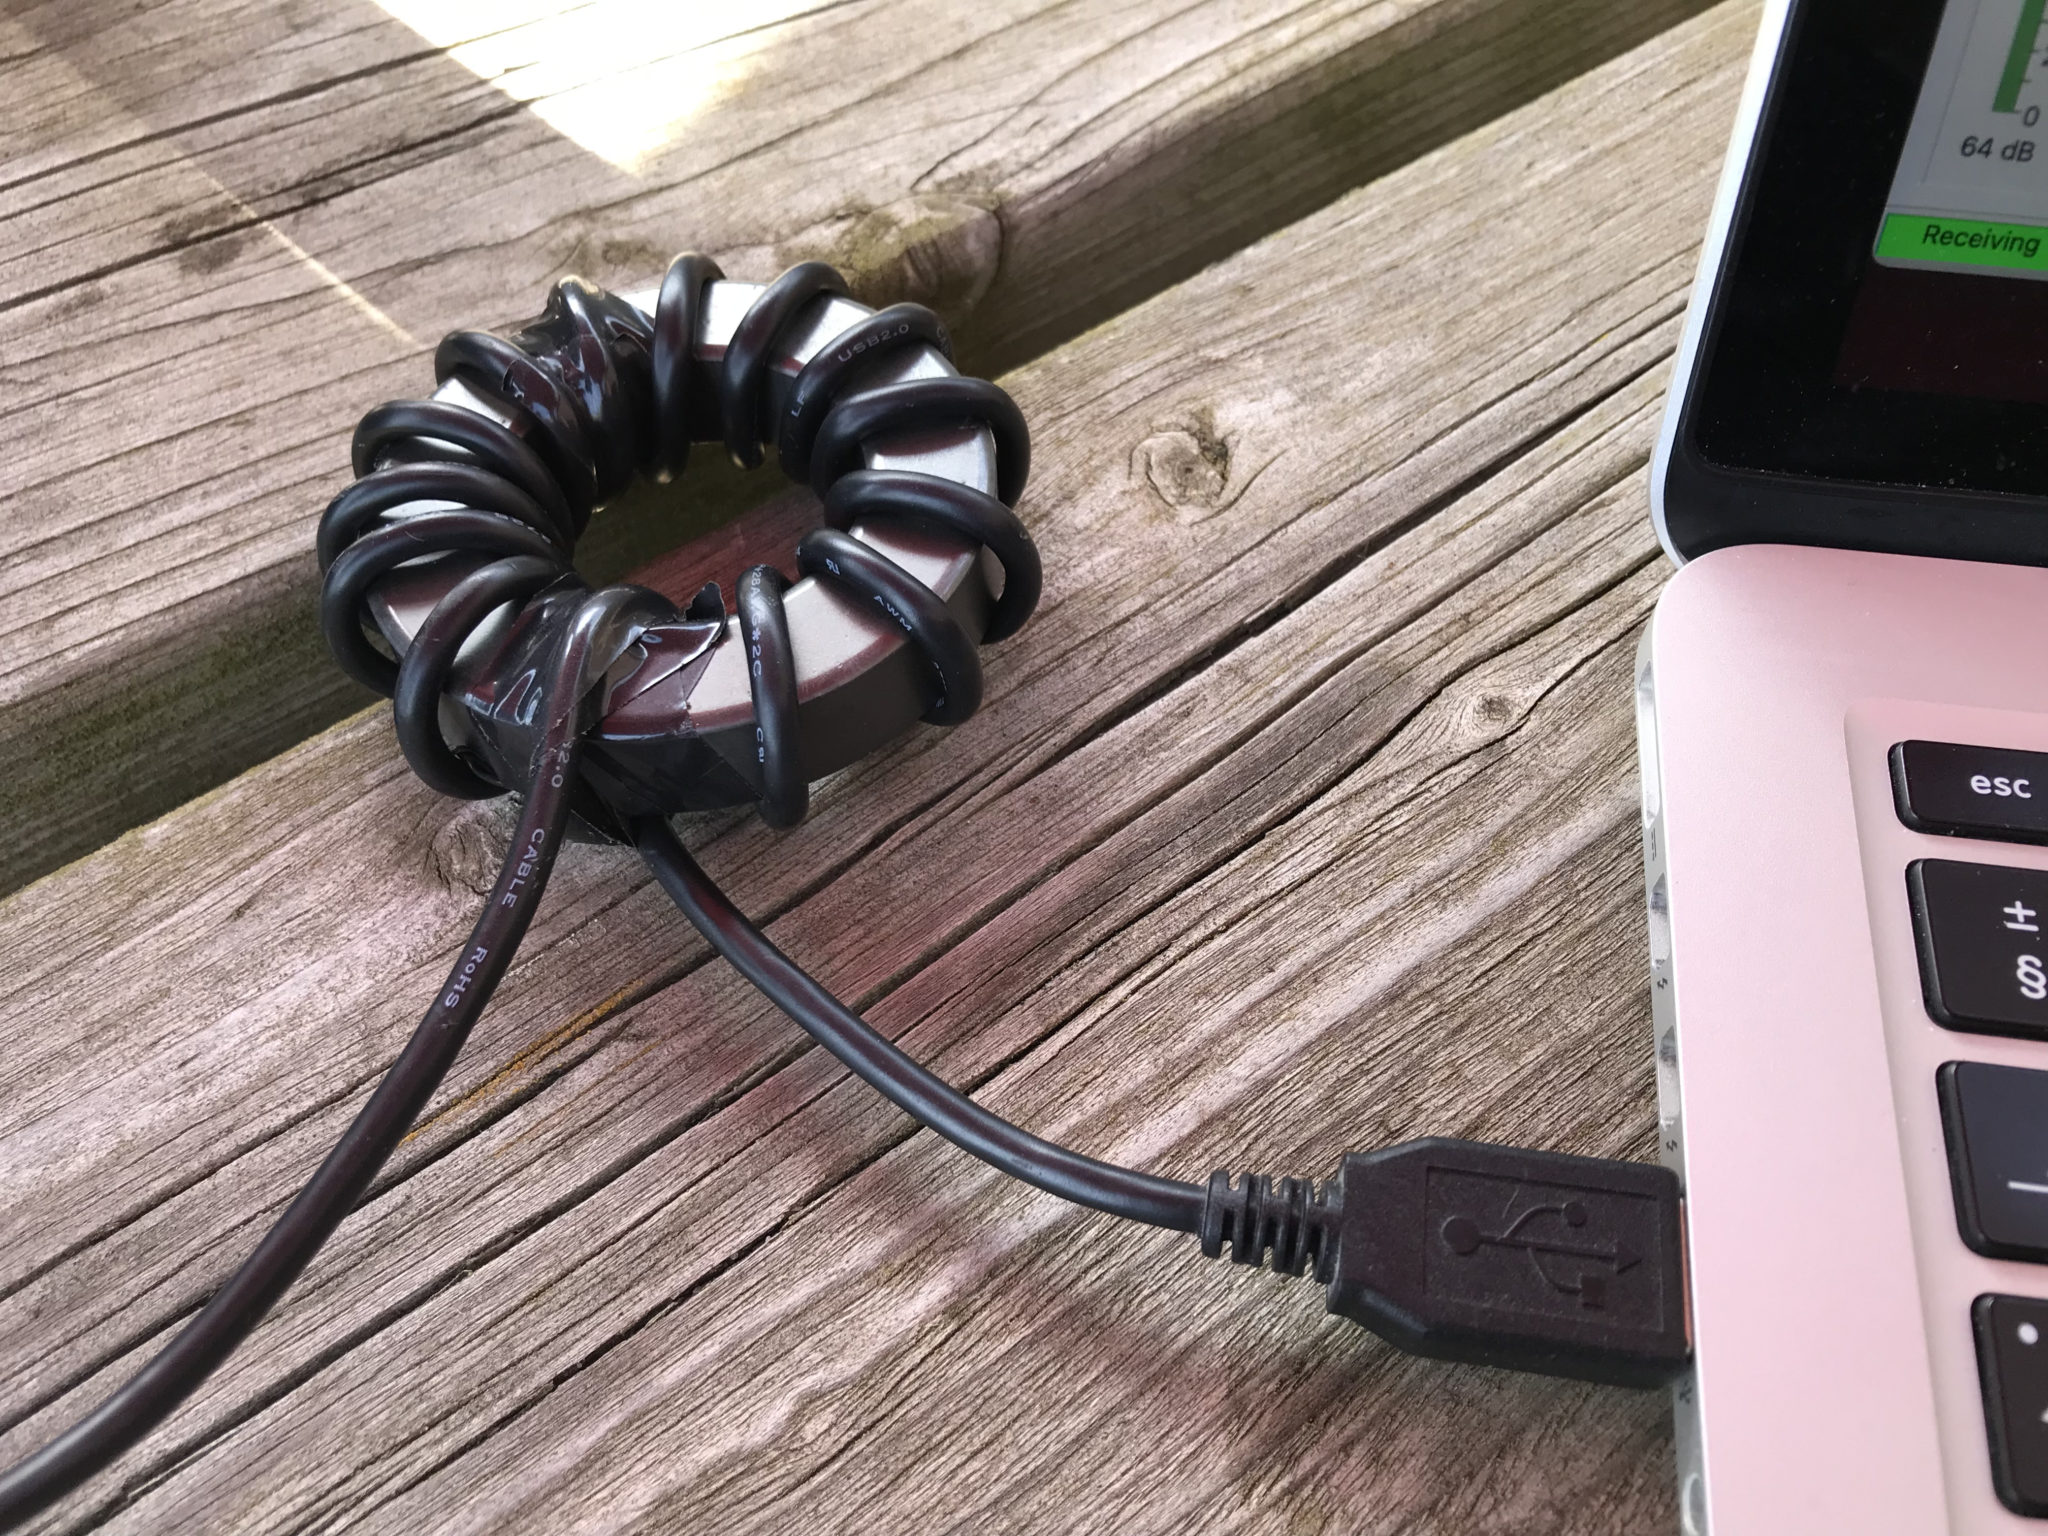
USB Cable wrapped around a FT240-31 Ferrite Toroid to create a choke

I wrapped a long USB cable around the toroid and used some tape to hold the cable in place, it’s surprising how much length is lost by simply wrapping around what looks like a very small toroid.

Firing up the radio the noise was reduced considerably but, it was still there and so I decided to do the same to the coaxial cable between the AH-705 and the IC-705.

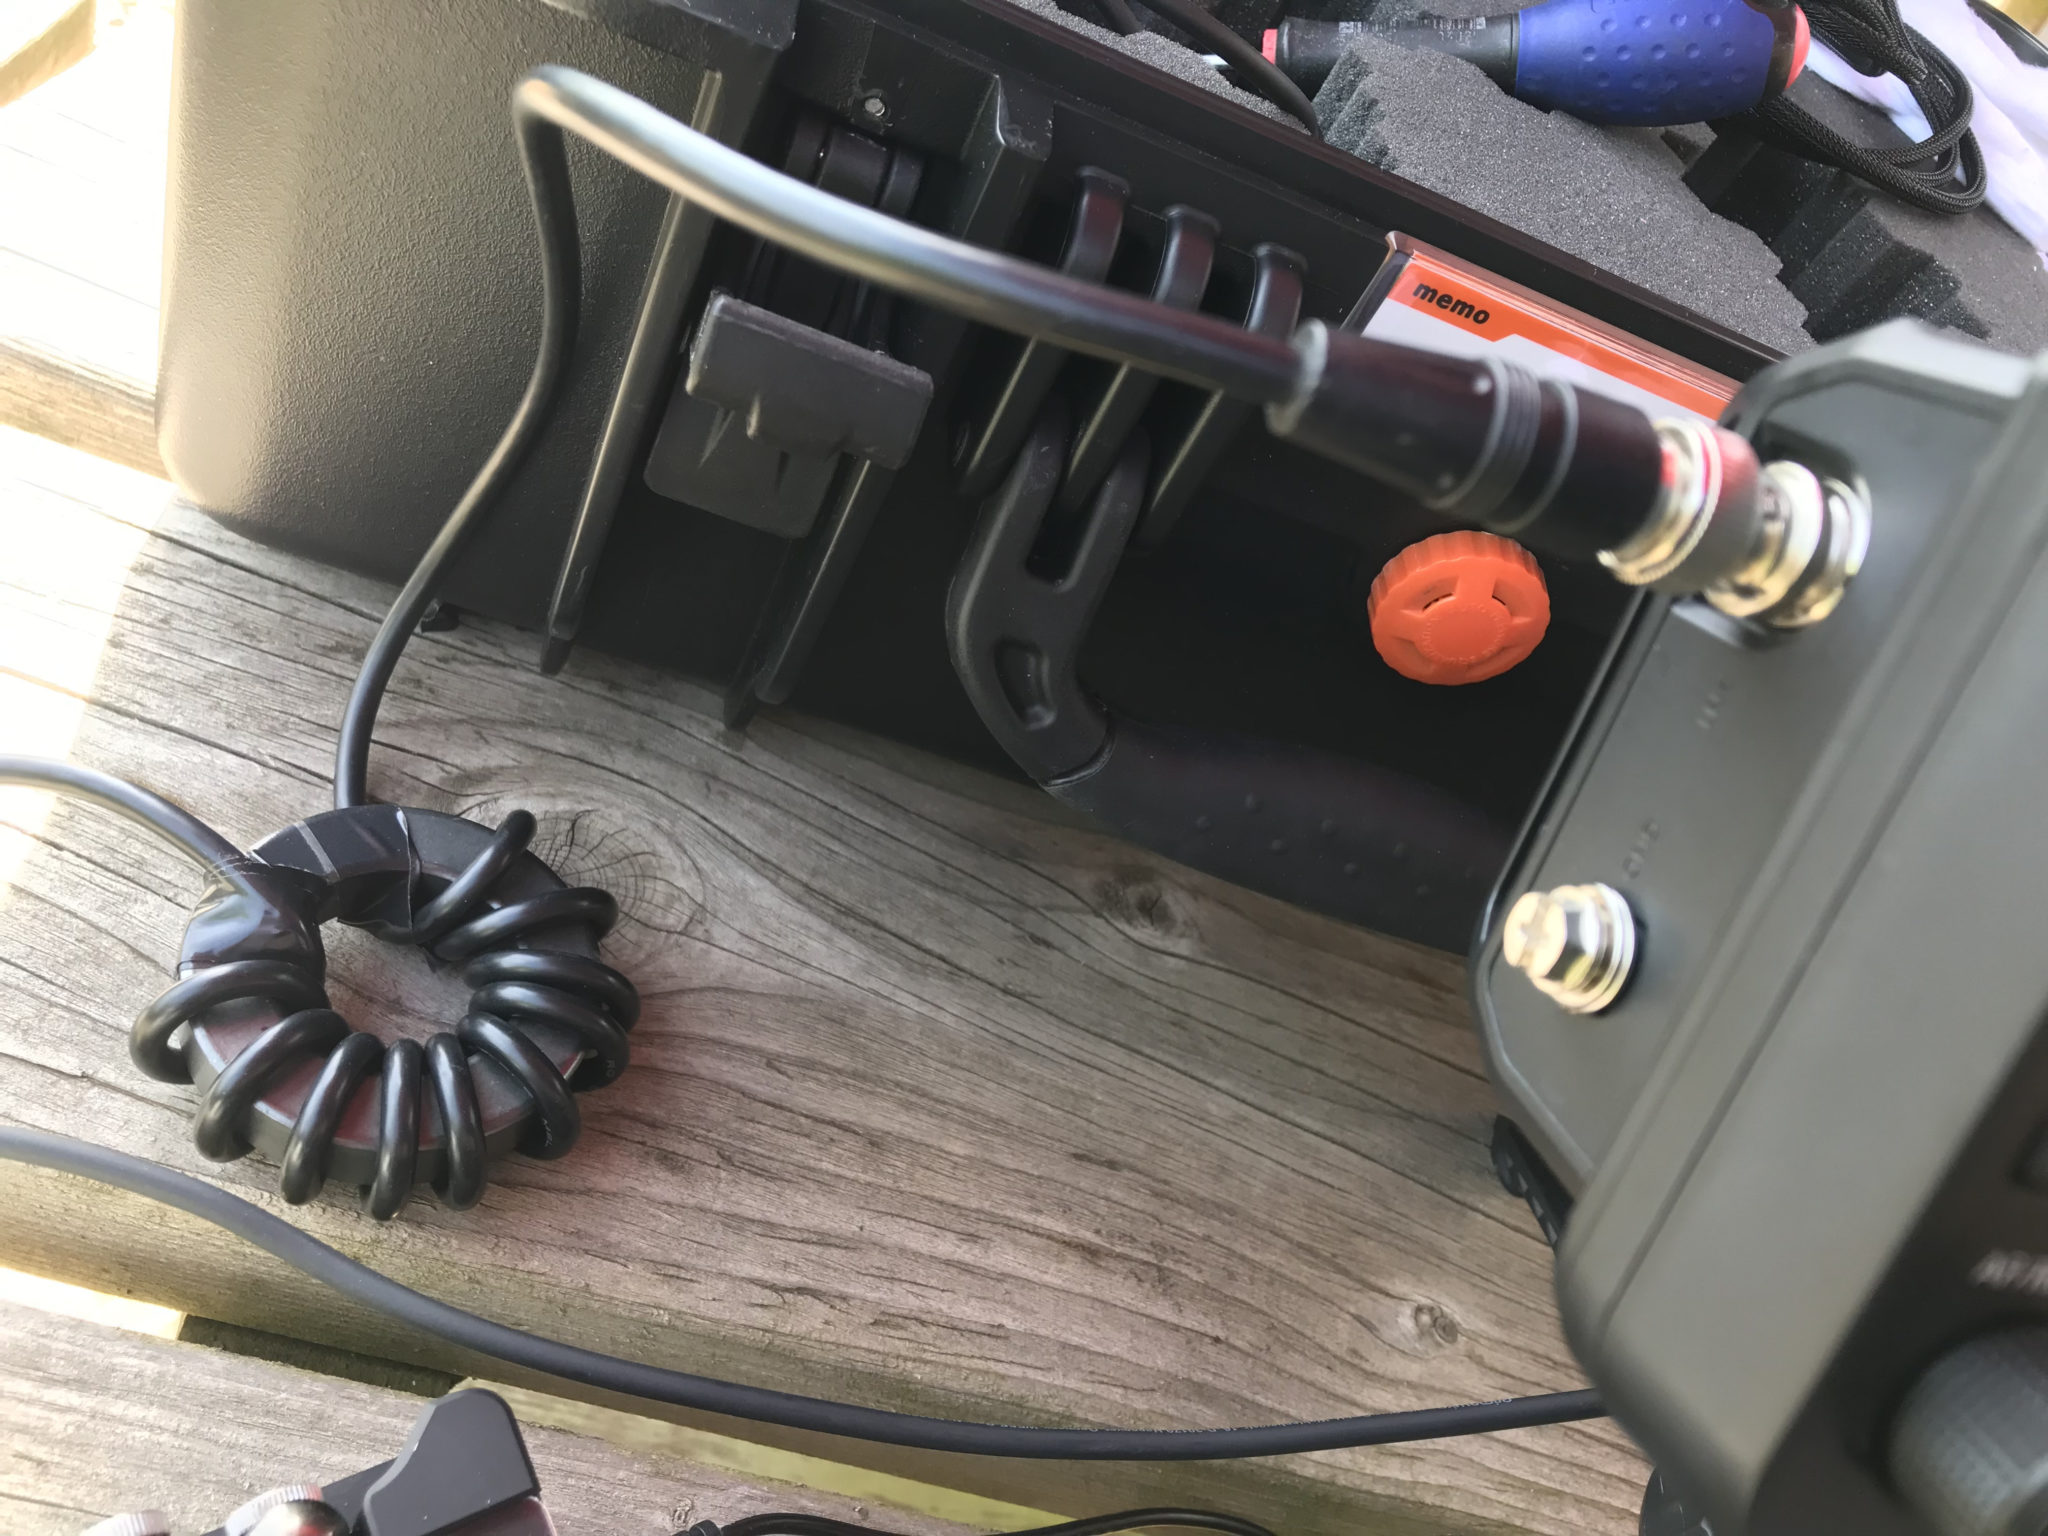
Coaxial cable between AH-705 and IC-705 wrapped around a FT240-31 Ferrite Toroid

Once I’d wrapped the coax around the toroid and reconnected the coax between the radio and ATU I was pleased to see that the computer data noise was now gone on all bands except for the 10m band. For some reason the 10m band interference is still as strong as it was without the toroids in place.

I’m not too sure why this is. I tried more and less turns on the toroid to no avail and so eventually I decided to just live with it for the time being.

At least now I can use 160m -> 12m without any interference whatsoever, a massive improvement on what I had before.

I need to do some more research on the different mixes of the ferrite toroids and perhaps trying a different mix will resolve the problem on the 10m band too.

More soon …
Reverse Beacon Network (RBN)

Operating a QRP station can often make you feel like you’re not getting out when no one responds to your multiple CQ calls. This was the case the other day when I was trying out my new to me Begali Traveler Light morse key.

I was on the 20m band calling and calling to no avail, the band was open as I could hear other stations just fine so I knew there was traffic on the band. The SWR on my EFHW Vertical was perfect as it always is and so I knew there wasn’t a problem with the coax/antenna combination.

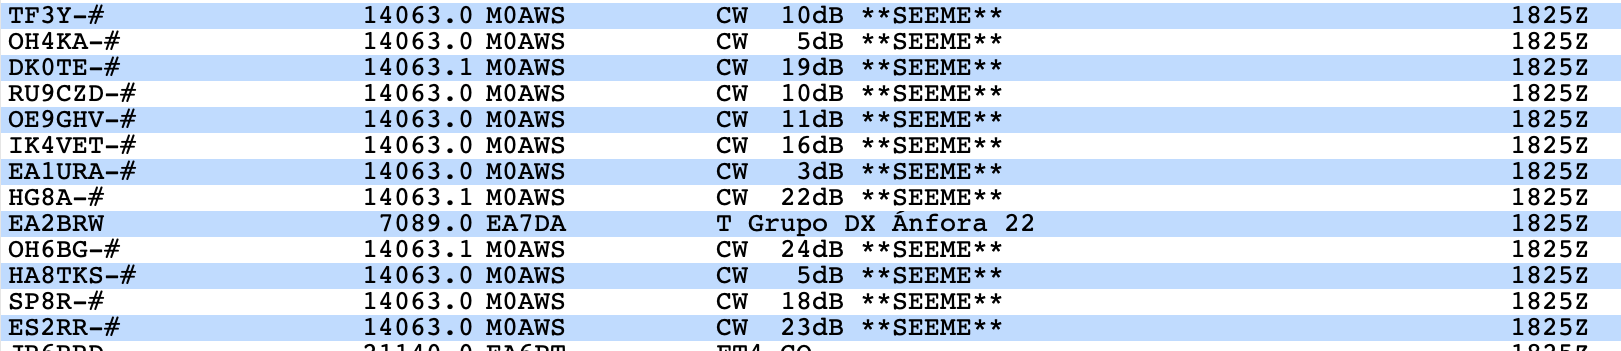
Wanting to know if my signal was indeed going anywhere I decided to make use of the SeeMe facility on the DXCluster that I use. The SeeMe facility effectively allows you to enable spots for your own callsign from the Reverse Beacon Network (RBN).

The SeeMe facility is easily switched on by issuing the set/seeme command on the DXCluster of your choice. Once enabled you will start to see spots for your own callsign from the RBN every time you call CQ using CW.

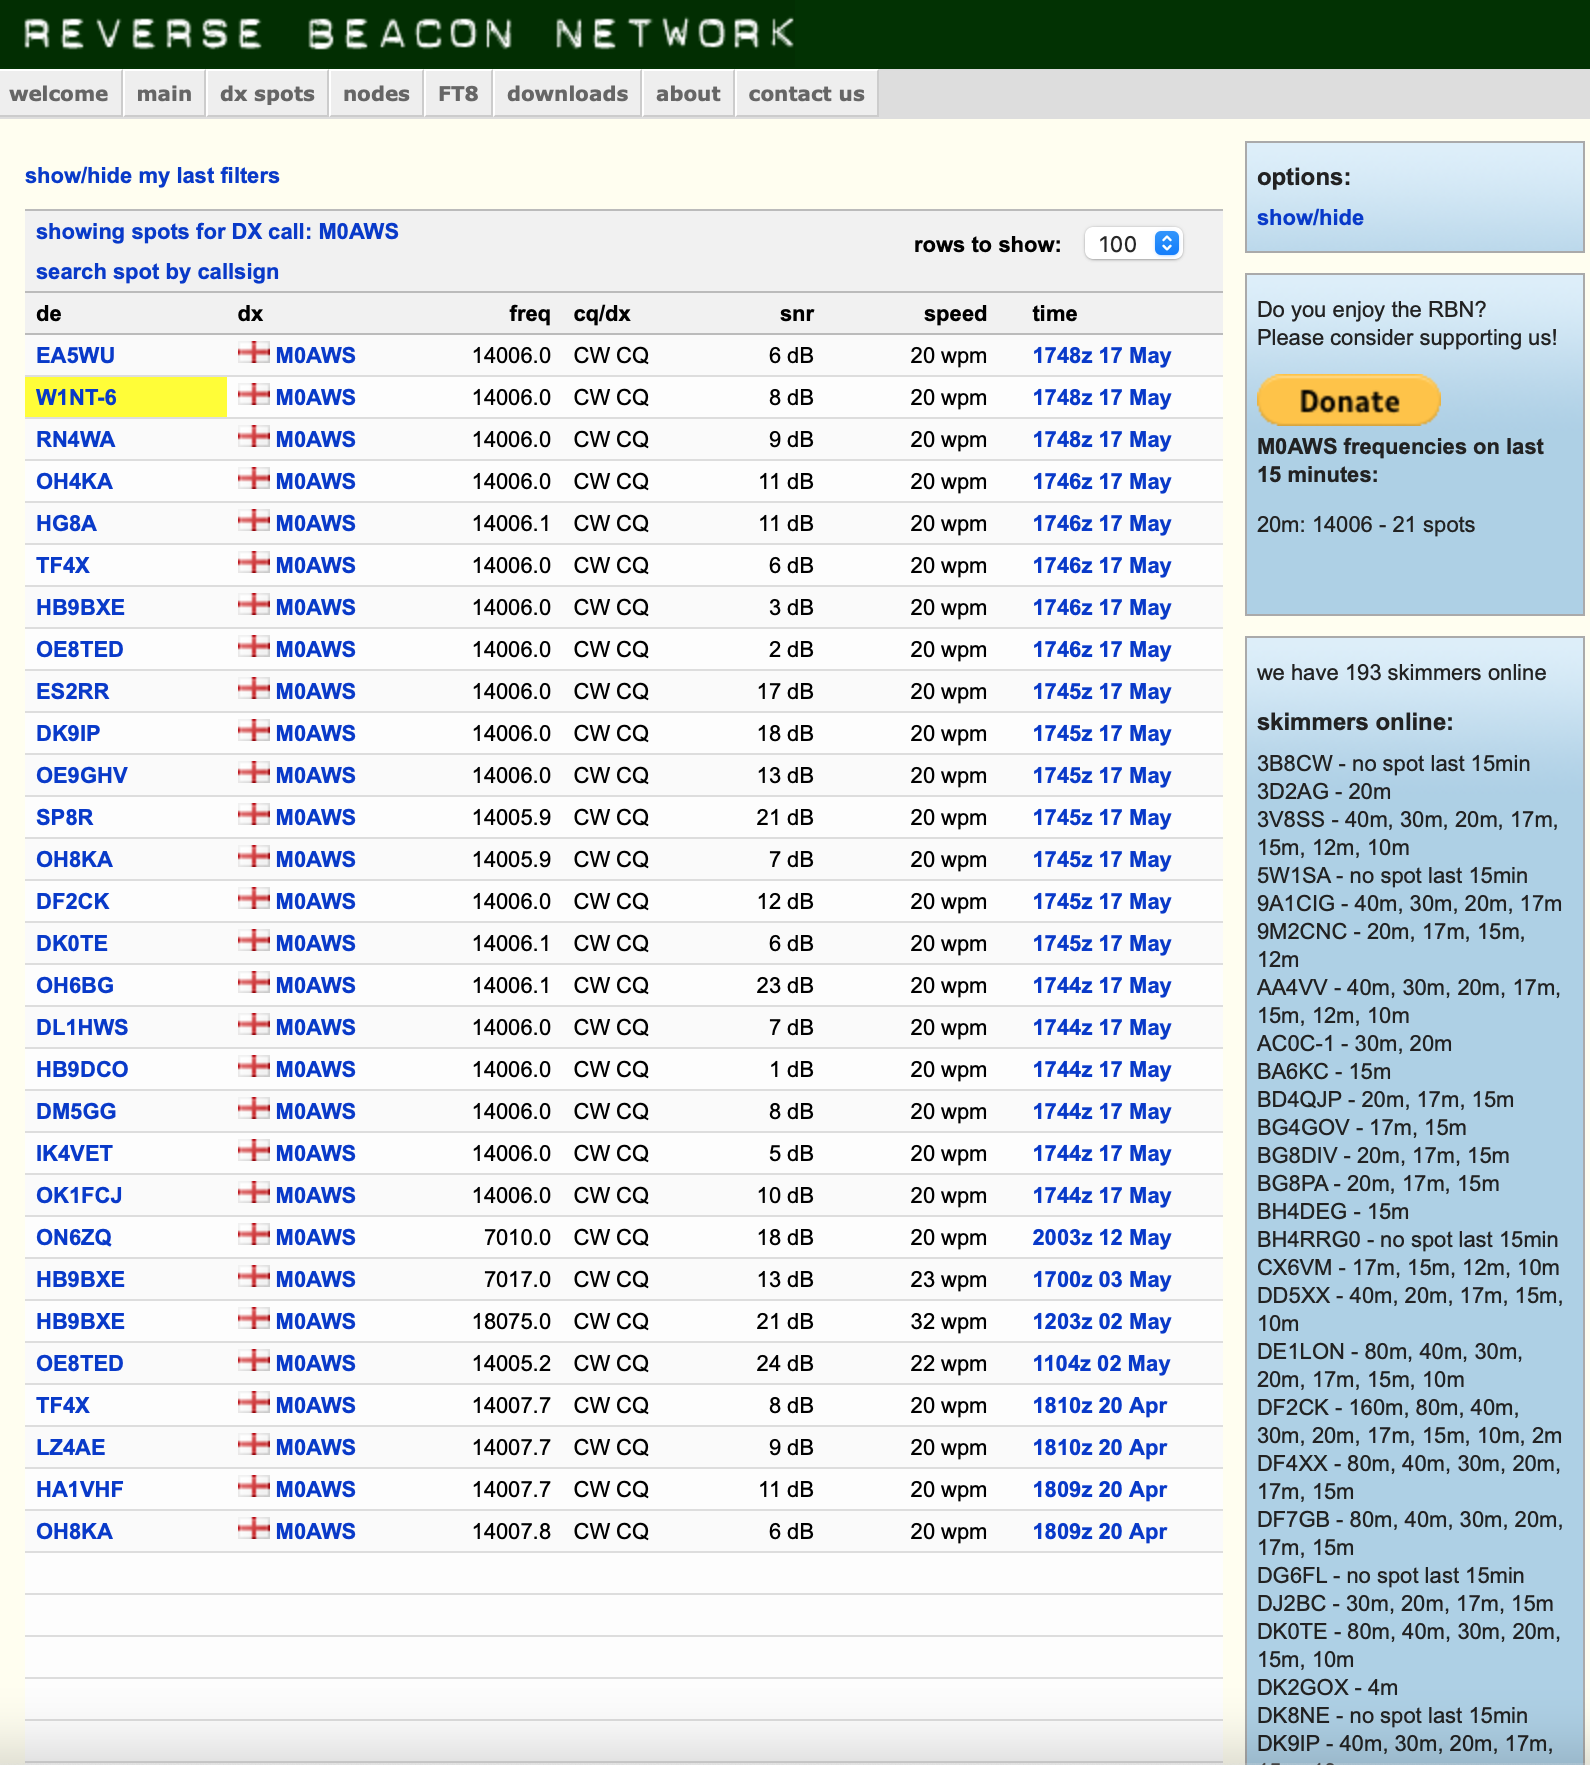
RBN Spots for M0AWS calling CQ on the 20m Band

As you can see above, I was clearly getting out very well with some great signal reports from a good spread of stations even though I was only using 5w of CW.

You can of course use the RBN website to view the spots if you prefer, it’s not quite as realtime as the DXCluster but, it provides the same information eventually.

M0AWS spots on the RBN Website

The view on the RBN Website is almost the same as that from the DXCluster however, it also shows your CW speed in WPM. I was also surprised to get a spot from the USA at 8dB, that’s a good signal (Just over S2) considering I was only using 5w of power.

I came to the conclusion that no one needed an exotic M0 call for their log and so I went on to my normal search and pounce approach and worked a bunch of stations spread around Europe and Asiatic Russia. My little 5w signal did well and I was able to get through the pileups by using my slide off to the side technique so that my little signal stood out on it’s own. This technique works well when trying to get a QRP signal into a pileup and is used often.

Needless to say, my Begali Traveler Light twin paddle morse key once setup how I like it was superb to use, light to the touch, quick and responsive. Begali make such beautiful morse keys!

More soon …
Another Begali Key!

Since purchasing my Begali Pearl twin paddle morse key I’ve been looking to get another Begali for my IC-705 portable setup. Going portable means I need a key that isn’t super shiny like the Pearl, something a little more hardy would be ideal.

I was looking to buy the Begali Simplex Basic directly from Begali as it would be ideal for portable operations however, my lovely wife spotted another Begali key for sale on Ebay and pinged the details over to me to take a look at.

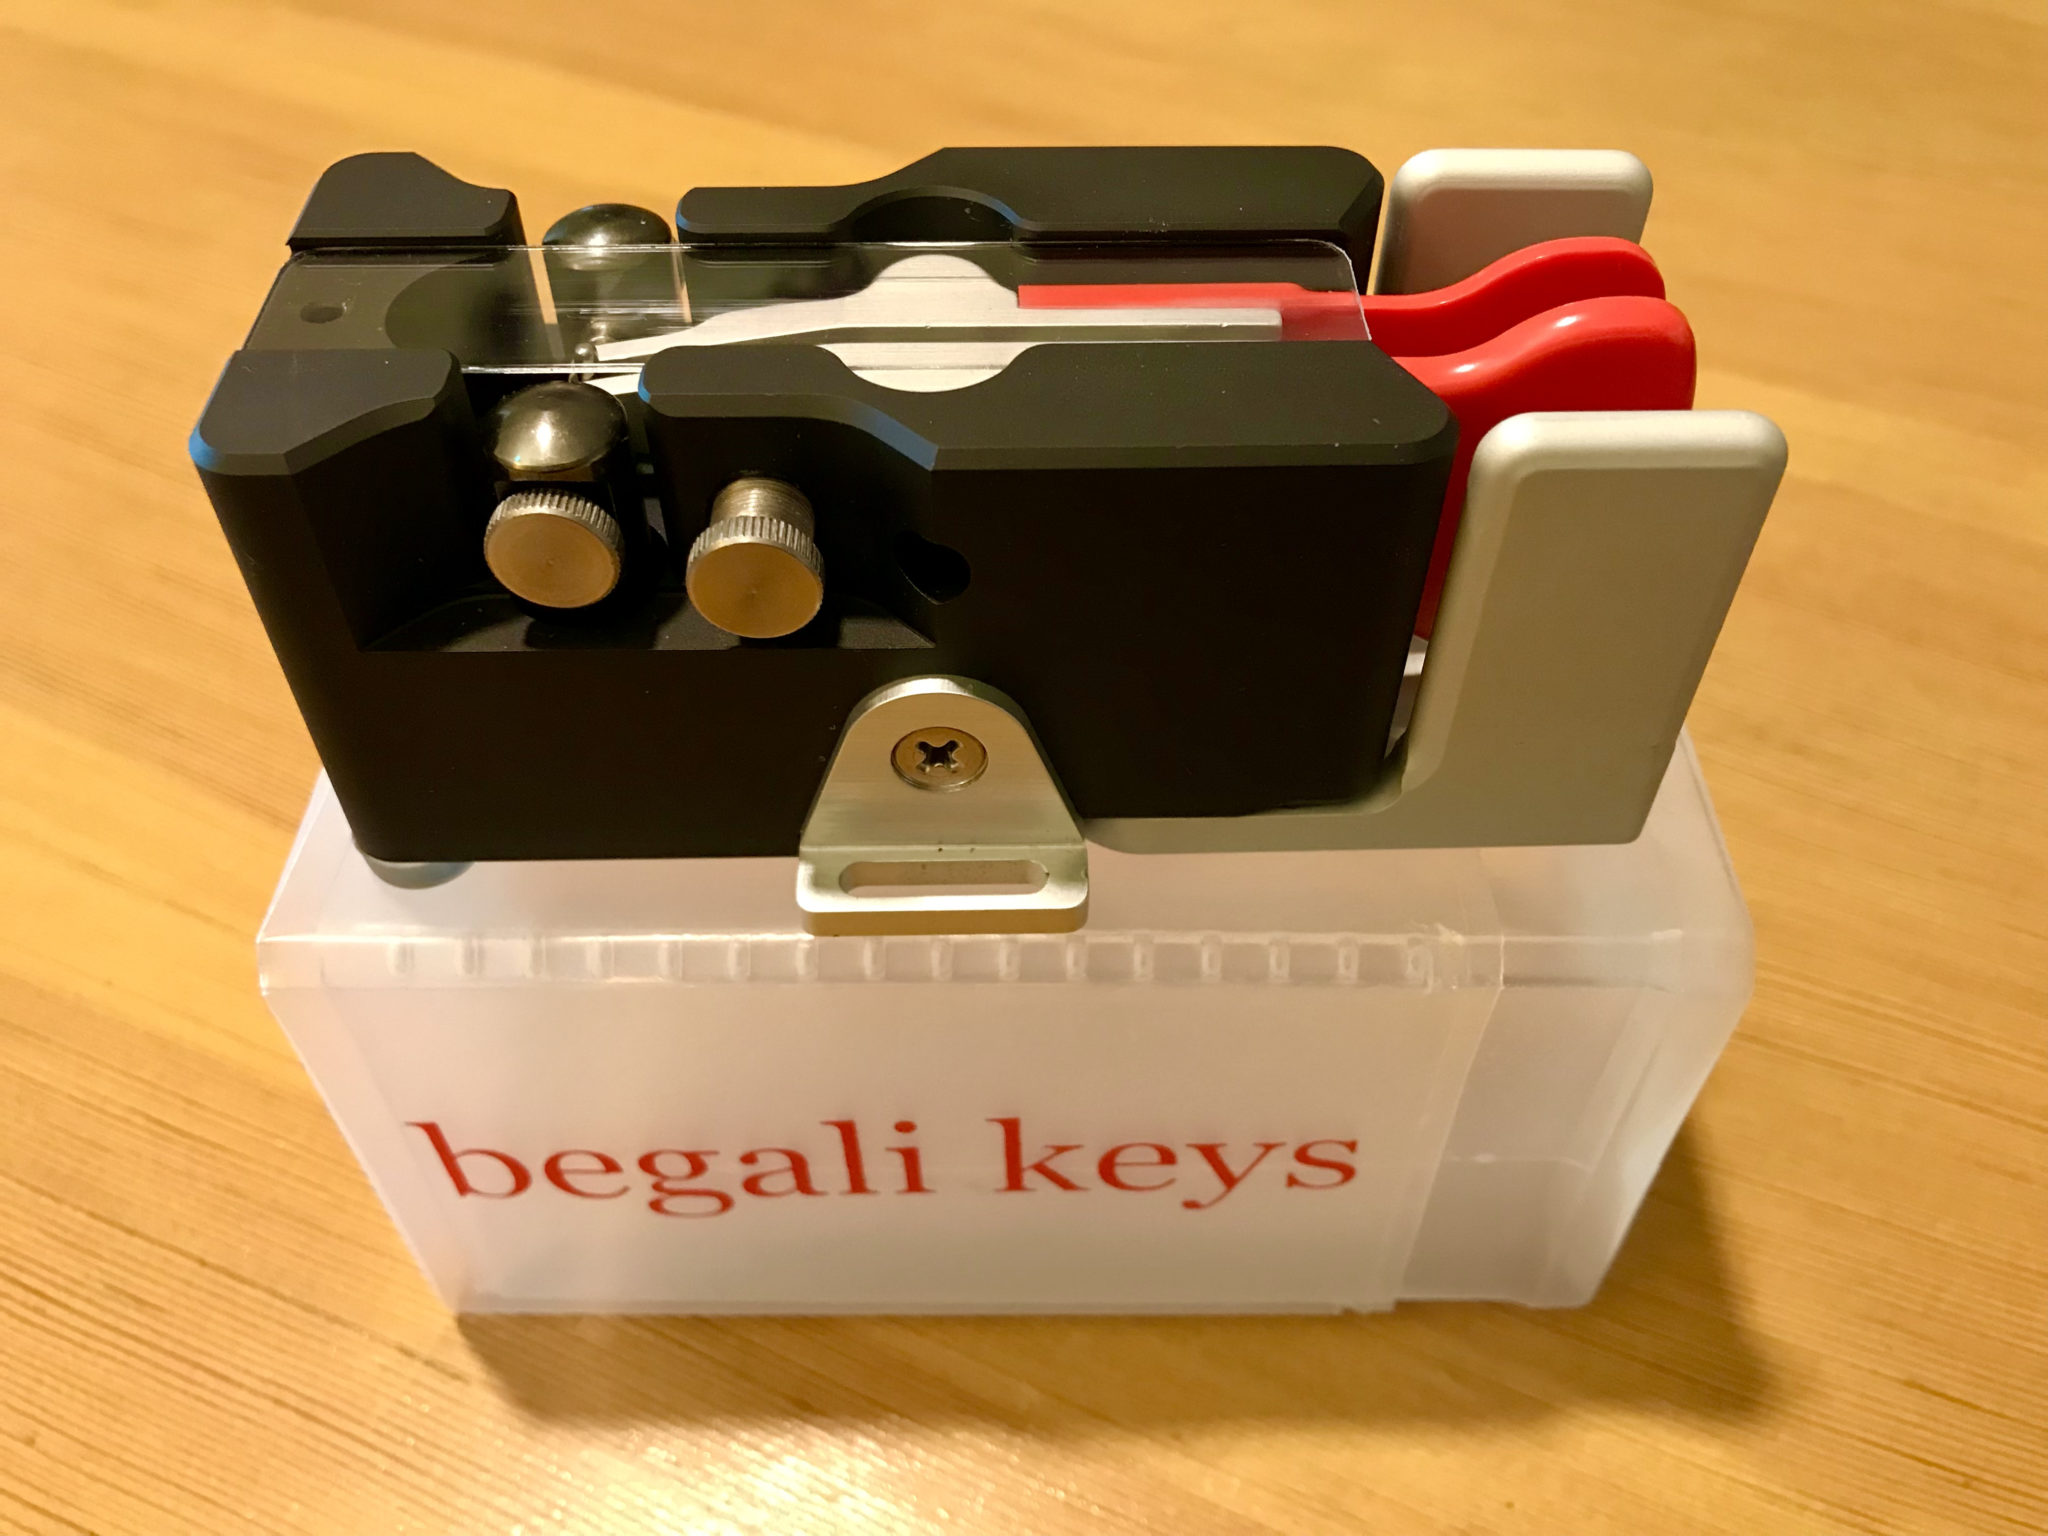
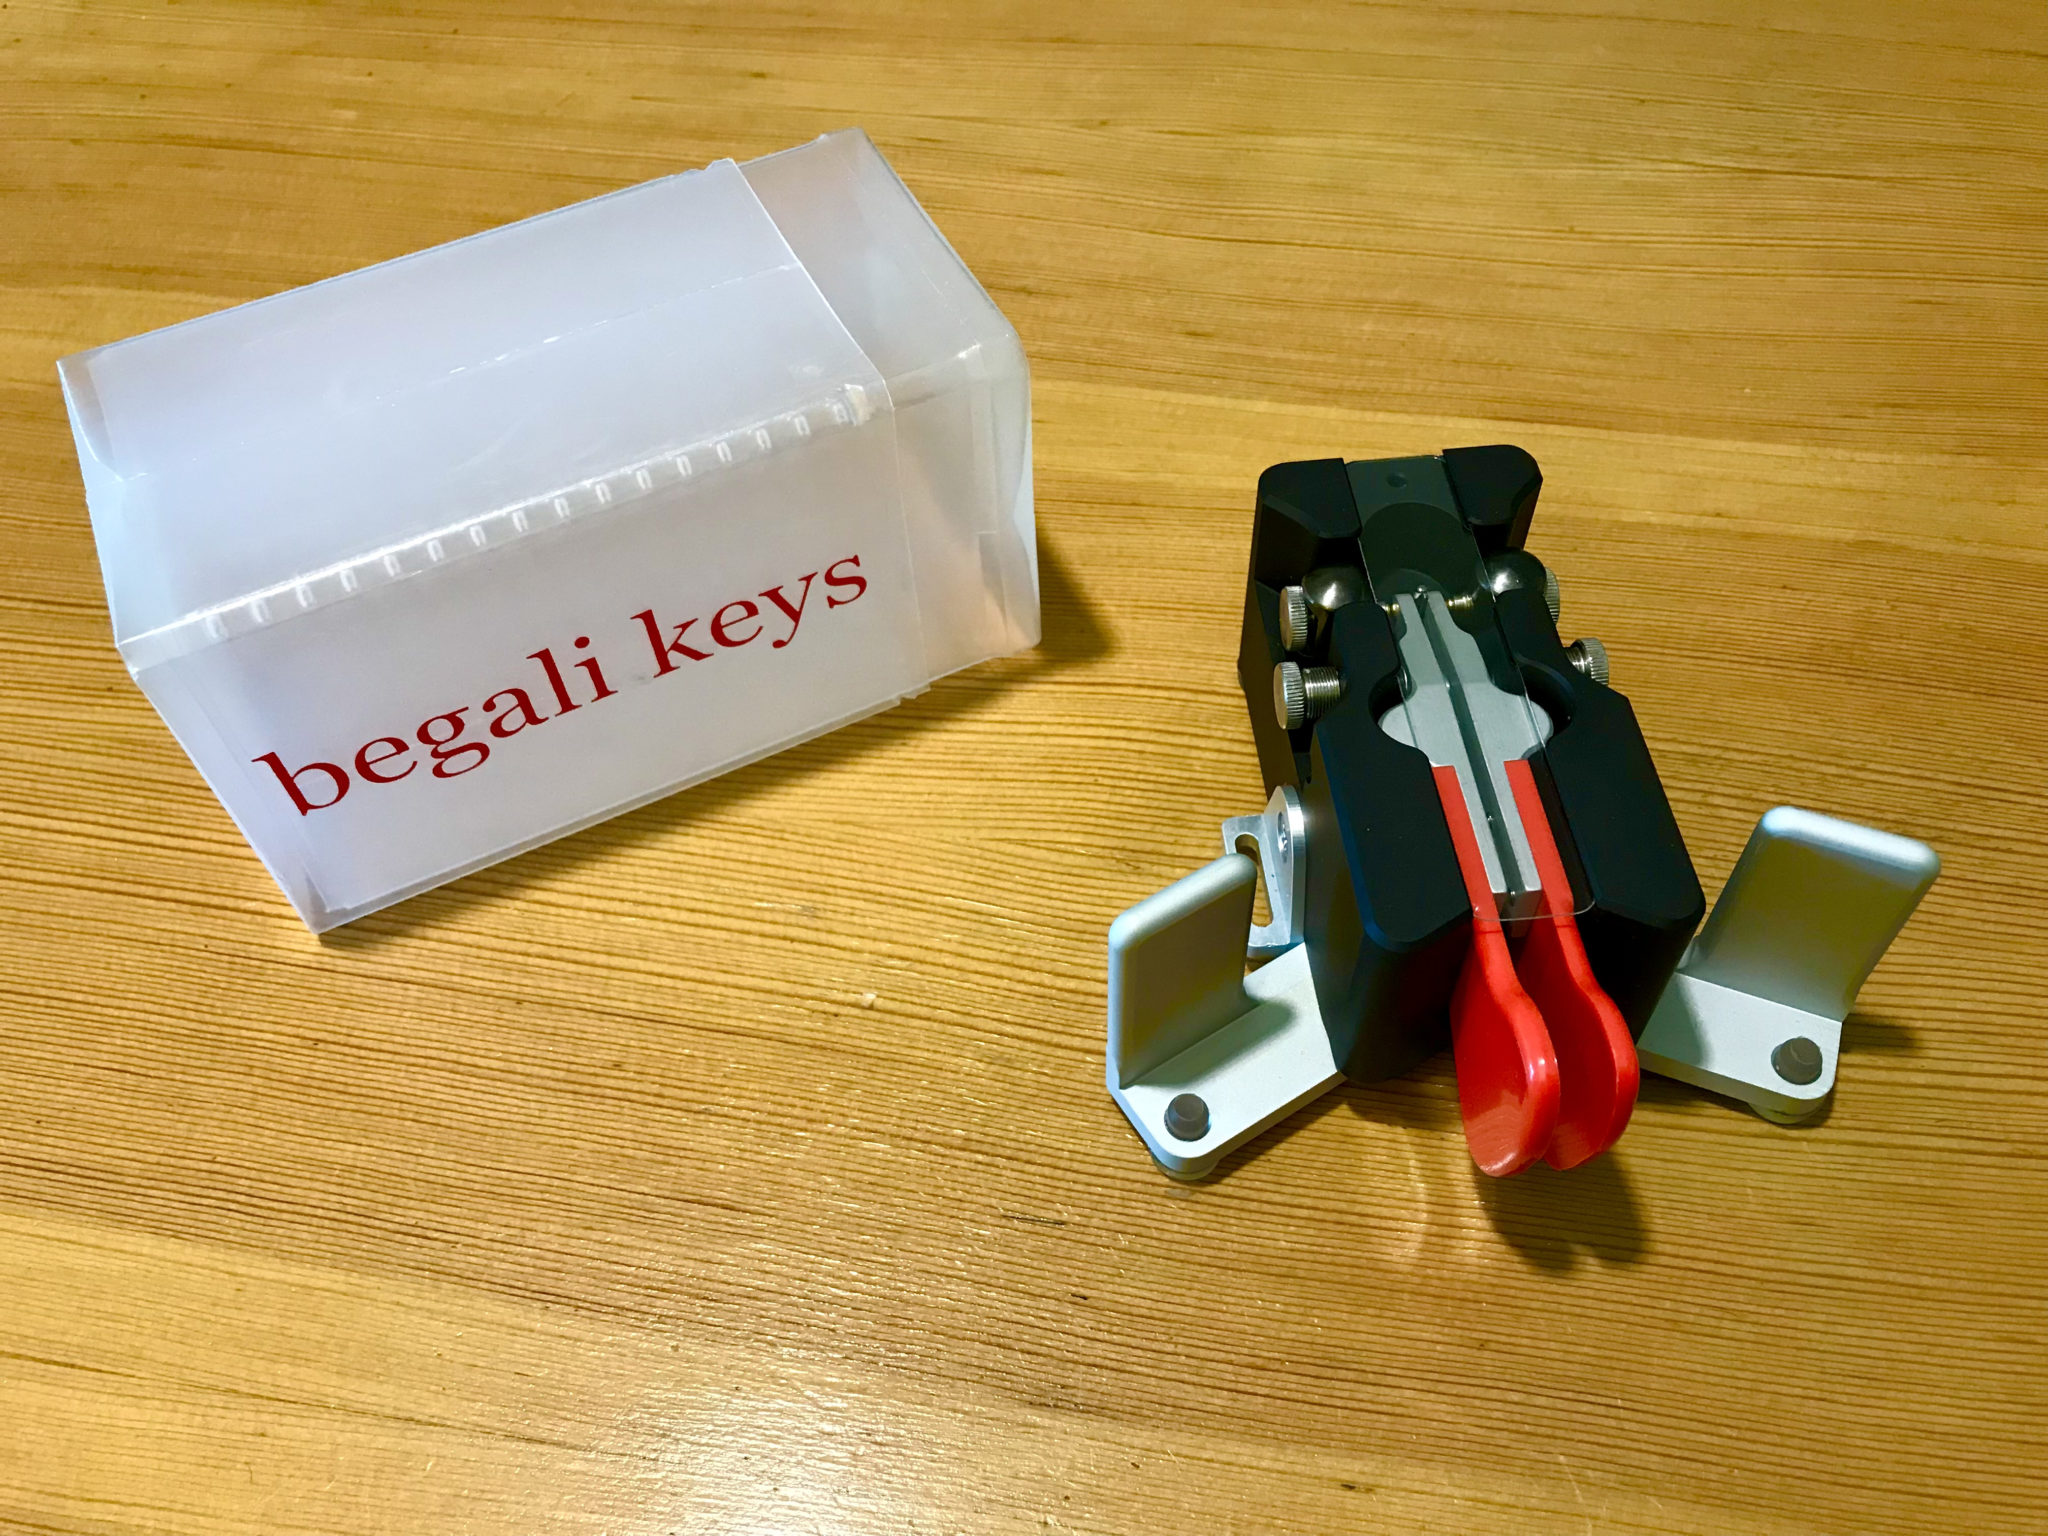
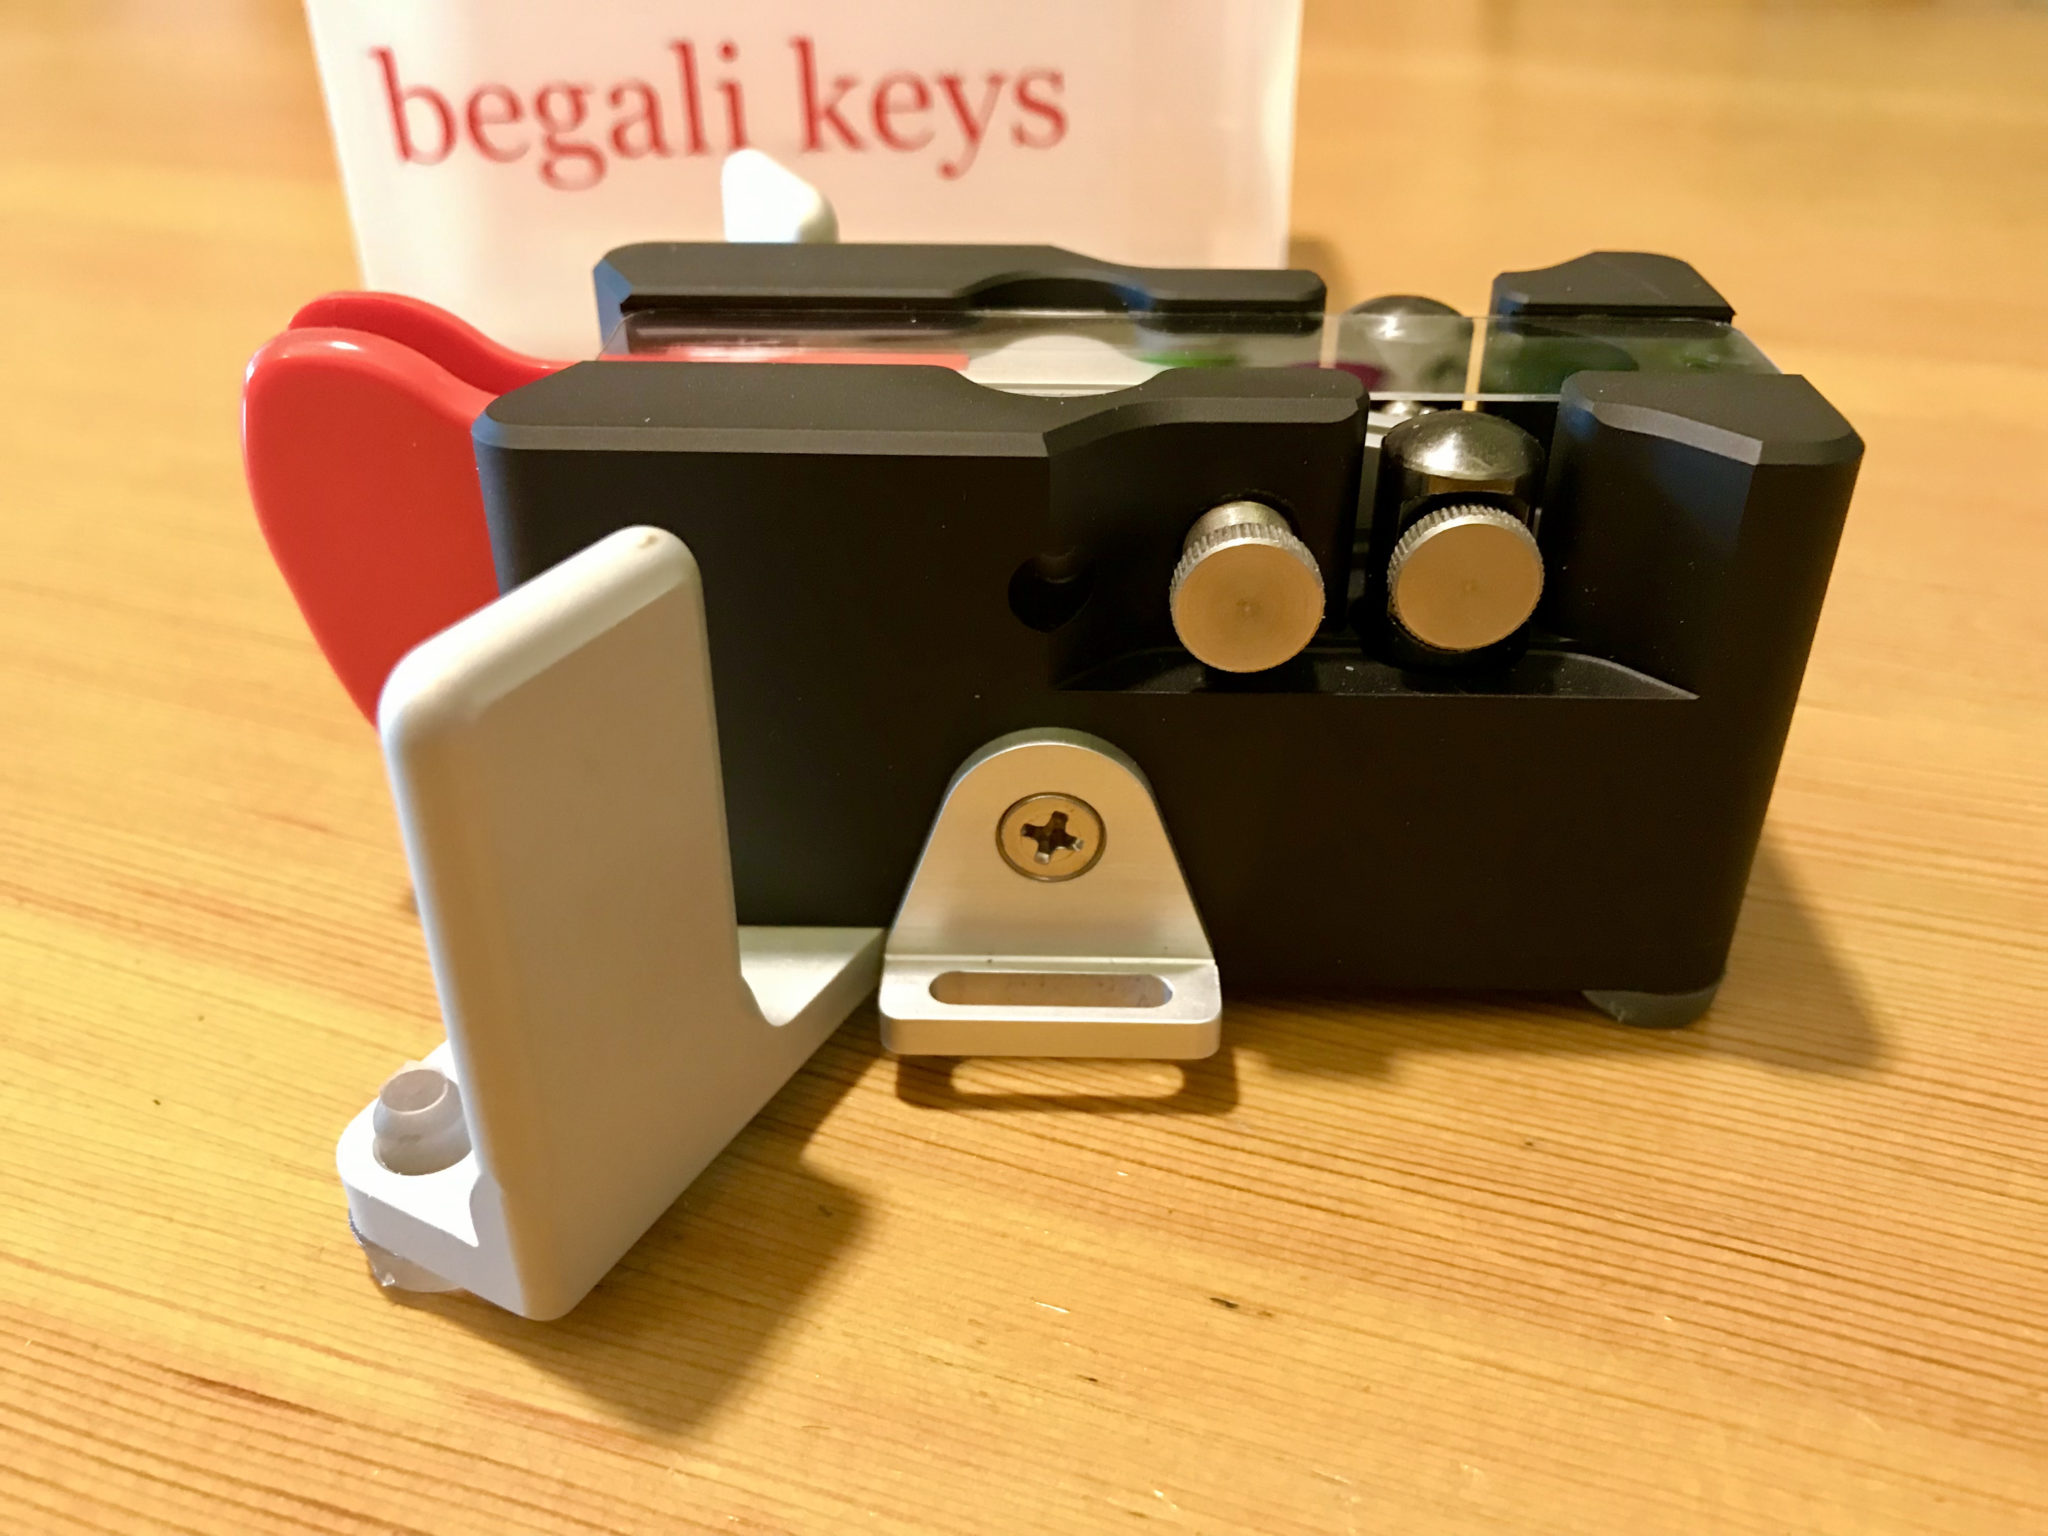
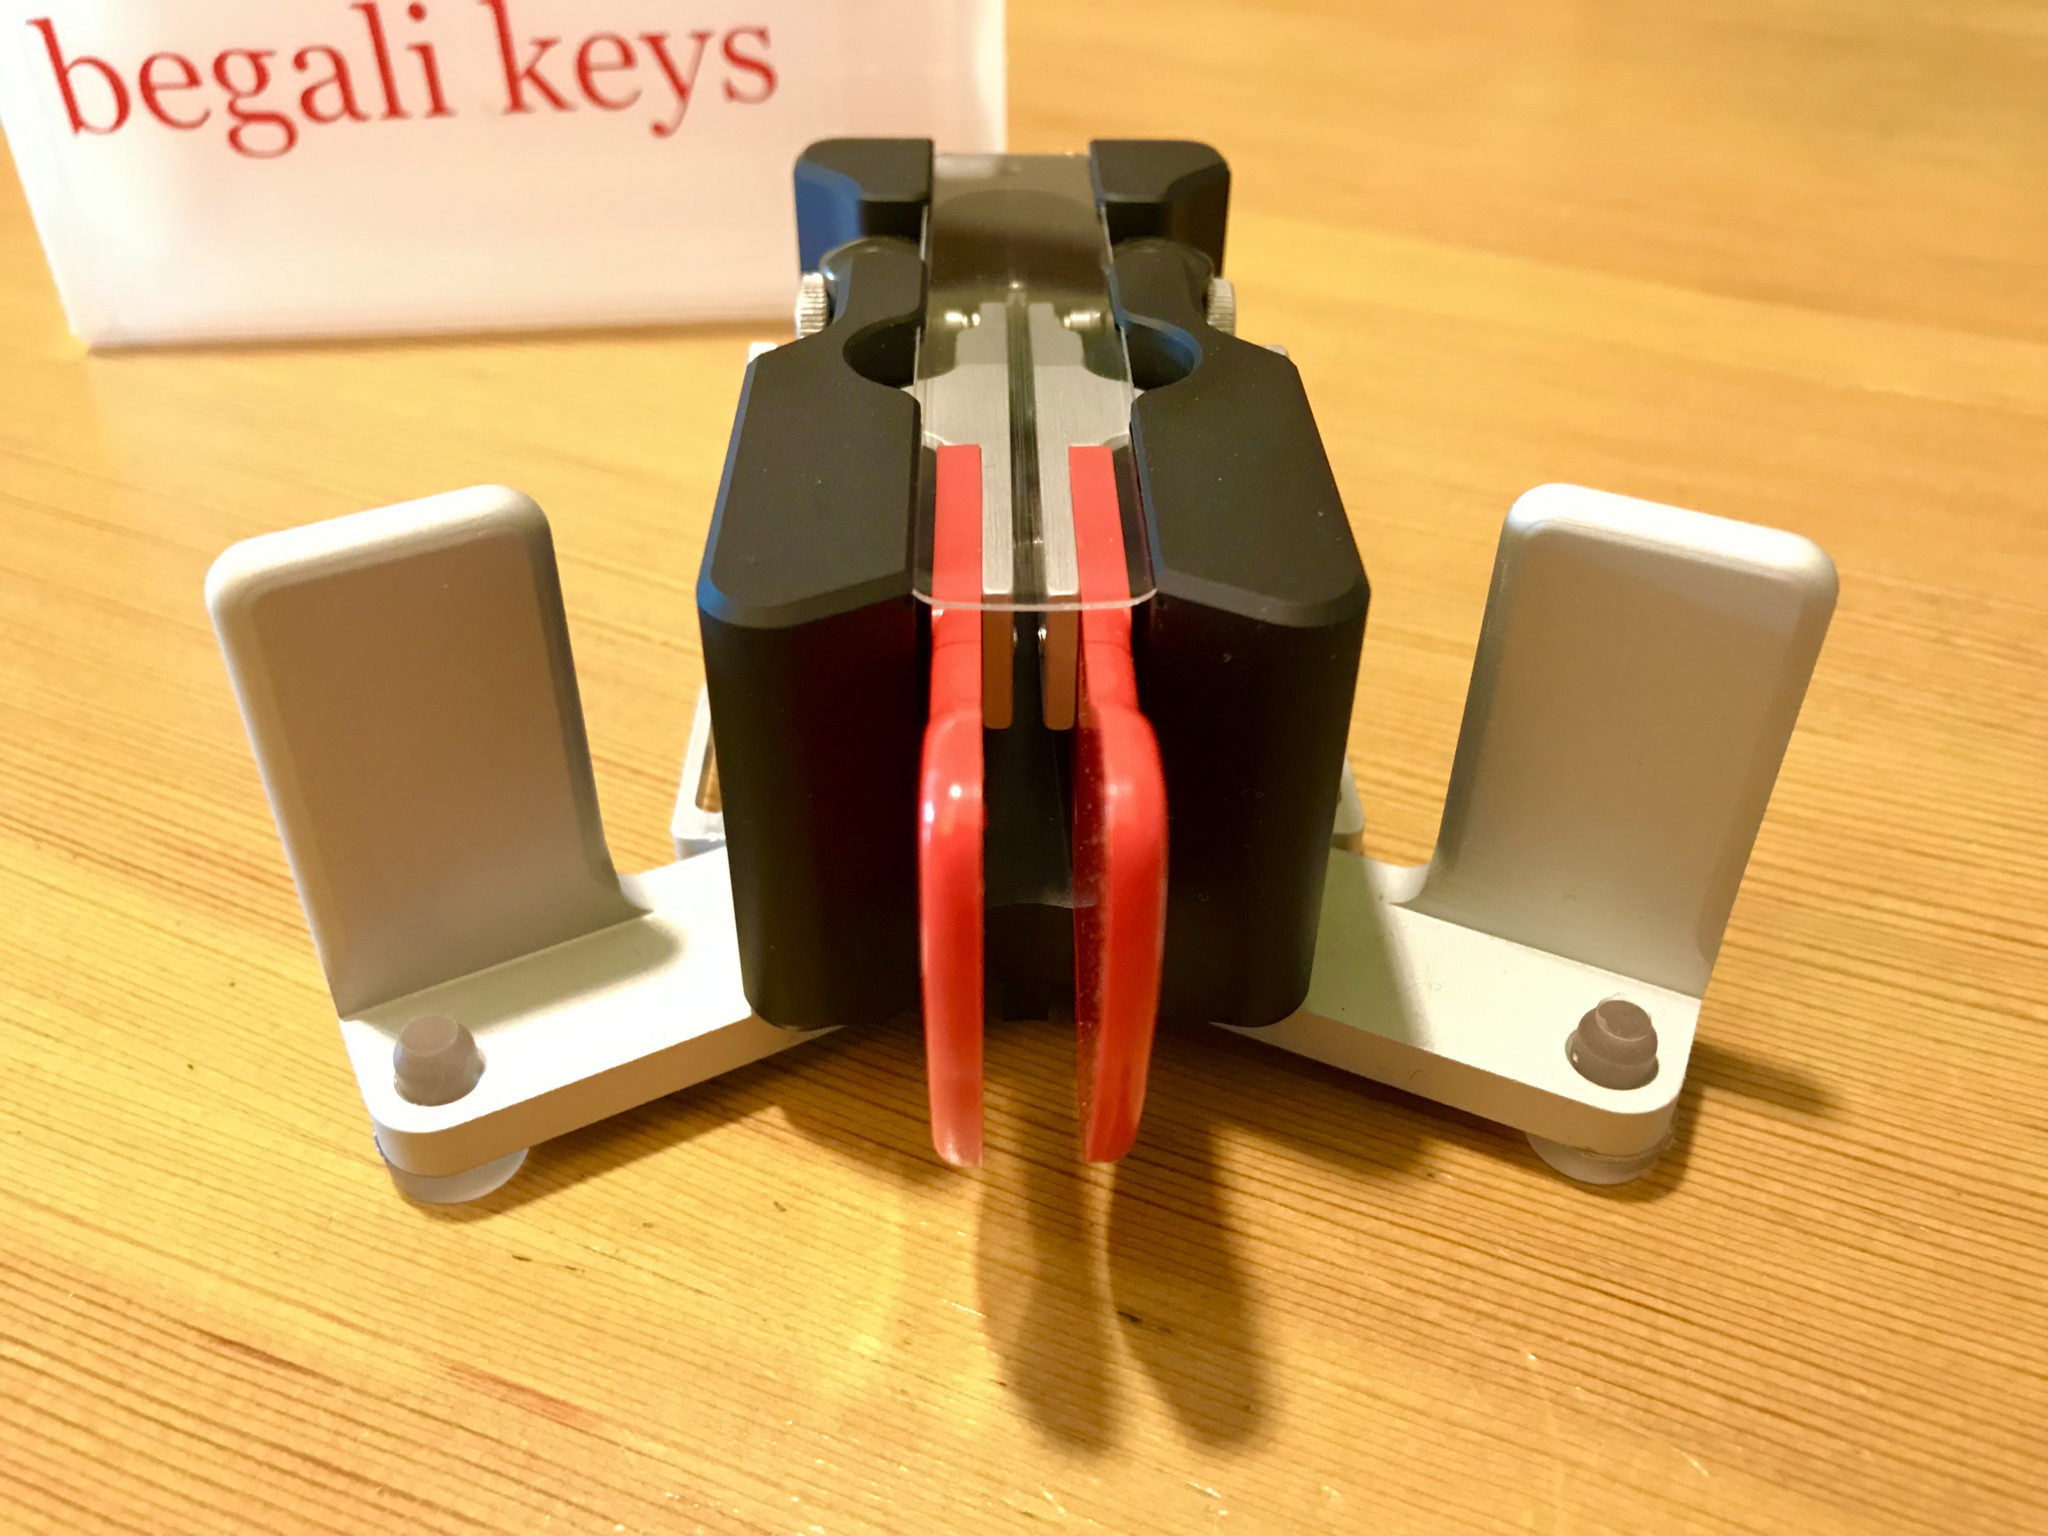
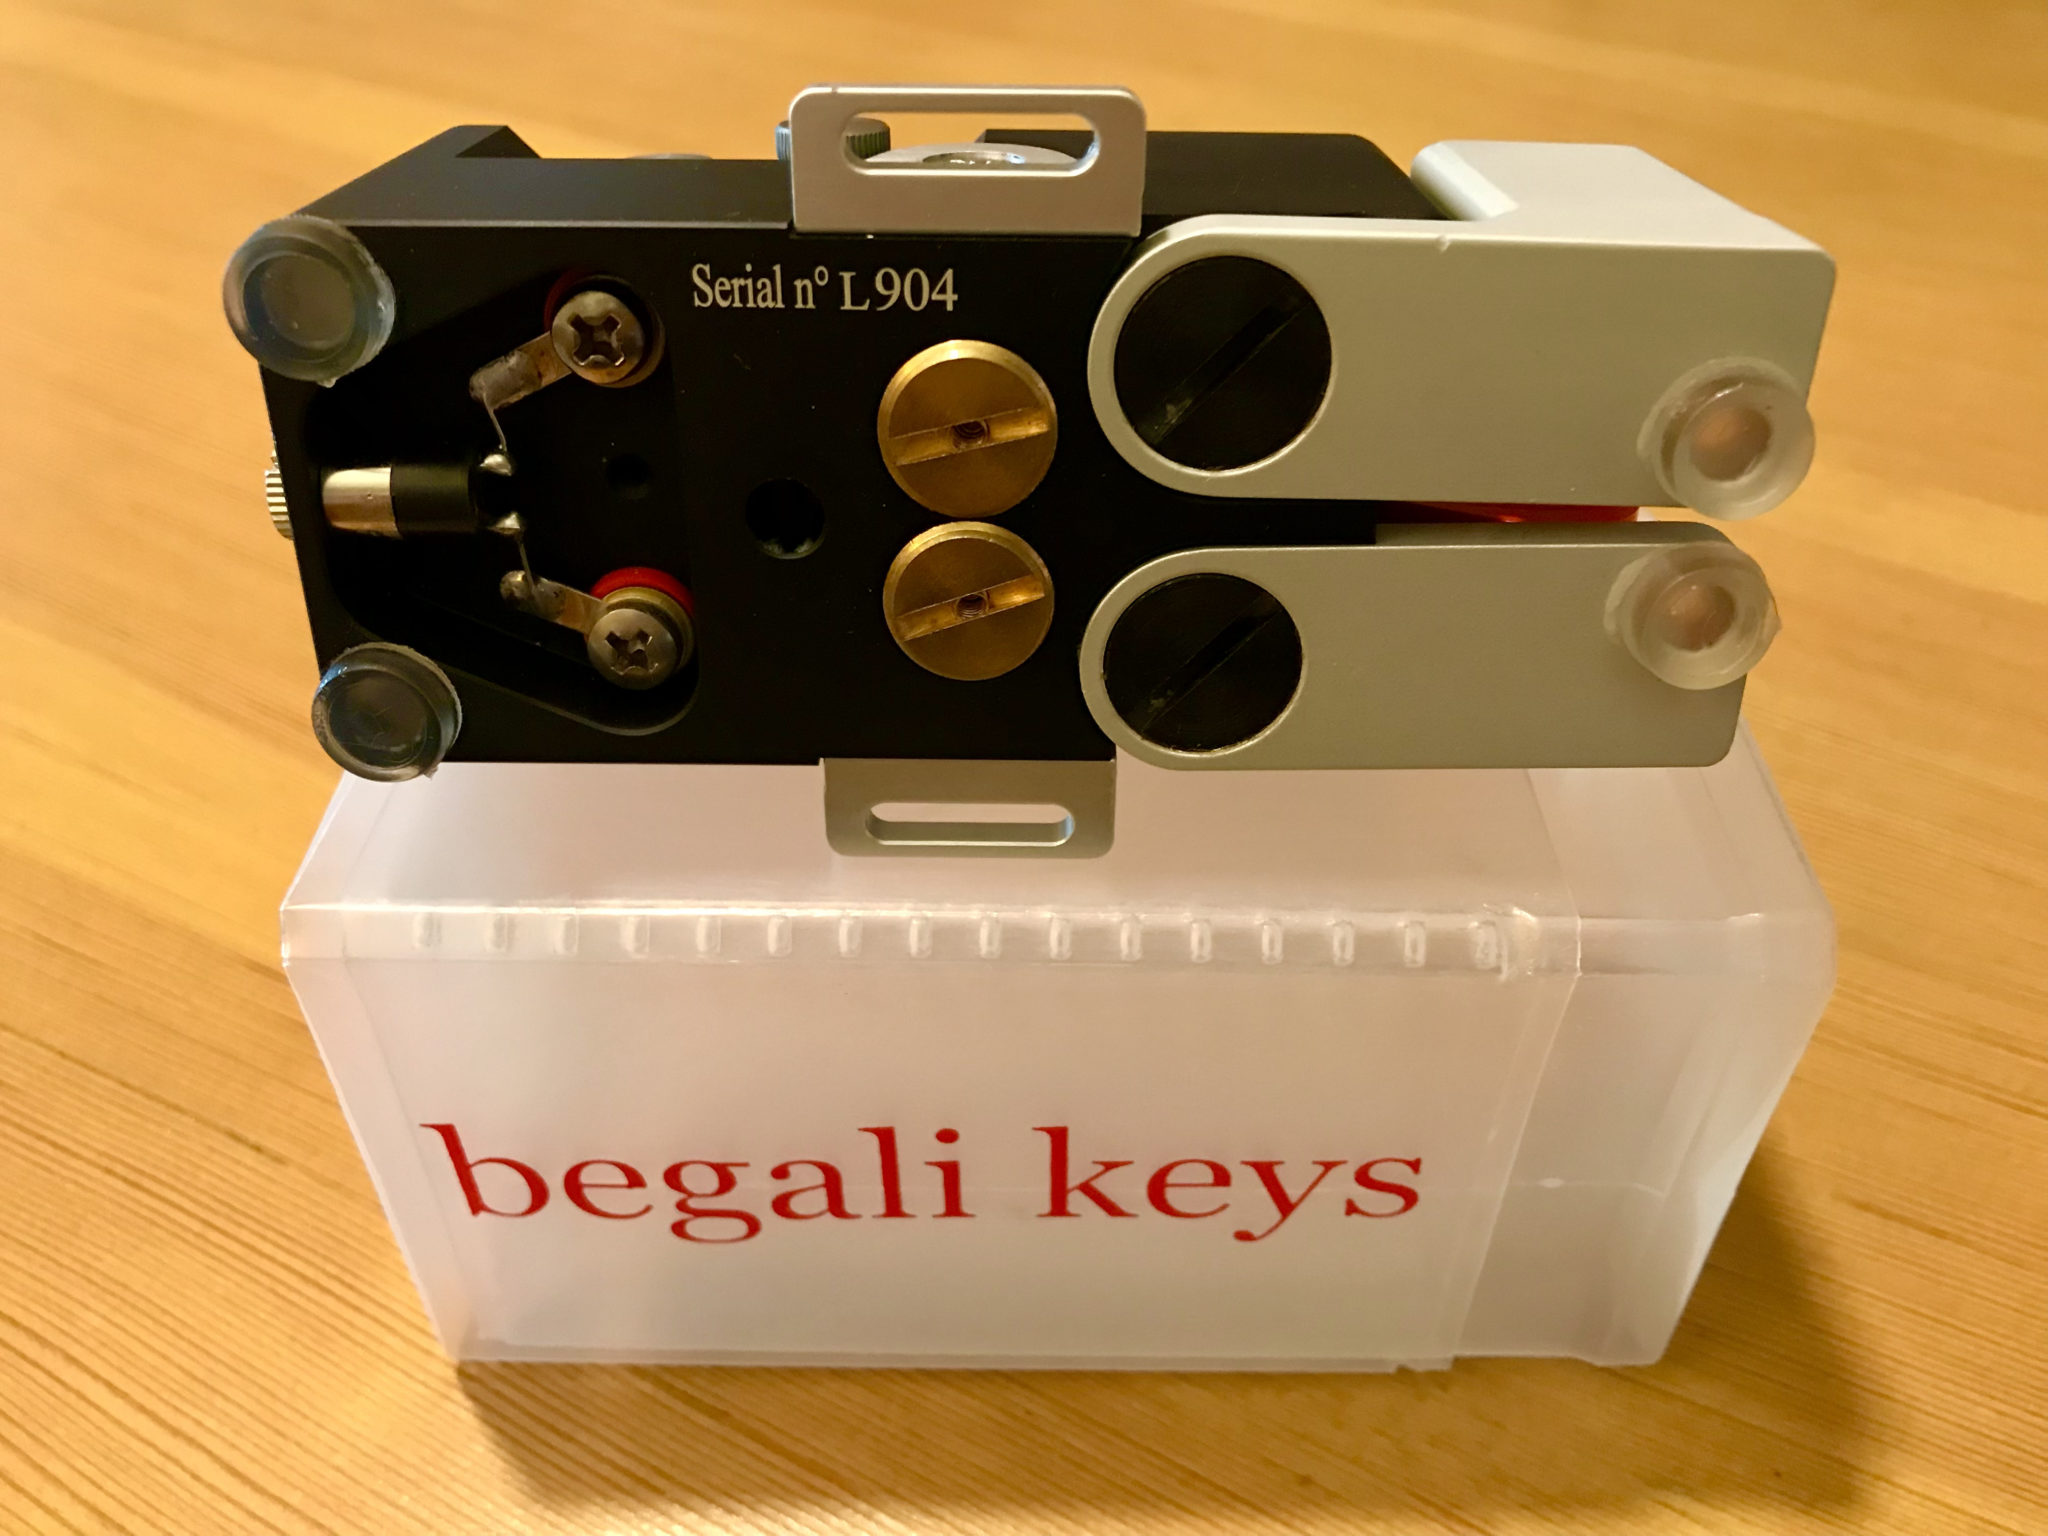
Begali Traveler Light

To my surprise the key for sale on Ebay was a Begali Traveler Light, the perfect key for portable use and at a much lower price than new.

I contacted the seller immediately asking a couple of questions about the key and got an immediate response, always a good sign!

It turned out that the key was being sold by Wallace, MM0AMV up in Scotland. Looking at his QRZ page it’s clear he’s an avid CW fan as he has two Begali keys. This was backed up by the conversation we had via Ebay messaging.

In no time at all I had paid the £170.00 including postage and was the owner of my second Begali morse key.

The key was in as new condition as described by Wallace, clearly it had been looked after well.

It didn’t take long for me to get it hooked up to my IC-705 and on air. After a little adjustment of the gap and return tension I had the key setup comfortably for my weird left-handed use.

The key isn’t anywhere as near as heavy as my Begali Pearl key but, it’s plenty heavy enough to stop it moving around when in use. This is of course is helped by the two fold out legs that stabilise the key firmly during use but, protect the paddles solidly when in transit. It’s a great design and a very unique approach to making a fairly light but, solid twin paddle for portable usage.

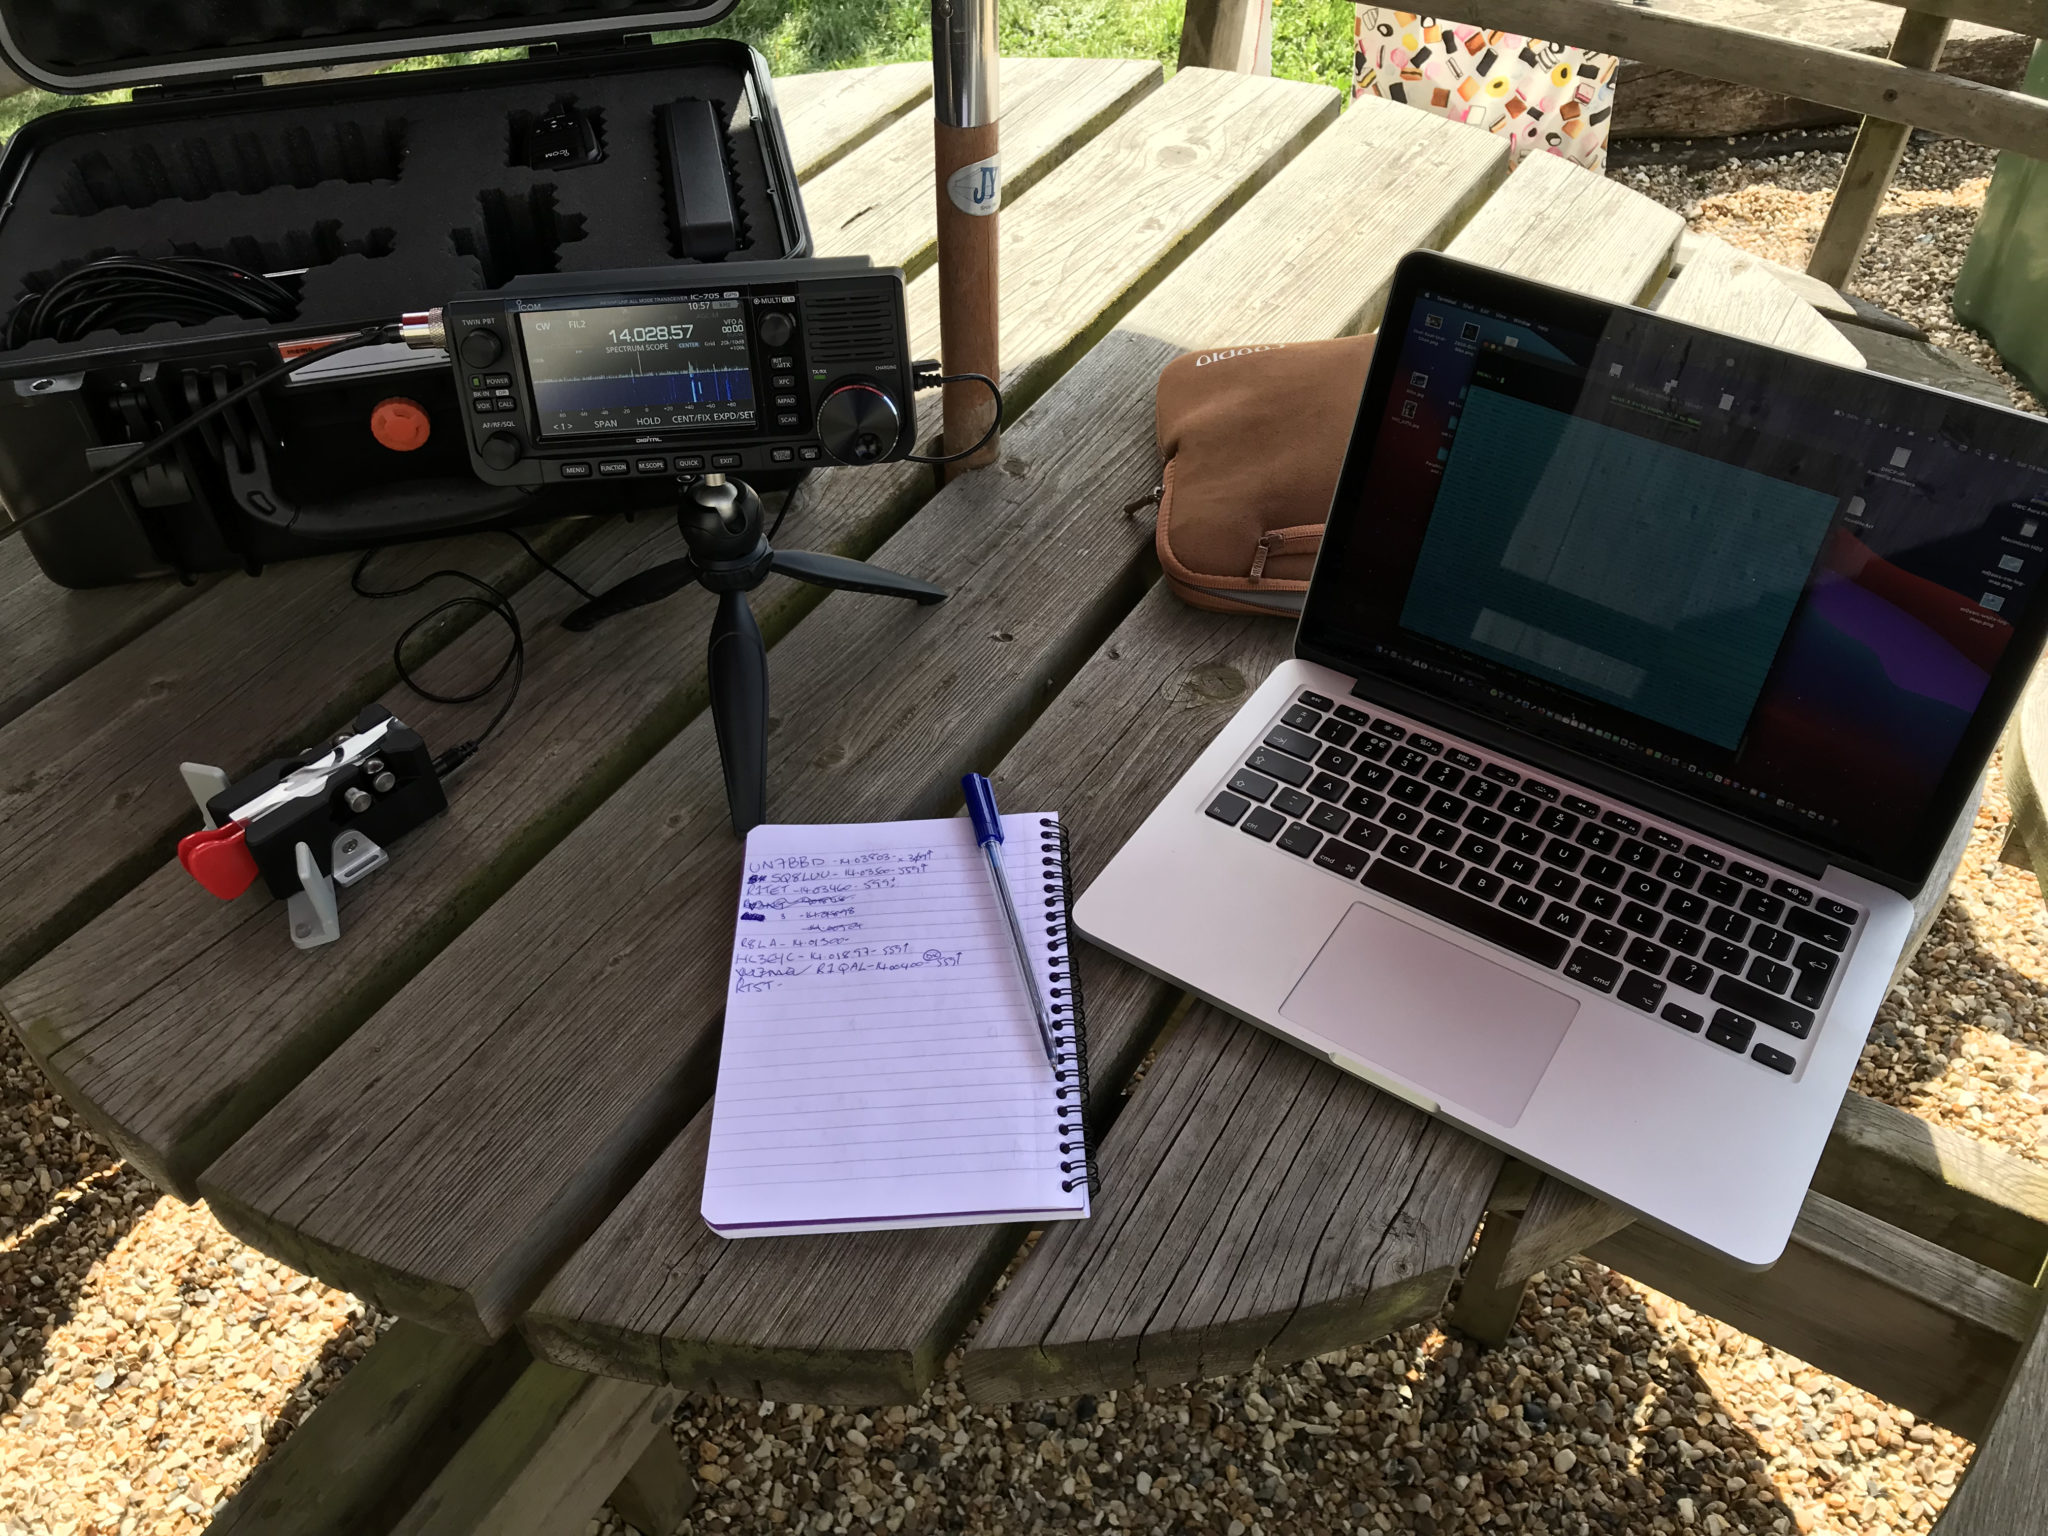
In the garden with my Begali Traveler Light and IC-705 connected to my EFHW Vertical for 20m

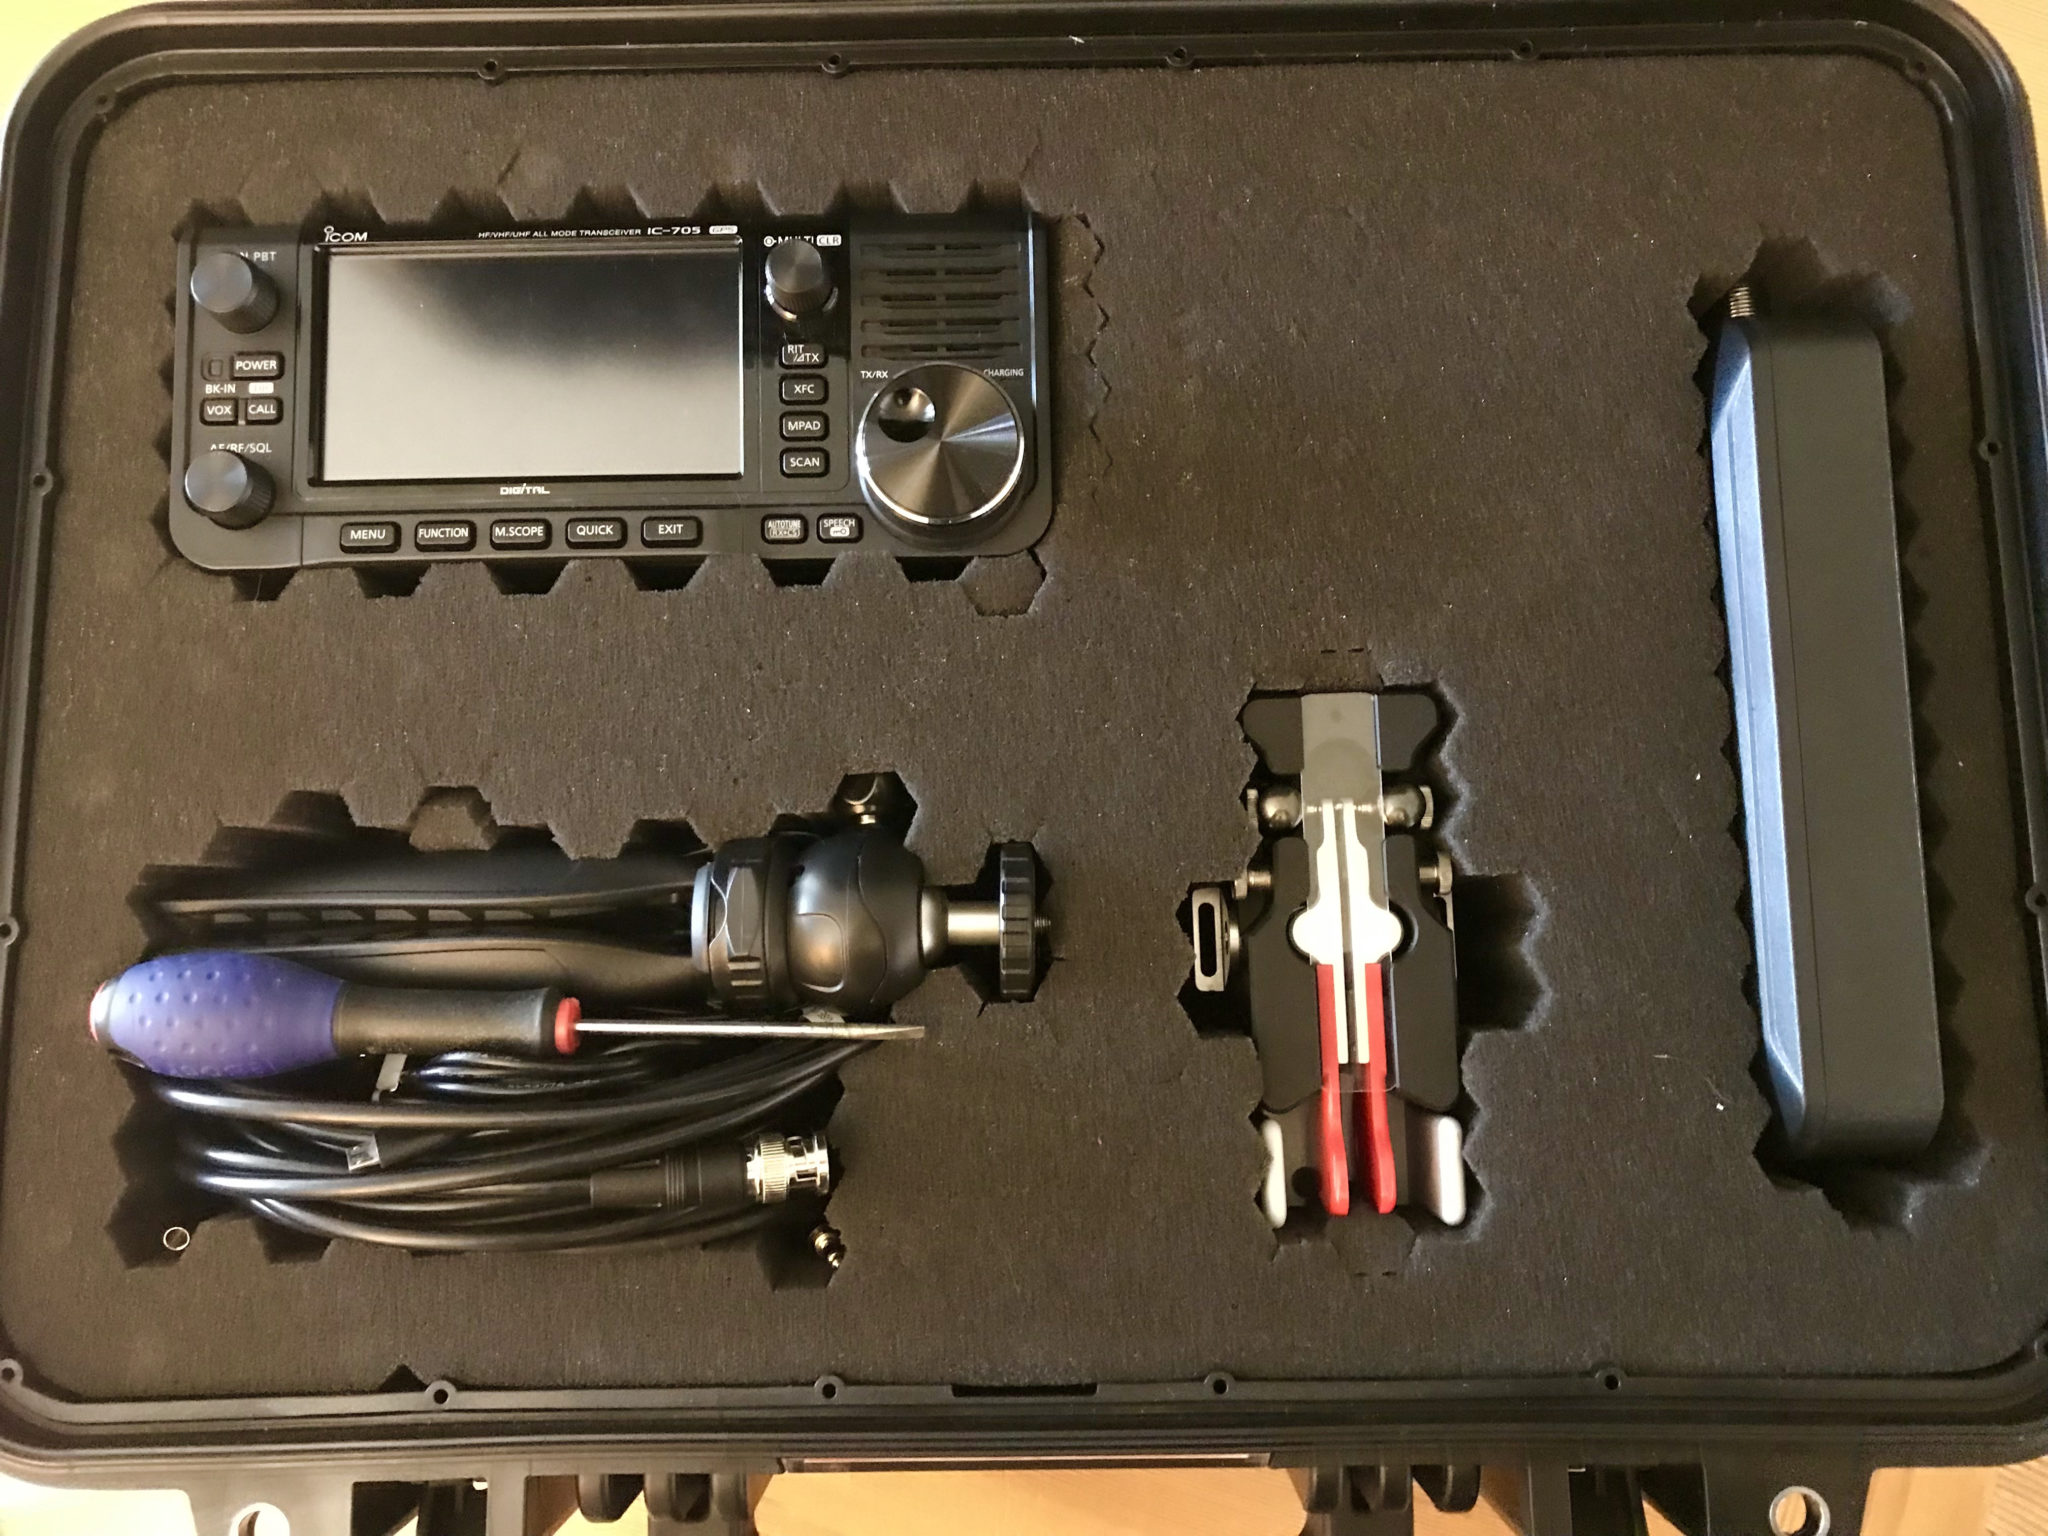
Once folded the key takes very little space in the IC-705 portable case and completes the setup nicely. IC-705 radio, AH-705 remote auto ATU, Begali Traveler Light, tripod and a few interconnect cables, the perfect portable station.

IC-705 Portable station case with plenty of space for future additions

Since purchasing the IC-705 I’ve found that I’ve hardly used my Yaesu FTDX10, which is strange considering the receiver, filtering, DSP and APF combination is considerably better on the FTDX10 than it is on the IC-705. The IC-705 has a much nicer, easier to use user interface and it’s just a lot of fun to use even though it’s only a QRP rig. I can see me having many happy hours on air with this QRP station.

More soon …